Picture this: you wake up early to water your plants and realize that your sprinkler system is gushing water beyond its intended boundaries. Suddenly, your efforts to give your lawn some TLC have turned into a potentially costly problem. Sprinkler leaks can be frustrating and can lead to wasted water and higher water bills, but the good news is that they’re often easy to fix once you’ve identified the problem area.
In this blog, we’ll cover the steps you can take to check for leaks in your sprinkler system so that you can keep your lawn looking lush without any unwanted surprises. So grab your detective hat and let’s get started!
Why It’s Important to Check for Leaks
Are you experiencing a sudden rise in your water bill? One possible reason for this is a leak in your sprinkler system. And if it is left unchecked, it can lead to costly repairs and wasted resources. So, how to check for leaks in sprinkler system? One way is by doing a visual inspection of the sprinkler heads, valves, and pipes for any signs of damage or leakage.
You can also conduct a meter test to detect slow leaks by turning off all water sources and monitoring your water meter to see if there is any movement. Another method is by using a pressurized air compressor to blow out your sprinkler system and detecting any leakages through the escaping air. By regularly checking for leaks, you can save yourself from unnecessary expenses and contribute to water conservation efforts.
Preventing Water Waste and Costly Repairs
As homeowners, we all want to keep our homes in tip-top shape, but it’s easy to overlook certain things like leaks. However, it’s important to check for leaks regularly, as even small leaks can lead to a significant amount of water waste and costly repairs. Not only can leaks cause water damage to your home and belongings, but they can also increase your water bill significantly.
Checking for leaks doesn’t have to be a complicated task. Simply look for signs of water damage, such as mold or mildew, and inspect your pipes and faucets regularly. Taking the time to inspect your plumbing can save you from a headache down the line and ensure that your home stays in great condition.
Remember, a small drip today can turn into a big problem tomorrow. So, take the necessary measures to prevent water waste and keep your wallet happy.
Improving Sprinkler System Efficiency
Improving sprinkler system efficiency requires regular maintenance and monitoring to ensure that every component is working correctly and at optimal levels. One critical aspect that homeowners and property managers should continuously check is the presence of leaks in the system. These leaks can occur in various locations, such as the pipes, valves, or sprinkler heads, and can significantly impact the system’s performance.
Not only do they waste water and increase utility bills, but they also reduce irrigation coverage and potentially create soggy areas that can attract pests and cause fungal diseases. Therefore, it’s essential to keep a keen eye for signs of leakage, such as low pressure, water stains, or unusual sounds, and immediately address them. Doing so can save water, money, and time, while also protecting the landscape and improving its aesthetic appeal.
Step-by-Step Guide to Check for Leaks
If you’re wondering how to check for leaks in your sprinkler system, don’t worry, it’s not as difficult as you might think! The first step is to conduct a visual inspection of your system, looking for signs of water pooling or spraying where it shouldn’t be. If you see wet spots or areas of your lawn that are significantly more saturated than others, this could be a sign of a leak. Next, turn on your system and walk your property, making note of any areas that seem to be receiving too much or too little water.
You can also check your water meter by turning off all water sources in your home and checking to see if it’s still spinning. If so, this could be a sign that your sprinkler system is using more water than it should be. Don’t forget to also inspect your sprinkler heads and piping for signs of damage or wear and tear.
By following these steps, you’ll be able to identify and fix any leaks in your sprinkler system, saving water and money in the process.
1. Turn off the Water Supply
When you suspect a leak in your home, it’s important to act quickly to prevent any further damage. The first step in checking for leaks is to turn off the water supply. This can usually be done at the main shut off valve, which is typically located near the water meter.
Shutting off the water supply will stop any additional water from entering the plumbing system, giving you time to locate and fix the leak. Remember, even a small leak can lead to major damage over time, so it’s important to take action as soon as possible. By turning off the water supply and assessing the situation, you can identify the source of the leak and take the necessary steps to repair it.
So don’t wait – take action today to protect your home and prevent costly repairs down the line! The main keyword used in this paragraph is “leak.”
2. Examine the Sprinkler Heads
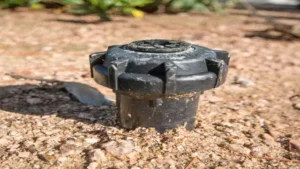
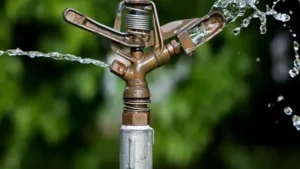
When it comes to checking your sprinkler system for leaks, examining the sprinkler heads is a crucial step. Start by visually inspecting each sprinkler head to check for any damage or wear. Look for cracks, chips, or dents in the casing or nozzle.
Next, turn on the water to see if there are any leaks coming from the sprinkler heads. If you see a stream of water shooting out from the side or top of the sprinkler head, you may need to replace the nozzle or the entire head. Additionally, check for any clogs in the sprinkler heads, which can lead to uneven watering or reduced water pressure.
By regularly inspecting and maintaining your sprinkler heads, you can prevent leaks and ensure your lawn or garden is getting the proper amount of water. Don’t let a faulty sprinkler head ruin your beautiful landscape – take the time to give them a thorough check today!
3. Check the Valves and Pipes
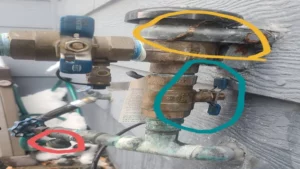
When it comes to checking for leaks in your plumbing system, one important step is to take a look at the valves and pipes. Follow these simple steps to ensure that your valves and pipes are in good condition: First, turn off all your water fixtures and make sure that there is no water running in your house. Then, take a look at the valves and pipes for any signs of wetness, rust, or corrosion.
This can be an indication of a leak and should be repaired immediately. Next, turn on the water supply and check the pressure gauge. A reading of over 80 psi can cause a lot of stress on your pipes, potentially leading to leaks.
If the pressure is high, you may want to consider installing a pressure regulator to prevent any future damage. Finally, inspect your pipes for any signs of damage, including cracks, splits, or bulges. These can be a result of freezing temperatures, age, or wear and tear.
If you notice any of these issues, it may be time to replace your pipes to avoid any potential flooding or water damage. Taking the time to inspect your valves and pipes can prevent costly repairs down the line. If you do happen to find a leak, be sure to take care of it quickly to avoid any further damage to your plumbing system.
Remember, regular maintenance is key to keeping your plumbing system in good shape!
4. Look for Wet Spots and Puddles
When it comes to keeping your home in tip-top shape, checking for leaks is a crucial step. One simple way to do this is to look for wet spots and puddles around your home. This could indicate a leak in your pipes or roof, which can cause damage and even mold growth if left untreated.
To start, check any areas that are prone to moisture, such as bathrooms, kitchens, and basements. Look for any signs of moisture or water stains on the walls or ceiling. You can also inspect your pipes for signs of dripping or pooling water.
If you notice any wet spots or puddles, it’s important to address the issue promptly to prevent any further damage. By taking the time to check for leaks, you can avoid costly repairs and keep your home safe and healthy.
Common Causes of Sprinkler System Leaks
If you’re wondering how to check for leaks in your sprinkler system, there are a few common culprits you should investigate. The first is damage to the pipes themselves, which can occur due to age, tree roots, changes in temperature, or accidental impacts from tools or vehicles. Another common cause of leaks is faulty or damaged valves, which control the flow of water through the system and can wear down over time.
Additionally, issues with the sprinkler heads themselves, such as clogs or cracks, can also contribute to leaks and inefficiencies. To check for leaks, you can first examine the visible components of your system for signs of wear or damage. However, it’s often best to call in a professional who can perform a thorough inspection and identify any issues that may be harder to spot.
By addressing leaks and other issues promptly, you can ensure that your sprinkler system is functioning as efficiently as possible and saving you money on water bills in the long run.
1. Wear and Tear
Sprinkler system leaks are a common issue for homeowners and can be caused by various factors. One of the most prevalent causes is wear and tear on the system components due to regular use. Over time, the pipes, fittings, and valves in your sprinkler system can become worn and prone to cracks or leaks, particularly if they are made of older materials such as galvanized steel or copper.
Additionally, environmental factors such as exposure to sunlight and extreme temperatures can also contribute to the deterioration of these components. It’s important to inspect your sprinkler system regularly to identify any signs of wear and tear and replace damaged parts before they cause a significant leak that can result in water waste and costly repairs. Regular maintenance and upgrades can help extend the lifespan of your sprinkler system and prevent leaks in the future.
2. Pressure Changes
One of the common causes of sprinkler system leaks is pressure changes. These changes can cause the system to become over-pressurized, leading to leaks in the pipes and fittings. On the other hand, if the pressure is too low, the sprinkler heads may not spray enough water to cover the designated area adequately, resulting in dry spots.
Similarly, sudden pressure drops or spikes can cause the system’s components to weaken or even fail, leading to leaks. To prevent these pressure changes, it is essential to have a pressure regulator installed in the system that monitors and adjusts the pressure levels. It is also crucial to carry out regular maintenance of the system, including inspections and proper servicing to identify and fix leaks or potential issues before they lead to costly damages.
So, if your sprinkler system is experiencing leaks, make sure to check for any pressure changes and consider installing a pressure regulator to keep them at an optimum level.
3. Improper Installation or Maintenance
Sprinkler system leaks can be caused by a variety of factors, one of which is improper installation or maintenance. This can often result in damage to the system’s pipes and fittings, leading to leaks and other issues. For example, if a sprinkler head is not installed correctly, it may not be able to function properly and may continuously leak water.
Additionally, if the system is not maintained or inspected regularly, it can cause parts to wear out or become damaged over time, leading to leaks or other issues. It is important to ensure that your sprinkler system is installed by a professional and that it undergoes regular maintenance to prevent leaks and keep your lawn and garden healthy. Remember, proper installation and maintenance are key to preventing sprinkler system leaks and other related problems!
Conclusion and Final Thoughts
In the end, checking for leaks in your sprinkler system is not as daunting as it may seem. With a little bit of patience, effort, and maybe a some detective work, you can be sure that your lawn and garden are getting the water they need without wasting a drop. So don’t let a leak sneak up on you – grab your magnifying glass, put on your detective hat and get to work! Your lawn and wallet will thank you.
“
FAQs
What are some signs of a leak in a sprinkler system?
Signs of a leak in a sprinkler system include soggy or overly wet areas, low water pressure, and unexplained spikes in water bills.
How can I locate a leak in my sprinkler system?
To locate a leak in a sprinkler system, turn off all water sources and observe the water meter. If the meter continues to run, you likely have a leak. You can also perform a “bucket test” to identify the exact location of the leak.
Can I fix a leak in my sprinkler system myself?
Depending on the severity of the leak, it may be possible to fix it yourself. Minor leaks can often be repaired by tightening connections or replacing damaged or worn out parts. However, if the leak is significant or difficult to locate, it may be best to contact a professional.
What causes leaks in sprinkler systems?
Leaks in sprinkler systems can be caused by a variety of factors, including age and wear and tear of the system, improper installation, damage from lawn equipment or root growth, and freezing temperatures.
How often should I check my sprinkler system for leaks?
It’s a good idea to check your sprinkler system for leaks at least once a year. However, if you notice any signs of a leak, such as soggy areas or a higher than usual water bill, you should check for leaks right away.
Can a leak in my sprinkler system cause damage to my lawn or landscaping?
Yes, a leak in a sprinkler system can cause significant damage to your lawn or landscaping. Overly wet areas can lead to mold or fungus growth, while dry areas can cause plants to wither and die.
What should I do if I suspect a leak in my sprinkler system?
If you suspect a leak in your sprinkler system, the first step is to turn off all water sources and check your water meter. If you still suspect a leak, you can perform a “bucket test” to locate the source of the leak. If you’re unable to locate the leak or if it’s a significant one, it’s best to contact a professional for assistance.
