Setting up a sprinkler system can be a daunting task, but with the right guidance, you can have your lawn looking lush and green in no time. If you’re looking for a reliable and efficient sprinkler system, the Hunter brand is an excellent choice. However, the thought of setting up a complex irrigation system may seem overwhelming.
Don’t worry; we’ve got you covered! In this article, we’ll guide you through the process of setting up a Hunter sprinkler system, step-by-step. You’ll be amazed at how easy it is to set up your new sprinkler system with a little bit of patience, effort, and the right tools. Sit back, grab a cup of coffee, and let’s get you started!
Step 1: Choose the Right Sprinkler Head
When it comes to setting up a Hunter sprinkler system, the first step is choosing the right sprinkler head. There are a few factors to consider when making this decision. Firstly, the size and shape of your lawn or garden will determine the coverage area needed from the sprinkler.
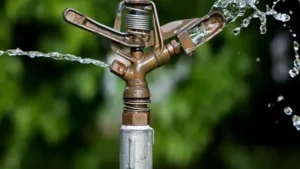
Secondly, the type of soil and plant life in your outdoor space will determine the water output required from the sprinkler head. Depending on these factors, you may need a pop-up sprayer head or a rotor head. Pop-up spray heads are ideal for smaller areas with more delicate plant life, while rotor heads are better suited for larger areas with denser grass and soil.
Ultimately, choosing the right sprinkler head can make all the difference in ensuring your Hunter sprinkler system functions effectively and efficiently, providing your outdoor space with the right amount of hydration, and reducing water waste.
Consider the size of your lawn and the water pressure in your area.
When it comes to choosing the right sprinkler head, the size of your lawn and water pressure in your area play a huge role in making the selection. If you have a small lawn, you may benefit from using a stationary sprinkler head, which sprays the water in a fixed pattern, and you can move the sprinkler around as needed. However, if your lawn is large, it might be best to opt for a rotating sprinkler head or an oscillating sprinkler.
These types of sprinkler heads provide better coverage over a larger area and can save you time and water. Additionally, it’s important to consider the water pressure in your area. A high water pressure can cause a misty spray that wastes water and drifts away, while a low water pressure might struggle to reach the edges of your lawn.
Overall, choosing the right sprinkler head can help you save water and give your lawn the hydration it needs to flourish.
Step 2: Plan the Layout of the System
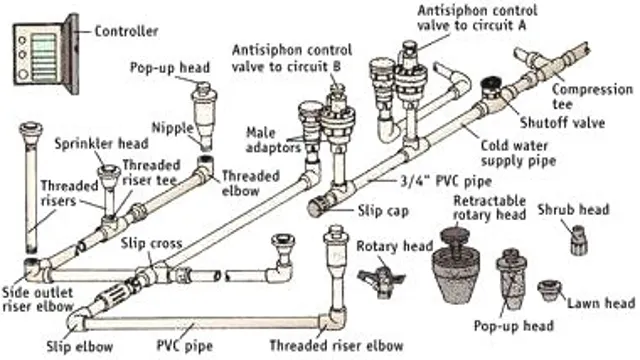
Now that you’ve chosen the appropriate Hunter sprinkler system for your lawn, it’s time to plan out its layout. Before digging into the dirt, it’s important to know where your electrical and water sources are located. This will help you design the most efficient layout for your system.
Take note of any water pressure issues or areas that require specific watering requirements, and plan accordingly. When designing your system, consider the flow rate of each sprinkler head, the type of spray pattern it produces, and the range of the spray. You’ll want to position the sprinkler heads where they can provide adequate coverage for your lawn while avoiding water waste.
Remember, you want to create a system that’s easy to maintain, so plan out areas that may need regular adjustments or replacement. Once you’ve mapped out your system, you can then mark the locations of the sprinkler heads and begin digging trenches for the pipes. With a well-planned system, your lawn will receive the necessary irrigation, leaving you and your family free to enjoy your days outdoors.
Create a diagram of your lawn and map out where you want the sprinklers to go.
When it comes to planning the layout for your sprinkler system, the first step is to create a diagram of your lawn. This will help you to identify where you want the sprinklers to be placed and ensure that every area of your lawn is adequately covered. The diagram doesn’t have to be perfect, but it does need to be detailed.
Use a measuring tape to measure the dimensions of your lawn and mark the boundaries on your diagram. It’s also important to consider the shape of your lawn and any obstacles such as trees, flowers, and other plants. Once you have your diagram in place, you can start mapping out where you want the sprinklers to go.
Take note of any areas that may need more water than others and adjust your plan accordingly. Remember, the key to a successful sprinkler system is to ensure that every inch of your lawn is covered, so take your time and plan carefully. With a well-designed sprinkler system in place, you can sit back and relax while your lawn stays green and healthy all year round!
Step 3: Dig Trenches for the Pipes
Once you’ve planned and mapped out where your Hunter sprinkler system will be installed, it’s time to start digging trenches for the pipes. This step is crucial since these trenches will house the pipes that will carry the water from the source to your sprinkler heads. First, mark the location of the trenches with stakes and string.
Then, using a trenching tool, dig the trenches to the correct depth and width. It’s important to note that you want to dig the trenches deep enough to accommodate the pipes but not so deep that they are hard to access if you need to make repairs. Additionally, make sure to lay the trenches out in a way that allows for the most efficient use of the water supply.
Once the trenches are dug, lay the pipes into place and make sure they are properly connected and secured. This may seem like a simple step, but it’s a necessary one in order to successfully set up your Hunter sprinkler system.
Use a trenching machine or shovel to dig trenches for the pipes.
When it comes to installing a new plumbing system or upgrading an existing one, digging trenches for pipes is a necessary step. You can either use a trenching machine or a shovel for digging trenches based on the type of soil and the specific requirements. Trenching machines are efficient and can save you a lot of time, especially if you’re dealing with hard or rocky soil.
On the other hand, shoveling is more labor-intensive and time-consuming, but it is more suitable for softer soil. Regardless of the method, the trenches should be deep enough to accommodate the pipes at the required angle and depth. The depth of the trenches can vary based on the location of the pipes and local regulations, so make sure to do your research beforehand.
Keep in mind that the trenches should also be wide enough to allow for easy installation and maintenance of the pipes. Once the trenches are dug, you can start laying the pipes in place. By taking the time to dig proper trenches, you can ensure that your plumbing system will function smoothly for years to come.
Step 4: Lay the Pipes and Connect the Sprinkler Heads
Now that you have planned out your Hunter sprinkler system and ordered the necessary parts and tools, it’s time to lay out the pipes and connect the sprinkler heads. Start by digging trenches where the pipes will be laid and make sure they are deep enough to prevent damage from lawn mowers or other equipment. Attach the pipes to the water source and run them to each location where a sprinkler head will be installed.
Next, connect each sprinkler head to the pipes using the appropriate fittings and adapters. Finally, test the system to make sure the water flow is consistent and that each sprinkler head is spraying water as intended. Adjust the flow and direction of the sprinkler heads as needed until the entire lawn is covered evenly.
With these steps completed, your Hunter sprinkler system is ready to keep your lawn healthy and lush all season long!
Connect the sprinkler heads to the pipes and lay them in the trenches.
It’s time to lay the pipes and connect the sprinkler heads to bring the irrigation system to life. First, connect the sprinkler heads to the pipes using T-fittings, which allow for the water to flow in two directions. Make sure to install them according to the manufacturer’s instructions and take into account the proper spacing for each sprinkler.
Then, lay the pipes in the trenches, making sure to keep them level to ensure proper water distribution. Use pipe straps to secure the pipes to the ground and prevent them from shifting over time. Once the pipes are in place, test the system to ensure everything is working correctly.
This step ensures that your lawn or garden receives plenty of water in the right spots, saving time and water in the long run. With the sprinkler heads connected and the pipes laid, you’re almost there!
Step 5: Install the Controller and Connect the Wiring
Now that you have set up your Hunter sprinkler system with the necessary pipes and sprinklers, it’s time to install the controller and connect the wiring. The controller is the brain of the system, and it controls when and how often the sprinklers will turn on and off. First, find a suitable location for the controller, preferably near a power source.
Then, attach the controller to the wall using the mounting screws provided. Once you’ve found your location, you’ll need to connect the wiring. This can be a bit tricky, so be sure to refer to the manufacturer’s instructions or seek help from a professional if you’re not confident in your abilities.
Now that we’ve covered the installation of the controller and wiring, it’s important to note that your Hunter sprinkler system will only work as well as it’s maintained. Be sure to regularly check for leaks or damage to the sprinkler heads and replace any faulty parts as needed. Additionally, adjust the watering schedule according to weather conditions to avoid over or under-watering your lawn.
With proper maintenance, your Hunter sprinkler system will keep your lawn looking lush and green all season long.
Mount the controller on the wall and connect the wiring to the sprinkler heads.
If you want to set up your sprinkler system with ease, then you must install the controller and connect the wiring properly. First, you should mount the controller on the wall in an appropriate location that can be easily accessed when necessary. Once the controller is in place, you can start connecting the wiring from the controller to the sprinkler heads.
Make sure that you use the appropriate wiring for each zone or section of the lawn. Then, it’s time to attach each wire to the corresponding zone or station valve. Remember, it’s essential to follow the manufacturer’s instructions when connecting the wires to the valve.
When it comes to mounting the controller, always ensure that it is placed in a waterproof and secured location. This is crucial to prevent accidents and any damage to the controller that may be caused by harsh weather conditions. Additionally, you should keep the wiring organized and labeled to avoid any confusion when the system is in use.
With all the wiring properly installed, the final step is to test the system. Turn on the controller and check if each zone is receiving the proper amount of water pressure and coverage. Once the system is running smoothly, you can sit back, relax, and enjoy your lush, green lawn.
Installing a sprinkler system controller and connecting the wiring may seem daunting, but with the right guidance, it’s a piece of cake. Remember, safety should always come first, so make sure to handle the wiring carefully and follow instructions. With a little bit of patience and effort, your sprinkler system will be up and running, keeping your lawn and garden looking beautiful and healthy.
Step 6: Program the Controller
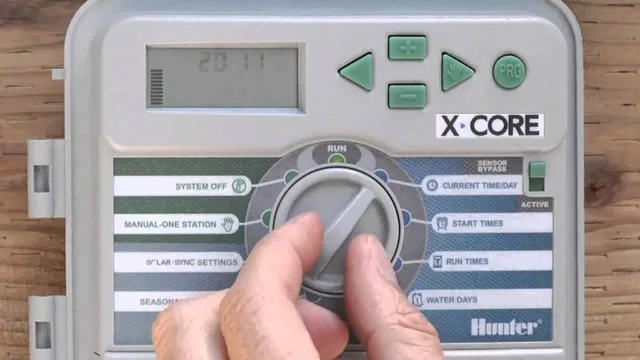
Now that you have set up your Hunter Sprinkler System with the proper design, installed the components, and connected them to the water source, it’s time to program the controller. The controller is a central computer unit that controls the timing and duration of each individual sprinkler zone. It’s essential to program the controller correctly to ensure that your lawn and garden receive the right amount of water at the right time.
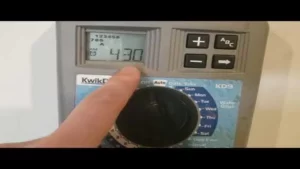
To program the controller, you must first identify the type of controller you have and follow the manufacturer’s instructions. Typically, you will need to enter the date and time, select the watering schedule, set the duration for each zone, and adjust the watering frequency based on weather conditions. Once you have programmed your Hunter Sprinkler System controller, review the settings, and ensure they are correct — this will save you time, money, and water in the long run.
Remember, a well-programmed irrigation system can help you keep your lawn and garden healthy while saving time and money on your water bills.
Follow the instructions in the manual to program the controller.
Programming the controller can seem intimidating at first, but with the manual as your guide, you’ll be able to program it in no time. Step 6 of the process is where you’ll begin programming, so make sure you have a good understanding of the previous steps. Follow the instructions carefully, taking note of any specific codes or symbols needed.
Don’t hesitate to reach out to customer support if you’re having trouble. It’s important to program the controller correctly, as it ensures the device functions properly and can help extend its lifespan. Think of it like cooking a meal – following the recipe precisely leads to delicious results! By programming the controller correctly, you’re setting yourself up for success and a smooth experience using the device.
Trust in the process and take your time – you’ll be a pro in no time!
Conclusion
Setting up your Hunter sprinkler system may seem like a daunting task, but with a little patience and some careful planning, you can have a lush, green lawn in no time. Follow the step-by-step instructions, make any necessary adjustments, and always remember to give your system a test run before leaving it to do its job. So, unleash your inner hunter and go forth and conquer those dry spots with your new sprinkler system.
Happy watering!”
FAQs
What is a hunter sprinkler system and how does it work?
A hunter sprinkler system is an automated irrigation system that uses water pressure to distribute water through a network of pipes and sprinkler heads. The system is set up to water your lawn and garden according to a predetermined schedule.
How do I install a hunter sprinkler system?
To install a hunter sprinkler system, you will need to dig trenches for the water pipes and connect them to a water source. You will also need to install sprinkler heads and a control panel to manage the system. It may be best to hire a professional to handle the installation to ensure it is done correctly.
How do I program my hunter sprinkler system?
To program your hunter sprinkler system, you will need to use the control panel to set the watering schedule according to the needs of your lawn and garden. You can set different zones for different areas and adjust the watering duration and frequency as needed.
How often should I water my lawn with a hunter sprinkler system?
The frequency of watering will depend on your climate, soil type, and the type of plants in your lawn and garden. As a general rule, you should water deeply once or twice a week rather than frequent shallow watering, which can cause shallow root growth.
How do I maintain my hunter sprinkler system?
Maintaining your hunter sprinkler system involves regular inspection for leaks, clogs, and broken sprinkler heads. You should also adjust the schedule according to seasonal changes and monitor water usage to ensure efficient operation. It may also be necessary to winterize the system to avoid damage from freezing temperatures.
Can I use a hunter sprinkler system with a well water supply?
Yes, a hunter sprinkler system can be used with a well water supply as long as the water pressure and flow rate are sufficient to meet the system’s needs. A professional installer can determine the necessary requirements for your specific setup.
How much does it cost to install a hunter sprinkler system?
The cost of installing a hunter sprinkler system will depend on various factors such as the size of your lawn and garden, the complexity of the system, and the cost of labor in your area. On average, the cost can range between $1,500 to $3,500 for a typical residential installation.
