If you’re finding that your plants are looking a bit thirsty, it might be time to take a look at your sprinkler system. A malfunctioning sprinkler system can be a headache, but luckily, there are some simple troubleshooting tips you can try before calling in the professionals. In this post, we’ll cover the most common reasons why sprinkler systems stop working and what you can do to fix them.
From clogged nozzles to electrical issues, we’ll walk you through the steps to diagnose and repair your sprinkler system. So grab your tool belt and let’s get started!
Check the Water Supply
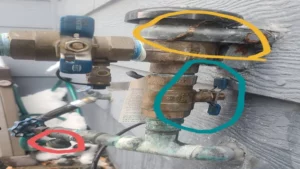
“Why is my sprinkler system not working?” Checking the water supply is one of the first things to do to diagnose this issue. It’s important to check the water pressure and make sure the main valve is fully open. If the water pressure is low, it could be due to a clogged filter or the water supply being turned off.
If the main valve isn’t fully open, it could restrict water flow to the sprinkler system. Another thing to consider is the type of water you’re using. Hard water can cause mineral buildup in sprinkler heads, leading to clogs and decreased water flow.
Testing the water quality and using a water softening system may be necessary to resolve this issue. By checking the water supply, you can identify and address any issues affecting the sprinkler system’s performance and keep your lawn looking healthy and green.
Inspect the Valve Box
When you inspect your valve box, it’s essential to check the water supply to ensure your irrigation system is working correctly. The water supply is the vital element that enables your sprinkler system to function correctly. Without an adequate water supply, your plants may experience drought stress, which may cause them to wilt or die.
Begin by examining the main water valve to determine whether it’s turned on or off. When the valve is closed, the irrigation system will not work correctly. If it’s open, investigate the water pressure to ensure it’s consistent across all sprinkler heads in the system.
If the water pressure fluctuates across the system, you may require a professional to inspect the system’s connection or install a pressure regulator to regulate water pressure. Inspecting the valve box and checking the water supply are critical steps in ensuring a healthy and thriving lawn.

Look for Broken Sprinkler Heads
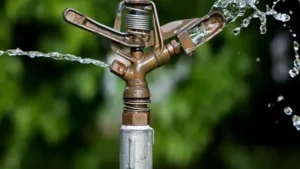
Look for Broken Sprinkler Heads When it comes to maintaining your lawn’s health, one of the most important things you can do is to ensure it receives adequate water. But before you start sprinkling your garden with water, take a moment to check the water supply. Ensure that the water pressure is strong, and the sprinkler heads are working correctly.
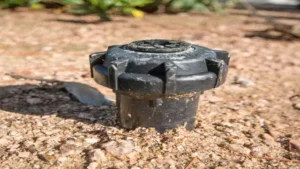
Broken sprinkler heads will water some areas more than others, resulting in uneven grass growth. You don’t want to waste water or end up with patchy grass, so it is essential to inspect all sprinkler heads and identify any that require repair. If you discover a broken head, replace it immediately, and your lawn will thank you.
Your beautiful grass will grow consistently, without any brown spots, giving you a lush green garden that will make all your neighbors envious. So, make a habit of checking your sprinkler heads regularly to ensure your lawn remains healthy and attractive. Main keyword: Broken Sprinkler Heads
Examine the Controller
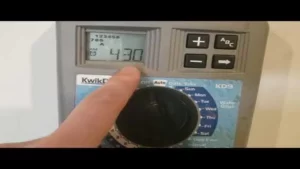
Are you baffled by why your sprinkler system is not functioning correctly? One possible culprit could be the controller. The controller is essentially the brain of the system, responsible for initiating and stopping watering cycles at specific times and for specific durations. If your controller is malfunctioning or not set correctly, your sprinklers may not receive the signal to turn on, skip watering altogether, or run for the incorrect amount of time.
Double-check to make sure your controller is programmed with the correct watering schedule, and that all settings are adjusted appropriately. If you’ve ruled out issues with the controller, it may be time to call in a professional to diagnose and repair any other problems with your system.
Check for Power
When checking for power in your controller, there are a few things you can do to make sure it’s working properly. The first thing you should do is check to see if the controller is receiving power. This can be done by making sure the cord is securely plugged into the outlet or, if it’s a wireless controller, by making sure the batteries are fully charged.
If the controller isn’t receiving power, it won’t be able to function properly. Once you’ve determined that the controller is receiving power, you can examine it to make sure there are no visible signs of damage. This can be done by checking the casing for any cracks or dents, and by inspecting the buttons and joysticks to make sure they’re all in good working order.
By taking these steps, you can help ensure that your controller is functioning properly and ready for use.
Inspect the Programming
When examining the controller of a system, it is crucial to inspect the programming. The controller acts as the brain of the system, receiving and interpreting input signals and then executing the appropriate output commands. Therefore, any errors in the programming can have significant consequences and result in system failure or malfunctions.
It is essential to review the programming code thoroughly and ensure it aligns with the desired system behavior. In addition, testing the system under various input scenarios can help identify any programming flaws and improve the system’s overall functionality. Ultimately, a well-programmed controller is critical for the proper operation and success of any system.
By inspecting and maintaining the programming, you can help ensure the system performs at its best.
Verify the Zone Settings
When it comes to examining your controller to verify the zone settings, there are a few things to keep in mind. First off, make sure to check your manufacturer’s instructions for specific details on how to do this. Once you have your instructions, start by turning on your controller and navigating to the settings menu.
From here, you should be able to see a list of your zone settings, including the name, description, and watering schedule for each zone. Take a close look at each setting and make sure it lines up with what you want for your lawn or garden. If anything looks off, don’t hesitate to make changes or contact your manufacturer.
By carefully examining your controller and adjusting the zone settings as needed, you can ensure that your plants are receiving the right amount of water to thrive.
Test the Wiring
If your sprinkler system isn’t working, one potential issue could be faulty wiring. Even if everything else seems in order, damaged or disconnected wires can disrupt the system’s overall functionality. To test the wiring, you’ll first need to turn off the system’s power supply to avoid electrocution.
Once you’ve safely accessed the wires, use a multimeter to check for continuity. This means that electric current can successfully flow through the entire circuit. If you find a break in the wiring, it’s best to call a professional to make the necessary repairs.
Bad wiring can also lead to potentially dangerous situations, so it’s crucial to address the issue as soon as possible. By taking the time to test the wiring, you can help ensure that your sprinkler system is functioning optimally and keeping your lawn healthy.
Use a Multimeter
If you’re having trouble with your electrical system, one of the simplest ways to test the wiring is to use a multimeter. This handy tool can quickly and easily detect any breaks or short circuits in your wiring, allowing you to pinpoint the source of the problem. To start testing, first set your multimeter to the appropriate setting, typically either DC voltage or resistance.
Then, touch the meter’s leads to different points along the wiring, such as at the switch or outlet. If you get a reading, the wiring is likely intact. However, if you don’t get a reading, there may be a break or short circuit in that section of the wiring.
By testing your wiring with a multimeter, you can save yourself time and money by accurately diagnosing the issue and making targeted repairs. So, don’t shy away from using this helpful tool to get your electrical system working properly again.
Check for Cut or Damaged Wires
If you notice any issues with your electrical system, the first thing you should do is check the wiring. Wires can become cut or damaged over time, which can cause a variety of problems, such as electrical shorts, power outages, and even fires. To test the wiring, start by turning off the power to the affected area.
Then, visually inspect the wiring for any signs of damage, such as frayed or exposed wires. Next, use a multimeter to test the continuity of the wires. A continuity test will determine if there is an unbroken circuit throughout the wiring, allowing electricity to flow smoothly.
If the test reveals any issues, you may need to replace the damaged wiring or call in a professional electrician to do it for you. By taking the time to test and repair your electrical wiring, you can help prevent potentially dangerous electrical issues in the future.
Consider Calling a Professional
If your sprinkler system isn’t working properly, it can be a frustrating experience. While you may be tempted to try and fix the issue yourself, consider calling a professional. A professional sprinkler repair technician has the tools and experience necessary to diagnose and repair any issue, which can save you time and money in the long run.
Some common reasons for a malfunctioning sprinkler system include clogged sprinkler heads, broken pipes or valves, and electrical issues. A professional can easily identify these issues and take the necessary steps to fix them. So, don’t waste your time and energy trying to troubleshoot the issue yourself.
Instead, consider calling a professional to get your sprinkler system back up and running efficiently.
Conclusion
In conclusion, your sprinkler system is not working because it’s simply tired of doing all the work. It’s time for you to give it some love and attention. Whether it’s a clogged nozzle, a blown-out valve, or a faulty controller, your sprinkler system needs some TLC to get it up and running again.
So don’t be like the lazy sprinkler system, roll up your sleeves and get to the root of the problem. After all, a happy sprinkler system will lead to a happy lawn and a happy you!”
FAQs
How do I troubleshoot my sprinkler system if it’s not working properly?
Check the water supply, inspect the sprinkler heads for clogs or damage, and verify the controller settings and wiring.
Why are my sprinkler heads not popping up when my system turns on?
Possible reasons include clogged or damaged sprinkler heads, low water pressure, a faulty control valve, or an electrical issue in the wiring.
Can a water leak cause my sprinkler system to malfunction?
Yes, a leak in the supply line, control valve, or sprinkler head can cause low water pressure, uneven water distribution, or no water output at all.
Why do my sprinklers spray water in the wrong direction?
This can result from improper placement of the sprinkler heads, incorrect nozzle selection, or misaligned spray patterns due to wind or other external factors.
How can I adjust the coverage area of my sprinkler heads?
Use the manufacturer’s instructions to adjust the deflector, spray pattern, or arc settings on each sprinkler head to ensure proper water distribution and avoid overspray.
What type of maintenance does a sprinkler system require?
Regular maintenance should include checking and cleaning the sprinkler heads, renewing clogged or damaged parts, adjusting the water pressure and flow, and inspecting the wiring and controller settings.
Why does my sprinkler system run continuously even after the controller is turned off?
This could be due to a stuck control valve, a faulty solenoid, or a short circuit in the wiring. Consult a professional to diagnose and repair the issue.
