Are you tired of manually watering your lawn and garden? Have you considered installing a sprinkler system? A well-functioning water sprinkler system is like having a personal gardener who ensures your greenery stays healthy and lush. And, the best part is, once the system is installed, turning it on is a breeze. In this blog post, we’ll walk you through the steps of turning on your water sprinkler system so you can sit back, relax and let your sprinklers do the work for you.
So, let’s get started!
Step 1: Locate Your Sprinkler System
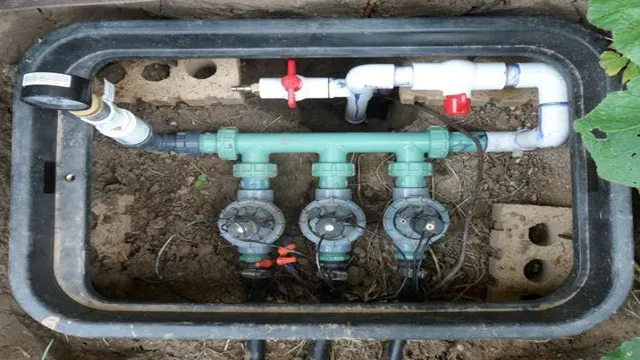
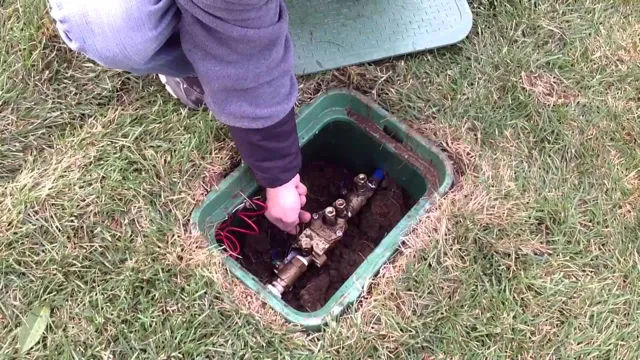
Are you ready to get your lawn looking its best this year? The first step in turning on your sprinkler system is to locate it. Your sprinkler system may be buried underground, so you’ll need to find the valves that control it. Look for a rectangular box with a lid in your lawn or garden.
You may also see a small metal lever sticking out of the ground. Once you have located the sprinkler system, you can move on to the next step. Don’t worry if you can’t find it right away – sometimes, sprinkler systems can be difficult to locate.
Just keep looking, and you’ll find it eventually.
Locate the controller box for your sprinkler system
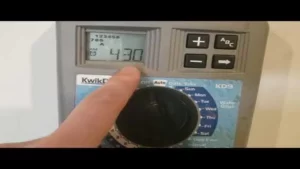
When it comes to maintaining your sprinkler system, the first and most important step is to locate the controller box. The controller box is the brain of your sprinkler system, and it’s where you can set the schedule for when your sprinklers turn on and off. Typically, the controller box is located near your home’s electrical panel or water main, either inside or outside your home.
If you can’t find the controller box right away, try looking for a metal or plastic box that’s mounted to a wall or post. If you’re still having trouble, check your property’s blueprint or consult a professional to help you locate it. Once you’ve found the controller box, make sure you understand how to use it properly to avoid wasting water, time, and money.
By taking the time to locate your sprinkler system’s controller box, you’ll be on the right track to keeping your lawn and garden healthy and well-watered all year long.
Identify which valves control the water flow to your sprinklers
One of the crucial steps in identifying which valves control the water flow to your sprinklers is to locate your sprinkler system. It may seem like a no-brainer, but many homeowners have no idea where their sprinkler system is located. Look for the control panel that turns on and off the sprinkler system.
It should be located near the main water source of your home, usually near the garage or basement. If you’re not sure where it is, check with the previous owner or consult a professional sprinkler system installer. Once you’ve located the control panel, turn on the system and observe which areas of your yard are receiving water.
This will give you an idea of which valves control the water flow to your sprinklers. Keep in mind that there may be multiple valves, so it’s essential to note which ones are controlling which areas of your yard. By locating your sprinkler system, you’ll be well on your way to identifying which valves control the water flow and being able to make any necessary adjustments.
Step 2: Turn on Water Source
When it comes to turning on your water sprinkler system, the process can vary depending on the type of system you have. Generally, the first step is to find the water source that supplies your system. This may be a valve located on the side of your house or in your basement.
Once you have located the valve, turn it on slowly to avoid any sudden bursts of water. It’s important to keep an eye on the system as you turn on the water, to make sure everything is functioning properly. If you notice any leaks or malfunctions, turn off the water immediately and address the issue before continuing.
Once the water source is fully turned on, the next step is to program your sprinkler system (if it is not already programmed). This will set the schedule for when and how often your sprinklers will run, ensuring your lawn stays healthy and green all season long. Don’t forget to periodically check your system for any leaks or clogs, and adjust your watering schedule as needed based on weather conditions.
Overall, turning on your water sprinkler system may seem like a daunting task, but with a little preparation and know-how, it can be done in no time.
Locate the main water valve on your property
Locating the main water valve on your property is crucial to ensure proper control over your water supply. Once you have found the main water valve, the next step is to turn on the water source. This may seem like a simple task, but it is important to do it correctly to avoid any potential damage.
The first thing you should do is make sure all your faucets and valves are turned off. Then, slowly turn on the main water valve. This may take a few turns, so don’t rush it.
As you turn the valve, listen for any sounds of water rushing through the pipes. If you hear any unusual noises, turn the valve off immediately and consult with a professional. Once the main water valve is fully open, double-check that all the faucets and valves are still turned off.
After that, you can turn on the faucet closest to the main water valve and let the water run for a few minutes to flush out any air or debris that might have accumulated in the pipes. Remember, turning on the water source should always be done with caution, as water damage can be costly and difficult to fix. By taking the time to locate your main water valve and properly turn on the water source, you can avoid any potential problems and ensure a steady supply of water for your home.
Turn the valve counterclockwise to open water flow to your sprinklers
When it’s time to turn on your sprinklers, one of the first steps is to locate your water source and turn it on. Start by locating your main water valve, usually found near the water meter. Use a water key or pliers to turn the valve counterclockwise and open the flow of water to your sprinklers.
Make sure you turn the valve slowly to avoid water hammer, which can damage your pipes and valves. Once the water is flowing, check to see if there are any leaks or breaks in your sprinkler system. It’s also a good idea to test each sprinkler zone to ensure proper coverage and pressure.
If everything looks good, you’re ready to proceed with your irrigation schedule. Remember, regular maintenance is key to keeping your sprinklers running smoothly, so be sure to check your system for leaks and other issues on a regular basis. By following these simple steps, you can keep your lawn healthy and green all season long!
Step 3: Activate Sprinkler System
Now that you have checked and prepared your sprinkler system, it’s time to turn it on and get your garden blooming! To begin, make sure the main water valve is turned on. Locate the sprinkler control box and check that each zone is set up correctly. Turn on the controller, and select the first zone you want to activate.
Once selected, run the system for a few minutes to ensure that the water pressure is suitable and there are no leaks or damages to the pipes. If the system is working correctly, move onto the next zone, repeating the process until all zones are activated. Remember that different zones may require different watering times, so adjust the timer and watering duration according to the needs of each area.
And there you have it- a fully functional sprinkler system to keep your lawn and garden looking fresh and hydrated all-year-round!
Enter the correct settings on the controller box
When it comes to activating your sprinkler system, make sure you enter the correct settings on the controller box. This step is crucial, as it ensures that you don’t waste water or damage your lawn. The first thing you need to do is set the watering schedule.
Determine how often you want your sprinkler system to run, and for how long. Keep in mind that watering too frequently or for too long can lead to overwatering, which can harm your lawn and plants. Once you’ve established your watering schedule, set the start time.
This is the time of day when your sprinkler system will begin watering. Ideally, you want to avoid watering during the hottest part of the day, as this can lead to water evaporation and waste. Finally, adjust the watering zones.
Depending on the size and shape of your lawn and garden, you may need to customize the watering zones to ensure they get adequate coverage. By entering the correct settings on the controller box, you can activate your sprinkler system and keep your lawn looking lush and healthy all season long.
Select the zones you want to water and set the start time
Now that you have installed your sprinkler system and set up the controller, it’s time to activate it. The next step is selecting the zones you want to water and setting the start time. Most sprinkler systems have multiple zones, each covering a different area of your lawn or garden.
By selecting the zones, you can avoid overwatering or underwatering any specific area. Once you have specified the zones, you have to set the start time to ensure that the sprinkler system will turn on at the appropriate time. You can either set the start time manually or use the smart controller option that automatically adjusts the watering schedule based on the weather conditions.
You want to make sure that the start time is early in the morning as this is the most effective time to water your lawn or garden. Remember to check and adjust the watering schedule regularly to ensure that your plants receive just the right amount of water. By following these simple steps, you can activate your sprinkler system and enjoy a healthy and lush lawn or garden.
Step 4: Monitor Your Sprinkler System
Now that you have turned on the water supply to your sprinkler system, it’s time to monitor it regularly. Check the sprinkler heads to ensure that they are functioning correctly and spraying water evenly over the lawn and garden. If you notice any misaligned, broken, or clogged sprinkler heads, make sure to repair or replace them as soon as possible.
Moreover, keep an eye out for any leaks in the pipes or valves leading to the sprinkler system. Leaks can waste a lot of water and money, and it’s essential to repair them swiftly. To prevent the system’s damage during winters when the temperature drops below freezing, consider draining the pipes and valves to prevent freezing and bursting.
Keep in mind that monitoring and maintaining the sprinkler system regularly will ensure that it works efficiently and effectively while saving resources and money in the long run.
Regularly check your sprinkler heads for proper function and leaks
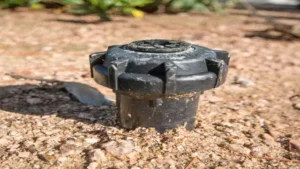
Regularly checking your sprinkler heads for proper function and leaks is a crucial step in maintaining a healthy and efficient sprinkler system. Over time, sprinkler heads can become clogged with dirt, debris, or grass clippings, causing uneven watering or even complete blockages. By monitoring your system and regularly checking for blockages or leaks, you can catch small issues early on before they turn into more significant problems.
Additionally, checking for leaks can save you money on your water bill and prevent water waste. It’s essential to stay on top of any maintenance needed for your sprinkler system to ensure that it continues to work effectively and efficiently. By doing so, you can save money and protect your lawn and garden investment for years to come.
Adjust your controller box settings as needed
After taking the time to set up and program your sprinkler system, it is important to consistently monitor its performance to ensure it is watering your lawn and garden efficiently. As part of this monitoring process, you will need to adjust your controller box settings as needed. This can include checking the weather forecast and adjusting watering schedules accordingly, as well as making sure your sprinklers are functioning properly and not wasting water.
By regularly monitoring your sprinkler system and adjusting its settings as needed, you can keep your lawn and garden healthy and beautiful, while also conserving water and saving money on your water bill. So, take the time to periodically check your controller box settings and make any necessary adjustments for optimal performance. Your lawn and garden will thank you for it in the long run!
Conclusion
In conclusion, turning on your water sprinkler system is as easy as pressing a button, flipping a switch, or turning a valve. However, if you really want to show off your sprinkler skills, you can recite a few quotes from “The Secret Garden” while doing it. Just remember, the key to a lush green lawn is consistent watering, so make sure to schedule regular sprinkler sessions and enjoy your verdant paradise!”
FAQs
What is a water sprinkler system?
A water sprinkler system is an automated irrigation system that sprays water onto landscapes or crops to maintain moisture and promote healthy growth.
How does a water sprinkler system work?
A water sprinkler system is connected to a water source and a controller that determines when and for how long the sprinklers should run. Water is then sprayed onto the designated area through nozzles or sprayers.
What are the benefits of a water sprinkler system?
Water sprinkler systems provide efficient and precise irrigation, saving time and water. They also promote healthier plant growth and reduce the risk of diseases caused by overwatering or uneven watering.
How often should I water my lawn with a water sprinkler system?
The frequency of watering with a water sprinkler system depends on several factors, such as the climate, soil type, and type of plants. Generally, lawns should be watered deeply once or twice a week.
How do I adjust the water distribution of my sprinkler system?
The water distribution of a sprinkler system can be adjusted by changing the direction, angle, or flow rate of the individual sprinkler heads. Consult the manufacturer’s instructions for specific guidance.
What should I do to prepare my sprinkler system for winter?
To prepare a sprinkler system for winter, all water must be drained from the pipes to prevent them from freezing and bursting. This can be done by using compressed air or manually draining the system.
How do I troubleshoot my sprinkler system if it’s not working properly?
Common problems with sprinkler systems include clogged nozzles, broken valves, or faulty controller settings. Consult the manufacturer’s instructions for troubleshooting tips, or contact a professional for repairs.
