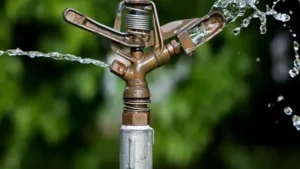
If you’re a homeowner who takes pride in maintaining their yard’s lush green grass, then you know the importance of having a functioning sprinkler system. The seasonal change from winter to spring signifies that it’s time to start prepping for your yard’s needs, which means it’s also time to start your sprinkler system. Starting your sprinkler system for the first time can be overwhelming, but fear not! This guide will provide you with the necessary steps to take to ensure your sprinkler system is running at its best.
So grab your notepad, put on your work gloves, and let’s get started!
Check Your System
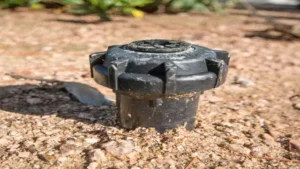
Starting up your sprinkler system after a long winter can be exciting, but also a bit intimidating. Before turning on the water, it’s important to check your system for any damage or leaks. Begin by visually inspecting all the sprinkler heads and look for any cracks, missing parts, or sunken heads.
Test each individual sprinkler to make sure it’s spraying properly and adjust any heads that are pointed in the wrong direction. Next, turn on the water supply slowly and check for any leaks in the pipes or connections. If everything looks good, you can now program your sprinkler controller with the appropriate watering schedule for your yard and enjoy a lush, green lawn all summer long! Remember, safety first – always wear protective gear and use caution when working with water and electricity.
Inspect Sprinkler Heads
To ensure your lawn is getting the proper coverage and hydration, it’s important to regularly inspect your sprinkler heads. Over time, these heads can become clogged with dirt and debris, causing them to malfunction or become less efficient. Additionally, they may become damaged or misaligned through use or harsh weather conditions.
By checking each head individually, you can easily spot any issues and make necessary repairs or replacements. Incorporating regular maintenance routines for your sprinkler system helps you avoid headaches down the line. Instead of waiting for a big problem to occur, by regularly inspecting your sprinkler heads, you can easily identify small issues before they turn into larger problems.
Remember, every head on your system is responsible for adequately watering a particular part of your lawn. By allowing even one head to malfunction, you’re putting some of your yard at risk of not receiving the proper watering. Keep in mind, it’s far easier to take a few minutes to inspect your heads regularly than it is to fix damaged grass or replace entire heads of your sprinkler system.
Check Water Pressure
“Water Pressure Check” Have you noticed a decrease in your water pressure? If so, it may be time to check your system to ensure everything is up to par. Low water pressure can be caused by a number of factors including clogged pipes, a leak, or even an outdated water heater. One way to check your water pressure is to use a pressure gauge.
Simply attach the gauge to an outdoor faucet and turn on the water. The gauge will measure the pressure and help you determine whether your system is working properly. If the pressure is below 40 psi, it’s time to take action! Another way to check for issues is to inspect your pipes for any signs of damage or leaks.
Don’t overlook this issue as low water pressure can lead to other problems such as ineffective cleaning, longer fill times, and even damage to your water-using appliances. Make sure to address any issues with your water pressure as soon as possible to avoid further damage and unnecessary expenses.
Turn on Water Supply
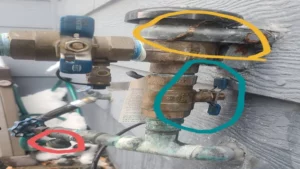
Starting your sprinkler system after a long winter can be a daunting task, but once you know what to do, it will be a breeze. One of the first things you need to do is turn on the water supply to your sprinkler system. Start by locating your main water valve and turning it on slowly.
Be sure to open it fully to avoid damaging the valve. If you have an irrigation control box, you can turn it on after you have opened the main water valve. Next, check the lines for any leaks.
Turn on each zone individually and watch for any water leaks. Address any leaks immediately to prevent wasting water and damage to your lawn. Once you have confirmed that there are no leaks, you can relax and enjoy a lush, green lawn all season long.
Remember to regularly maintain and check your sprinkler system to ensure it is working efficiently.
Locate Water Shut-Off Valve
Finding and turning off the water shut-off valve is an essential step before performing any plumbing repairs or maintenance. The shut-off valve is typically located near the water meter, where the main water supply line enters your home, and it controls the flow of water to your entire house. If you’re unsure where your shut-off valve is located, locate your water meter first.
It’s an excellent place to start and usually found in the basement or trench near the curb. Once you find your shut-off valve, turn it clockwise to stop the water supply. This process will prevent any accidental leaks or water damage and allow you to do your plumbing work with ease.
Remember, knowing where your shut-off valve is located and how to use it can save you from costly repairs in the long run.
Open Water Valve Slowly
When it comes to turning on your water supply, it’s important to approach the task with caution. You don’t want to risk bursting your pipes or causing any damage by turning the valve on too quickly. Instead, take it slow and steady.
Begin by locating the valve and ensuring that it’s fully closed. Then, slowly turn the valve counterclockwise, allowing the water to gradually flow into the pipes. It may take a few minutes for the water to fully reach your home’s plumbing system, so be patient.
Remember, the key is to avoid any sudden movements or changes in pressure. By taking your time and opening the valve slowly, you can ensure a smooth and safe water supply for your home. So, take a deep breath, turn the valve, and let the water flow!
Activate Controller
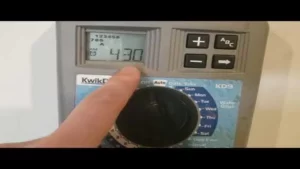
So, you’re ready to start up your sprinkler system for the season, but you’re not exactly sure how to activate the controller. Don’t worry, it’s easier than you might think! First, locate the controller, which is typically mounted on a wall in a central location. Once you’ve found it, turn the dial or press the button to switch it on.
Some controllers may require a password or pin code, so be sure to check your instructions if you’re unsure about this step. Once the controller is powered up, you can begin programming it to run your sprinklers on the desired days and times. Remember to start off with shorter run times and adjust as necessary to avoid wasting water.
With these simple steps, you’ll have your sprinkler system up and running in no time!
Set Time and Date
If you want to make the most out of your controller, you should set the correct time and date. Activating your controller can be done easily if you go through the proper setup process. Setting the time and date is important so that you can accurately track how long you’ve been using the device.
Imagine playing your favorite game and losing track of time without knowing if it’s already midnight or not. It can be frustrating, especially if you have work the next day. Having your controller time and date updated can also help you keep track of achievements or time-based events in games.
You wouldn’t want to miss out on any special events or in-game items that can only be obtained during certain times, right? To set the time and date of your controller, you need to follow a few simple steps. First, navigate to the settings menu and look for the date and time option. Once you’ve found it, you can then enter the correct values for the current date and time.
Some controllers may also allow you to set the timezone, which is a useful feature if you travel frequently or live in a different timezone from where you bought your controller. After you’ve inputted your desired values, save the changes and exit the settings menu. Your controller should now display the accurate time and date, making it easier for you to keep track of your gaming time and schedule.
So, take a few minutes to set up the time and date of your controller and make the most out of your gaming experience. By doing so, you’ll avoid running into any time-related inconveniences and ensure that you never miss out on any in-game events or achievements. Happy gaming!
Program Zones and Run Times
To activate your controller, you need to first understand program zones and run times. These are the settings that control your sprinkler system and determine how long and when each zone will run. Different areas of your lawn require different amounts of watering, and program zones allow you to customize the watering schedule for each area.
The run time refers to the amount of time each zone will run, and this can vary depending on factors such as soil type, slope, and sun exposure. Once you have programmed your zones and run times, you can activate your controller to start the watering process. This ensures that your lawn receives the right amount of water at the right time, which will promote healthy growth and prevent water waste.
So take the time to set up your program zones and run times correctly, and enjoy a lush, vibrant lawn all season long!
Test System
If you’re looking to start your sprinkler system but aren’t sure where to begin, don’t worry – it’s easier than you might think! The first step is to check the weather forecast and be sure not to start your system if there is any chance of rain in the next 24-48 hours. Next, locate your main sprinkler system valve and turn it on. This will allow water to flow through the system and reach your sprinkler heads, but be careful not to turn it on too high or you could damage your system.
Finally, go to each of your sprinkler heads and check for any blockages or clogs, and make sure they are adjusted to the proper level for your lawn. With these simple steps, you can ensure your sprinkler system is up and running in no time, keeping your lawn healthy and green all season long.
Run Each Zone Individually
When testing your sprinkler system, it’s important to run each zone individually to ensure that each one is working properly. This will help you pinpoint any issues that need to be addressed, such as broken sprinkler heads or clogged nozzles. To do this, simply turn off all of the other zones and run each one separately.
Start with the first zone and run it for about 10-15 minutes, checking to see if all of the sprinkler heads are working and that the water is reaching all parts of the zone. Then move on to the next zone and repeat the process. This may take some time, but it’s worth it to ensure that your system is working as it should be.
By doing this, you can catch any problems early on and avoid a larger, more expensive issue down the road. So take the time to test your system and keep your lawn looking green and lush all season long.
Adjust Sprinkler Heads If Needed
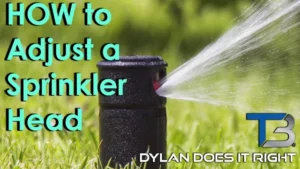
When it comes to maintaining your lawn’s irrigation system, one of the most important tasks is ensuring that your sprinkler heads are properly adjusted. This is essential for maximizing the system’s efficiency and minimizing water waste. To test your system, first, make sure that all the sprinkler heads are popping up as they should.
Then, turn on the system and observe the coverage area of each sprinkler head. Are there any dry patches that aren’t receiving adequate coverage? Are there any areas where the water is spraying onto the sidewalk or roadway instead of onto the lawn? These are signs that your sprinkler heads need adjusting. By making the necessary adjustments, such as tilting or rotating the heads, you can ensure that your lawn is receiving optimal irrigation coverage, promoting healthy growth and reducing water usage.
So, take a bit of time to test your system and adjust your sprinkler heads if needed. Your lawn (and your water bill) will thank you for it.
Maintain Your System
Starting your sprinkler system after a long winter can seem like an intimidating task. The first step is to locate your system’s main shut-off valve and turn it on slowly to allow the system to pressurize. If you notice any leaks or broken sprinkler heads, turn off the water right away and call a professional.
Once the system is pressurized, it’s time to program your sprinkler controller with the correct settings for your lawn’s needs. Make sure to adjust the watering schedule as needed based on the weather or recent rainfall. Regular maintenance is also crucial to keep your system running efficiently such as cleaning the sprinkler heads and checking for any clogs or debris.
By following these steps, you can ensure that your sprinkler system is ready to keep your lawn healthy and watered all summer long.
Regularly Check for Leaks and Damage
Regularly checking for leaks and damage is crucial to maintaining your system. Ignoring leaks and damage can cause your system to fail, leading to costly repairs or even replacement. It’s important to inspect your system regularly, especially after harsh weather conditions or strong storms.
Check for any cracks or damage, and make sure all joints and connections are secure. Additionally, monitor your water bill for any unexpected spikes, as this could indicate a leak. Don’t ignore even small leaks, as they can add up over time and cause significant damage.
Think of it like a small hole in a boat – if you don’t fix it, the boat will eventually sink. A well-maintained system will not only save you money in the long run, but it will also ensure the safety and comfort of your home. So, make sure to take the time to inspect your system regularly and address any issues promptly.
Winterize Your System Annually
Maintaining your HVAC system is important to ensure it runs efficiently and effectively for years to come. One crucial step in this process is winterizing your system annually. This involves thoroughly cleaning and inspecting the system, replacing filters, and checking for any potential issues that could arise during the winter months.
By doing so, you can prevent any unexpected breakdowns or costly repairs during the colder season. Winterizing your HVAC system also helps to improve indoor air quality and increase energy efficiency, ultimately saving you money on your monthly bills. Think of it as giving your system a winter coat to keep it warm and protected from the harsh elements.
So, don’t neglect this important step in maintaining your HVAC system. Schedule an annual winterization service with a qualified technician to ensure your system is ready for the winter months ahead.
Conclusion
So there you have it, folks! Starting your sprinkler system may seem daunting, but with these simple steps, you’ll be well on your way to a lush, green lawn worthy of envy from your neighbors. Remember, just like any relationship, communication is key. Make sure those valves are open and flowing, and your sprinkler heads are free from any blockages.
With a little bit of care and attention, your plants and grass will thank you for the hydration they so desperately need. Happy watering!”
FAQs
What are the basic components of a sprinkler system?
The basic components of a sprinkler system are the control panel, valves, piping, sprinkler heads, and a water supply source.
How do I prepare my sprinkler system for spring?
To prepare your sprinkler system for spring, you should turn on the water supply, check for leaks, and test each zone to ensure proper function.
What is the best time of day to water my lawn with a sprinkler system?
The best time of day to water your lawn with a sprinkler system is early in the morning before the sun is up or late in the evening after the sun has set.
How do I adjust the sprinkler heads for optimal coverage?
To adjust the sprinkler heads for optimal coverage, use a screwdriver to adjust the spray angle and distance, and ensure that there are no obstructions blocking the spray pattern.
How do I winterize my sprinkler system?
To winterize your sprinkler system, you should turn off the water supply, drain the pipes and valves, and use compressed air to blow out any remaining water.
How often should I water my lawn with a sprinkler system?
The frequency of watering your lawn with a sprinkler system will depend on factors such as climate, soil type, and grass species. Generally, it is recommended to water deeply and infrequently, rather than frequently and shallowly.
What maintenance tasks should I perform on my sprinkler system?
Common maintenance tasks for a sprinkler system include checking for leaks and clogs, replacing damaged components, and ensuring that the system is properly programmed and timed.

