Ah, the sweet sound of springtime. Birds chirping, the sun shining, the grass growing, and the sprinkler system churning to life! Yes, it’s that time of the year when homeowners must gear up to start their sprinkler systems back up after winter hibernation. Although this task may seem daunting and complex, it is necessary to ensure that your lawn remains healthy and lush all season long.
In this article, we will guide you through the process of starting up your sprinkler system step-by-step, so all you need to worry about is enjoying your green oasis. So, dust off your irrigation system, grab a coffee, and let’s get started on this important garden task!
Check for any damage
Before turning on your sprinkler system, it’s essential to check for any damage that may have occurred during the winter months. Start by inspecting the hoses and sprinkler heads for cracks, leaks, or deformities. Such damage can cause water to spray or leak in unintended directions, causing watering inefficiencies and create water wastage.
Also, ensure everything is connected correctly, including hoses, valves, and filters, assuring there are no missing or broken pieces. Identifying any damage beforehand will save you on time, money, and water in the long run. Regularly checking your sprinkler system helps extend its lifetime and ensures it is running optimally and efficiently, providing an adequate watering system for your lawn or garden.
With proper maintenance, you will enjoy a healthy and green lawn throughout the year. So, when starting up your sprinkler system, don’t forget to check for any damage and fix any issues before turning it on.
Inspect sprinkler heads and pipes for cracks or leaks
When it’s time to turn on your sprinkler system for the season, it’s important to inspect each and every sprinkler head and pipe for any signs of damage. A small crack or leak might not seem like a big deal, but it can lead to bigger problems down the road. If water is leaking out where it’s not supposed to, it can cause your grass to become over-watered in some areas while leaving other spots dry and yellowed.
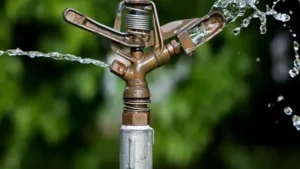
Plus, a leaking sprinkler head can waste a lot of water, which can be costly for your wallet and harmful to the environment. Start by walking around your lawn and inspecting each sprinkler head. Look for any visible cracks, chips, or other signs of damage.
If you notice any, replace the sprinkler head as soon as possible. Next, turn on your sprinkler system and look for any leaks or other problems. If you see water spraying out of a location where it’s not supposed to, you might have a leaky pipe.
If you’re not sure where the problem is coming from, it’s best to call in a professional to help. They’ll be able to quickly identify any issues and make the necessary repairs. By taking the time to inspect your sprinkler system before using it, you’ll be able to ensure that it’s working properly and efficiently.
Plus, you’ll be able to catch any problems before they become bigger, more expensive headaches. So, take a few minutes to give your sprinkler system a once-over before using it this season. Your lawn will thank you!
Repair any damaged parts before turning on the system
When you’re setting up a new system, whether it be a computer, a home theater, or a gaming console, it’s important to ensure that all the components are in good working order before you turn on the power. One of the most crucial steps is to check for any damage. Even if a particular part appears to be intact, there’s always a chance that it could be faulty in some way that’s not immediately visible to the naked eye.
For example, a tiny crack in a component can cause it to fail catastrophically once the system is powered on. To avoid the risk of damage to your new system or even personal injury, it’s essential to inspect all components thoroughly before switching on the power. If you do discover any damage, it’s best to repair or replace the affected part before proceeding with the setup.
When it comes to setting up a new system, the last thing you want is to discover that something’s wrong after you’ve already turned it on. Not only can this be frustrating, but it can also be dangerous. That’s why it’s important to take the time to check for any damage before you switch on the power.
Whether it’s a loose connection, a frayed wire, or a cracked component, even the slightest fault can cause serious problems once electricity starts flowing. By inspecting all of the parts and repairing any damage before you start using your new system, you can ensure that it runs safely and smoothly for a long time to come. So don’t skip this crucial step – take the time to check for damage and make sure everything is in working order before you power on your new system.
Turn the water source on
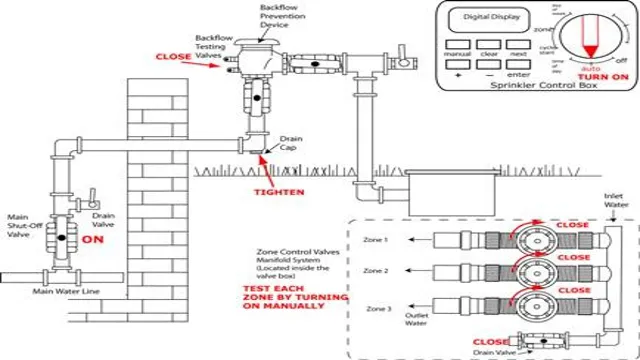
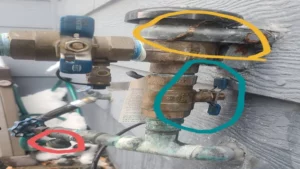
So you want to know how to start up your sprinkler system? Well, let’s begin with step one: turning on the water source. This may seem obvious, but it’s important to ensure that the water supply valve is turned on and that water is flowing to your system. If you’re not sure where the valve is located, check near the main water line or meter.
Once you find it, turn it to the “on” position and listen for the sound of water rushing through the pipes. If you hear water running, congratulations, you’ve successfully turned on the water source. If not, check for any leaks or blockages in the pipes and try again.
With the water source turned on, your sprinkler system is one step closer to being fully operational. But don’t forget, there are still a few more steps to go before your lawn is getting the hydration it needs.
Locate and open the main water valve
If you’re experiencing low water pressure or no water at all, it’s probably time to locate and open the main water valve. The main water valve is usually located near the water meter or where the main water supply enters your home, but if you’re having trouble finding it, you can always ask a plumber for help. Once you’ve located the valve, turn it counterclockwise to open it and allow water to flow through the pipes again.
It’s important to make sure the valve is fully open, otherwise you may still experience low pressure. If you’re unsure whether the valve is fully open or not, you can test the water pressure at an outdoor faucet. If the pressure is low, open the valve a little bit more until the pressure increases to normal levels.
With a fully functioning main water valve, you can ensure that proper water flow is maintained throughout your home, so it’s always important to keep it in good working order.
Allow the water to flow through the pipes for a few minutes
If you’ve recently had your plumbing system checked or repaired, it’s essential to allow water to flow through the pipes. This step ensures that any residual debris or contaminants are flushed out of the system and prevents clogging or damage. To begin this process, you need to turn on the water source.
Most homes have a water shut-off valve that controls the flow of water from the main supply line. Locate the valve and turn it on gradually to avoid sudden bursts of water that might cause damage. Once the valve is fully open, allow the water to flow through the pipes for a few minutes until it runs clear and free from debris.
This process helps to ensure that your plumbing system is working efficiently and that you can enjoy clean and safe water in your home. Taking care of your plumbing system in this way can save you money on repair costs and protect your home from water damage in the long run.
Reset the controller
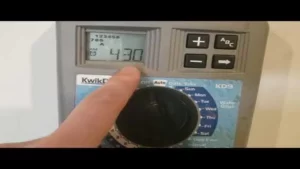
Starting up your sprinkler system can be a tricky process, but one of the most crucial steps is resetting the controller. To do this, first locate your controller box. Then, turn off the power to the controller by either unplugging it or flipping the breaker switch.
After a few minutes, turn the power back on and navigate the controller’s settings to ensure that they are set correctly for the current season and weather patterns. It’s also essential to check and adjust any zone or program settings as needed. By taking the time to reset your controller correctly, you’ll ensure that your sprinkler system is operating at maximum efficiency, saving you time and money in the long run.
So, the next time you’re wondering how to start up your sprinkler system, don’t forget about resetting the controller and following these simple steps.
Check the controller settings and adjust as needed
If you’re experiencing issues with your console or games, one of the first steps you should take is to check the controller settings. Sometimes, the default settings may not be suitable for your play style or the game you’re playing. Resetting the controller can help fix any issues and restore the default settings.
By doing this, you can also ensure that your controller is properly synced with your console. Generally, the reset button is located on the back of the controller. It’s a small, circular button that can be pressed using a paperclip or other similar tool.
Hold down the button until you see the controller’s lights flash. Once this is done, you can reconnect the controller to your console and adjust the settings as needed. This simple step can help resolve a variety of issues and greatly enhance your gaming experience.
Don’t let frustration and glitches ruin your gameplay – take a few minutes to reset your controller and enjoy seamless gaming.
Make sure the controller is connected to the power source
When it comes to troubleshooting your controller, there are a few things you should check before assuming it’s broken. First and foremost, make sure it’s connected to the power source. This may seem like common sense, but it’s a simple mistake that can easily be overlooked.
If the controller is not getting any power, it will not function properly. Once you’ve confirmed it’s connected to the power source, the next step is to reset the controller. This is a quick and easy fix that can often resolve any issues you may be experiencing.
To do this, simply unplug the controller from the power source and wait a few seconds before plugging it back in. This will reset the settings and hopefully resolve any glitches or malfunctions. By taking these simple steps, you can avoid the frustration and expense of purchasing a new controller.
Remember to always check the power source and reset the controller before assuming the worst.
Run a test cycle
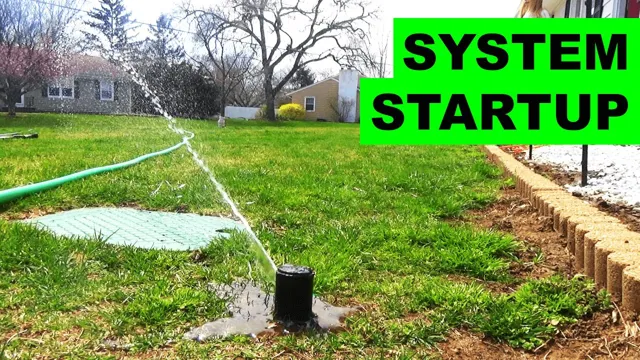
To start up your sprinkler system, it’s important to run a test cycle before diving straight into the watering schedule. This ensures that all the sprinklers are functioning properly and delivering water to the right areas. To start the test cycle, turn on the water supply to your sprinkler system and activate each zone manually, one at a time.
Walk around your yard and ensure that each sprinkler head is functioning, that there are no leaks or clogs, and that the water pressure is adequate. After every zone has been tested, you can then adjust the sprinkler heads and controller to ensure that each zone is delivering the appropriate amount of water. Additionally, it’s important to regularly maintain and inspect your sprinkler system to ensure optimal performance and water conservation.
By taking these steps, your sprinkler system will be up and running flawlessly, providing your lawn and garden with the water it needs to thrive.
Activate each zone to check for proper water distribution
As a homeowner, you want to ensure that your irrigation system is working as efficiently as possible. One way to check for proper water distribution is to run a test cycle. It’s important to activate each zone individually to ensure that each area of your yard is receiving the appropriate amount of water.
This will help prevent overwatering or underwatering in certain areas, which can lead to costly damage to your plants and lawn. By running a test cycle, you can identify any areas that may need adjustment or repair. It’s a simple step that can save you time, money, and frustration in the long run.
Don’t overlook the importance of proper water distribution in your irrigation system. Taking the time to run a test cycle can ensure that your yard is looking its best all year round.
Adjust sprinkler heads to ensure even coverage
Sprinkler heads Adjusting sprinkler heads is an important task every homeowner should do to ensure the even distribution of water onto their lawn or garden. To start, run a test cycle by turning on your sprinkler system and observing how the water is being distributed. Check for any areas that are not receiving enough water or are receiving too much.
Once you’ve identified the problem areas, it’s time to adjust your sprinkler heads accordingly. You can do this by manually turning each head to the left or right until the water is being distributed evenly. It’s essential to adjust your sprinkler heads regularly as changes in landscaping or weather conditions can affect the distribution of water.
With proper adjustments, your lawn or garden will receive the water it needs, leading to a healthier and more vibrant outdoor space. So, don’t forget to adjust your sprinkler heads to enjoy a lush and green landscape that everyone will admire!
Schedule regular maintenance
If you’re wondering how to start up your sprinkler system this spring, one of the most important steps you can take is to schedule regular maintenance. Even if your system appears to be in good condition, it’s important to have it checked annually by a professional to ensure that everything is working as it should be. Regular maintenance can help prevent costly repairs and extend the lifespan of your system.
A typical maintenance visit may include checking the system for leaks, adjusting sprinkler heads for proper coverage, cleaning filters, and testing the control valves. By scheduling regular maintenance, you can be confident that your system is ready to keep your lawn and garden looking lush and green all season long. So why not book your maintenance appointment today and get your sprinkler system off to a great start?
Clean sprinkler heads and remove debris from the system
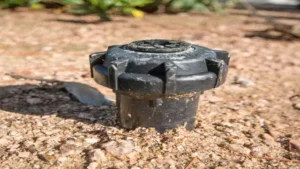
Regular sprinkler system maintenance can save you from costly repairs or replacements later on. One aspect of this is cleaning your sprinkler heads and removing debris from the system. Debris can accumulate in the pipes or clog up the heads themselves, reducing their effectiveness or even causing them to stop working altogether.
You can get ahead of this by scheduling regular maintenance for your system, which can give you the peace of mind that everything is in good working order. A trained professional can inspect your system for any potential issues, clean the heads and make any necessary repairs. This can help you avoid any stressful situations down the line and keep your lawn looking lush and healthy.
So don’t wait until there’s a problem – schedule sprinkler system maintenance today to keep everything running smoothly!
Check for leaks or other issues throughout the season
Regular maintenance is essential to keep your plumbing system functioning smoothly throughout the year. Schedule regular check-ups with a professional plumbing company to identify leaks or other issues that may arise during the season. This ensures that minor issues are detected and resolved before they turn into major problems.
It is important to maintain your plumbing system to avoid costly repairs or replacements that may be required if undetected leaks or clogs cause damage. Plumbing issues can be both perplexing and bursty, as they often occur unexpectedly and require immediate attention. However, with regular maintenance, you can avoid these problems, ensuring that you and your family have access to clean water and a functioning plumbing system.
Don’t wait until your plumbing system breaks down – schedule regular maintenance to keep your home running smoothly all year round.
Conclusion
Starting up your sprinkler system may seem daunting, but fear not! Follow these steps to get your lawn watered and your neighbors envious of your perfect grass. Just remember to turn on your water supply, set your timer, check for leaks, and adjust your sprinkler heads. With a little bit of patience and some tweaking, your sprinkler system will be up and running like it’s brand new.
So grab your sunscreen, a cold drink, and enjoy your lush green lawn, all thanks to your newly started sprinkler system. Happy watering!”
FAQs
What are the necessary steps to start up my sprinkler system after winter?
The first step is to turn on the water supply valve, then remove any debris or obstruction from the sprinkler heads, and finally, program the timer to start watering as per your schedule.
Can I start up my sprinkler system without professional help?
Yes, you can start up your sprinkler system on your own if you follow the manufacturer’s guidelines and take necessary safety precautions.
How often should I start up my sprinkler system?
It depends on several factors such as the climate, soil type, and plant water needs, but generally, it is recommended to start up your sprinkler system at least twice a year, in the spring and fall.
What are the signs of a malfunctioning sprinkler system?
Some common signs of a malfunctioning sprinkler system are low water pressure, uneven watering pattern, leaking pipes, damaged sprinkler heads, and excessive water bills.
How can I prevent my sprinkler system from freezing during winter?
You can prevent your sprinkler system from freezing by draining the water from the system, insulating the pipes, and covering the backflow preventer with an insulated pouch.
Can I use recycled water for my sprinkler system?
Yes, you can use recycled or reclaimed water for your sprinkler system, but you need to ensure that it is treated and meets the quality standards for irrigation.
What should I do if my sprinkler system is not working correctly?
If your sprinkler system is not working correctly, you should troubleshoot the problem first, such as checking the water supply, the controller, or the valves, and if you cannot fix it, call a professional technician.
