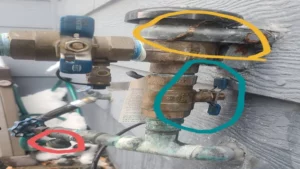
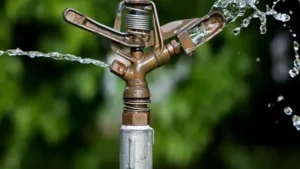
Do you notice a patch of brown grass in your lawn that doesn’t seem to disappear even after watering more frequently? Or are some parts of your garden drenched with water while others are completely dry? These are signs that there may be a leak in your sprinkler system. But, do not worry. Finding a sprinkler system leak is not rocket science, and can be done with a little effort and patience.
In this step-by-step guide, we will explore some techniques to help you locate and fix the leak quickly and efficiently. So put on your detective hat, grab your tools, and let’s get started!
Tools You Will Need
If you suspect a leak in your sprinkler system, there are several tools that you will need to effectively locate and repair the issue. The first tool you will need is a shovel to remove any soil or turf blocking access to the sprinkler system. A spade or flat shovel works best, as it can quickly remove large amounts of soil without damaging the pipes.
The next item you’ll need is a pair of pliers to tighten any loose fittings or connections that may be causing the leak. A pressure gauge should also be used to measure the water pressure in each zone of the sprinkler system. This will help you identify any areas that may be experiencing higher than normal pressure, which could be a sign of a leak.
Finally, you will need a leak detector, which can locate leaks in the sprinkler system by listening for the sound of water leaking from the pipes. By using these tools, you can quickly and efficiently locate and repair any leaks in your sprinkler system, ensuring that your lawn and garden remain healthy and hydrated all season long. So, if you’re wondering how to find a sprinkler system leak, gather up these essential tools and get to work!
Pressure Gauge
When it comes to using a pressure gauge, it’s important to have the right tools on hand. The first tool you’ll need is the pressure gauge itself, which can come in a variety of types to suit your specific needs. You may also need a set of wrenches or pliers to attach the gauge to the part that you’re testing.
In some cases, you may also need a Teflon tape or sealant to ensure a tight connection between the gauge and the part. Before beginning your testing, be sure to read the manufacturer’s instructions carefully and double-check that you have all the necessary tools on hand. By taking these steps, you’ll be able to use your pressure gauge with confidence and achieve accurate and reliable results.
Utility Knife
One of the essential tools for any kitchen or workshop is a utility knife. You’ll need this versatile cutting tool for a wide range of tasks from cutting meats and vegetables to slicing corrugated boxes and opening packages. When shopping for a utility knife, look for one with a sharp serrated blade for sawing through tough materials and a sturdy handle that provides a comfortable grip.
I recommend investing in a high-quality utility knife that will last for many years and make your daily cutting tasks easier and more efficient. With a trusty utility knife by your side, you’ll be ready to tackle any cutting job that comes your way.
Trowel
When it comes to gardening, having the right tools is essential for success. One of the most fundamental tools you will need is a trowel. A trowel is a small handheld instrument used for digging, scooping, and moving soil, plants, and other garden materials.
It’s perfect for planting smaller plants, bulbs, or seedlings. If you plan on doing any container gardening, a trowel is especially important, as it allows you to control the amount of soil you use and place it exactly where you want it. When shopping for a trowel, look for one with a comfortable grip and a sturdy blade.
Stainless steel blades are often more durable and resist rusting, making them a popular choice. A good trowel should be able to handle the heavy-duty digging without breaking or bending easily. Overall, investing in a high-quality trowel will save you money in the long run, as it will last longer and perform better than a cheaper, low-quality option.
So, don’t overlook the importance of this humble tool when stocking up on your gardening supplies!
Leak Detection Solution
If you suspect a leak in your plumbing system, then you need the right tools to help you identify and fix the problem. There are several tools you will need to perform a thorough leak detection, including a flashlight, a water meter, and a pressure gauge. A flashlight will help you inspect your pipes and look for any visible leaks.
You will also need a water meter to measure the flow of water through your pipes and check for any inconsistencies in the readings. Additionally, a pressure gauge will help you test the pressure levels in your plumbing system, which can indicate if there is a leak or other issues. With these tools, you can accurately detect and repair any leaks in your plumbing system, preventing further damage and saving you money on your water bill.
So, the next time you suspect a leak, make sure you have the right tools on hand to get the job done.
Step 1: Turn Off Water Supply
If you suspect that your sprinkler system has a leak, the first step is to turn off the water supply. This will prevent further water waste and damage to your lawn or garden. To turn off the water supply, simply locate the main shut-off valve for your sprinkler system and turn it off.
This valve is typically located near the point where the sprinkler system connects to your home’s main water line. If you’re not sure where to find the valve, check your owner’s manual or consult with a professional landscaper. Turning off the water supply is a crucial first step in identifying and repairing any leaks in your sprinkler system.
Locate the main control valve
When it comes to locating the main control valve for your water supply, the first step is to turn off the water supply to your home. This is a crucial step as it ensures that no water is flowing through the pipes while you locate and work on the main control valve. The water shut-off valve is typically located near the main water meter, which is often installed outside the home, near the sidewalk, or in the basement.
You may need to use a special wrench or tool to turn off the water supply, so be sure to have the right equipment on hand. Once you have successfully turned off the water supply, you can begin looking for the main control valve. This valve is usually located near the water meter and may look like a lever or dial.
Turning this valve off will shut off all water to your home, so it’s important to know where it is in case of emergencies. By following these simple steps and turning off your water supply first, you can safely and easily locate the main control valve and ensure that your home’s water supply is properly regulated.
Close the main control valve
If you’re planning to perform any plumbing work, make sure to follow step one: turn off the water supply. The first thing you need to do is locate the main control valve, which is usually located near the water meter. Turn the valve clockwise until it stops to close off the water supply from entering your home.
This step is critical because it prevents the risk of bursting pipes or flooding. If you don’t close the valve, water will keep coming, making it impossible to perform any repairs or maintenance. Remember to turn off any water source you’re using, including washing machines or dishwashers, as well.
A ruptured pipe can cause significant damage, so make sure to always close the main control valve before performing any plumbing work. By taking this step, you are mitigating disaster from happening and ensuring a successful plumbing job.
Step 2: Check the Pressure Gauge
When trying to find a leak in your sprinkler system, it’s essential to check the pressure gauge. The pressure gauge can indicate if there’s any water pressure loss, which is a sign of a potential leak in the system. Typically, the pressure gauge should read between 30-50 psi.
If the gauge reads lower than 30 psi, it could indicate a leak in the mainline or lateral lines. On the other hand, a gauge reading higher than 50 psi could indicate a possible blockage in the system. It’s also crucial to ensure that all valves are open and that no water is running when checking the pressure gauge for accurate readings.
By checking the pressure gauge regularly, you can identify any issues in the system early on and prevent excessive water waste and high utility bills.
Attach pressure gauge to a hose bib
Once you’ve attached the pressure gauge to a hose bib, you’ll need to check the reading on the gauge to determine your home’s water pressure. Simply look at the numbers on the gauge, which should indicate the pressure in PSI (pounds per square inch). Most homes have a pressure of around 50-70 PSI, but it’s important to verify that your pressure falls within a safe range.
If the reading is too high or too low, you may need to make adjustments to your water system to avoid damage or inefficiency. A high reading could indicate that your pressure regulator is faulty, while a low reading might suggest an obstruction in your pipes. By taking this step, you’ll have a better understanding of your home’s water pressure and can ensure that it’s operating at optimal levels.
Check the pressure level
When it comes to maintaining home appliances, checking the pressure gauge is an important step to keep in mind. The pressure gauge measures the water pressure within the system, and proper levels ensure optimal functioning of the system. To complete this task, ensure that the water supply is on and open the valve on the gauge.
Check the reading and compare it to the recommended pressure level for your system. If the reading is too high or too low, it may be necessary to adjust the system’s pressure regulator. A pressure gauge that consistently shows high or low readings can indicate an issue with the system that requires professional assistance.
Remember, regular checks on the pressure gauge will help you make sure your appliances work efficiently and help prevent costly damage to your system over time.
Step 3: Inspect Sprinkler System
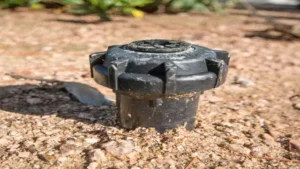
Once you’ve checked your water meter and valves and haven’t found any obvious issues, it’s time to inspect your sprinkler system. One of the most common causes of leaks is a damaged or broken sprinkler head. Inspect each head carefully for signs of damage, including cracks or missing pieces.
You should also check the surrounding area for pooling water or signs of erosion that could indicate a leak underground. If you suspect a leak but can’t see any visible damage, you can test the system by turning it on and checking for any irregularities in water pressure or flow. Keep an eye on your water meter while the system is running – if it keeps spinning after you’ve turned off all water sources inside your home or business, that’s a sign of a potential leak in the system.
By thoroughly inspecting your sprinkler system, you can quickly and easily identify any issues that may be causing water waste and costing you money on your water bill.
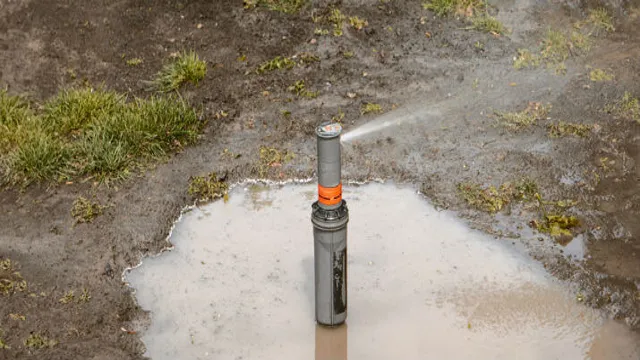
Look for wet spots on lawn
Inspecting your sprinkler system is an essential step in keeping your lawn looking healthy and vibrant. One way to tell if your sprinklers are working correctly is to look for wet spots on your lawn. If you notice any areas that seem to be getting too much water, this could be a sign of a broken sprinkler head or a malfunctioning valve.
If you have dry patches, this could mean that certain areas aren’t getting enough water from your sprinklers. It’s also a good idea to check the water pressure in your system, as high or low pressure can cause problems with how your sprinklers distribute water. By inspecting your sprinkler system regularly, you can catch any issues before they become major problems, ensuring that your lawn stays green and healthy all season long.
Check for water pooling or bubbling
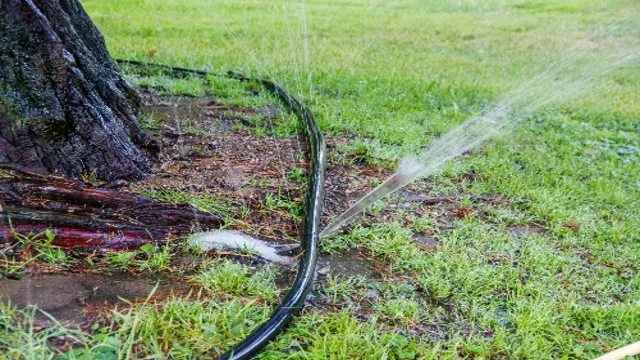
When inspecting your sprinkler system, it’s important to keep an eye out for any signs of water pooling or bubbling. This could be an indication of a leak or a problem with the system’s pressure. A leak in your sprinkler system not only wastes water but can also damage your lawn and plants if left unaddressed.
To check for water pooling or bubbling, take a walk around your lawn while the sprinkler system is running and look for any areas where the water seems to be collecting or creating bubbles. If you notice any of these issues, it’s best to call in a professional to inspect and repair your sprinkler system before any further damage occurs. Don’t let a small leak turn into a bigger problem that could cost you time and money in the long run.
Keep your lawn healthy and vibrant by maintaining a properly functioning sprinkler system.
Use trowel to inspect soil around sprinkler heads
As you inspect your sprinkler system, it’s important not to forget the soil around the sprinkler heads. This area is critical for proper water distribution, and any clogs or obstructions can negatively impact the overall performance of your irrigation system. Using a trowel, carefully dig around each sprinkler head and examine the soil for signs of debris or blockages.
Remove any build-up that you find and ensure that the sprinkler head remains level with the ground. Proper soil maintenance around your sprinklers is crucial for maintaining a healthy, lush lawn and garden. Don’t neglect these vital areas during your inspection!
Step 4: Use Leak Detection Solution
Using leak detection solution can help you easily find the leak in your sprinkler system. This solution can be purchased from most hardware stores and is simple to use. First, turn off the water supply to your sprinkler system and let the system release any excess pressure.
Then, apply the leak detection solution to the sprinkler heads, valves, and any other areas where the leak may be occurring. The solution will bubble up at the source of the leak, making it easy for you to pinpoint the exact location. Once you have identified the leak, you can then proceed to repair or replace the damaged parts.
By using leak detection solution, you can save time and money by quickly identifying and fixing any leaks in your sprinkler system.
Apply solution to suspected leak areas
When it comes to finding and fixing leaks, using a leak detection solution is essential in identifying the areas where the leak may be occurring. This is the fourth step in the process and it is crucial. The solution works by creating bubbles in the area where the leak may be present, making it more visible to the trained eye.
Generally, the solution is applied to fittings and connections where the leak is most likely to occur. Once the areas have been coated with the solution, it’s important to wait a few minutes for any bubbles to form. This waiting period can be an anxious time for some, but it’s important to be patient and let the solution do its job.
Once the bubbles have formed, it’s easier to determine where the leak is occurring and what steps need to be taken in order to fix it. Overall, using a leak detection solution is a key part of the leak-finding process and should not be skipped.
Observe for color change or bubbling
When it comes to detecting leaks in a gas system, it’s important to use the right tools to ensure accuracy and safety. One of the best tools for leak detection is a leak detection solution. This solution is a specially formulated mixture that can be applied to the area where a gas leak is suspected.
One way to use the solution is by observing it for a change in color or bubbling. If the solution changes color or produces bubbles, this indicates the presence of a gas leak. This simple yet effective method is a must-know when it comes to gas leak detection.
Using a leak detection solution is a straightforward and reliable technique for identifying gas leaks. The solution can be applied to pipes, joints, valves, and other areas where leaks may occur. Before applying the solution, it’s important to turn off all gas appliances and ensure that the area is well-ventilated.
Once the solution is applied, simply wait and observe for any changes in color or the appearance of bubbles. If a gas leak is present, the solution will react, making it easy to identify the exact location of the leak. In conclusion, using a leak detection solution is a simple and effective way to detect gas leaks.
By observing for a color change or bubbling, it’s easy to identify the location of the leak and take action to address it. Remember to always follow the proper safety procedures when working with gas, and if you suspect a gas leak, seek professional help immediately. By taking the right precautions and using the right tools, gas leak detection can be quickly and efficiently conducted, ensuring the safety of you and your loved ones.
Keyword: Leak Detection Solution
Step 5: Repair the Leak
Once you’ve located the leak in your sprinkler system, it’s time to repair it. This can be a tricky process, but with the right tools and some troubleshooting know-how, you’ll be able to fix the problem in no time. First, turn off the water to your system and dig around the leak to expose the damaged area.
If it’s a small crack, you may be able to fix it with a patch or sealant. For larger leaks or damaged pipes, you’ll need to replace the section of pipe or fitting. Use PVC primer and cement to secure the new parts in place and allow the adhesive to dry completely before turning the water back on.
Once the system is pressurized again, test the repair and make sure there are no further leaks. Taking care of a leak in your sprinkler system can save you money on your water bill and prevent damage to your lawn and garden.
Dig up the leaking pipe or sprinkler head
Now that you’ve identified the location of the leak, it’s time to dig up the source. This means locating the problematic pipe or sprinkler head and removing it for inspection and repair. Depending on the location and severity of the leak, you may need to excavate the soil around the affected area to access the pipe.
Be sure to follow proper safety protocols when digging, such as avoiding underground utilities and wearing protective gear. Once you’ve located the pipe or sprinkler head, you can assess the damage and determine the best course of action. This may involve replacing the damaged component, sealing a crack or hole, or tightening loose fittings.
By properly repairing the leak, you will not only save water and reduce your water bill, but also prevent further damage to your irrigation system. So, grab your shovel and get ready to do some digging!
Cut out the leaking section with a utility knife
To repair a leak in your plumbing, the fifth step is to cut out the leaking section using a utility knife. This may seem like a daunting task, but it is actually quite simple. First, locate the section of the pipe that is leaking and turn off the water supply to that area.
Then use a utility knife to cut out the damaged section of the pipe. Be sure to cut cleanly and straight through the pipe to ensure a proper fit for the replacement piece. Once the damaged section has been removed, measure the length of the gap and cut a new piece of pipe to fit.
From there, use couplings to connect the new piece and secure it in place. By following these steps and cutting out the leaking section, you can effectively repair a plumbing leak and prevent further damage to your home.
Replace with new section and fittings
If you’ve identified a leak in your plumbing system, the next step is to fix it. In order to do that, you’ll need to replace the damaged section and fittings with new ones. First, turn off the water supply to the affected area.
Then, carefully remove the damaged section and fittings using the appropriate tools. Make sure you have the correct size and type of replacement fittings before installation to avoid any further complications. Once you have the new fittings in place, tighten them securely with a wrench, making sure not to overtighten and damage the threads.
Finally, turn the water supply back on and check for any remaining leaks. If everything is in order, congratulations, you’ve successfully repaired the leak! Remember to regularly inspect your plumbing system to catch any potential leaks before they become bigger problems. Keyword: plumbing leak.
Test the repaired area for leaks
After repairing the leak, it’s important to test the repaired area for leaks once again. This step is crucial to ensure that the repair job was successful and there are no other leaks in the same area. To test the repaired area, you can use a hose to direct water onto the area where the leak occurred.
If you notice any water leakage, it’s an indication that the repair job has not been successful and you need to recheck the area. You might also want to check for any other leaks in close proximity to the original leak. It’s important to fix any other potential leaks as well, as they can cause future problems.
Ultimately, testing the repaired area will help you identify and fix any leaks, providing peace of mind that your home or property is safe from further water damage.
Conclusion
In the quest for a dry and functional lawn, the search for a sprinkler system leak can be quite a challenge. But fear not! With a bit of detective work and perseverance, you can unearth even the sneaky, elusive leaks that threaten to drown your yard. Whether it’s a mysterious drop in pressure or a soggy spot that just won’t dry up, follow the clues and trust your instincts.
You’ll be rewarded with a properly functioning sprinkler system and the satisfaction of a job well done. So put on your detective hat and get cracking – the perfect lawn awaits!”
Regular maintenance can prevent leaks
Regular maintenance is key when it comes to preventing leaks in your home. However, if you do find yourself with a leak, it’s essential to repair it promptly before it leads to more significant issues. This step may seem obvious, but it cannot be overlooked.
There are a few different routes you can take when it comes to repairing your leak, such as fixing it yourself or hiring a professional plumber. If you choose to fix it on your own, be sure to follow safety precautions and have the correct tools and materials. Hiring a professional may result in a higher upfront cost, but it can save you money in the long run by avoiding further damage caused by a faulty repair.
Overall, making sure leaks are repaired quickly and properly is crucial in keeping your home safe and secure.
Prompt detection and repair are crucial for water conservation
Prompt detection and repair of plumbing leaks are crucial for water conservation. Even a small leak in your plumbing system can waste a large amount of water if left unchecked. That water can add up to hundreds of gallons per month, causing your bills to skyrocket while wasting a valuable resource.
Repairing a plumbing leak is an essential step towards conserving water and saving money on your bills. The process of repairing a leak may range from a simple fix such as replacing a washer or tightening a connection to a more complex problem such as replacing a section of piping or fixing a damaged valve. It’s important to figure out the cause of the leak before you start repairing it.
This can be done by examining the source of the leak, whether it’s a sink, toilet, or showerhead. You may also need to check the surrounding pipes and connections for signs of wear and tear or corrosion. If you’re not confident in your plumbing skills, it’s best to contact a professional plumber to identify and repair the leak.
They have the necessary knowledge, experience, and tools to do the job right, ensuring that the repair is done quickly and efficiently. In addition, a professional plumber can also help you identify any potential leaks and provide you with advice on how to prevent future plumbing problems. By repairing a plumbing leak early on, you can save a significant amount of water and money.
Not only will you prevent unnecessary waste, but you’ll also avoid the damage that water can cause to your home, such as mold, mildew, and structural damage. Prevention is always better than cure, so it’s important to keep an eye out for any signs of leaks, such as damp spots or musty smells, and address them promptly. In doing so, you’ll not only conserve water but also protect your home from potentially costly damage.
FAQs
What are common signs of a sprinkler system leak?
Common signs of a sprinkler system leak include reduced water pressure, soggy or flooded areas around the sprinkler heads, and higher than usual water bills.
How can I detect the location of a sprinkler system leak?
You can detect the location of a sprinkler system leak by shutting off the water supply and measuring the water pressure at different points in the system, or by using a leak detection device specially designed for sprinkler systems.
Can I repair a sprinkler system leak myself?
Yes, you can repair a sprinkler system leak yourself if you have basic plumbing knowledge. However, if you are not confident in your abilities, it is recommended to hire a professional plumber.
How much does it cost to repair a sprinkler system leak?
The cost to repair a sprinkler system leak varies depending on the size and location of the leak, as well as the cost of labor in your area. On average, repair costs range from $75 to $250.
How often should I check my sprinkler system for leaks?
It is recommended to check your sprinkler system for leaks at least once a year, preferably before the start of the irrigation season.
What can I do to prevent sprinkler system leaks?
To prevent sprinkler system leaks, it is important to properly maintain your system by checking for leaks, adjusting sprinkler heads, and cleaning filters. Additionally, consider installing a pressure regulator to prevent damage to the system.
Can a sprinkler system leak cause damage to my property?
Yes, a sprinkler system leak can cause damage to your property by flooding and saturating your yard, creating mold and mildew, and increasing water bills. It is important to address any leaks as soon as possible to prevent further damage.
