As a woodworker or DIY enthusiast, you know that chisels are essential tools in your arsenal. But, with frequent use, even the finest chisels can become dull, making it difficult to make precise cuts. Therefore, you need to keep your chisels sharp at all times.
But have you ever wondered what grit sandpaper to use for sharpening chisels? The answer is not as straightforward as you might think. Using the wrong grit sandpaper can lead to disastrous results. If the grit is too rough, you risk damaging the blade, while a too-fine grit sandpaper may not remove the metal properly, leading to a dull edge.
In this blog post, we’ll explore the various grits of sandpaper and which is best for sharpening your chisels. We’ll examine how to distinguish between coarse, medium, and fine grit sandpapers, what to look out for when searching for the appropriate grit, and the type of chisels you have to consider when picking your sandpaper. By the end of this post, you’ll have a better understanding of the different grits of sandpaper and will have the knowledge to sharpen your chisels correctly.
So, sit tight and read on!
Understanding Grit Sizes
When it comes to sharpening chisels, choosing the right grit size of sandpaper is crucial. Grit refers to the number of abrasive particles per square inch on the sandpaper. The higher the grit number, the finer and smoother the sandpaper.
For sharpening chisels, a grit size of between 1000-3000 is ideal, as it creates a more refined and polished edge. However, if the chisel has a lot of nicks or imperfections, starting with a lower grit size of around 400-600 can help to remove those imperfections before progressing to a higher grit size. It’s important to note that using too fine a grit size can actually dull the chisel, as it removes more of the metal and creates a less sharp edge.
So, it’s important to strike the right balance between removing imperfections and creating a sharp edge when selecting sandpaper for sharpening chisels.
Coarse Grits (40-80)
Coarse Grit (40-80) is a type of grit size that brings a rough texture to the surface it’s working on. The grit size is determined by the number of abrasive particles per square inch that are embedded in the sandpaper or grinding wheel. Coarse grit is ideal for initial shaping and smoothing of rough surfaces, especially wood, metal, or plastic.
It removes material quickly but leaves rough scratches on the surface. It’s often used for heavy-duty sanding tasks, like removing paint, rust, or corrosion, or preparing surfaces for further sanding with finer grits. Coarse grit also creates a better surface for adhesion, making it an ideal choice for automotive bodywork or woodworking projects.
It’s important to use coarse grit with caution, as it can easily damage or remove too much material if not used correctly. Overall, understanding grit sizes is essential, and using the right grit for each task is crucial for achieving the desired result.
Medium Grits (120-150)
When it comes to sandpaper grits, medium grits are essential for smoothing out rough surfaces and removing small scratches. Ranging from 120-150 grit, these sandpapers are commonly used for preparing surfaces before applying a coat of paint or stain. They are also great for removing rust, old paint, and smoothing out woodwork.
Medium grits are an excellent balance between coarser grits and finer grits as they can quickly remove roughness and scratches while leaving the surface with enough texture for paint or other coatings to adhere to. Think of them as the Goldilocks of sandpapers – not too rough, not too smooth, but just right for the job at hand. So, if you’re tackling a DIY project, make sure to have a few sheets of medium grit sandpaper in your toolbox.
Fine Grits (220-240)
Fine Grits (220-240) When it comes to sandpaper, grit size is everything. Fine grits, ranging from 220 to 240, are used for smoothing out surfaces and removing scratches left by coarser grits. These grits are ideal for finishing wood, as they leave behind a smooth surface that’s ready for varnish or paint.
But they can also be used on metal, plastic, and other materials, depending on the desired result. The thing to keep in mind with fine grits is that they don’t remove much material, so it can take a bit longer to achieve the desired result. However, if you’re looking for a polished finish, they’re a must-have in your sandpaper collection.
They can be used after coarser grits to further refine the surface or on their own for a final smoothing pass. One thing to remember when using fine grits is to not push too hard. Let the sandpaper do the work and focus on maintaining a consistent motion.
If you push too hard, you risk creating an uneven surface or even burning through a thin layer of material. Take your time and focus on achieving a smooth, even finish. Overall, fine grits are an essential tool for any DIY project or professional job that requires a smooth surface.
Whether you’re finishing up a woodworking project or polishing metal, fine grits ranging from 220 to 240 are a versatile and effective tool for achieving the desired result.
Choosing the Right Grit for Your Chisels
When it comes to sharpening your chisels, choosing the right grit sandpaper is crucial. The grit level determines how coarse or fine the sandpaper is and ultimately affects the finish of the chisel’s edge. If you are working with a chisel that is dull or in need of significant repair, you’ll want to start with a lower grit sandpaper, around 120-150 grit.
This coarse grit will help you quickly remove any nicks or chips in the edge. Once you’ve repaired the edge, you can move on to a medium grit, around 220-400. This grit will help you refine the edge further and create a smoother finish.
Finally, a fine grit sandpaper, about 800-1000 grit, will help you create a polished edge that’s ready to tackle any detailed work. Keep in mind that the grit you choose will also depend on the type of wood you’re working with and the level of precision you require. So, be sure to experiment with different grit levels to determine what works best for your specific chisel and project.
Condition of Your Chisels
When it comes to choosing the right grit for your chisels, it all depends on the condition of your tools. If your chisels are in good condition and only need a touch-up, a fine grit sandpaper would be suitable. A 600-grit sandpaper will give you a smooth finish and help you get rid of any minor rust or blemishes.
On the other hand, if your chisels are in rough shape and require a more significant restoration, a coarse grit sandpaper is your best bet. A 120-grit or 150-grit sandpaper will help you remove any deep rust, chips, or nicks. However, it’s essential to proceed slowly and carefully when using a coarse grit sandpaper to avoid damaging your chisels.
Remember, the condition of your chisels is the key factor in determining which grit to use, and by keeping them sharp and well-maintained, you’ll ensure that they last a long time.
Type of Wood You Are Working With
When it comes to choosing the right grit for your chisels, the type of wood you are working with is a crucial factor to consider. Softwoods like pine and cedar require lower grit sandpaper, around 150-220, to prevent over-sanding and damaging the wood. Hardwoods like oak and maple can handle higher grit sandpaper, ranging from 320-600, for a smoother finish.
It’s important to keep in mind that sanding with too high of a grit can lead to clogged sandpaper and ineffective sanding. By matching the grit to the wood type, you’ll achieve the best results and efficiently work on your project without causing harm or delays.
Your Skill Level and Preferences
Choosing the right grit for your chisels can make all the difference when it comes to achieving a fine finish on your woodworking projects. It’s important to consider both your skill level and personal preferences when selecting the right grit. If you’re new to sharpening chisels, a coarser grit such as 100 or 200 may be a good starting point.
These grits will remove any nicks or chips in the blade quickly and efficiently. However, if you’re more experienced or working with a chisel that is already in good shape, a finer grit such as 1000 or 2000 may be more suitable. These grits will produce a sharper and more polished edge, ideal for intricate work.
Ultimately, it comes down to what you feel comfortable with and what best suits your project’s needs. It’s always a good idea to experiment with different grits to find the perfect fit.
How to Sharpen Chisels with Sandpaper
When it comes to sharpening chisels, sandpaper can be a great solution. But you may wonder what grit sandpaper to use. The answer depends on the condition of your chisels.
If they are in great shape and you just want to maintain their sharpness, you can start with a higher grit sandpaper, such as 800 or 1000. However, if your chisels are dull and have nicks or chips, you’ll need to start with a lower grit sandpaper, such as 220 or 320. From there, you can work your way up to higher grits until you achieve the desired sharpness.
Remember to always keep a consistent angle and apply even pressure when sharpening with sandpaper. With a little practice, you’ll be able to sharpen your chisels like a pro. So, what grit sandpaper for sharpening chisels? It depends on the condition of your chisels and what level of sharpness you’re trying to achieve.
Step 1: Prepare Your Chisels
Sharpening chisels with sandpaper is an essential skill for any woodworker or DIY enthusiast. The first step in this process is to prepare your chisels by cleaning them thoroughly. Use a steel wool pad to remove any rust or debris from the blade and then wipe it down with a clean cloth.
Once your chisels are cleaned, it’s time to start sharpening them with sandpaper. Begin by wrapping a small piece of coarse grit sandpaper around the blade and holding it at a 20-degree angle. Slowly drag the sandpaper back and forth across the blade until you form a burr on the edge.
Repeat this process with progressively finer sandpaper until you have a razor-sharp edge. Keep in mind that the key to sharpening chisels with sandpaper is to maintain a consistent angle and apply even pressure throughout the process. With a little bit of practice, you’ll be able to sharpen chisels like a pro and tackle all your woodworking projects with confidence.
Step 2: Choose Your Grit
When it comes to sharpening your chisels with sandpaper, choosing the right grit is essential. Grit refers to the coarseness of the sandpaper and can range from very fine to extremely coarse. A general rule of thumb is to start with a coarse grit, like 150 or 220, to remove any nicks or chips.
Once the blade is free of imperfections, you can move on to a finer grit, like 400 or 600, to hone the edge and create a razor-sharp finish. It’s important to remember that the grit you choose will ultimately determine the quality of your final product, so take your time and choose wisely. A good tip is to use a higher grit sandpaper for softer woods and a lower grit for harder woods.
Whatever grit you choose, make sure to keep your blade lubricated with honing oil or water to prevent damage and ensure smooth, even sharpening. With the right grit and a little bit of patience, you can achieve a professional-grade edge on your chisels in no time.
Step 3: Start Sharpening
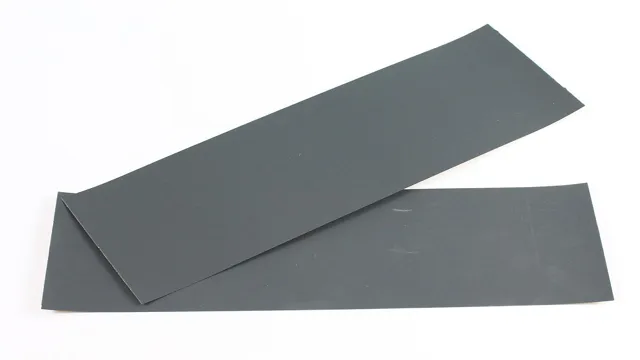
When it comes to sharpening chisels, sandpaper is a great option that can help you achieve effective results. Start by selecting the grit of sandpaper that fits your needs. Generally, it’s recommended to begin with 220 grit sandpaper and gradually move to 400 and 600 grit for a smoother finish.
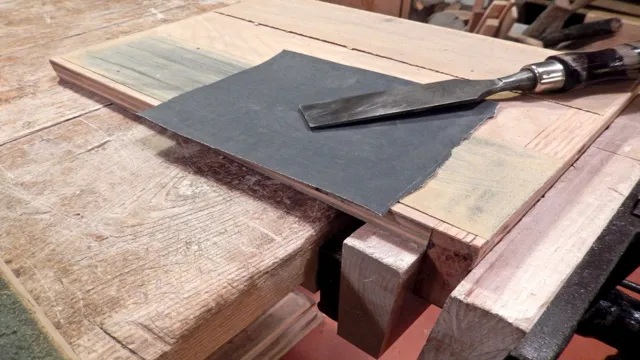
Secure the sandpaper onto a flat surface such as a piece of glass or a granite tile. Wetting the sandpaper will prevent it from clogging up with debris and allow it to work more effectively. Begin by placing your chisel flat onto the sandpaper and pushing it forward in a forward and back motion with gentle pressure.
Make sure to keep the blade flat throughout the process. Repeat this process a few times and then flip the chisel over and repeat on the other side. Before moving to a higher grit, make sure to remove any burrs or bumps on the chisel blade with a honing stone.
Remember, practice makes perfect when it comes to sharpening chisels with sandpaper, so keep at it until you achieve the desired result!
Step 4: Move on to Higher Grits (Optional)
When it comes to sharpening chisels with sandpaper, moving on to higher grits is an optional step that can really make your tool razor sharp. Once you’ve finished honing your chisel with a lower grit sandpaper – such as 120 or 220 – you can progress to higher grits such as 320, 400, and 600. The purpose of using a higher grit sandpaper is to polish the edge of your tool and remove any remaining burrs or rough spots.
It’s important to note that the higher the grit, the gentler you should be with your chisel. Think of it like polishing a silver necklace – you wouldn’t use a coarse sandpaper to polish it, as it would scratch the surface. Instead, you would use a gentle cloth with a light touch to bring out the shine.
Similarly, when using higher grit sandpaper to sharpen your chisel, you should be gentle and apply only light pressure. This will allow the sandpaper to do its job without causing any unwanted damage. In the end, taking the extra step to progress to higher grits while sharpening your chisels can really make a difference in the quality of your work.
Conclusion and Final Thoughts
So, in conclusion, the answer to the age-old question of what grit sandpaper to use for sharpening chisels is…
it depends! Are you looking for a quick touch-up or a full-on restoration job? Is your chisel made from a harder or softer material? Ultimately, it’s about finding the right balance between grit size and abrasive material to achieve the desired result. And let’s not forget the most important ingredient in any successful sharpening job: a healthy dose of elbow grease and determination. So gather your sandpaper, grab your chisel, and get ready to make those blades sharper than a witty one-liner from Oscar Wilde!”
FAQs
What is sandpaper grit?
Sandpaper grit refers to the coarseness or fineness of the abrasive particles on the paper. The higher the grit number, the finer the particles are.
What is the recommended grit for sharpening chisels?
The recommended grit for sharpening chisels is between 1000 and 3000 grit. Coarser grits are useful for initial grinding, while finer grits are better for honing and polishing the edge.
How can I tell if my chisel is blunt and needs sharpening?
You can tell if your chisel is blunt and needs sharpening by examining the edge – if it appears rounded or dull, or if it struggles to cut through wood cleanly, it’s time to sharpen it.
Can I use a lower grit sandpaper for sharpening chisels?
While it’s possible to use a lower grit sandpaper for sharpening chisels, it’s not recommended. Lower grits will remove material quickly but will create a rougher edge that will require more work to polish.
What is the process for sharpening chisels using sandpaper?
The process for sharpening chisels using sandpaper involves clamping the chisel securely and then working through several grits, starting with a coarse grit and finishing with a fine grit, to create a sharp, polished edge.
Can I use water or oil with sandpaper to sharpen chisels?
Yes, you can use water or oil with sandpaper to sharpen chisels. Water is typically preferred for finer grits, while oil is better for coarser grits.
How often do I need to sharpen my chisels?
The frequency with which you need to sharpen your chisels will depend on how frequently you use them and for what tasks. As a general rule, they should be sharpened whenever they become dull or difficult to use.
