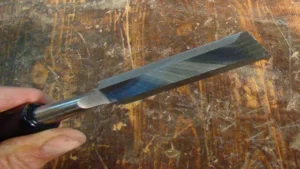
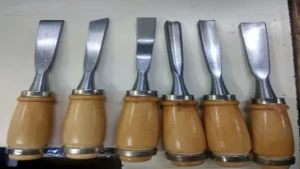
Chisels are versatile tools and a must-have for any woodworking enthusiast. But with constant use, they tend to lose their sharp edge, which results in inefficient and frustrating work. Fortunately, you can learn how to sharpen chisels by hand with ease and precision.
Sharpening your chisels by hand is a cost-effective and practical way to maintain their efficiency and prolong their lifespan. With a few simple steps, you can have your chisels sharp and ready to use in no time. Let’s dive into the world of chisel sharpening and learn how to revive dull chisels by hand.
Gathering Your Materials
When it comes to getting started on sharpening your chisels by hand, the first step is gathering your materials. You’ll need some essential tools, including a sharpening stone, honing oil, and of course, the chisel itself. When selecting your sharpening stone, it’s important to choose the right grit for your needs.
A rough grit, around 220, is best for sharpening dull or damaged chisels, while a medium grit, around 1,000, is ideal for general sharpening work. A fine grit, around 4,000, is best for honing and polishing your chisels after they’ve been sharpened. Once you have your materials ready to go, you’ll be able to start sharpening your chisels and achieving precise, clean cuts every time you use them.
List of Necessary Tools and Materials
Gathering your materials is an essential step in any DIY project. To make the process as smooth as possible, it’s important to have a list of necessary tools and materials handy before you begin. The first step is to determine what specific supplies are needed for your project.
Will you need power tools, nails, screws, or sandpaper? Once you know what you need, make a list and gather everything in one place. This will help you stay organized and avoid any last-minute runs to the hardware store. It’s also important to ensure that you have the right amount of each material for your project.
Running out of materials halfway through can be frustrating and time-consuming. Don’t forget to take safety precautions and wear appropriate safety gear, such as gloves and eye protection. By taking the time to gather all your materials before beginning your DIY project, you’ll be setting yourself up for success.
Preparing The Chisel
If you want to know how to sharpen chisels by hand, one of the first things you need to learn is how to prepare the chisel for sharpening. This involves getting it into the right shape, so that you can create a sharp edge. The first step is to remove any rust or debris from the chisel.
Once this is done, you should check the angle of the bevel. This is the sloped edge that runs along the blade of the chisel. You want to make sure that it is at a consistent angle, typically around 25 degrees.
Once this is done, you can begin sharpening the blade itself. This usually involves using a series of sharpening stones or files, starting with a coarse grade and working your way up to a fine one. With some practice and patience, you should be able to get your chisel into tip-top shape, ready for any task that comes your way.
Cleaning the Chisel
Cleaning the chisel is an important part of preparing it for use. First, you’ll want to gather a few things: a soft cloth, some mineral oil, and a sharpening stone. Begin by wiping off the chisel blade with a clean, dry cloth to remove any debris or dust that may have accumulated.
Next, apply a small amount of mineral oil to the blade and use the soft cloth to wipe it down, making sure to remove any excess oil. The oil will help to prevent rust and protect the blade from damage. Once the blade is cleaned and oiled, it’s time to sharpen it using the sharpening stone.
Hold the chisel at a 20-degree angle and use a circular motion to sharpen the blade, checking the angle frequently to ensure it remains consistent. A sharp chisel is essential for precise, clean cuts and will make your work much easier. With a little bit of care and attention, your chisel will be ready to use in no time.
Establishing The Proper Angle
One of the most critical steps in achieving a clean chisel cut is to establish the proper angle. To do this, you will first need to prepare the chisel. When preparing your chisel, it is crucial to ensure that the blade is sharp.
A dull blade can cause frustration and result in a poor cut. Once you have your chisel ready, begin by identifying the bevel angle. The bevel angle is the angle between the chisel’s flat surface and its edge.
The bevel angle you choose will depend on the type of cutting you will be doing. For general woodworking, a bevel angle between 25 and 35 degrees is suitable. However, for more delicate work, you may need a bevel angle closer to 20 degrees.
Once you have determined the appropriate bevel angle, work to sharpen the chisel to the desired angle using either a sharpening stone or honing guide. With the angle established, you can now get to work on your woodworking project with confidence that your chisel will make precise cuts.
Sharpening The Chisel
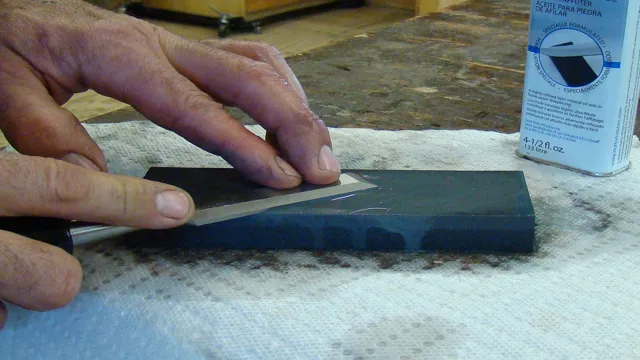
If you’re looking to improve your woodworking skills, then learning how to sharpen chisels by hand is essential. While there are many ways to sharpen chisels, the traditional method involves using a sharpening stone. This process involves rubbing the beveled edge of the chisel back and forth across the stone until it is sharp and shiny.
You will need to use steady pressure and keep the angle consistent so that the edge is uniform. It’s important to remember that the angle of the chisel’s bevel can vary depending on its intended use, so it’s essential to first determine the intended purpose of the chisel before sharpening it. Don’t rush the process, and remember that practice makes perfect.
Sharpening chisels by hand is a skill that takes time and patience to master, but the results are well worth the effort. So grab your chisels, stone, and let’s start sharpening!
Starting with Coarse Grit
As you prepare to sharpen your chisel, it’s important to start with a coarse grit. Coarse grit is essential for removing the damaged or dull edge from the chisel. The sharpening process is similar to peeling a vegetable; you start with a rough outer layer, then you move to a finer layer to achieve a smooth and sharp edge.
To sharpen your chisel, you’ll need a sharpening stone with coarse grit, water, and a steady hand. Begin by applying water to the stone and placing the chisel’s bevelled edge on the stone. Use light pressure to move the chisel back and forth across the stone, keeping the blade at a consistent angle.
Check the blade for burrs and repeat the process until you have a uniform edge. Remember to never rush the sharpening process as it takes time and patience to achieve a sharp and refined edge.
Progressing to Fine Grit
When it comes to sharpening a chisel, the progression to a fine grit is crucial. Starting with a coarse grit, typically between 100-300, helps remove any nicks or chips in the blade. However, to achieve a sharp edge, it’s important to progress to a finer grit, such as 1000-1200.
As you sharpen with a higher grit, the scratches left by the previous grit will become smaller, creating a smoother and more refined edge. This process should continue until the desired sharpness is achieved. It’s important to be patient and take your time when sharpening with finer grits to avoid overheating the blade and causing damage.
By steadily progressing to a fine grit, the chisel will become sharp and effective for all of your woodworking needs.
Finishing Touches
Sharpening chisels by hand requires some finishing touches to ensure a sharp and precise edge. After honing and polishing the blade, using a strop can help to remove any remaining burrs or micro-serrations. A strop is a piece of leather or other soft, pliable material that is coated with polishing compound.
Simply lay the blade flat on the strop and gently drag it backwards towards the handle. Repeat this process on both sides of the chisel until the blade is smooth and reflective. Another important finishing touch is to test the edge for sharpness.
Hold a piece of paper in one hand and run the blade smoothly along the edge of the paper, slicing through it with ease. If the blade cannot cut through the paper smoothly, it may require further honing. Remember, taking the time to properly sharpen your chisels will not only improve your woodworking skills, but it will also ensure a safer and more efficient working environment in your shop.
Using a Honing Guide
When it comes to achieving a polished edge on your tools, a honing guide can be your best friend. This handy tool helps you maintain consistent angles and gives you greater control over the honing process. But just having a honing guide isn’t enough – to get the best results, you need to develop good honing technique as well.
Start by using light pressure and a steady hand, and be sure to check your progress frequently. You may need to make minor adjustments to your honing guide or your technique as you go along. With practice, you’ll be able to achieve razor-sharp edges with ease.
So don’t be afraid to experiment and find the method that works best for you – your tools (and your work!) will thank you for it.
Stropping for a Razor-Sharp Edge
Stropping is a vital step in achieving a razor-sharp edge for your blade. It is the final touch that polishes and aligns the edge, resulting in a sharper and smoother cut. Stropping is often done in conjunction with honing, which sharpens the blade by removing material from the edge.
Unlike honing, stropping does not remove material but rather smooths out the cutting edge. This is achieved by running the blade edge along a strip of leather or similar smooth material, holding the blade at a specific angle and applying slight pressure. The leather strip is coated with a fine polishing compound, which further enhances the blade’s edge.
Stropping is necessary to refine and maintain a razor-sharp edge for an effortless cut.
Maintenance Tips
Chisels are an essential tool for any carpenter or woodworker, but they need to be sharpened regularly to work effectively. While there are various methods to sharpen chisels, learning how to sharpen chisels by hand can be a cost-effective and very useful skill. First, ensure the chisel’s bevel angle is accurate, which is the angle between the flat side of the blade and the bevel edge.
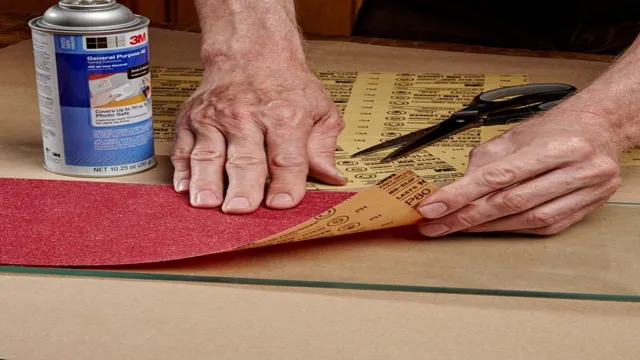
Use a honing guide or set the chisel on a flat surface to ensure the angle is precise. Next, work on the bevel edge, using a sharpening stone, diamond plate or sandpaper, applying enough pressure and honing the blade consistently to refine the edge. After shaping the bevel, polish it with a strop or a honing compound on a leather strop.
Repeat the process on the other side of the chisel, checking for burrs between the bevel and flat sides. Finally, use a honing guide to hone the chisel’s flat sides, ensuring that the edges remain sharp. With some practice, patience, and effort, you can hone your chisels to a razor-sharp edge with ease, enhancing their lifespan, and preserving their quality.
Regular Cleaning
Regular cleaning is an essential aspect of maintaining the cleanliness and hygiene of your home. By making cleaning a regular part of your routine, you can ensure that your living space stays neat, tidy, and free from harmful bacteria and germs. To make the most out of your cleaning schedule, try setting aside specific times for different cleaning tasks, such as vacuuming, dusting, and scrubbing down surfaces.
You can also switch up your cleaning methods, using natural products like vinegar and baking soda to deep clean surfaces and eliminate odors. By investing time in regular cleaning, you can keep your home looking and feeling fresh, welcoming, and hygienic for you and your family. So why not make a weekly cleaning schedule and enjoy a cleaner, healthier home?
Avoiding Over-Sharpening
When it comes to maintaining sharpness in your tools and knives, it’s essential to avoid over-sharpening. While it may be tempting to sharpen your tools often, doing so can actually cause damage to the blade and shorten its lifespan. To avoid over-sharpening, it’s important to follow a regular maintenance routine that includes cleaning the blade, using the correct sharpening tool, and using the appropriate pressure and angle.
Maintaining your tools correctly will keep them in top condition and prevent the need for frequent sharpening, which can be detrimental. By following these tips, you can keep your tools sharp and in good condition for many years to come.
Protecting the Blade When Not In Use
One of the most important maintenance tips for keeping your blade in optimal condition is protecting it when it’s not in use. Although it’s tempting to just toss it aside or lay it on a nearby surface, this can quickly lead to damage or dullness. Instead, consider investing in a protective cover or storage solution that keeps the blade safe from any accidental bumps or scratches.
This could be as simple as a sheath or blade guard, or as elaborate as a custom storage case. Whatever option you choose, make sure it fits snugly and securely around the blade to prevent any accidental damage. By taking the time to protect your blade when it’s not in use, you’ll be able to keep it in top shape for years to come.
So why not invest in a little extra protection and ensure your blade stays in pristine condition?
Conclusion
A sharp chisel is a woodworker’s best friend, but getting there takes some effort and finesse. By following these steps and using a bit of patience and skill, you’ll be able to hone your chisel to a razor-sharp edge. Remember, the key is to take your time and let the sharpening stone do the work.
So, whether you’re a seasoned professional or a newcomer to the craft, keep these tips in mind and get ready to make some precise and beautiful cuts with your trusty chisel!”
FAQs
What are the essential tools required to sharpen chisels by hand?
The essential tools required to sharpen chisels by hand are a sharpening stone, honing guide, and a strop.
Why is it necessary to sharpen chisels by hand?
Sharpening chisels by hand helps to maintain their optimal performance, which includes efficient cutting and reduces the chances of damage or injury due to a dull blade.
How often should I sharpen my chisels?
The frequency of sharpening your chisels would depend on the usage and type of wood you are working on. As a general rule, it is good practice to sharpen your chisels every few weeks.
What is the correct angle to sharpen chisels by hand?
The correct angle to sharpen chisels by hand is between 25 and 30 degrees. It is best to consult your user manual or manufacturer’s recommendations.
How can I tell if my chisels need sharpening?
You can tell if your chisels need sharpening by checking for dullness in the blade, difficulty in cutting through wood, or a change in the chisel’s shape due to regular use.
What is the process of sharpening chisels by hand?
The process of sharpening chisels by hand involves preparing the sharpening stone, securing the chisel in the honing guide, and running it at the correct angle along the stone. Follow this up by refining the edge with the strop.
Can I sharpen my chisels without a honing guide?
It is recommended to use a honing guide while sharpening chisels by hand to maintain the correct angle. However, it is possible to sharpen the blade without a guide, but it would require careful attention and practice.
