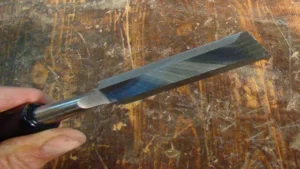
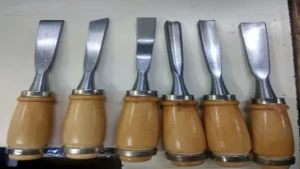
Have you ever tried to use a dull gouge chisel? It’s frustrating and can even be dangerous if you’re not careful. But sharpening your gouge chisels doesn’t have to be a daunting task. In fact, with a bit of practice, anyone can sharpen their gouge chisels to a razor-sharp edge.
In this post, we’ll cover the steps you need to take to sharpen your gouge chisels so that you can get back to your woodworking projects with ease. Don’t let a dull chisel slow you down – let’s get started!
Introduction
If you are a woodworker, then you know how important it is to have sharp tools. Gouge chisels are no exception. Sharpening gouge chisels can be a bit tricky if you don’t know what you’re doing.
However, it’s essential to keep them sharp to ensure clean and precise cuts. First, you need to choose the right sharpening stone. You can opt for water stones, diamond stones, or oil stones.
Next, you need to set the bevel angle on your chisel. The bevel angle determines how sharp the blade will be. Once you have set the bevel angle, you can start sharpening.
Make sure to hold the gouge chisel securely while sharpening it. Move the chisel back and forth across the stone to sharpen the edge evenly. Finally, use a honing compound to give the chisel a polished edge.
By following these steps, you can increase the longevity of your gouge chisels and have clean cuts every time.
What is a Gouge Chisel?
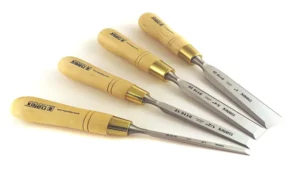
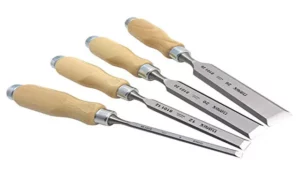
A gouge chisel is a handheld woodworking tool that features a curved blade. The blade is sharpened on its inner edge and is used to carve out concave shapes, such as bowls or spoons, from wood blocks. Gouge chisels come in different sizes and shapes, each with its intended use.
The larger the chisel, the more material it can carve out, making it ideal for roughing out the shape, while smaller chisels are perfect for precise carving of details and edges. The curved blade of a gouge chisel gives the tool versatility, allowing it to scoop out large amounts of wood in a single motion or make delicate cuts with ease. Whether you are a beginner or a seasoned woodworker, a gouge chisel is an essential tool to have in your arsenal.
Why Sharpen Gouge Chisels?
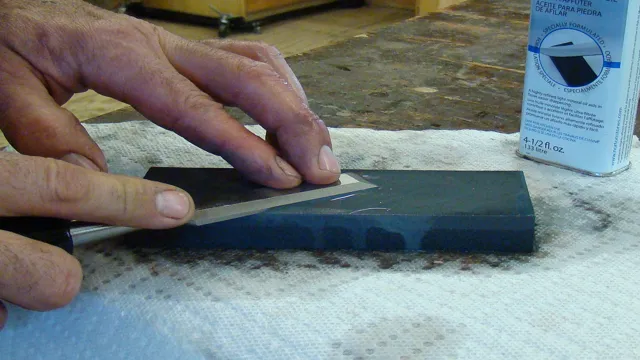
Sharpen Gouge Chisels If you’re thinking of tackling woodworking projects, gouge chisels are integral tools that come in handy for carving patterns and intricate shapes on wood. Without a doubt, regular use of gouge chisels leads to dull and ineffective blades, making it challenging to create flawless designs. Sharpening your gouge chisels is crucial to ensure maximum effectiveness and better results.
A sharp gouge chisel will cut smoothly, reducing the risk of blunders and accidents. While sharpening can seem like a daunting task, especially if you are a beginner, it’s an essential skill that every woodworker should master. In this blog section, we’ll delve into why you should sharpen gouge chisels, the benefits of doing so, and how to achieve the best results.
Tools Needed
To sharpen gouge chisels, you’ll need a few essential tools. These include a sharpening stone or a diamond plate, a honing guide, and a leather strop with honing compound. The sharpening stone is used to remove any nicks or imperfections in the blade of the chisel.
The honing guide ensures that you maintain a consistent angle while sharpening, which is crucial for achieving a sharp edge. Finally, the leather strop with honing compound helps to polish and refine the edge of the chisel, resulting in a razor-sharp tool. Sharpening gouge chisels can be a time-consuming process, but using the right tools will make all the difference.
So, gather these tools and get ready to bring new life to your dull gouge chisels.
Whetstone or Diamond Stone
If you’re wondering whether to use a whetstone or diamond stone for sharpening your tools, the answer depends on your specific needs. Whetstones are natural abrasive stones usually made of quartz or aluminum oxide, while diamond stones are coated with diamond grit for an increased abrasive effect. To determine which one is best, you’ll need to consider the type of tool you’re sharpening, the level of hardness you need, and the sharpness you desire.
For example, if you’re sharpening a softer tool with a dull edge, a whetstone may be sufficient. However, if you’re sharpening a harder tool with a very dull edge, a diamond stone may be more effective. Ultimately, it’s important to choose the right tool for the job to achieve the best results.
Leather Strop
If you are looking to sharpen your knives and tools, you can always rely on a leather strop. This tool is essential for maintaining a razor-sharp edge on your blades. Before you start using your strop, there are a few things you will need to have on hand.
Firstly, you will need a leather strop. There are various types of strops available in the market, but a good quality, high-density leather strop is the best option. Secondly, you will need a honing compound.
This compound aids in the sharpening process and works best when applied to the leather side of the strop. Lastly, you will need a flat surface to mount your strop. This can be a work desk or any other flat surface that is large enough to mount the strop.
By having all these tools, you are well on your way to achieving a razor-sharp edge on your knives and tools.
Honing Guide
When it comes to sharpening your tools, a honing guide is an essential tool you’ll need. But what exactly is a honing guide and what tools do you need? A honing guide is a device that holds your sharpening stone securely in place while you sharpen your tools. This ensures that you’re sharpening your tool at the right angle, which is essential for achieving a sharp edge.
To use a honing guide, you’ll need some basic tools such as a sharpening stone, oil for lubrication, and a flattening stone. The sharpening stone is used to sharpen the tool while the flattening stone is used to keep the sharpening stone flat. Additionally, you’ll need a bench grinder to shape or reshape your tools.
Overall, a honing guide is an essential tool to have in your sharpening kit and with the right tools, you can quickly achieve a sharp edge on your tools.
Step-by-Step Process
If you’re a woodworker, you know how important it is to keep your gouge chisels sharp. Dull chisels not only make your work more difficult, but they can also lead to accidents. Luckily, sharpening your gouge chisels is a simple process that can be done in just a few steps.
The first step is to choose the right type of sharpening stone. You’ll want to use a fine-grit stone, such as a Japanese waterstone. Next, you’ll need to secure your gouge chisel in a vice or clamp to keep it stable during sharpening.
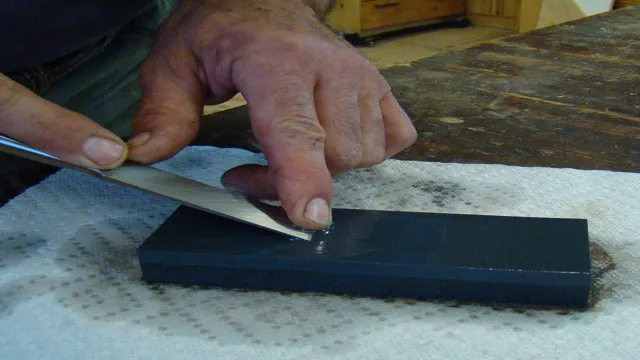
Using the sharpening stone, carefully sharpen the inside of the gouge, making sure to maintain the curvature of your chisel. It’s important to use a consistent angle and pressure throughout the sharpening process. Once you’ve achieved a sharp edge, you can use a leather strop or honing compound to polish the edge and remove any burrs.
With a little bit of practice, sharpening your gouge chisels will become a quick and easy part of your woodworking routine.
Preparation and Safety Measures
If you’re thinking of embarking on a hiking trip, it’s important you take some preparation and safety measures to ensure a successful and enjoyable journey. The first step is to choose the right gear, including sturdy hiking boots, sunscreen, a hat, and plenty of water and snacks. You should also check weather conditions beforehand, and plan your route accordingly.
It’s a good idea to bring a map and compass, or a phone with GPS capabilities, and make sure someone knows your exact itinerary in case of emergency. It’s also important to be aware of potential hazards, such as wildlife and rough terrain. Always stay on marked trails and avoid taking shortcuts, as they can lead to dangerous situations.
By taking these steps, you can ensure a safe and enjoyable hiking experience, whether it’s a short day trip or a multi-day backpacking adventure. Remember, being prepared is the key to a successful hike!
Grinding the Bevel
When it comes to grinding the bevel on a knife, there are several steps you need to follow to ensure that you achieve the desired results. First, you need to choose the appropriate angle that you want to grind the bevel. Generally, angles between 15 and 20 degrees are recommended for knives, and this will depend on the intended use of the knife.
Once you have selected the angle, you can start by rough grinding the bevel with a coarse-grit belt or grinding stone. This process involves removing the excess metal from the blade until you reach the desired bevel width. Next, you can move on to fine-grinding the bevel with a finer grit to smooth out any rough edges and achieve a polished finish.
It is important to note that you need to maintain a consistent angle and pressure throughout the process to achieve a uniform and even bevel. Finally, you can apply a final honing on the bevel using a fine-grit honing stone to refine the edge and ensure that the blade is razor-sharp. By following this step-by-step process, you can effectively grind the bevel on your knife to your desired specifications, which will result in a sharp and durable blade that can handle any task you throw at it.
Honing the Edge
Honing the edge of a blade is an essential process to keep it sharp and efficient, and it’s not as difficult as it may seem. The first step is to select the right sharpening tools, which include abrasive pads, grinding stones, honing rods, or sharpening belts. Once you’ve chosen the method that suits you best, it’s time to start the sharpening process.
Begin by ensuring that the blade is cleaned and dried, and then set the angle of the blade for sharpening. You can then start sharpening the bevel, working from the heel towards the tip. Make sure to apply consistent pressure and keep the angle consistent throughout the process.
Repeat the process on the other side of the blade until a burr appears on the opposite side. Finally, use a honing rod to smooth out the edge and remove any burrs before testing the sharpness. With this step-by-step process, you can keep your blades sharp and efficient, whether it’s for cooking, woodworking, or any other purpose.
Stropping the Edge
Stropping the edge is an important step in maintaining the sharpness of your knife. It involves using a leather or synthetic strap to refine the edge and remove any burrs or imperfections. The process is quite simple and can be done in just a few steps.
First, lay the strop on a flat surface and apply a small amount of honing compound. Then, hold your knife at a 20-degree angle and stroke the edge back and forth across the strop. Be sure to keep the pressure consistent and use the entire length of the strop.
After a few strokes on one side, flip the knife over and repeat on the other side. Keep a steady hand and take your time, as rushing can cause damage to the blade. Once you’ve completed the process, wipe your knife clean and check the edge for sharpness.
With regular stropping, your knife will maintain its sharp edge for years to come.
Tips and Tricks
If you’re new to woodworking or need a refresher, learning how to sharpen gouge chisels can seem like a daunting task. Fortunately, with a little practice, it becomes easier than you might think. The first step is to have the right tools, such as an oilstone, honing guide, and a strop.
Next, secure the gouge chisel in the honing guide and follow the manufacturer’s instructions for sharpening the blade on the oilstone. Be sure to maintain the proper angle and use a gentle pressure to avoid damaging the blade. After honing, use the strop to polish the blade and create a razor-sharp edge.
With these simple tips, you’ll be sharpening your gouge chisels with ease in no time.
Frequent Sharpening is Key
When it comes to keeping your tools in top condition, frequent sharpening is key. This is especially true for blades used in cutting and slicing, which can become dull over time due to frequent use. However, it’s not just a matter of grabbing a sharpening tool and going at it – there are some tips and tricks to keep in mind.
For starters, make sure you’re using the right type of sharpening tool for your blade. Different materials and blade shapes require different sharpening methods, so do your research beforehand. Additionally, don’t be afraid to sharpen your blade frequently – even after just a few uses if necessary.
It’s better to maintain a consistently sharp edge than to wait until it’s too dull to work effectively. With these techniques in mind, you’ll be able to keep your tools in top condition and work more efficiently in the long run.
Use the Correct Angle
When using a tool that requires an angle, it’s important to ensure that it’s set correctly. This not only makes your work more precise but also prevents you from damaging the tool or the material you’re working with. One tip is to use a protractor or angle finder to measure the angle accurately.
Another trick is to use clamps or a vice to keep the material steady while you adjust the angle. Once you have the correct angle, be sure to double-check it before making any cuts or drills. Remember, a minor mistake can lead to a significant problem.
So, taking the time to get the correct angle is crucial. By using these tips and tricks, you can save yourself time, money, and frustration in the long run.
Avoid Overheating
Overheating is one of the most common problems that people face while using electronic devices like laptops, smartphones, and tablets. It can cause serious damage to your device, and in some cases, even lead to a fire hazard. To avoid this situation, here are some useful tips and tricks that you can follow.
Firstly, ensure that your device is placed on a flat surface so that it can dissipate heat effectively. Secondly, use a cooling pad or fan to help with the airflow and keep the device cool. Additionally, try to avoid using your device in direct sunlight or hot conditions as this can increase the temperature of your device rapidly.
Lastly, always keep your device clean and free from dust as it can clog the fans and prevent them from working efficiently. By following these simple tips, you can protect your device and prevent any unwanted damage. Remember, prevention is always better than cure!
Conclusion
In conclusion, sharpening gouge chisels is not rocket science, but it requires a level of precision and patience. With the right tools, technique, and practice, you can turn that dull and rusty chisel into a sharp and precise carving tool that will make your woodworking projects stand out. So, grab your chisel and let’s start sharpening.
Remember, a sharp chisel is a happy chisel, and a happy chisel will always make your carving experience a joyous one. Happy carving!”
FAQs
What is a gouge chisel?
A gouge chisel is a woodworking tool that is used for carving, shaping, and cutting wood.
Why is it important to sharpen gouge chisels?
Sharpened gouge chisels allow for more precise and efficient wood carving, which leads to better quality of work.
What materials are needed to sharpen gouge chisels?
You will need a sharpening stone, honing oil, and a leather strop to sharpen your gouge chisels.
How do I prepare my gouge chisels before sharpening?
Before sharpening your gouge chisels, make sure to clean them of any debris or gunk. You can use a wire brush or steel wool to do this.
How do I sharpen my gouge chisels?
To sharpen gouge chisels, you will need to use a sharpening stone. Start by honing the bevel of the chisel, then work on the inside edge. Make sure to maintain the angle of the bevel while sharpening.
How often should I sharpen my gouge chisels?
It is recommended to sharpen your gouge chisels after every use or as needed. Regular sharpening will prolong the life of your chisels and maintain their quality.
Can I sharpen my gouge chisels with a power tool?
Yes, you can use a power tool such as a bench grinder to sharpen your gouge chisels. However, it is important to be cautious and maintain the correct angle while sharpening with a power tool.
