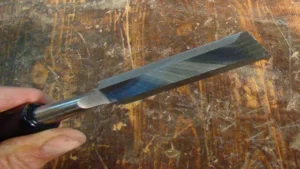
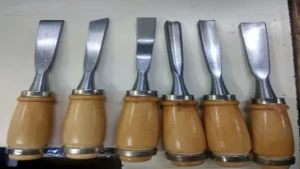
Whether you’re a carpenter or a DIY enthusiast, sharpening chisels should be an essential skill in your tool kit. Chisels tend to dull with use, making them less effective in creating clean cuts. This is why it’s crucial to have the right grit sharpening stone for chisels.
With so many options available in the market, it can be overwhelming to choose the right one. But don’t worry, we’ve got you covered! In this blog post, we’ll guide you through the process of choosing the right grit sharpening stone for chisels. We’ll start by explaining what grit is and how it affects the sharpening process.
After that, we’ll discuss the different types of sharpening stones available and their respective grit levels. By the end of this article, you’ll have a clear understanding of which sharpening stone grit level is best suited for your chisels. Sharpening your chisels can be a somewhat daunting task, but having the right sharpening stone can make all the difference.
It’s essential to choose a grit level that fits your chisel needs to ensure the best possible result. Remember that a higher grit level means a finer abrasive surface, which results in a sharper edge. So, if you’re looking for a precise and smooth cut, a higher grit level is the best choice.
So, whether you’re a beginner or a seasoned pro, choosing the right grit sharpening stone for chisels is crucial. Don’t hesitate to invest in good quality sharpening stones that will significantly improve your projects’ outcomes. Stay tuned for our next posts, where we’ll dive deeper into the sharpening process and provide you with useful tips and tricks.
What grit sharpening stone do you need?
When it comes to sharpening chisels, you’ll want to use a grit sharpening stone that works for your particular needs. Depending on the condition of your chisels, you’ll need to consider the coarseness or fineness of the grit. If your chisels are dull and have nicks or chips, you’ll want to start with a coarse grit around 300-400.
This grit will remove the damaged parts and reshape the edge. Once these issues are resolved, you can move onto a finer grit of around 1000-2000 to refine the edge and achieve a sharper finish. If your chisels have a relatively sharp edge, you can start with a finer grit between 1000-2000 to maintain the sharpness.
It’s important to ensure that you’re using the correct grit for the specific task at hand to achieve optimal results.
Understanding grits and their uses
When it comes to sharpening knives or other tools, using a sharpening stone can be incredibly effective. But with so many grit options available, it can be confusing to know what grit to choose. Generally, the lower the grit number, the more coarse the stone, and the higher the grit number, the finer the stone.
For sharpening dull blades, a coarse stone with a grit of around 240 to 600 is ideal, as it can remove more material and create a sharp edge. For honing or maintaining a sharp edge, a medium stone with a grit of around 800 to 1000 is a good choice. And for finishing or polishing the edge, a fine stone with a grit of 3000 to 8000 can help create a razor-sharp edge.
It’s important to choose the right grit for the task at hand to achieve the best results. So before you start sharpening, consider what grit sharpening stone you need for your specific needs.
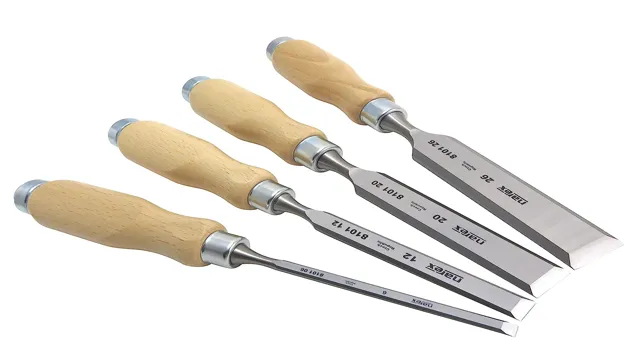
Factors to consider when choosing a grit
When it comes to sharpening knives or other tools, the grit of the sharpening stone can make all the difference. Grit refers to the number of abrasive particles in the stone, and the higher the number, the finer the grit. So, what grit sharpening stone do you need? Well, it depends on a few factors.
First, consider the level of dullness or damage on your blade. For very dull or damaged blades, a coarse grit (around 200-400) is best to remove more material and reshape the blade. For blades that are simply dull or in need of a touch-up, a medium grit (around 800-1000) should suffice.
For finishing touches and polishing, a fine grit (around 3000-8000) is ideal. Another factor to consider is the type of blade or tool you are sharpening. Knives used for heavy-duty chores like chopping may benefit from a more coarse grit, while delicate knives used for precision cutting may require a finer grit.
Lastly, consider your own skill level and comfort with sharpening. If you are a beginner, starting with a medium grit may be easier to work with, while advanced sharpeners may prefer a finer grit for more precision. In summary, the grit of your sharpening stone should be chosen based on the level of dullness or damage on your blade, the type of blade or tool you are sharpening, and your own skill level and comfort with sharpening.
Always start with a lower grit and work your way up as needed for the best results.
Recommended grits for sharpening chisels
When it comes to sharpening chisels, choosing the right sharpening stone can make all the difference. The grit of the stone determines how coarse or fine the surface is, which affects the sharpness of the edge you’ll achieve. Generally, for sharpening chisels, it’s recommended to start with a coarse grit, such as 100 or 200, to remove any nicks or chips in the blade.
Next, move onto a medium grit, like 400 or 600, to refine and shape the edge. Finally, finish with a fine grit, such as 1000 or higher, to polish and hone the cutting edge. Keep in mind that the specific grits you choose may vary depending on the condition of your chisel and personal preference.
So, before you start sharpening, assess your chisel’s condition and take some time to consider which grits will work best for your needs. Overall, using a combination of grits can help you achieve a razor-sharp edge that’s perfect for woodworking or any other task that requires precision cutting.
Coarse grits (1000 – 3000)
Coarse grits (1000-3000) are recommended for sharpening chisels. These grits are perfect for removing nicks and sharpening dull blades quickly. Chisels that are used frequently require coarse grits to maintain their sharpness.
With coarse grits, you can easily shape the bevel and remove any chips that may have formed from previous use. A 1000-grit sharpening stone is ideal for creating a rough edge on the chisel while a 3000-grit sharpening stone will refine the edge and make it sharp enough to cut through most materials effortlessly. It is important to note that when sharpening, the chisel should be at a 25-degree angle with the coarse grits to achieve the desired edge.
Once you have sharpened the chisel with coarse grits, it is recommended to move onto progressively finer grits to refine the edge further. By using the recommended coarse grits for sharpening your chisels, you can ensure that your tools are always sharp and ready for use.
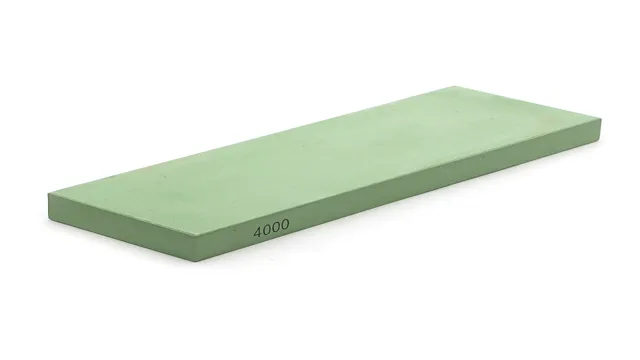
Medium grits (4000 – 8000)
For chisel sharpening, medium grits ranging from 4000 to 8000 are recommended. These grits provide a smooth and polished edge, perfect for fine woodworking tasks. But what exactly do these numbers mean? Grits are determined by the number of abrasive particles per square inch on the surface of the sharpening stone.
The higher the number, the finer the grit and the smoother the edge it produces. Using medium grits after using coarser grits helps to remove any scratches and further refine the edge. It’s essential to keep in mind that while higher grits provide a more polished edge, they may not be suitable for all types of chisels.
Some chisels require a more aggressive edge, and using higher grits may make the edge too smooth and less effective. Therefore, the grits used should be chosen based on the task at hand and the type of chisel being sharpened.
Fine grits (10000 and above)
When it comes to sharpening chisels, fine grits are the way to go. Grits with a rating of 10000 and above are ideal for achieving that razor-sharp edge that every woodworker needs. These high grits are perfect for putting that final touch on your chisels, helping to eliminate any remaining burrs or rough areas left from previous sharpening.
Using a higher grit can also extend the life of your chisels, reducing the need for frequent sharpening. However, it’s important to note that using grits that are too high may result in overheating and damage to your chisels, so it’s important to use caution and take your time when sharpening. With the right technique and the right grit, you’ll be able to achieve a sharp, polished edge that will allow you to tackle your woodworking projects with ease.
Tips for using a sharpening stone on chisels
When it comes to sharpening chisels, choosing the right grit sharpening stone is crucial. For beginners, a 1000-grit sharpening stone is perfect because it offers a good balance between speed and precision. If the chisel is very dull or damaged, starting with a 400 or 600-grit stone may be more effective.
Once the chisel is properly sharpened, you can move on to a finer 3000-grit or 6000-grit stone to hone the edge and achieve a razor-sharp finish. It’s important to use lubrication while sharpening to prevent damage to both the stone and the chisel. Alternatively, using a honing guide can help ensure that the chisel is sharpened at the correct angle.
Remember to always use a light touch and let the stone do the work. Consistent sharpening results in a longer lifespan for the chisel and cleaner, more precise cuts.
Preparing the chisel for sharpening
Sharpening a chisel is crucial to achieve precise cuts and ensure a job well done. However, before you start using a sharpening stone on your chisel, you need to prepare it first. Begin by removing any burrs or nicks on the cutting edge with the use of a honing guide.
Then, flatten the back of the chisel by rubbing it against a coarse diamond stone. This will ensure that the chisel’s flat back will stay in contact with the sharpening stone’s surface when you start sharpening the beveled edge. Don’t forget to lubricate the surface of the sharpening stone with honing oil to prevent the formation of any swarf and to protect the stone from getting damaged.
Now, you can place the chisel’s beveled edge on the sharpening stone and start sharpening it by maintaining a consistent angle. Repeat the process on different grits of sharpening stone until you achieve a razor-sharp edge. By following these simple steps, you can prepare your chisel for sharpening and achieve a sharp and accurate cutting edge.
Applying the right pressure and angle
Sharpening chisels with a sharpening stone can seem daunting, but with the right pressure and angle, it becomes an easy task. The first step is to properly secure the chisel in a sharpening jig or hold it firmly on a flat surface. Next, start with a coarse grit stone and work your way up to a finer grit.
When sharpening, it’s important to apply consistent pressure and maintain a consistent angle. A common mistake is using too much pressure, which can damage the blade and make it difficult to achieve a sharp edge. Instead, use firm but gentle pressure and keep your angle consistent throughout each stroke.
Remember to also use oil or water to lubricate the stone and prevent clogging. With patience and practice, sharpening chisels with a sharpening stone can become a simple and satisfying task, giving your tools a longer lifespan and better performance.
Conclusion
In the world of chisels, the choice of grit for your sharpening stone can make all the difference in your craftsmanship. Without the proper grit, your chisels may dull quickly leaving rough and uneven cuts, but with the right grit sharpening stone, your chisels will be sharp enough to slice through wood like a hot knife through butter. So whether you’re a seasoned carpenter or a novice woodworker, remember the wise words of the old adage: “a sharp chisel is a woodworker’s best friend, and a right grit sharpening stone is the faithful companion that brings out its best.
“
FAQs
What is a sharpening stone?
A sharpening stone is a tool used to sharpen edges by rubbing them against a rough surface.
What grit sharpening stone is best for chisels?
For chisels, a grit between 1000 and 4000 is typically recommended, with 3000 being a good all-purpose grit.
How do I know when my chisel is dull enough to need sharpening?
You can tell that your chisel is getting dull when it stops cutting as cleanly as it once did, and when you feel like you’re having to apply more pressure than usual.
How often should I sharpen my chisels?
The frequency with which you should sharpen your chisels depends on how often you use them. As a general rule, it’s a good idea to touch up the edge after every use, and to do a more thorough sharpening every few weeks or so.
Can I use the same sharpening stone for all my tools?
While you technically can use the same sharpening stone for all your tools, it’s generally recommended that you use different grits for different tasks. This will help you achieve the best possible edge for each particular tool.
How do I properly sharpen a chisel on a sharpening stone?
To sharpen a chisel on a sharpening stone, start by moistening the stone with water. Then, place the chisel on the stone at the angle you want to sharpen it, and rub it back and forth against the stone while applying a gentle pressure. Repeat this process on the other side until you have a nice, sharp edge.
What are some common mistakes people make when sharpening chisels?
Some common mistakes people make when sharpening chisels include not soaking the stone, not maintaining a consistent angle, and not using the correct grit for the task at hand. Additionally, many people tend to apply too much pressure, which can damage the edge of the tool.
