If you’re a car enthusiast, you know that keeping your vehicle in tip-top shape requires regular maintenance. Along with oil changes and tire rotations, car waxing is an essential step in ensuring your vehicle’s longevity and sparkling appearance. While waxing by hand can be effective, using an orbital polisher can take your car detailing game to the next level.
In this blog post, we’ll explore some tips and tricks for waxing your car with an orbital polisher, allowing you to achieve a professional-grade finish in no time. So grab your polisher and let’s get started!
Why Use an Orbital Polisher for Waxing?
If you’re looking for a quick and easy way to wax your car, using an orbital polisher might be the perfect solution. Not only does it save time and effort, but it also provides a better finish than doing it by hand. The reason for this is that orbital polishers operate with a random motion, which distributes the wax evenly across the surface of your car.
This motion also helps to minimize the appearance of swirls and scratches that can occur when using a rotary polisher. When using an orbital polisher for waxing, make sure to use the correct attachment and apply the wax in small sections to ensure an even finish. By using an orbital polisher, you can achieve a showroom-ready shine and protect your car from the elements.
Efficiency and Consistency
If you’re looking for a more efficient and consistent way to apply wax to your car, then an orbital polisher might just be the tool for you. Not only does an orbital polisher distribute wax evenly and effectively, but it also saves you time and energy. With its powerful motor and easy-to-use handle, you can quickly and easily cover large areas of your car’s surface without having to worry about uneven or inconsistent applications.
Plus, using an orbital polisher can also help you avoid common mistakes like buffing too hard or leaving behind streaks and swirls, which can be difficult to remove later on. So if you want to achieve a sleek and shiny finish on your car without all the hassle, consider investing in an orbital polisher today.
Ease of Use and Comfort
When it comes to waxing your car, an orbital polisher can make all the difference in the world. Not only does it make the process easier and quicker, but it also provides an extra level of comfort that hand waxing can’t match. With an orbital polisher, you no longer have to worry about sore arms or uneven application.
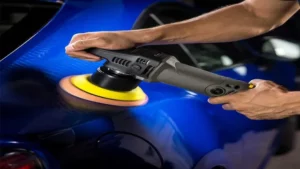
Plus, the random orbital action of the polisher ensures that the wax is applied evenly, which translates to a smoother, shinier finish. The best part? You don’t have to be a professional detailer to use one! Even if you’re a beginner, an orbital polisher is user-friendly and easy to maneuver. Just make sure to choose the right pad for your particular wax product and follow the instructions carefully.
By using an orbital polisher, you’ll achieve a showroom-worthy shine in no time!
What You Will Need
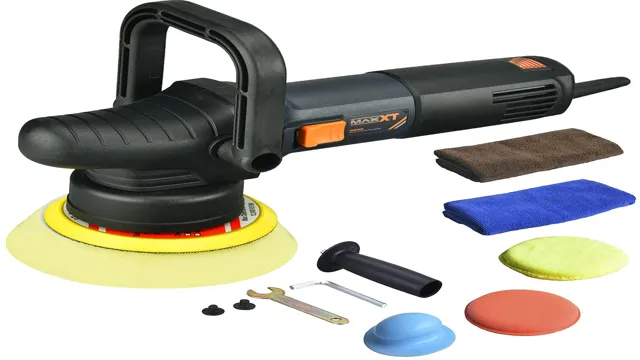
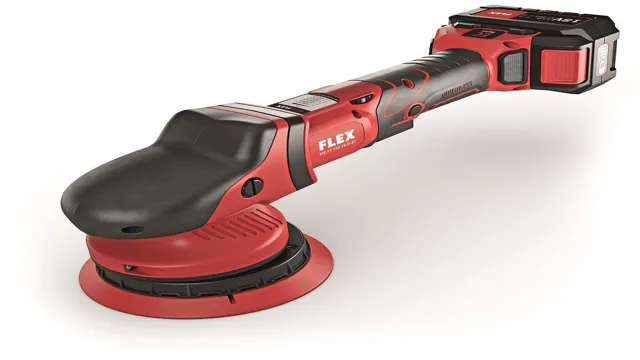
If you want to know how to wax a car with an orbital polisher, then there are a few things you will need first. The most important item on your list should be your orbital polisher. This is the tool that will help you to achieve a professional-looking finish on your car.
You should also have a few different types of wax on hand so that you can choose the best one for your needs. You might want to consider a liquid or spray wax if you are new to waxing your car. Alternatively, you might prefer a paste wax if you are more experienced and want a longer-lasting shine.
Additionally, you should have microfiber towels or an applicator pad so that you can apply the wax evenly and smoothly on your car. With these items in hand, you will be ready to start waxing your car with an orbital polisher.
Orbital Polisher
If you’re looking to give your car a professional-grade polish, investing in an orbital polisher can make all the difference. Before you get started, you’ll need a few supplies to ensure your polish job goes smoothly. Firstly, you’ll need the orbital polisher itself – there are plenty of options on the market, so take the time to research which one suits your needs and budget.
Next, you’ll need some polishing pads. These attach to the orbital polisher and help spread the polishing compound evenly across your car’s surface. You’ll also need a polishing compound, which comes in different levels of abrasive power depending on how much correction your car’s paint job needs.
Finally, you’ll need some microfiber towels to buff off any excess polish and bring out the shine. With these supplies on hand, you’ll be well-equipped to achieve the ultimate glossy finish on your car.
Wax and Applicator Pads
When it comes to caring for your car, having the right tools on hand is essential. One of the things you will need to keep your car looking its best is a good quality wax and applicator pads. A good wax will protect your car’s paintwork from the elements and keep it looking shiny and new.
Applicator pads are also important as they help you apply the wax evenly and avoid any streaks or smears. When choosing your wax, look for one that is specifically designed for your car’s make and model. You should also invest in a microfiber applicator pad, as these are gentle on your car’s paint and provide a smooth and even application of the wax.
By using the right wax and applicator pads, you can keep your car looking its best for years to come.
Microfiber Towels
Microfiber towels are a popular and important tool for cleaning a variety of surfaces. To use these towels effectively, you’ll need a few things. First, you’ll need the microfiber towels themselves.
These towels come in a range of sizes and colors, so choose ones that fit the tasks you plan to tackle. Next, you’ll need a cleaning solution that’s appropriate for the surface you’ll be cleaning. This might be a commercial cleaner, a homemade solution, or just water.
Finally, you’ll need to follow some basic instructions to use microfiber towels correctly. This might include pre-washing the towels, avoiding fabric softeners, and using the towels in a particular way. By following these steps and using the right tools, you can make the most of your microfiber towels and keep your surfaces sparkling clean.
Preparing Your Car
Waxing your car with an orbital polisher can give it a fantastic shine that will protect it from a variety of elements. First of all, it’s important to prepare your car by washing it thoroughly and drying it off completely. Any kind of dirt or debris can damage the surface of your car, so be sure to remove it all before moving forward with the waxing process.
Next, apply a small amount of wax to the foam pad of your orbital polisher and test it out on a small section of your car. Once you’re comfortable with the results, start waxing in a circular motion, making sure to go over each section several times. A good rule of thumb is to use about one inch of wax for every square foot of your car, and make sure to stop and refill the pad periodically.
Once you’re finished waxing, use a microfiber towel to buff the surface of your car to a nice shine. Not only will your car look great, but it will also be well-protected from everything from pollution to bird droppings.
Wash and Dry Your Car
Washing and drying your car is crucial for maintaining its appearance and longevity. Before you start the process, it’s essential to prepare your vehicle adequately. First, park your car in a shaded or covered area to avoid washing it in direct sunlight, which can cause water spots.
Next, gather all the necessary supplies, including a bucket, car shampoo, microfiber towels, and a hose. It’s recommended to use a specific car shampoo because it’s formulated to clean without stripping off the wax or the vehicle’s paint. Once everything is set, start by rinsing your car with water to remove any dirt and debris on the surface.
Do this from top to bottom to prevent dragging dirt from the roof down to the side panels. Then, apply the car shampoo directly to your wash mitt and start scrubbing in a circular motion, starting from the top and working your way down. Avoid using household detergents or dish soap because they can damage the paint and strip off the wax coating.
After thoroughly washing the car, rinse it again with water from top to bottom to ensure all the soap residue is removed. Once completed, use a microfiber towel or a chamois to dry your car in sections, starting from the roof and working downward. This helps to prevent water spots and ensures that every inch of your car is dry.
Remember, the key to preventing spots is to keep your car wet until it is completely dry. By following these simple steps, you’ll be able to effectively wash and dry your car, leaving it looking smooth and shiny.
Remove Any Old Wax or Contaminants
Preparing your car for waxing starts with the first step of removing any old wax or contaminants that may be on the surface of your vehicle. Whether you’re waxing your vehicle for the first time or you’ve done it before, this step is crucial to ensure a smooth and even application of wax. Before applying new wax, you must remove any old wax that may be on the car by washing it thoroughly with soap and water.
However, if the old wax or other contaminants are persistent, you might consider using a specialized cleaning product to get rid of them. Using such products can help you remove any stubborn dirt, grease, or other contaminants that may not be removed using just soap and water. By taking the time to remove old wax and contaminants, you’re creating a clean slate for the wax to adhere correctly and create a protective barrier for your car.
Waxing Your Car
Do you want to keep your car looking shiny and new for as long as possible? Then waxing your car is a must. And if you have an orbital polisher, it can make the job even easier and more efficient. An orbital polisher mimics the circular motion applied when waxing a car by hand but with less effort and greater coverage.
First, ensure that your car’s surface is clean and dry to avoid rubbing in dust or dirt. Then, apply a small amount of wax to the pad of the polisher and gently work it into the car’s surface, using slow, circular motions. Keep the speed and pressure consistent to achieve a uniform wax coat.
Let the wax dry for a few minutes before buffing it with a clean microfiber towel, using a back-and-forth motion. And that’s it! Now, sit back and enjoy the gleaming finish of your freshly waxed car.
Apply Wax to Applicator Pad
When it comes to waxing your car, the first step is to apply wax to an applicator pad. This may seem simple enough, but it’s important to do it correctly to ensure the best results. Start by choosing a high-quality wax that’s appropriate for your car’s paint and surface.
Then, take a small amount of wax and apply it evenly to the pad, working in small sections at a time. Spread the wax evenly over the surface of your car, taking care not to apply too much pressure or use too much wax. Think of it like icing a cake – you want a thin, even layer that covers the entire surface.
By taking the time to properly apply wax to your applicator pad, you’ll set yourself up for a successful waxing job and a car that looks clean and shiny for weeks to come.
Apply Wax to Your Car
Waxing your car is an essential part of keeping it looking brand new. To start, choose a high-quality wax that suits your car’s needs, then make sure your car is washed and dried thoroughly before application. Begin waxing in a small section and work your way around.
Remember to apply the wax in a circular motion, making sure to use a moderate amount on each area. Afterward, let the wax sit for a few minutes before buffing it off with a dry cloth. Not only will this give your car a glossy finish, but it will also protect it from the elements.
Applying wax regularly will ensure that harmful substances like UV rays and dirt do not damage your car’s paint. Don’t forget to wax your car regularly to maintain its beautiful shine and prevent any unwanted damages.
Buffing the Wax
Buffing the Wax After applying wax to your car, it is important to buff it out thoroughly to achieve that coveted shine. Buffing allows the wax to settle and bond with the paint, creating a protective layer for your car’s exterior. You can buff the wax by hand or with a machine, depending on your preference.
When buffing by hand, use a soft microfiber cloth and apply moderate pressure in circular motions. Be sure to cover every inch of the vehicle to ensure an even coat. If using a machine, use a foam applicator pad and work in sections, moving the pad in straight lines.
Remember to apply even pressure and not to leave the pad in one spot for too long as this can cause damage to the paint. Buffing the wax not only improves the appearance of your car but also extends the life of its paint job. So go ahead, buff your way to a stunning car!
Final Touches
Now that you have successfully applied the wax to your car using an orbital polisher, it’s time for the final touches. Take a clean microfiber towel and gently buff the wax residue off the car’s surface. Make sure to use a light touch to avoid scratches.
Don’t forget to check all the corners and crevices that might have been missed during the wax application. If needed, you can use a detailing brush to get into those hard-to-reach areas. After you have buffed the entire car, step back and admire your work.
Your car should now have a beautiful shine that will last for weeks to come. Remember to store your orbital polisher and any other tools you used in a safe and dry place, ensuring their longevity. Congratulations, you now know how to wax a car with an orbital polisher like a pro!
Remove Any Residue
After you have finished cleaning your surfaces, it’s time to remove any residue that may be left behind. Residue can not only make your surfaces look dirty, but it can also attract more dirt and dust. To get rid of any residue, use a clean, damp cloth to wipe down the surface once more.
Make sure to use a different cloth than the one you used for cleaning to avoid spreading any dirt or grime back onto the surface. For tougher residue, you can use a chemical residue remover, or make your own using equal parts vinegar and water. Simply spray the solution onto the surface, let it sit for a few minutes, then wipe it away.
Remember, it’s important to always remove any residue to keep your surfaces looking clean and to prevent further buildup.
Admire Your Shiny Car!
After spending countless hours cleaning and detailing your car, you want to make sure it shines like it’s brand new. That’s where the final touches come into play. One of the most important steps in achieving a beautiful shine is using a high-quality wax or sealant.
This will not only add a protective layer to your car’s paint but also enhance its shine. Applying the wax correctly is crucial as it can make a big difference in the final result. It’s important to apply it in thin and even layers, working one section at a time.
Once you have applied the wax to the whole car, let it dry completely before buffing it off with a clean microfiber towel. Another essential step is polishing the headlights, taillights, and rims to achieve a uniform shine all around the car. For that, invest in a good polish and dedicate the time to remove any stubborn stains or scratches.
With these final touches, you will be proud to show off your car’s new shine and make heads turn when driving down the road.
Conclusion
With the power of an orbital polisher in your hands, waxing your car has never been so easy, efficient, and enjoyable. You’ll be able to achieve a professional-looking finish and be the envy of the neighborhood. Just remember to take your time, use the right products, and don’t forget to turn up the tunes while you work – because as they say, ‘wax on, groove on’!”
FAQs
What is an orbital polisher and how is it different from other polishing tools?
An orbital polisher is a machine that uses a circular motion to distribute wax evenly on the car’s surface. It differs from other polishing tools, such as rotary polishers, because it is less likely to cause damage to the paint and is easier to use for beginners.
What are the benefits of using an orbital polisher to wax a car?
Using an orbital polisher for waxing a car can save time and effort, as the machine does most of the work. It also ensures a more even distribution of wax, leading to a better finish and more protection for the car’s paint.
Do I need any special training or experience to use an orbital polisher for waxing a car?
While previous experience and training can be helpful, using an orbital polisher to wax a car is generally considered to be a beginner-friendly task. It is important to read the manufacturer’s instructions carefully and to practice on a small area of the car before attempting to do the entire vehicle.
How do I choose the right type of wax for my car when using an orbital polisher?
The type of wax you choose for your car depends on several factors, such as the color of the car, the condition of the paint, and the level of protection you want. Some popular types of wax include carnauba wax, synthetic wax, and ceramic wax. It is important to research the different options and consult with a professional if you are unsure.
Can an orbital polisher be used on all types of car paint?
Yes, an orbital polisher can be used on most types of car paint. However, it is important to check the manufacturer’s instructions and to take precautions when using the machine on delicate or custom paint jobs.
How often should I wax my car with an orbital polisher?
The frequency of waxing depends on several factors, including the climate, driving conditions, and overall use of the car. As a general rule, it is recommended to wax your car every three to six months.
What is the proper technique for using an orbital polisher to wax a car?
The proper technique for using an orbital polisher involves applying a small amount of wax to the pad, spreading it evenly on a small area of the car, and then using the machine to buff the wax onto the paint. It is important to work in sections and to avoid applying too much pressure or moving the machine too quickly.
