If you’re a car enthusiast, you know that maintaining your car’s shine is crucial. Waxing your car regularly is one of the easiest and most effective ways to do so. But applying it by hand can be a real pain, especially if you have large, detailed surfaces to cover.
That’s where an orbital polisher comes in handy. By using an orbital polisher, you can apply wax more evenly and in less time. It’s important to note that not all orbital polishers are the same.
Some are better suited for waxing than others, so it’s essential to choose the right one for the job. In this blog post, we’ll explore the benefits of using an orbital polisher to wax your car and how to do it correctly. We’ll also discuss some of the best polishers on the market to help you make an informed decision.
So sit back, grab a drink, and let’s dive in!
Safety Measures Before Getting Started
Before you start using an orbital polisher to wax your car, it is important to take some safety measures to avoid any accidents. Firstly, make sure that your car is parked on a flat and stable surface and the parking brake is engaged. Also, ensure that you are wearing safety gear, including gloves and goggles, to protect your hands and eyes from any debris or flying wax.
Consider using a respirator or face mask to avoid inhaling any chemicals or fumes emitted during the waxing process. Additionally, it’s crucial to read and understand the user manual of your orbital polisher before getting started. This will help you know how to operate and handle it appropriately, reducing the likelihood of causing damage to your car or injuring yourself.
By taking these safety measures, you can enjoy a hassle-free and safe waxing experience with your orbital polisher.
Clean Your Car Thoroughly
Before you start cleaning your car thoroughly, there are a few important safety measures you should consider. Firstly, make sure your car is parked in a safe and well-lit area to avoid any accidents or injuries. Secondly, avoid washing your car in direct sunlight as this can cause water spots and make it difficult to see any dirt or debris.
Next, wear appropriate clothing and safety gear such as gloves and goggles to protect yourself from any chemicals or debris that may be present. Additionally, read all the instructions on the cleaning products you plan to use, and follow them carefully. By taking these safety measures, you will be able to clean your car effectively and safely.
Remember, safety always comes first when undertaking any task, including car cleaning.
Choose The Right Products
When choosing products for any personal or professional project, the first thing to consider is safety. From tools to materials, it’s essential to ensure that everything is safe to use in the way you intend. This means doing your research on each product, looking into reviews, and speaking with experts to determine the best options.
Additionally, you’ll want to consider any safety gear necessary to use those products safely. Whether it’s gloves, goggles, or something else, make sure you have everything you need before getting started. Finally, double-check that you understand how to use everything properly.
Don’t skip safety steps or take shortcuts – it’s always better to be safe than sorry. By taking these steps, you can ensure that your project is not only successful but also safe for everyone involved.
Step-by-Step Guide to Using an Orbital Polisher
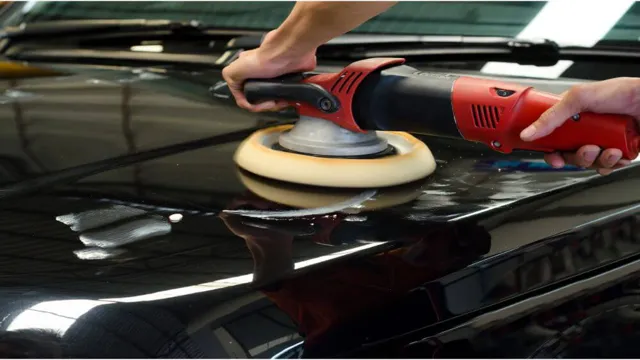
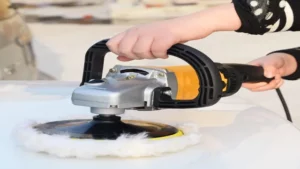
If you’re tired of hand-waxing your car and want to try something new, an orbital polisher is perfect for you. The machine’s design ensures that the wax covers every inch of your car, giving you that professional-looking finish that you’ve been dreaming of. To start, attach a polishing pad to the machine and apply the wax directly to the pad.
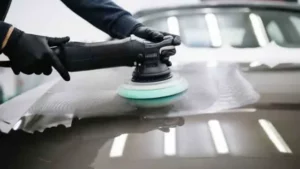
Spread a thin, even layer of wax over the car’s surface, making sure not to miss any spots. Next, set the machine to a low speed and begin buffing. Use long, overlapping strokes to cover the car’s surface, making sure to never keep the polisher in one spot for too long.
Once you’re done, use a microfiber towel to wipe off any remaining residue and admire your work. With an orbital polisher, getting a perfect wax job has never been easier.
Apply The Wax
Now that you’ve thoroughly washed and decontaminated your vehicle with claying, it’s time to move on to applying the wax. Before starting, make sure your car is dry and out of direct sunlight. Choose the type of wax that suits your needs and preferences – liquid, paste, or spray wax.
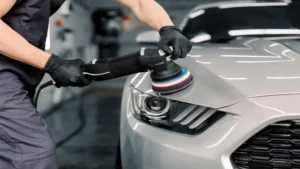
Once you have the wax, apply it to the orbital polisher pad in small amounts using a foam applicator pad. Spread the wax evenly across the surface of the car moving the polisher from side to side and up and down. Avoid applying too much pressure on the pad, or it may spin too quickly and cause the wax to splatter.
Continue in small sections until you have applied wax to the entire vehicle. And voila! Your car is now protected and looking like new, all thanks to the power of wax.
Attach The Pad To The Orbital Polisher
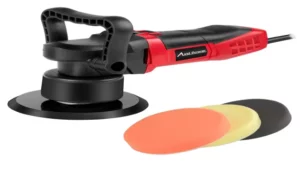
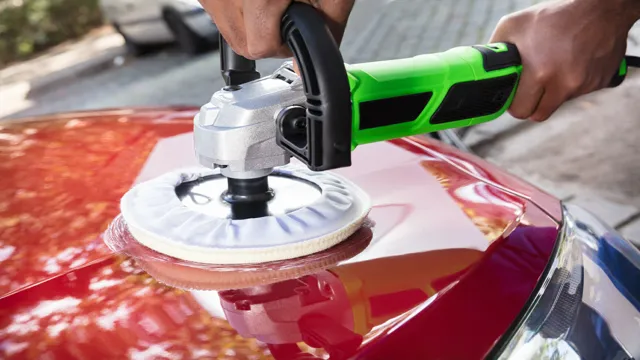
When it comes to using an orbital polisher, one of the most crucial steps is attaching the pad correctly. Start by selecting the right pad for the job, whether it be a cutting pad for heavy paint correction or a finishing pad for final touch-ups. Then, place the pad onto the polisher’s backing plate and secure it in place with the hook and loop system.
Ensure that the pad is centered and balanced on the plate to avoid any vibration or wobbling during use. It’s important to remember that the pad’s condition can affect the polishing process, so be sure to inspect it for any signs of wear or damage before use. Taking the time to attach the pad properly can make all the difference in achieving the desired result.
So, before starting, make sure the pad is correctly fitted on the backing plate, secure and balanced, and be ready for great results.
Start The Orbital Polisher
If you’re looking for a way to get your car looking like new again, using an orbital polisher can do wonders! However, you want to ensure that you use it correctly, as misuse can lead to swirl marks, scratches or even burn your car’s paintwork. Before starting, make sure that your car is clean and dry. Next, you’ll want to apply the polishing compound onto the pad, spreading it evenly.
When starting up your polisher, ensure that it is at a slow speed, to begin with, to avoid any mishaps. From there, you’ll want to work the polisher in circular motions. Remember to keep the pad level with the surface of the car to avoid any damage.
Work in small sections, and don’t forget to clean the pad regularly. Once you’re happy with the results, remember to give your car a wash to remove any leftover residue. And there you have it, a simple step-by-step guide to using an orbital polisher and bringing your car’s shine back to life!
Move The Polisher On The Car’s Surface
If you’re trying to achieve a polished look on your car, using an orbital polisher can be a game-changer. However, it’s important to know how to properly use it to avoid any damage to the vehicle’s surface. Here’s a step-by-step guide to get you started:
Begin by washing and drying the car thoroughly. This will remove any dirt or debris that can scratch the paint surface while polishing.
Apply a small amount of polish to the pad on the orbital polisher. Don’t overdo it as this may cause streaking or uneven application.
Hold the machine firmly, and place the pad on the car’s surface. Turn on the polisher and start moving it in a slow, circular motion.
Be careful not to apply too much pressure, as this can create swirl marks or damage the paint. Let the machine do the work as you move it across the surface of the car.
After a few passes, check the results. If you’re happy with the level of polish, move on to the next section. If you need more polishing, repeat the process in the same area until you get the desired results.
Post-Waxing Measures
After waxing your car, it’s important to take some post-waxing measures to ensure the wax job lasts as long as possible. One of the best ways to do this is by using an orbital polisher to buff and shine the car’s exterior. Not only does this process help to enhance the car’s luster and shine, but it helps to evenly distribute the wax coating, preventing any potential streaking or buildup.
To use an orbital polisher for waxing, start by applying the wax to the polishing pad and running the polisher across the car’s surface in small, circular motions. Keep the pad moving at a slow and steady pace, taking care to avoid any abrupt stops or starts which may damage the paint job. Once complete, wipe the surface down with a microfiber towel to remove any excess wax residue and voila – your car is now beautifully polished and protected!
Buff The Surface
After waxing, it’s crucial to take some measures to soothe the skin and prevent ingrown hairs. One of the best ways to do this is to buff the surface with a dry brush. Using gentle circular motions, you can remove dead skin cells, encourage circulation, and prevent any clogging of the hair follicles.
This will not only leave your skin looking smoother and brighter, but will also help to prevent any irritation or inflammation. Just remember not to overdo it, as too much buffing can actually worsen the problem by irritating the skin. So go easy, take your time, and enjoy a smoother, softer, and more radiant post-waxing glow.
Clean The Orbital Polisher Pad
After waxing your car, it’s important to take some post-waxing measures to ensure that the shine on your car’s paint lasts for a long time. One of the essential post-waxing steps is cleaning the orbital polisher pad properly. You need to clean off any excess wax or debris from the pad to ensure that it’s ready for use the next time you need to polish your car.
The process is quite simple – you can wash the pad under running water while using a mild soap or detergent to get rid of any contaminants. Make sure to rinse the pad thoroughly after washing and let it air dry completely before storing it. Taking care of your orbital polisher pad will ensure that it remains in good condition and lasts for a long time.
Keyword: post-waxing measures
Conclusion
In conclusion, using an orbital polisher to wax your car is like having your own personal workout session for your vehicle. With just a few flicks of the wrist, you can achieve a shiny and smooth finish that will have heads turning in your direction. So, grab that polisher, put on some tunes, and let your car feel the burn.
Who needs a gym when you can buff your way to a beautiful ride?”
FAQs
What is an orbital polisher and how does it work for waxing a car?
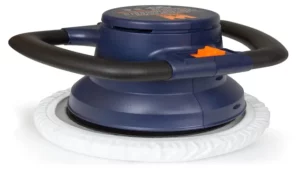
An orbital polisher is a machine that oscillates in a circular motion to apply and distribute the wax evenly on the car surface. It has a soft pad that rotates in a random orbit, preventing any damage to the paint.
Can an orbital polisher be used for polishing as well as waxing?
Yes, an orbital polisher can be used for both polishing and waxing. It can remove the stubborn stains, swirl marks, and minor scratches from the car surface.
What type of wax should be used with an orbital polisher?
Any type of car wax can be used with an orbital polisher, such as liquid, paste, or spray wax. However, it’s recommended to use a high-quality wax for better results and long-lasting protection.
How much wax should be applied on the car for waxing?
A thin layer of wax is enough for waxing the car with an orbital polisher. Over-applying the wax can cause streaks, smears, and uneven surfaces. The excess wax can be wiped off with a clean microfiber towel.
How often should the pads of the orbital polisher be changed?
It depends on how often you use the polisher and the type of wax you use. Generally, it’s recommended to change the pads after every 4-6 uses or when the pad becomes worn or caked with wax residue.
Is it necessary to wash the car before waxing with an orbital polisher?
Yes, it’s essential to wash the car thoroughly before waxing with an orbital polisher. Any dirt, debris, or contaminants on the car surface can scratch the paint and damage the wax layer.
Can an orbital polisher damage the car paint if used improperly?
Yes, an orbital polisher can damage the car paint if used improperly, such as using too much pressure, leaving the polisher in one spot for too long, or using a coarse pad. It’s important to follow the manufacturer’s instructions and use the right products for your car’s paint type.
