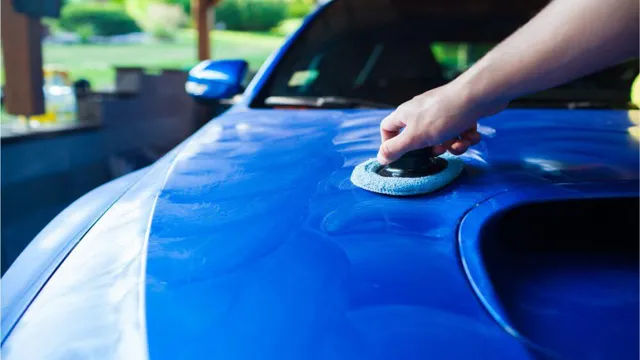
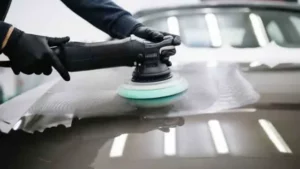
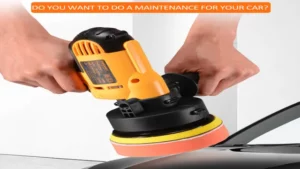
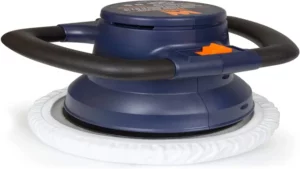
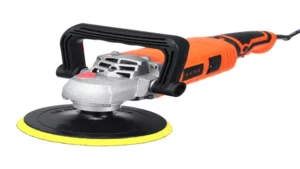
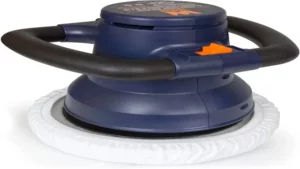
If you’re an avid car enthusiast, you know that keeping your car in pristine condition can be both satisfying and challenging. One of the biggest challenges comes in the form of paint correction and restoring the glossy shine of your car’s paint. If you’re struggling to achieve the perfect shine by hand, using a rotary polisher might be just the solution you need.
While rotary polishers can intimidate some people due to their power and potential for damage if used improperly, in the right hands, they can bring out the best in your car’s paint. With the appropriate techniques, a rotary polisher can make quick work of paint correction and take your car’s finish to the next level. This guide will cover everything you need to know before using a rotary polisher on your car.
From selecting the right machine to applying the correct technique, we’ll walk you through every step of the process to help you achieve the ultimate shine. So, grab your rotary polisher and let’s get started!
Introduction: Reasons to Use a Rotary Polisher
If you’re looking for a way to revive the paintwork on your car and give it a high-gloss shine, using a rotary polisher could be just the trick you need. A rotary polisher uses a circular motion to polish the surface of your car, removing scratches, swirls, and other imperfections. But before you jump in, it’s important to know how to use a rotary polisher on a car properly so you don’t cause any damage.
Start by selecting the right polishing pad and compound for your vehicle’s paint type, and then work in small sections, never leaving the polisher in one spot for too long. Keep the polisher moving at a moderate speed and use light to medium pressure, letting the machine do the work. With a little bit of practice, you’ll be able to achieve professional-looking results that will have your car looking like new again!
Removing Scratches and Swirl Marks
If you’re looking to remove scratches and swirl marks from your car, a rotary polisher could be just what you need. While hand polishing can yield good results, a rotary polisher offers more power, speed, and a consistent action to achieve a perfect finish. With a good grip and precise control, you can work on specific areas of your car without tiring your arms or wrists.
The variable speed options allow for more control over the polishing process, so you can tailor your efforts to the type of paint you’re working on. And, with many manufacturers offering polishing pads and compounds designed to work with their machines, you can achieve a pro-level finish with minimal effort. So, if you want to get your car looking like new again, a rotary polisher is definitely worth considering.
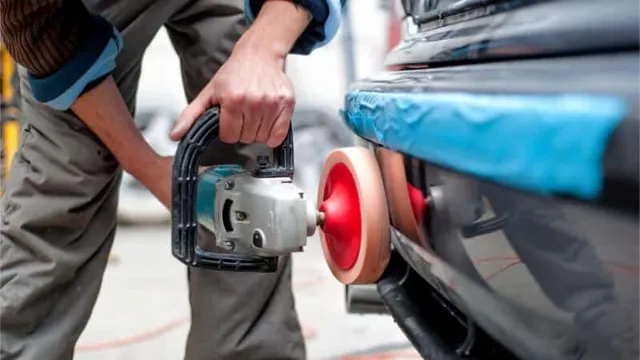
Applying and Removing Wax
If you’re looking to achieve a flawless finish on your vehicle, the use of a rotary polisher can be incredibly beneficial. This specialized tool allows for increased control and precision when applying and removing wax, resulting in a smooth and glossy appearance. A rotary polisher works by spinning a circular pad at a high speed, which helps to evenly distribute product and create a uniform finish.
Additionally, the pressure and speed can be adjusted to suit the specific needs of your vehicle, making it ideal for all types of paint and surface finishes. So why struggle to achieve a professional-grade finish by hand when a rotary polisher can make the process quick, easy, and effective? With its ability to remove scratches and swirls, restore faded paint, and protect your vehicle from the elements, a rotary polisher is a must-have tool for any car enthusiast or detailer.
Choosing the Right Rotary Polisher and Pads
One of the best ways to achieve a perfect finish on your car’s paintwork is by using a rotary polisher. However, choosing the right rotary polisher and pads is crucial to avoid damaging the paint. The first step is to select a polisher that suits your needs, whether you’re a professional detailer or a DIY enthusiast.
Look for a polisher with variable speed settings, adjustable handles, and lightweight design. As for the pads, choose wisely depending on the type of paint and the level of correction you need. For instance, use a wool pad for heavy defects and a foam pad for lighter scratches.
Always remember to use the right technique when using a rotary polisher, keeping the pad level, and avoiding applying too much pressure that may burn the paint. With the right combination of tools and techniques, you can achieve a smooth blemish-free finish and keep your car looking new for years to come.
Consider the Size and Weight of the Polisher
When it comes to choosing the right rotary polisher and pads, considering the size and weight of the polisher is crucial. A heavy polisher can cause strain on your hands and arms, especially if you’re working for long periods. Additionally, a large polisher may not be able to reach tight and narrow spaces.
On the other hand, a lightweight polisher may not have enough power to remove stubborn scratches and swirls. It’s essential to find a balance between power and weight so that you can work comfortably and effectively. When selecting pads, consider their size and material.
Smaller pads are suitable for tight spaces, while larger pads can cover more extensive surfaces quickly. Moreover, the material of the pad affects its cutting ability, so choose the right pad for your polishing needs. With the right combination of polisher and pads, you can achieve a flawless finish on your vehicle or any polished surface.
Selecting the Best Pads for Your Car’s Paint
When it comes to detailing your car, selecting the best pads for your car’s paint is crucial. The right rotary polisher and pads can make all the difference in achieving a flawless finish. But how do you know which ones to choose? First, determine the condition of your paint.
If it’s heavily scratched or marred, a more abrasive pad may be necessary. However, if your paint is in good condition, a less abrasive pad will suffice. Consider the type of paint you have as well, as some pads may not be suitable for certain types.
It’s also important to choose pads that are the right size for your polisher, as well as ensuring they are of high quality to prevent any damage to your car’s paint. Remember, don’t skimp on quality when it comes to selecting pads for your car’s paint, as it could cost you more in the long run. By taking these factors into consideration, you’ll be able to choose the best pads for your car’s paint and achieve a flawless finish every time.
Preparing Your Car for Polishing
Before using a rotary polisher on your car, you need to prepare it properly. This means washing your car thoroughly with soap and water, and then using a clay bar to remove any impurities and contaminants on the surface. Next, dry the car using a microfiber cloth or air blower.
Then, inspect the paint surface for any scratches or swirl marks. If present, these need to be buffed out before using the polisher. It’s also essential to tape off any parts of the car that you don’t want to accidentally polish, such as plastic trims and rubber seals, to avoid damage.
Finally, apply a suitable polishing compound to your polishing pad and get started, taking care to work in small sections and not allowing the polish to dry out before wiping it off with a clean microfiber cloth. With the proper preparation, using a rotary polisher can help achieve a shiny and perfect finish for your car.
Washing and Drying Your Car Properly
When it comes to preparing your car for polishing, you need to start with a clean slate. That means washing and drying your car properly before moving onto the next step. First, gather all the necessary materials, including a bucket, car wash soap, a wash mitt or sponge, and towels for drying.
Then, fill the bucket with water and the soap, making sure to follow the manufacturer’s instructions for the correct dilution ratio. Next, rinse your car with a hose to remove any loose dirt or debris. Now, it’s time to use the wash mitt or sponge, starting from the top of the car and working your way down.
Make sure to rinse the mitt or sponge in the bucket frequently to avoid scratching the paint. After washing, rinse the car thoroughly with a hose again to remove all soap residue. Now, it’s time to dry the car, using a soft, microfiber towel or chamois.
Avoid air-drying, as this can leave water spots. By following these simple steps, you’ll have a clean, dry car that’s ready for polishing.
Claying and Decontaminating the Paint Surface
If you’re looking to give your car that shiny, showroom finish, then preparing it for polishing is a crucial step that should never be skipped. One way to prepare your car’s paint surface is by claying and decontaminating it. Claying is a process that involves using a clay bar to remove any contaminants that may be stuck on the surface of the paint, such as dirt, tar, or brake dust.
Decontaminating, on the other hand, involves using a chemical product to dissolve any embedded contaminants that may have bonded to the paint surface over time. Together, these two processes help to remove any impurities and create a smooth, polished surface that’s perfect for applying a coat of wax or polish. So, if you want your car to look its best, make sure to include claying and decontaminating in your car detailing routine.
Steps to Using a Rotary Polisher on Your Car
If you’re looking to give your car a deep and thorough clean, using a rotary polisher can be a great option. However, it’s important to be aware of the steps involved in order to avoid causing damage to your car’s paint. Firstly, prep your vehicle by washing and drying it completely.
Then, choose the appropriate pad and polish for the job. Apply a small amount of polish to the pad, and work in small sections. Set the speed of the polisher at a low setting and work in a back-and-forth motion, slowly increasing the speed as needed.
It’s important to keep the pad flat and in constant contact with the surface to avoid producing swirl marks. Once you are finished with a section, wipe it clean with a microfiber towel. Remember to take breaks and assess your progress to make sure you are achieving the desired results.
By following these steps, you can effectively use a rotary polisher on your car to achieve a professional-level shine.
Start with Low Speeds and Work in Small Sections
When it comes to using a rotary polisher on your car, it’s important to start with low speeds and work in small sections. This will allow you to get a feel for the machine and avoid causing any damage to your vehicle. First, choose the appropriate pad and product for your paint type and apply a small amount to the pad.
Next, start with a low speed setting and work in a small section of the car, gradually increasing the speed as you go. It’s important to be patient and take your time, as rushing can lead to mistakes. Remember to keep the polisher moving at all times and avoid applying too much pressure, as this can cause swirl marks.
By following these steps, you can achieve a professional-quality finish without damaging your car’s paint. So, why not give it a try and see the difference it makes to your vehicle’s appearance?
Apply the Polish to the Pad, Not the Car’s Paint
When using a rotary polisher on your car, it’s important to know that the pad is where the polish should be applied, not directly to the car’s paint. If the polish is applied directly to the paint, it can cause swirls and scratches. To avoid this, first, clean the surface of the car using a car wash and dry it thoroughly with a microfiber towel.
Then, apply a small amount of polish to the pad and spread it evenly onto a small section of your car’s surface. Turn on the polisher at a low speed and move it in a back and forth motion, covering the entire section. As you work, add more polish to the pad as needed and ensure that the polisher stays in contact with the surface of the car at all times.
Once the section is complete, wipe it down with a clean microfiber towel to remove any excess polish and move onto the next section. By following these steps and remembering to apply the polish to the pad and not directly to the car’s paint, you can achieve a flawless finish and protect your car’s paint from damage.
Use Proper Technique and Pressure
When it comes to polishing your car with a rotary polisher, it’s important to use proper technique and pressure. First, make sure the polisher is held level to the surface of the car at all times. Use a moderate amount of pressure, allowing the weight of the polisher to do most of the work.
Start with a low RPM speed and gradually work your way up. Use overlapping motions, working from one section of the car to the next in a consistent pattern. Keep the polisher moving at all times and avoid applying too much pressure in one spot, as this can create swirl marks or burn through the paint.
By using the right technique and pressure, you can achieve a perfect shine on your car that will impress all your friends and neighbors.
Check Your Progress and Adjust Speeds and Pressure as Needed
When using a rotary polisher on your car, it’s important to regularly check your progress and adjust your speeds and pressure as needed. This will ensure that you maintain control over the polishing process and achieve the desired results without accidentally damaging your car’s paint job. Start by applying a small amount of polishing compound to the pad and working in a small area.
Keep your machine moving in a steady, circular motion and increase or decrease your speed and pressure depending on how the compound is performing. If you notice any swirls or scratches, dial back the pressure and speed until the polish becomes more effective or try a different pad or compound. Remember, practice makes perfect, so take your time to become comfortable with the machine and your technique before tackling larger areas.
With a little patience and practice, you can achieve a flawless finish that will make your car look like new.
When Not to Use a Rotary Polisher on Your Car
Learning how to use a rotary polisher on your car can be a game changer for achieving a flawless finish. However, it’s important to know when not to use a rotary polisher. One instance is if your car has very thin or delicate paint, as this type of polisher can be too aggressive and potentially damage the paint.
Another instance is if you’re new to using polishers, as this type of tool can be difficult to control and lead to uneven or hazy results. In these cases, it may be best to opt for a less aggressive tool, such as a dual action polisher, or seek professional help to avoid causing any harm to your car’s exterior. Proper technique and caution are crucial when using a rotary polisher, and knowing when to skip it can save you from costly mistakes.
Inexperienced Users or Those with Little Time
If you are an inexperienced user or simply don’t have much time to dedicate to detailing your car, it may be best to avoid using a rotary polisher. While effective for removing deep scratches and swirl marks, rotary polishers require a certain level of skill and experience to use properly. They can easily damage your car’s paint if not used correctly or if the wrong pads or compounds are used.
Additionally, using a rotary polisher can be time-consuming, as it requires multiple steps and careful attention to detail. Instead, consider using a dual-action polisher, which is more forgiving and easier to use for those with limited experience or time. A dual-action polisher is less likely to cause damage and can still effectively remove minor scratches and swirl marks.
Remember, the key to achieving a flawless finish on your car is to use the right tools and techniques for your skill level and time constraints.
Cars with Thin or Delicate Paint Coatings
If your car has a thin or delicate paint coating, it’s best to avoid using a rotary polisher. These types of vehicles require a gentler approach to avoid causing damage to the paint job. Rotary polishers are powerful tools that can strip away the wax layer and take off a thin layer of paint, leaving the surface exposed to the elements.
This is why it’s best to stick to a dual-action polisher or a orbital polisher when working with thin or delicate paint coatings. These tools provide a great finish without damaging the car’s paint. Remember, taking care of your car’s paint is crucial to maintaining its value and appearance.
So, it’s worth investing in the right polishing tools for your specific type of car.
When Working on Small, Tight Areas Not Accessible by the Polisher
When working on small, tight areas not accessible by the polisher, it’s important to know when not to use a rotary polisher on your car. While a rotary polisher can be an effective tool for removing swirls and scratches from larger areas of your car’s exterior, it’s not always the best choice for smaller, more delicate areas. For example, if you’re working on tight corners or curves around your car’s headlights or taillights, a rotary polisher may be too powerful and could lead to accidental damage or scratches.
In situations like these, it’s often best to use a gentle hand-held buffer or even a soft microfiber cloth instead. Remember, the key to achieving a flawless finish on your car is knowing when to use the right tool for the job. So if you’re not sure whether a rotary polisher is the right choice for a particular area on your car, it’s always better to err on the side of caution and choose a gentler alternative.
Conclusion: Enjoying Your Newly Polished Car
In conclusion, using a rotary polisher on your car is like dancing with a partner. You need the right moves and the right tool to achieve a flawless performance. Take your time, start with the low setting, make slow and steady movements, and never forget to clean up after yourself.
With a bit of practice and patience, you can bring out the shine in your ride and impress everyone around you. So, grab your rotary polisher and let’s dance our way to car beauty!”
FAQs
What is a rotary polisher and how does it work on cars?
A rotary polisher is a tool used for polishing and buffing car paint. It has a spinning head that rotates in a circular motion to remove scratches and swirl marks from the paint.
What are the different types of polishing pads used with a rotary polisher?
There are different types of polishing pads used with a rotary polisher, including wool pads for heavy compounding, foam pads for finishing, and microfiber pads for removing fine scratches.
How do you properly prepare the car before using a rotary polisher?
Before using a rotary polisher on a car, it’s important to thoroughly wash and dry the car, remove any contaminants from the paint surface, and tape off any areas that should not be polished.
Can a rotary polisher damage car paint?
Yes, a rotary polisher can damage car paint if used improperly or if too much pressure is applied. It’s important to use the correct speed and pressure settings and to keep the polisher moving in a consistent motion.
What are some tips for using a rotary polisher on cars?
Some tips for using a rotary polisher on cars include starting with a low speed setting, using the proper technique and pressure, working in small sections, and using the correct type of polishing pad for the type of paint and level of detailing needed.
What safety precautions should be taken when using a rotary polisher on a car?
When using a rotary polisher on a car, it’s important to wear eye protection, a dust mask, and gloves to prevent injury and exposure to chemicals. The polisher should also be used in a well-ventilated area to prevent inhalation of fumes.
How often should a rotary polisher be used on a car?
The frequency of using a rotary polisher on a car depends on the condition of the paint and the desired level of detailing. In general, it’s recommended to polish a car two to four times a year to maintain its shine and protect the paint from damage.
