Looking to get your car looking like it just rolled off the showroom floor? Using an orbital polisher can be just the tool you need to achieve that perfect, mirror-like finish. But if you’ve never used one before, it can be overwhelming to figure out how to get started. Fear not! We’ve put together a step-by-step guide to help you get started with using an orbital polisher on your car.
From picking the right machine to applying the polish and buffing it out, we’ll take you through the process in detail. So grab a towel and a cold drink, and let’s get started!
Preparation
Before using an orbital polisher on your car, it’s essential to prepare the surface properly. Begin by washing your car thoroughly and drying it completely using a microfiber cloth. Any dirt or dust left on the surface can cause scratches during the polishing process.
Next, use a clay bar to remove any embedded contaminants that cannot be removed through regular washing. Once the surface is free of contaminants, it’s time to mask off any trim, crevices, or delicate areas using painter’s tape to avoid accidentally damaging them during the polishing process. Lastly, select the right polishing pad and polishing compound based on the level of correction needed and the type of paint on your car.
Preparing your car properly will help ensure a successful polishing experience with your orbital polisher, resulting in a smoother, shinier finish.
Wash the car thoroughly
When it comes to washing your car, a little preparation can go a long way in ensuring you get the best results possible. Before you start cleaning, make sure you have all the necessary tools and materials on hand. This includes a high-quality car shampoo, a bucket, a hose or pressure washer, microfiber towels, and any other cleaning products you prefer to use.
It’s also a good idea to park your car in a shady area, as washing in direct sunlight can cause water spots and streaks. Once you have everything you need and your car is in the perfect spot, take a few moments to give it a quick rinse with the hose or pressure washer to remove any loose dirt or debris. This will make the washing process much easier and more effective.
By taking the time to prepare and gather all necessary items, your car washing experience will be smoother and more enjoyable, and your car will look great as a result.
Clay bar the car
Preparing your car before using the clay bar is a crucial step to achieve better results. This process should not be rushed because any debris left on the surface of the vehicle can cause scratches when clayed. Start by washing the car with soap and water as this helps to remove dirt and dust.
Thoroughly rinse the car and dry it off with a microfiber towel to avoid leaving water spots. Afterwards, inspect the surface of the car by running your hand over it carefully. If you can feel any roughness, this means that there are contaminants that need to be cleaned up before using the clay bar.
In this case, consider using a pre-clay solution to eliminate any stubborn dirt or grime. This step is important because any contamination can cause scratches on your car during the clay bar process. Taking the time to prepare your car before using the clay bar is worth the effort because it will lead to a much smoother finish and avoid the risk of new scratches.
Dry the car completely
“Car drying techniques” Preparation is key when it comes to drying your car after washing it. Before you start, make sure that you have all the necessary tools at hand. You will need a soft microfiber cloth, which will not scratch your car’s surface, as well as a high-quality drying towel.
Begin by removing any excess water from the car’s surface using a squeegee or a water blade. Once you have removed the majority of the water, use the microfiber towel to dry the remaining moisture. Make sure to work in sections, moving from the top to the bottom of the car.
It is important to be thorough and make sure that every area is dry before moving on to the next section. Once you have dried the entire car, go over it again with a drying towel to ensure that all water spots have been removed. Remember, an excellent drying technique will help protect your car’s paint and keep it looking shiny and new for longer.
Setting up the polisher
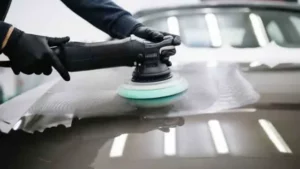
Using an orbital polisher on your car can be a bit intimidating if you have never done it before, but with the right steps, it can be a breeze. Before you start polishing, make sure your car is clean and dry. Plug in your polisher and attach the pad.
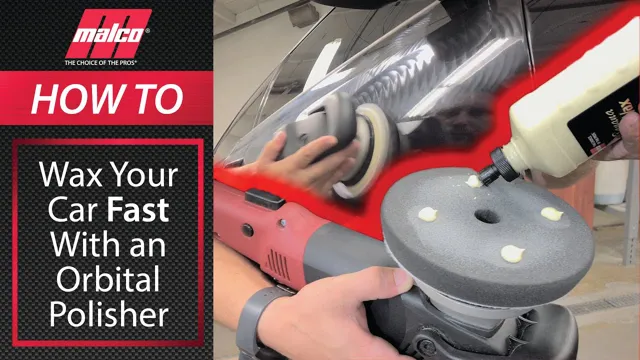
Apply a small amount of polish to the pad and spread it over the area you want to work on. Once you have applied the polish, turn on the polisher and start moving it in circular motions. Work in one section at a time, making sure to keep the pad flat against the surface of the car.
As you work, keep an eye on the pad and if it becomes dirty or dry, apply more polish and continue polishing until the section is shiny and smooth. With a little patience and practice, using an orbital car polisher can give your car a professional-looking finish that will make you proud to drive around.
Choose the right polishing pad
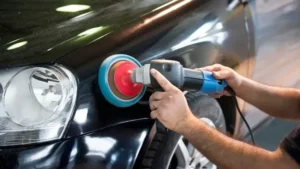
When it comes to polishing, the right pad is essential for achieving the desired results. Before starting, ensure that you have the correct pad attached to your polisher. There are a variety of pads available, each designed for different tasks and surfaces.
Choose a pad that matches the type of polishing compound you’ll be using and the surface you’ll be working on. Foam pads are excellent for finishing, while wool pads are better for heavy cutting. Keep in mind that the color of the pad indicates its firmness, with darker colors being denser and better-suited for heavy-duty jobs.
Picking the right pad will ensure that you get the best results and have a smooth and safe polishing experience.
Attach the pad to the polisher
When it comes to setting up your polisher for the first time, it’s essential to know how to attach the pad properly. The process isn’t complicated, but it’s crucial to follow a few steps to ensure a secure and safe attachment. Firstly, determine the right pad size for your polisher and the task at hand.
Once you’ve selected your pad, center it on the polisher’s base plate and press down firmly. To secure it in place, screw the backing plate onto the polisher’s spindle with a wrench and tighten it. Make sure it’s firmly attached, and the pad is flat against the base plate.
Using your polisher with a poorly attached pad is dangerous and can lead to severe damage or injury. So, before you get started, always double-check that the pad is correctly attached and secure. By taking time to attach your pad correctly, you’ll ensure that your polisher is ready to go and deliver the perfect finish every time.
Set the speed of the polisher
When setting up a polisher, the speed at which it rotates is a critical factor to consider. Most polishers come with adjustable speed settings, which can vary from low to high. A lower speed is ideal for delicate polishing tasks or when working with softer surfaces, while a higher speed is better suited for tougher jobs and more durable surfaces.
It’s worth noting that a higher speed doesn’t necessarily mean a better finish, as it can cause overheating and wear out the polishing pad faster. So, it’s wise to start with a lower speed and gradually increase it until you find the right balance for the surface you’re working on. Also, keep in mind that the speed should be adjusted depending on the type of polish being used.
For instance, a coarser polish may require a higher speed than a finer one. By taking the time to set your polisher’s speed correctly, you’ll be able to achieve professional-quality results with minimal effort. Keyword: polisher speed.
Using the polisher
If you’ve never used an orbital polisher on your car before, don’t worry, it’s not as complicated as it looks. First, clean your car thoroughly so that there’s no dirt or debris left on the surface. Then attach the pad to the polisher and apply a few drops of polishing compound.
Turn on the polisher and move it back and forth across the surface of the car, being careful not to apply too much pressure. You’ll want to work in small areas at a time, so move the polisher over that section until the polishing compound is evenly spread. Then wipe off the compound with a clean, microfiber towel in a circular motion.
Repeat this process for each section of the car until it’s all shiny and clean! Remember to take breaks and switch out the pad if it gets too dirty. With a little patience and practice, you’ll have a polished car in no time.
Apply polish to the pad
When it comes to using a polisher, one of the important steps is to apply polish to the pad. This helps to ensure that the pad has the right amount of product to work with and helps to prevent any damage to the surface that you are polishing. Start by placing a small amount of polish onto the pad and then spread it evenly across the surface.
Be sure not to use too much polish, as this can lead to a mess and create unnecessary waste. Keep in mind that different polishes have different consistencies and may require different amounts to achieve the desired results. By taking the time to carefully apply polish to the pad, you can ensure that your polishing job is successful and leaves a beautifully finished surface.
Spread the polish over the first section
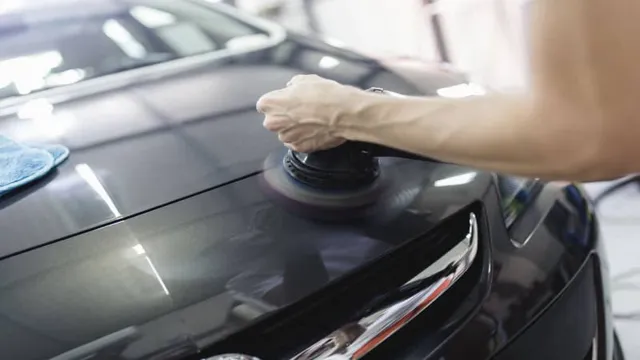
When using a polisher to apply polish to your car, it’s important to work in sections to ensure even coverage. Start by spreading a small amount of polish over the first section of your vehicle, typically the hood or roof. Use a circular motion, applying light pressure to the polisher while keeping it moving at a consistent speed.
It’s important to avoid pressing too hard or keeping the polisher in one spot for too long, as this can cause damage to the paint. Once you’ve covered the first section, move on to the next section and repeat the process until the entire car has been polished. Remember to always work in small sections and to keep the polisher moving to achieve the best results.
With a little patience and attention to detail, your car will be shining like new in no time!
Polish the section with the polisher
When it comes to achieving a flawless and shiny surface on your car or any metal object, using a polisher is an essential tool! A polisher is a machine that rotates and spins abrasive pads at high speed to buff and polish the surface. Polishing is the final stage of detailing, and it is crucial to do it correctly to obtain the desired results. Before starting, it is essential to clean the surface thoroughly and remove any dirt, debris, or wax residues.
Once you have prepared the surface, attach the polishing pad to the polisher and apply a small amount of polish to it. Then, turn on the machine and work in small areas, moving the polisher in circular motion until you have covered the whole surface. Be sure to use the right amount of pressure, as too much pressure can damage the surface, while too little pressure will not achieve the desired shine.
After finishing, remove the residue with a microfiber towel, and voila! Your surface will look like new. By using a polisher, you can achieve a high-quality finish that will last longer than traditional hand polishing, making your car or object look as good as new.
Repeat for other sections
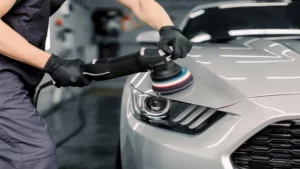
Using a polisher can take your car’s look to the next level. If you’re polishing your car for the first time, begin with washing it thoroughly before you start with the buffer. Take one section at a time and apply the polish on a clean foam pad.
Turn on the buffer and work in small areas, overlapping the previous passes to ensure full coverage. Remember, it is crucial to use the right amount of pressure when polishing to avoid damaging the paint. Don’t forget to take breaks to prevent the motor from overheating.
Once you finish polishing the entire car, wipe it down with a microfiber cloth to remove any excess polish and admire the final results. Using a polisher is a great addition to any detailer’s toolkit.
Clean the pad periodically
When using a polisher to clean your car’s pad, it’s important to periodically clean the pad itself. Over time, the pad can accumulate polish residue and debris from the surface you’re working on, decreasing its effectiveness and potentially damaging your vehicle’s paint. To clean the pad, simply turn off the polisher and use a brush to gently remove any debris.
If there is still polish residue, use a pad cleaning solution and follow the manufacturer’s instructions to get the pad looking new again. It may seem like a small task, but taking the time to clean your pad regularly will ensure that your vehicle’s paint stays in top shape and you’re able to achieve the perfect finish every time you use the polisher. So, don’t overlook this crucial step in maintaining your car’s appearance!
Finishing up
In conclusion, using an orbital polisher on your car can bring out a glossy, showroom shine. Remember to start with the least aggressive pad and polish combination, and work your way up if necessary. Use overlapping motions and keep the machine moving at a consistent speed.
Be mindful of the pressure you apply, and focus on small sections at a time. When you’re finished, wipe off any excess polish and inspect your work. Don’t forget to clean your pads and tools after each use, and store them properly to prevent damage.
With a little bit of practice and patience, you can achieve professional-level results and make your car stand out from the crowd.
Wipe down the car with a microfiber towel
After thoroughly washing your car, it’s time to give it a final wipe-down with a microfiber towel. This will help to remove any remaining water droplets that can leave spots and streaks. Plus, using a microfiber towel will prevent any scratches or damage to the car’s paint job.
Make sure to use a clean and dry microfiber towel to avoid any dirt or debris from scratching your car. Start at the top of the car and work your way down, using a light touch as you go. Pay extra attention to the windows and mirrors as they tend to show streaks the most.
Once you’ve finished wiping down your car, step back and admire your sparkling clean ride! Remember to always take care of your car to ensure it looks its best for years to come.
Admire your shiny car
As you reach the end of detailing your car, it’s time to sit back and admire your shining beauty. Seeing the reflection of the sunlight or streetlights off your car is such a satisfying moment. Taking care of your car is just as important as taking care of yourself, and when you do take care of it, it will return the favor with a stunning appearance.
Every nook and corner is glowing, and you can’t help but feel proud of the hard work you’ve put into your automobile. The keyword here is “admire,” and it’s not just about feeling good but also a sign that you’ve done an excellent job in caring for your car. So, take a step back, look at your car and appreciate the sense of accomplishment that comes with it.
Conclusion
And there you have it, my friends! A guide on how to use an orbital polisher on your car. Remember, it’s all about technique, speed, and pressure. If you follow these simple steps, you’ll achieve that satisfying, professional-looking finish in no time.
Just don’t forget to take breaks and hydrate – polishing can be quite the workout! So go ahead, get buffed and shiny, and enjoy your newly polished ride. Happy buffing!”
FAQs
What is an orbital polisher and how does it differ from a rotary polisher?
An orbital polisher is a tool that oscillates in a circular motion while also spinning on its axis, causing less heat buildup and minimizing the risk of burning paint compared to a rotary polisher that only spins in one direction.
What type of pad should be used with an orbital polisher?
Foam pads are commonly used with an orbital polisher because they provide a cushioning effect while also being effective at removing swirl marks and minor defects in paint.
Can an orbital polisher remove scratches?
An orbital polisher can reduce the appearance of scratches, but it may not be able to remove deeper scratches that have penetrated the clear coat.
What speed setting should be used when polishing a car with an orbital polisher?
The speed setting will vary based on the type of paint and the condition of the surface being worked on. It is recommended to start on a lower speed setting and gradually increase as needed.
What type of polish or compound should be used with an orbital polisher?
A lighter compound or polish should be used with an orbital polisher to avoid overworking the paint and causing damage. It is best to start with a mild polish and move up to a harsher one only if needed.
Is it necessary to use a polishing pad and a finishing pad when using an orbital polisher?
It is not always necessary, but using a separate polishing pad and finishing pad can result in a finer finish with less marring, scratches or holograms left behind.
How often should I clean my pads when using an orbital polisher?
It is recommended to clean pads after each section or panel you work on to avoid buildup of polish or dirt that can cause uneven results or damage to the paint.
