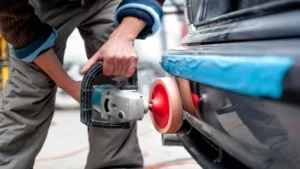
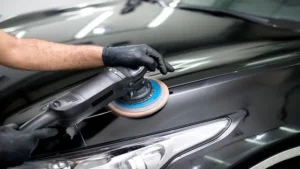
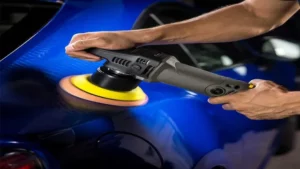
Are you tired of spending hours waxing your car by hand only to see mediocre results? Well, fear not, as we have the perfect solution for you – using a DA polisher. Not only does this method save you time, but it also results in a flawless and professional-looking finish that will leave your car looking like new. In this blog post, we will guide you through the process of waxing your car with a DA polisher step by step, starting from the basics of what a DA polisher is and how it works.
We will also cover the tools and materials you’ll need, as well as some tips and tricks to help you get the best results. Whether you’re a seasoned car enthusiast or just looking to up your car maintenance game, this post is for you. So, let’s dive in and learn how to wax a car with a DA polisher in no time!
What You’ll Need:
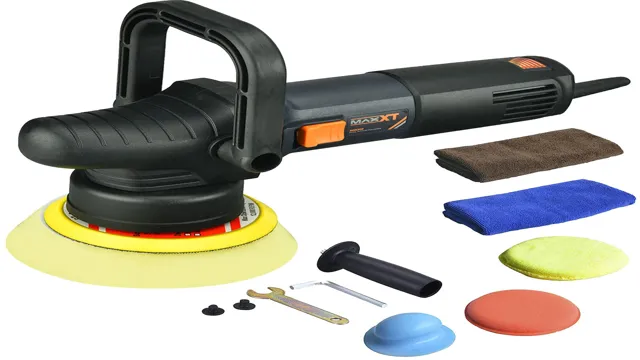
If you want to learn how to wax a car with a DA polisher, then you’ll need a few things to get started. First, you’ll need a good quality DA polisher. Not all polishers are created equal, so make sure you select one that is designed for waxing and polishing cars.
You’ll also need a foam pad that is specifically designed for applying wax. Additionally, you’ll need a quality car wax. There are many different types of wax available, so choose one that suits your needs and your budget.
Finally, you’ll need a clean microfiber towel to buff the wax off your car. Once you have all of these items, you’re ready to begin waxing your car with a DA polisher. Just remember to work in small sections, apply a thin coat of wax, and buff in a circular motion to achieve the best results.
With a little practice and patience, you’ll be able to achieve a beautiful, long-lasting shine on your car with your DA polisher!
DA Polisher
If you’re looking to get your car’s paint looking like new again, a DA polisher is an essential tool. But what do you need to get started? First and foremost, you’ll need a DA polisher itself. Look for one with a variable speed control, and choose a pad size that matches the size of the surface you’ll be working on.
You’ll also need some polishing pads. These come in a variety of materials and sizes, for different levels of abrasiveness. If you’re just starting out, it’s a good idea to get a range of pads so you can experiment to find the best one for each job.
Finally, you’ll need a good quality polish. Look for one that’s formulated for use with a DA polisher, and choose a grit level appropriate for the level of surface imperfections you’re dealing with. With these three things in hand, you’ll have everything you need to get your car looking like new again.
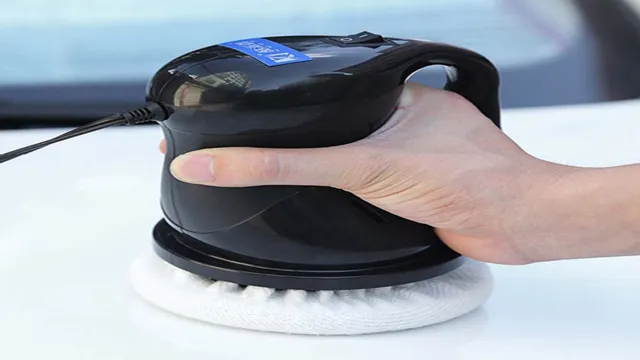
Car Wax
Car Wax Car wax is an essential component in any car maintenance kit. It not only gives your car a glossy finish, but it also protects the paint from scratches and UV damage. To get started, you’ll need a quality car wax, microfiber towels, and a foam applicator pad.
Before applying the wax, wash your car thoroughly to remove any dirt, debris, and contaminants. Then, use the foam applicator pad to apply the wax to a small area at a time, spreading it evenly over the paint. Once the wax has dried to a hazy finish, use a clean microfiber towel to buff the wax off the paint.
It’s important to note that car wax should be applied in a shaded area to prevent the wax from drying too quickly and leaving streaks. Additionally, waxing your car too frequently can damage the paint. It’s recommended to wax your car every three months or as needed.
With a little bit of care and attention, your car will look shiny and new for years to come.
Microfiber Towels
If you want to ensure a successful cleaning process, microfiber towels are an absolute essential. These towels are made from synthetic materials, which means that they are static-free and perfect for picking up dirt and grime. Unlike traditional cloths, microfiber towels do not leave behind residue, streaks or lint, making them perfect for cleaning all sorts of surfaces.
When using microfiber towels, it’s important to invest in high-quality ones, so that they are both durable and able to effectively pick up dirt. Make sure to use these towels dry or slightly damp and avoid using fabric softeners, bleach or dryer sheets when cleaning them. By taking care of your microfiber towels, you can ensure that they will remain effective for a long time.
So, whether you’re cleaning your car, home or office, microfiber towels are a must-have cleaning accessory.
Preparation:
If you’re looking to achieve that shiny, freshly-waxed look for your car, using a DA polisher can be a great option. However, before getting started, you’ll want to make sure your car is properly cleaned and dried. This will ensure that there are no particles or debris on the surface of your car that can get trapped under the wax, potentially causing scratches or other damage.
Once your car is clean and dry, it’s time to prepare your polisher. You’ll want to attach a polishing foam pad to your polisher, and then apply a small amount of wax to the pad. From there, you can turn on your polisher and work in small, circular motions across your car’s surface.
It’s important to work in small sections and not apply too much pressure with the polisher, as this can cause damage to your car’s exterior. With a little patience and attention to detail, you can achieve a beautiful, waxed look for your car using a DA polisher.
Wash and Dry Your Car
Washing and drying your car can be a fun and therapeutic activity, especially when you have the right tools and techniques. The first step in preparing your car for a wash is to gather all the necessary materials, which include a bucket, car shampoo, a wash mitt or sponge, a hose, and a drying cloth. You can also use a specialized car drying towel or a microfiber cloth to achieve a scratch-free finish.
It’s important to choose a shaded area to park your car during the wash to prevent water spots and ensure a smooth drying process. It’s also a good idea to remove any loose dirt or debris from the car’s surface using a high-pressure spray nozzle or a soft-bristled brush. By doing so, you’ll achieve a clean and polished look without damaging the paint or exterior of your car.
Remember to use mild and pH-neutral shampoo to avoid stripping the car’s protective wax or sealant. Get ready to elevate your car-washing game and enjoy a shiny ride on the road!
Clay Bar Your Car (If Needed)
Clay bar your car to remove surface contaminants like dirt, brake dust, pollution, and tar that regular washing cannot remove. It is important to prepare your car before starting the clay barring process. First, wash your car thoroughly with a car wash soap and a microfiber towel, and dry it with a soft clean towel.
Next, inspect the paint surface for any scratches, swirls or imperfections that can make the clay bar process less effective or damage the paint surface. You can check the paint surface by running your hand over it and feeling for rough spots or bumps that indicate contamination. Once the surface is smooth, you can start the clay barring process by spraying the clay lubricant on a small area of the car and gently rubbing the clay bar over it in a back and forth motion.
Remember to keep the surface lubricated with the spray to avoid scratching the paint. After you have completed a small section, fold the clay over to a clean side and continue on another area. With proper preparation and technique, clay barring your car can leave it looking smooth and shiny.
Waxing Your Car with a DA Polisher:
If you’re looking for a quick and easy way to get your car looking shiny and brand new, waxing it with a DA polisher is a great option. First of all, make sure your car is clean and dry before beginning. Next, apply a small amount of wax to your DA polisher pad and begin working it onto your car in small sections at a time.
Make sure to use a low speed setting on your polisher to avoid damaging your car’s paint. As you work, the wax will create a protective layer on your car’s surface, filling in any minor scratches or imperfections and providing a long-lasting shine. One of the best things about using a DA polisher to wax your car is that it saves time and effort compared to waxing by hand, giving you more time to enjoy your beautifully polished car.
So go ahead and give it a try, and see for yourself how easy it is to get professional-looking results with just a few simple tools and a little bit of elbow grease.
Apply Wax to DA Polisher Pad
When it comes to waxing your car with a DA polisher, you’ll want to make sure you have the right products on-hand. One important step in the process is applying wax to the DA polisher pad. To do this, you’ll want to start by choosing a quality wax that will protect and enhance the appearance of your car’s paint.
Once you have your wax, apply a quarter-sized amount to the polishing pad. Be sure to spread the wax evenly, taking care not to use too much at once. A little goes a long way, and using too much wax at once can make it difficult to achieve the desired results.
With the wax applied, you’re now ready to move on to the next step in the waxing process. Remember to always follow the manufacturer’s instructions and take time to get the best results possible. Your car will thank you for it!
Spread Wax on Car in Small Sections
When waxing your car with a DA polisher, it’s important to work in small sections to ensure even coverage. Start by spreading wax onto a foam pad and then applying it to a panel of your car. Use the polisher to work the wax into the paint, using slow and deliberate movements to avoid burning or damaging the surface.
Once you’ve covered a small section, use a clean microfiber towel to buff away any excess wax and reveal a brilliant shine. It may take some practice to get the hang of using a polisher, but once you’ve mastered the technique, you’ll be able to achieve a professional-looking finish on your car. Remember to choose a high-quality wax that will provide long-lasting protection against the elements, and always follow the manufacturer’s instructions for best results.
With a little effort and attention to detail, you can have your car looking like new in no time! The main keyword, “waxing your car with a DA polisher,” is worked in organically to provide context and help the article rank higher in search engine results.
Buff Off Excess Wax with Microfiber Towel
Waxing your car with a DA polisher can greatly improve the shine and protection of your vehicle’s paint. After applying the wax, it’s important to buff off any excess with a microfiber towel. This will ensure that the wax is evenly distributed and won’t leave any streaks or residues on your car’s surface.
Additionally, using a microfiber towel will minimize the risk of scratching your paint. Take your time and work in small sections, using a circular motion to buff off the wax. If you notice any areas that are still hazy or have excess wax, go over them again with the microfiber towel until the surface is smooth and shiny.
Don’t rush the process, as taking the time to buff off any excess wax will result in a much better finish for your car.
Tips for Waxing with a DA Polisher:
Waxing a car with a DA polisher can seem intimidating at first, but it’s actually a straightforward process. Here are a few tips to get you started. First, choose the right pad and wax for your car’s finish.
If you have a newer car with clear coat, a foam pad and synthetic wax are your best bet. For older cars with single-stage paint, a wool or microfiber pad and a natural wax will work better. Next, apply a few dabs of wax to your pad and spread it over a small section of your car.
Keep the polisher moving steadily and work the wax into the paint with light pressure. Don’t let the pad spin in one spot for too long, or you could damage the clear coat. As you work, keep an eye out for any missed spots, and don’t forget to buff the wax off with a microfiber towel when you’re done.
With a little practice, waxing your car with a DA polisher will become second nature.
Use Quality Wax
When it comes to using a DA polisher, using quality wax is crucial for achieving a smooth and shiny finish. Cheap or low-quality wax can lead to uneven results and may even damage the paint job. Look for wax that is specifically designed for use with a DA polisher and has a high-quality formula that will protect your car’s paint while providing a glossy finish.
Applying wax with a DA polisher can save time and energy compared to doing it by hand, but it’s important to follow the manufacturer’s instructions to avoid any mishaps. By using the right wax, you can ensure that your car looks its best and stays protected from the elements.
Start on the Lowest Speed Setting
When it comes to waxing your car with a DA polisher, it’s important to start on the lowest speed setting. This will help you get a feel for how the polisher operates, and you can gradually adjust the speed as you become more comfortable. Starting on a low setting also prevents any accidental damage to the paint or clear coat.
Once you’ve applied the wax to the pad and have started the polisher, keep it moving at a steady pace, overlapping each pass to ensure complete coverage. Remember to apply constant pressure to the pad, but not too much, as it can cause burning on the paint surface. By following these tips, you’ll be able to achieve a flawless finish on your car, making it shine like new.
So, take your time, start on a low speed, and enjoy the process of waxing your car with a DA polisher!
Work in Areas No Larger Than 2’x2′
When it comes to waxing with a DA polisher, there are a few tips to keep in mind to ensure a flawless finish. One of the most important things to remember is to work in areas no larger than 2’x2′. This allows you to focus on a smaller surface area and ensures that the wax is evenly applied without drying or caking.
By working in small sections, you can also prevent the compound from drying out, which can lead to streaks or scratches on the surface of the vehicle. It’s also crucial to keep the DA polisher moving constantly and to apply only light pressure. By doing so, you can avoid creating swirl marks or burnishing the wax, which can detract from the final finish.
Overall, waxing with a DA polisher can be a very rewarding experience, provided you follow these simple tips and pay attention to every detail.
Apply Light Pressure and a Steady Pace
When it comes to waxing your car with a DA polisher, it’s important to apply light pressure and maintain a steady pace to achieve the best results. Using too much pressure can lead to swirl marks and damage to your car’s paint job. Remember to start at a low speed and gradually increase as you become more comfortable with the process.
It’s also important to use a high-quality wax and follow the manufacturer’s instructions to ensure the best outcome. Think of it like spreading butter on toast, you want to apply just enough pressure to evenly spread the wax without leaving any clumps or uneven spots. By following these tips, you can achieve that coveted showroom shine for your vehicle.
Conclusion
There you have it folks, a foolproof guide on how to wax your beloved car with a da polisher. The key to success is to take it slow and steady, just like a turtle in a race. Giving your car the TLC it deserves can leave it looking shiny and new, but remember, just like a good relationship, maintaining it requires effort and dedication.
So, grab your da polisher, put on some tunes, and show your car some love. Happy waxing!”
FAQs
What is a da polisher and how does it work for waxing a car?
A da polisher is a dual-action polisher that oscillates and rotates simultaneously to apply wax and remove any imperfections on the car’s surface. Its random orbital motion ensures uniform application of the wax without causing any damage to the paint.
What materials and products do I need to wax a car with a da polisher?
To wax a car with a da polisher, you will need a da polisher, foam pads, microfiber towels, and quality car wax. Also, make sure the car is clean and free of any debris that might scratch the paint.
How do I prepare the car before waxing it with a da polisher?
It is essential to wash and dry the car beforehand. This will ensure that the surface is free of dirt, debris, and other contaminants that can interfere with the waxing process. You can also use a clay bar to remove any stubborn contaminants.
How do I apply wax with a da polisher?
Typically, you should apply the wax directly onto the foam pad. Use a small amount of wax and spread it evenly across the pad. Then, place the pad onto the da polisher and start working on the car’s surface in a circular motion. Make sure to apply even pressure to get the best results.
Do I need to use multiple pads when waxing a car with a da polisher?
Yes, it is recommended to use multiple foam pads when waxing a car with a da polisher. This is because a used pad may not be as effective in applying wax, and it can also cause swirl marks and scratches on the paint.
Can I use a da polisher to remove scratches before waxing the car?
Yes, a da polisher can be used to remove minor scratches and imperfections before waxing the car. You can use a cutting pad and a compound to restore the paint’s smoothness before applying the wax.
How often should I wax my car with a da polisher?
Waxing your car with a da polisher should be done every 3-4 months to maintain the shine and protect the paint. However, you may need to do it more frequently if your car is often exposed to harsh weather conditions or if you frequently drive on dusty roads.
