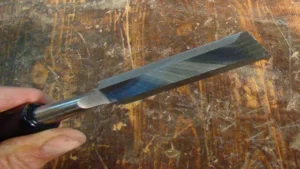
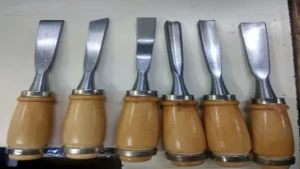
If you’re a woodworker or a DIY enthusiast, you know the importance of having sharp tools in your arsenal. Chisels are one of the most commonly used tools for carving, shaping, and cutting wood. However, sharpening curved chisels can be a daunting task, especially if you’re new to the art of sharpening.
The process may seem intimidating, but fear not, for we’ve got you covered with this comprehensive guide on how to sharpen curved chisels. From tools required to sharpening techniques, we’ll cover all the bases so that you can bring your chisels back to their sharp and reliable state. So grab your sharpening stones, and let’s get started!
Understanding Curved Chisels
Curved chisels are a valuable tool in any woodworker’s kit, but they can be tricky to sharpen. The unique shape and curves of these chisels mean that sharpening them requires a slightly different approach than standard, straight chisels. Start by using a sharpening stone with a fine grit to get the blade as sharp as possible.
Hold the chisel at a slight angle and make sure to follow the curve of the blade when sharpening. Don’t forget to sharpen both sides of the blade equally! Once you’re finished, test the sharpness by carefully shaving thin pieces of wood. With a bit of practice and patience, sharpening curved chisels can be a simple and rewarding task.
Types of Curved Chisels and Their Uses
When it comes to woodworking, having the right set of tools is crucial to achieving precision and accuracy in your craft. One of the most useful tools in any woodworker’s arsenal is the curved chisel. Curved chisels come in a variety of shapes and sizes, designed to perform specific tasks.
Understanding the different types of curved chisels can help you choose the right tool for the job. For example, the spoon chisel is ideal for carving out hollows, while the fishtail chisel can easily reach tight spots and get into corners. The gouge chisel, on the other hand, is perfect for making intricate cuts and designs.
Whatever your woodworking needs may be, a curved chisel can help you achieve the results you want, quickly and efficiently.
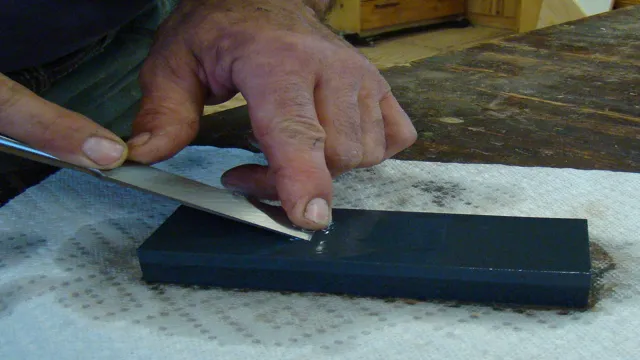
Why Sharpening Curved Chisels is Important
Curved chisels are essential tools for intricate wood carving projects. These tools are designed to provide control and precision when cutting complex contours and shapes in wood. However, due to their unique shape, sharpening curved chisels can be challenging, and many woodworkers tend to neglect their maintenance.
Sharpening curved chisels is crucial as it helps to keep the tool sharp, prevent damage to the cutting edge, and enhance its overall performance. A sharp chisel allows you to make smoother cuts and creates cleaner edges. Moreover, it minimizes the risk of accidental slips and injuries while carving.
To ensure that your curved chisels retain their sharpness, you must use proper sharpening techniques and tools. Using a sharpening jig, a honing guide, and a sharpening stone, you can achieve optimum cutting sharpness, thereby getting the best results out of your curved chisels.
Choosing the Right Sharpening Tools
If you need to sharpen curved chisels, it’s best to start with the right tools. A honing guide is essential when it comes to sharpening any chisel, but especially curved ones. This tool will help you maintain the correct angle and prevent you from accidentally rounding out the edge.
You’ll also want to use a set of diamond or ceramic sharpening stones. Diamond stones are more durable and will last longer, while ceramic stones are more affordable and produce a finer edge. When using the sharpening stones, make sure you’re pressing the chisel down evenly and sanding it in a circular motion to avoid creating any flat spots.
Finally, it’s important to pay attention to the burr that forms on the opposite side of the edge you’re sharpening. Use a fine-grit leather strop to remove this burr and keep your chisels sharp and ready to go.
Sharpening Stone vs. Honing Guide
When it comes to sharpening your knives, deciding between a sharpening stone or honing guide can be confusing. Sharpening stones are a traditional tool that allows you to manually sharpen your knife by running it over the abrasive surface, while a honing guide is a tool that assists in maintaining the angle of your knife as you sharpen it. The right choice of tool will depend on your experience level and the type of knives you have.
If you are an experienced sharpener and have a variety of knives, a sharpening stone may be the best option. It gives you more control over the sharpening process and allows you to adjust the angle based on the type of knife you are sharpening. On the other hand, if you are new to sharpening or have a specific angle requirement for your knives, a honing guide may be more suitable.
It provides consistent results and ensures that you maintain the correct angle throughout the sharpening process. Whichever tool you choose, it’s important to recognize that sharpening takes practice. It’s not something that can be done perfectly on the first try.
Therefore, it’s important to invest in quality tools and take the time to learn how to use them properly to achieve the best results possible. Remember, a sharp knife is a safer knife. With the right tools and techniques, you can extend the life of your knives while also ensuring they are consistently sharp and safe to use.
Grinding vs. Honing
When it comes to sharpening your knives or tools, it’s important to choose the right sharpening tools. Two common methods of sharpening are grinding and honing. Grinding is the process of removing material from the blade to reshape it and create a new, sharp edge.
This is often done with a coarse grinding wheel or belt sander. Honing, on the other hand, doesn’t remove material but instead smooths and sharpens the existing edge. This is typically done with a honing stone or other fine-grit sharpening tool.
It’s important to consider what type of blade or tool you’re sharpening before choosing between grinding and honing. Grinding is great for fixing damaged or chipped edges, while honing is better for maintaining a sharp edge. Using the wrong method can lead to uneven edges, reduced lifespan of the blade or tool, and difficulty maintaining a sharp edge in the future.
Remember, choosing the right sharpening tools is key to keeping your blades and tools in top condition. Whether you opt for grinding or honing, make sure to use a tool that matches the needs of your blade or tool for the best possible results.
Step-by-Step Guide to Sharpening Curved Chisels
Curved chisels are an essential tool for woodworkers who work on concave or convex surfaces. However, over time, the sharpness of curved chisels can become dull, making it difficult to create smooth cuts. Sharpening curved chisels is not as challenging as it may seem, and a little bit of patience and practice can go a long way.
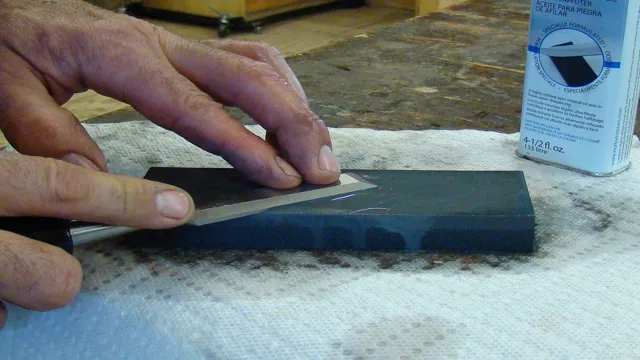
To begin, you will need a sharpening stone or sandpaper, honing oil, and a honing guide. Start by clamping the chisel securely in the honing guide, adjust the angle to match the curve of the blade, and lubricate the sharpening stone or sandpaper with honing oil. Maintain the angle of the chisel as you work it back and forth on the sharpening surface, making sure to use slow and steady strokes until the desired sharpness is achieved.
Remember to test the chisel periodically to make sure it is sharp enough for the job. By following these simple steps, you can keep your curved chisels sharp and ready for your woodworking projects.
Preparing the Chisel for Sharpening
When it comes to sharpening curved chisels, one of the first steps is preparing the chisel itself. This involves removing any rust, dirt, or debris that may be on the blade. Start by wiping the blade clean with a dry or damp cloth.
Next, mix a small amount of baking soda with water to create a paste. Apply the paste to the blade and use a soft-bristled brush to scrub away any rust or debris. Once the blade is clean, it’s important to hone the edges.
This can be done using a sharpening stone or a honing guide. By honing the edges, you’ll ensure that the chisel is able to make clean, precise cuts. With a well-prepared curved chisel, sharpening the blade will be much easier and more effective.
Setting the Honing Angle
When it comes to sharpening curved chisels, the honing angle is a crucial factor in achieving a sharp edge. The first step is to determine the angle of your chisel. Using a protractor or honing gauge, position the tool perpendicular to your work surface and measure the angle.
Once you’ve determined the angle, you can set your sharpening guide to match. If you don’t have a honing guide, you can create one using a wooden block with a groove and a clamp. Once your guide is in place, it’s time to start sharpening! Begin by flattening the back of the chisel on a coarse diamond stone using a figure-eight motion.
Then, move on to sharpening the bevel using the same motion. As you progress through the grits, be sure to maintain the same honing angle. Once you’ve achieved a sharp edge, don’t forget to hone the inside of the curve using a rounded stone or a leather strop.
With patience and practice, you’ll be able to sharpen your curved chisels like a pro!
Sharpening the Cutting Edge
Sharpening curved chisels can be a challenging task for any woodworker, but with the right techniques, it can be a breeze. The first step is to clamp the chisel securely to a flat benchtop or workbench, with the bevel facing up. Next, use a honing guide to position the sharpening stone at the correct angle.
It’s important to use a fine-grit stone to ensure a sharp edge, and to maintain a consistent angle throughout the sharpening process. Slowly move the chisel back and forth over the stone, applying even pressure to the bevel, and checking the edge frequently for any nicks or burrs. Once the edge is sharp and smooth, you can move on to honing the inside curve of the chisel.
Start with a coarse-grit stone and work your way up to a finer grit, using a circular motion to follow the contour of the inside curve. With practice and patience, you can achieve a razor-sharp edge on your curved chisels, ensuring precision cuts and a clean finish on all your woodworking projects.
Honing the Edge for a Razor-Sharp Finish
Sharpening curved chisels can be a challenge, but with the right tools and techniques, you can achieve a razor-sharp finish. The first step is to choose the correct type and grit of sharpening stones. For curved chisels, a round or oval-shaped stone with a medium to fine grit is ideal.
Begin by honing the bevel edge with a coarse grit stone, maintaining a consistent angle of around 25 degrees. After a few passes, switch to a finer grit stone and repeat the process until a burr forms along the edge. To remove the burr, switch to a leather strop charged with polishing compound and make a few passes on each side.
Finally, check the sharpness by gently running the chisel’s edge across your thumbnail. With practice, you can master the art of sharpening curved chisels and transform your woodworking projects.
Tips for Maintaining Curved Chisels
Maintaining curved chisels can be challenging, but it’s essential to keep them sharp to ensure optimal performance. To sharpen curved chisels, start by securing the chisel in a vise. Then, use a sharpening stone to grind the concave edge of the chisel.
Be sure to maintain the curve of the chisel by keeping the angle of the stone consistent with the shape of the blade. It’s important to avoid using excessive force, as this can cause damage to the blade and result in an uneven edge. Once the blade is sharpened, use a honing stone to refine the edge and remove any burrs.
Finally, make sure to keep the chisel clean and dry to prevent rust and maintain its sharpness. By following these tips, you can ensure that your curved chisels stay in top condition and perform at their best.
Storing the Chisels Safely
When it comes to maintaining your curved chisels, proper storage is key. Storing them in a dry, cool place away from direct sunlight and moisture can help prevent rust and prolong their lifespan. Furthermore, it’s crucial to secure them in a dedicated storage container or tool pouch that will protect them from damage during transportation.
To prevent nicks and chips, it’s best to keep them separate from other tools and to use blade covers. When it’s time to use them, properly sharpening them with a honing stone is essential. It’s important to maintain the correct angle and stroke to prevent damage to the blade.
By taking the time to properly care for and store your curved chisels, you’ll be able to ensure that they provide you with years of reliable use.
Regular Maintenance
Maintaining curved chisels can seem like a daunting task at first, but with some regular maintenance, it can be a breeze. Start by ensuring that your chisel is always kept clean and dry. Any moisture left on the tool can cause it to rust or corrode, which can damage the curved blade.
It’s also important to keep the sharpness of the chisel intact, as blunt blades can cause serious damage to the wood. To do this, you may need to hone or sharpen the blade regularly. Using a honing guide can help keep the blade at the correct angle and get a consistent edge every time.
Finally, it’s important to store your curved chisels properly. Keep them in a dry area, away from any sources of moisture, and make sure they are covered or sheathed to protect the blade. With these tips in mind, your curved chisels will remain well-maintained and ready to use for years to come.
Avoiding Common Mistakes
Curved chisels are a powerful tool for woodworking, but they can be tricky to maintain. Some common mistakes that people make when trying to maintain their chisels include not sharpening them frequently enough, using the wrong kind of sharpening stone, and neglecting to clean and oil the blade regularly. To keep your curved chisels in top condition, it’s important to invest in a high-quality sharpening stone specifically designed for curved blades.
Additionally, make sure to sharpen your chisels frequently, as dull blades can cause damage to your workpiece and increase the risk of injury. Finally, remember to clean your chisels after each use and oil them to prevent rusting and maintain optimal performance. By following these simple tips, you can ensure that your curved chisels stay sharp, precise, and effective for years to come.
Conclusion and Final Thoughts
So there you have it, the art of sharpening curved chisels. It may seem like a daunting task, but with the right tools and techniques, you can bring your chisels back to their former glory. Remember to start with a coarse grit and work your way up to a finer grit for a polished finish.
And don’t forget to maintain a consistent angle and pressure to achieve a sharp edge. Happy carving!”
FAQs
What is a curved chisel?
A curved chisel is a woodworking tool with a curved cutting edge that is used to carve out hollow areas or to create domed surfaces.
How do you sharpen curved chisels?
To sharpen a curved chisel, you can use a honing stone or a diamond abrasive sharpening tool. You’ll need to hold the chisel at a consistent angle and make several passes over the sharpening surface until the edge is sharp.
Can you use a sharpening jig for curved chisels?
Yes, you can use a sharpening jig to hold the chisel at a consistent angle while sharpening. However, you’ll need to make sure that the jig is designed to accommodate the curvature of the chisel blade.
What are some common problems with sharpening curved chisels?
One common problem is maintaining a consistent angle while sharpening, especially when working with a curved edge. Another issue is removing enough material to sharpen the edge without altering the overall shape of the chisel.
What type of sharpening stone is best for curved chisels?
A diamond abrasive stone is ideal for sharpening curved chisels because it can remove material quickly and is durable enough to handle frequent use. However, a natural honing stone can also be effective, especially when used with a honing guide.
Should you use oil or water when sharpening curved chisels with a stone?
It depends on the type of stone you’re using. A natural honing stone should be used with honing oil, while a diamond abrasive stone can be used with water or oil.
How often should you sharpen curved chisels?
The frequency of sharpening will depend on how often you use the chisel and the type of wood you’re working with. As a general rule, you should sharpen the chisel whenever the edge begins to dull or lose its sharpness.
