It’s a common scenario – you’ve invested in high-quality chisels, crafted a beautiful woodworking project, but now the edges of your chisels have become blunt. You need to sharpen those chisels to ensure precision, productivity, and safety in your upcoming project. Well, you can use a variety of tools to sharpen a chisel, such as a grinder or honing guide, but they may require proper maintenance and can be expensive.
Fortunately, sharpening chisels with a whetstone is a conventional and cost-effective option. A whetstone is a simple tool made of natural or synthetic abrasive materials, used to sharpen or hone the edges of chisels and other cutting tools. It is easy to use, inexpensive, and provides the best results.
With just a little bit of practice, you can sharpen your chisels like a pro. In this article, we’ll walk you through the process for sharpening your chisels with a whetstone step-by-step, and provide some tips and tricks to ensure you get the best results. Whether you’re an experienced woodworker or a beginner, you’ll find this guide helpful to keep your chisels sharp and ready for action.
So, let’s get started!
What You Need
When it comes to sharpening your chisels with a whetstone, there are a few things you will need to get started. Firstly, you will need a suitable whetstone. It is recommended to use a coarse-grit stone for repairing and reshaping the edge and then a finer-grit stone for honing and sharpening the blade.
You will also need a container of water to keep the stone lubricated and to wash away any debris during the sharpening process. Additionally, you may need a honing guide to ensure a consistent and accurate angle while sharpening. Lastly, you will need a leather strop to remove any burrs and polish the edge for a razor-sharp finish.
Remember, taking the time to properly prepare your equipment will make the sharpening process much easier and more effective.
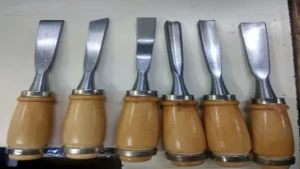
– Chisels
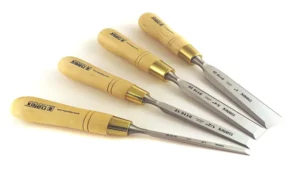
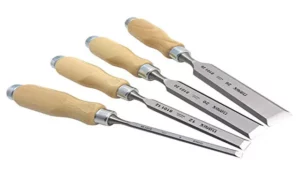
When it comes to woodworking, chisels are essential tools for carving, gouging and shaping wood. If you want to get started in woodworking, you’ll need a set of quality chisels. You don’t want to skimp out on cheap options as they can easily dull or break under pressure.
Look for chisels that are made from high-quality steel with a fine edge. It’s also important to choose chisels with a comfortable handle that feels good in your hand and provides enough grip. Different types of chisels perform different functions, so make sure you choose the right ones for the job.
For example, a beveled edge chisel is excellent for creating straight lines and hollowing out surfaces, while a mortise chisel is perfect for squaring corners and making mortises. Additionally, a specialized carving chisel can be used for intricate designs or decorative elements. Investing in a set of quality chisels will not only make woodworking easier, but it will also help improve the quality of your finished products.
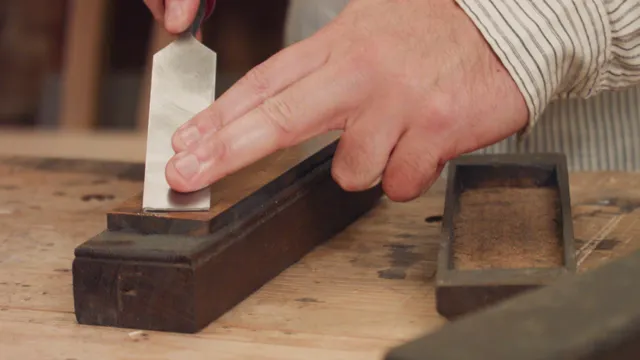
– Whetstone
If you’re looking to sharpen your knives, scissors, or other metal tools, a whetstone is an essential tool to have. A good quality whetstone will give you a razor-sharp edge quickly and easily, but choosing the right one can be confusing. First, consider the grit of your whetstone.
The grit level determines how coarse or fine the stone is and how much material it can remove. Higher grit stones are best for polishing and refining edges, while lower grits are better for removing nicks and reshaping blades. Next, think about the size of your whetstone.
The size you choose will depend on the length of your blades and how much space you have to work with. Finally, make sure you have the right lubricant. Water or oil can be used to keep the stone surface slippery and prevent damage to your blades.
By selecting the right whetstone with the right grit, size, and lubricant, you can ensure that your knives and other tools will be razor-sharp and ready for use whenever you need them!
– Honing Guide (Optional)
If you’re looking to take your sharpening game to the next level, a honing guide may be just the tool you need. However, it’s important to note that a honing guide is completely optional and you can still achieve a sharp edge without one. That being said, a honing guide can provide consistency and accuracy in your sharpening process.
To use a honing guide, you’ll need a sharpening stone, a blade to sharpen, and of course, the guide itself. There are many types of honing guides available on the market, from simple jigs to more complex systems. It’s important to choose one that fits your needs and budget.
Additionally, some honing guides may require additional accessories to work properly, so be sure to do your research before making a purchase. Ultimately, a honing guide can be a helpful addition to your sharpening toolkit, but it’s not necessary to achieve a sharp edge.
Preparing the Whetstone
If you’re wondering how to sharpen chisels with whetstone, the first step is to prepare the whetstone. Before use, soak the whetstone in water for around 10-15 minutes until it is fully saturated. This will prevent the stone from becoming damaged and will help prevent the build-up of residue on your chisels.
Once the whetstone is fully saturated, place it on a stable surface away from children or pets as it can be quite dangerous if not handled correctly. You’ll also need to use a honing guide to keep the chisel at the correct angle and ensure even sharpening. Once the guide is attached, you can begin sharpening your chisels, adjusting the pressure and angle as needed.
After sharpening, rinse your chisels in water and dry them thoroughly before storing them away. Learning how to use a whetstone can take some practice, but it is an essential skill for anyone wanting to keep their chisels sharp and in good working condition.
– Soaking the Whetstone
Preparing your whetstone for sharpening is a crucial step to ensure your blades get the best results. Soaking the whetstone is a necessary step in preparing the surface for sharpening. Before using the stone, it’s recommended to soak it in water for at least 10-15 minutes.
This will not only ensure that the stone stays put while sharpening but will also prevent damage to the blade due to excessive heat created during the sharpening process. Make sure to use room temperature water and not hot water as it may expand the stone, leading to cracks. Once the stone is sufficiently soaked, you can proceed to the next step of sharpening the blades.
It’s a simple yet effective process that can greatly enhance the results of your sharpening efforts.
– Setting Up the Whetstone
Setting up the whetstone for sharpening knives is a straightforward but vital process in achieving a razor-sharp edge. Before beginning, ensure that the whetstone is clean and free from debris. Soak the stone in water for a few minutes to soften it and help the sharpening process.
The recommended soaking time is usually indicated on the packaging. Ensure that the stone is level on a flat surface before starting. It’s essential to have a stable work surface, preferably with a non-slip mat to keep the stone from sliding.
The next step is to choose the appropriate grit size for the blade that you want to sharpen. Coarse grit stones remove the most material and are excellent for damaged or dull blades. Fine grit stones offer a finer finish and are great for refining the edge.
By carefully setting up your whetstone for sharpening, you can ensure better results and an overall smoother experience when honing your blades.
Sharpening the Chisel
Sharpening chisels with a whetstone might seem intimidating at first, but with a little practice, it can quickly become a breeze. The first step is to ensure you have the right type of whetstone. Diamond and water stones are two popular choices.
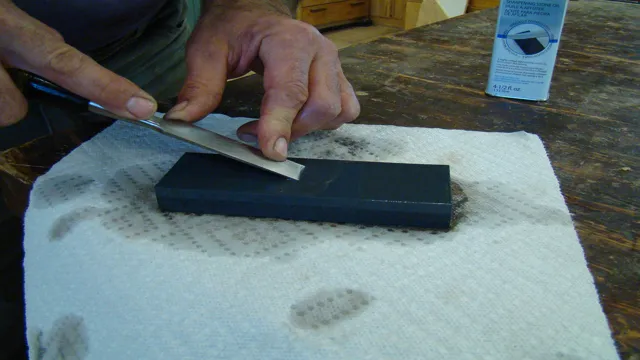
Next, soak your whetstone in water for at least ten minutes. Once it’s ready, hold the chisel at a 20-degree angle and run it along the coarse side of the stone. Use even pressure and keep it steady.
After several passes, flip the chisel over and repeat the process on the other side. Repeat this on the finer side of the stone, and you’re done. When sharpening, use slow and controlled movements, and remember that a well-sharpened chisel will make all the difference in your woodworking projects.
– Securing the Chisel in a Honing Guide
When it comes to sharpening your chisel, you want to make sure you secure it properly in a honing guide. The honing guide prevents the chisel from rocking back and forth, ensuring a consistent angle throughout the sharpening process. To secure the chisel in the honing guide, start by adjusting the guide to the correct angle.
Then, insert the chisel into the guide, making sure it is flush against the back and sides of the guide. Tighten the clamp on the guide to hold the chisel in place. Be sure to check the angle periodically as you sharpen to make sure it doesn’t shift.
With the chisel securely in the honing guide, you can confidently sharpen it to a razor-sharp edge, ready for your next woodworking project. So, take the time to properly secure your chisel in the honing guide, and you’ll see the difference in your woodworking results.
– Finding the Correct Angle
When it comes to sharpening a chisel, finding the correct angle is crucial. Depending on the type of woodwork you’re doing, you’ll want to sharpen your chisel at a different angle. A general rule of thumb is to sharpen the chisel at a 25-degree angle for softer woods and a 30-degree angle for harder woods.
However, this can vary based on personal preference and the project you’re working on. To find the correct angle, start by placing the chisel flat on the sharpening stone and lifting the handle until you achieve your desired angle. Use a honing guide to ensure that you maintain a consistent angle throughout the sharpening process.
Remember to take your time and apply even pressure to the stone to achieve a sharp, precise edge. By mastering the technique of finding the correct angle, you’ll be able to create precise cuts and achieve the perfect finish on your woodwork projects.
– Beginning the Sharpening Process
Sharpening the chisel is an important part of any woodworker’s routine. It’s essential to have a sharp chisel to make precise cuts, reduce tear-out, and save time. To begin the sharpening process, you’ll need a sharpening stone or a honing guide.
We recommend using a honing guide if you’re new to sharpening your tools as it ensures the chisel is at the correct angle. Next, secure the chisel in the honing guide and lubricate the stone with some honing oil. Rub the chisel back and forth on the stone, starting with a coarse grit and working your way up to a fine grit.
Be sure to keep the angle consistent throughout the process, and flip the chisel to sharpen both sides evenly. Once you’re satisfied with the edge, remove any burrs with a leather strop or honing stone. With a little practice and patience, you’ll be able to sharpen your chisels like a pro and improve your woodworking projects.
– Checking Your Progress
Sharpening the chisel is crucial for achieving your goals and taking a step closer towards your desired outcome. As you work on a project, it’s essential to check your progress regularly and make adjustments as necessary to ensure you’re still on track. Just like a carpenter needs to sharpen their chisel multiple times in a single project, they must also check their progress to ensure the project’s success.
Similarly, regularly assessing your progress can help you identify potential roadblocks and steer yourself towards a more successful outcome. By keeping a keen eye on your progress, you can stay motivated and ensure that the hard work you put in pays off in the long run. Sharpening the chisel is all about taking small steps towards a better outcome and regularly monitoring your progress to stay on track.
Finishing Up
Now that you’ve followed the steps on how to sharpen chisels with a whetstone, it’s time to finish up. First, wipe down your chisel to remove any metal filings or water residue. Then, test your chisel to see if it is sharp enough.
You can do this by making a few small cuts on scrap wood and inspecting the results. If your chisel is still dull, repeat the sharpening process on the whetstone until you achieve your desired sharpness. Finally, store your chisel in a safe place, protected from damage and oxidation.
By properly sharpening and storing your chisel, you can extend its lifespan and enjoy better results in your woodworking projects. So, go ahead and put your newly sharpened chisel to the test!
– Stropping the Chisel (Optional)
If you want to take your woodworking game to the next level, consider stropping your chisel. While this step is optional, it can make a significant difference in terms of the final outcome. Stropping involves running the chisel blade over a leather strop with polishing compound to create a razor-sharp edge.
This process can help remove any burrs or nicks that may have been left behind during the sharpening process, resulting in a tool that can effortlessly slice through wood. Plus, stropping can help extend the life of your chisel by keeping the edge sharper for longer periods between sharpenings. So next time you’re working with a chisel, take a few extra moments to strop it – you’ll be surprised at the difference it can make.
– Removing Burrs
Removing burrs is the final step in the process of achieving a smooth and polished finish on your metal parts. Burrs, those small, raised edges and bits of metal left over from cutting or grinding, can not only create an unsightly appearance but also cause safety hazards if left unaddressed. Removing the burrs provides a clean surface that is not only more aesthetically pleasing but can also improve the functionality of your parts.
There are several methods for removing burrs, including filing, sanding, and deburring tools. Each of these methods offers different benefits depending on the size and location of the burrs. Regardless of the method chosen, it is important to handle the parts with care to avoid any damage or scratches.
By taking the time to remove burrs, you can ensure high-quality parts that perform effectively and look great.
– Testing the Sharpness
As we wrap up our discussion on testing the sharpness of your tools, it’s important to remember that the process isn’t always straightforward. While sharper tools are generally more efficient and safer to use, there are many factors that can impact the results of your testing. For example, the type of material you are cutting and the angle of your blade can greatly affect how well your tool performs.
Additionally, it’s important to take breaks and rest your tools to ensure they don’t become overworked or damaged. By following these tips and staying mindful of your tools’ condition, you can continue to work safely and effectively for years to come. So, the next time you start a project, remember to give your tools a quick check to ensure they still have the sharpness you need to get the job done.
Conclusion
Sharpening chisels with a whetstone is like giving your tools a spa day – it’s a refreshing and rejuvenating experience that leaves them looking and working their best. With patience, precision, and a little bit of elbow grease, you can bring even the dullest chisels back to life. So grab your whetstone and get ready to channel your inner lumberjack – it’s time to sharpen those chisels like a pro!”
FAQs
What is a whetstone and how does it differ from other sharpening stones?
Whetstones are sharpening stones used to sharpen blades by removing material from the blade to create a sharper edge. They differ from other sharpening stones in their composition, as they are typically made from natural or synthetic materials such as silicon carbide.
What is the best grit size to use when sharpening chisels with a whetstone?
The best grit size to use when sharpening chisels with a whetstone depends on the condition of the chisel blade. A coarser grit, such as 100 or 200, is best for removing nicks and chips, while a finer grit, such as 1000 or 2000, is better for honing and polishing the edge.
How do I prepare my chisel for sharpening with a whetstone?
Before sharpening your chisel with a whetstone, ensure that it is clean and free of debris. Use a wire brush or sandpaper to remove any rust or corrosion from the blade, and then wipe it down with oil or a cleaning solution.
What angle should I hold my chisel at when sharpening with a whetstone?
The ideal angle to sharpen a chisel with a whetstone is between 20 and 25 degrees. This will provide a sharp edge that can withstand the rigors of woodworking.
How often should I sharpen my chisels with a whetstone?
The frequency with which you need to sharpen your chisels with a whetstone will depend on the amount of use they receive. As a general rule of thumb, you should aim to sharpen your chisels every 2-3 months to maintain their sharpness.
Can I use a whetstone to sharpen other tools besides chisels?
Yes, whetstones can be used to sharpen a variety of bladed tools, including knives, scissors, and even lawnmower blades. Just be sure to adjust the angle and grit size accordingly for each tool.
What’s the proper technique for sharpening chisels with a whetstone?
The proper technique for sharpening chisels with a whetstone involves holding the blade at the correct angle, applying light pressure, and making smooth, consistent strokes across the stone. Be sure to use plenty of water or oil to lubricate the stone and prevent the blade from overheating.
