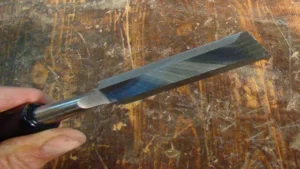
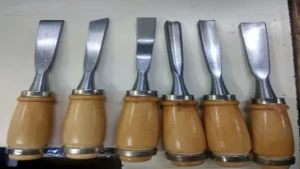
Have you ever tried sharpening a curved wood chisel, only to end up with a dull and unusable tool? It can be a challenging task, but with the right techniques and tools, you can achieve a sharp and precise edge that will make your woodworking projects a breeze. In this step-by-step guide, we will show you how to sharpen curved wood chisels effectively, ensuring that your tools are always ready to use when you need them. Think of it as a recipe to improve your woodworking skills- the proper mix of patience, technique, and the right tools can go a long way to help you achieve perfect results.
So, grab your chisels and let’s get to work!
Understanding Curved Chisels
Curved chisels are tools designed for intricate woodworking and sculpting. They come in different shapes and sizes and are commonly used for carving grooves, curves, and contours in wood. However, sharpening these chisels can be a bit complicated for beginners.
The first step is to identify the angle of the curve and make sure to match it with the correct sharpening stone. Using a honing guide can also help to maintain consistency throughout the sharpening process. It is important to take your time and be patient, as a poorly sharpened chisel can damage the woodwork.
With regular practice and proper technique, you can become a master at sharpening curved wood chisels and achieve beautiful and precise cuts in your work.
What are curved wood chisels and how are they used?
Curved wood chisels are specialized tools for carving and shaping rounded or cylindrical wooden objects. They feature a concave blade that allows woodworkers to create hollows, channels, and curves in their designs. These chisels are often used in traditional woodworking and furniture making, and are particularly useful for shaping chair legs, table skirts, and other rounded elements.
Curved chisels can be used with a mallet or by hand, depending on the complexity and type of work being done. They require a skilled hand and a keen eye for detail, as working with curves takes practice and precision. To maintain the integrity of the wood and ensure a smooth finish, it’s important to keep the blade sharp and to use it with care.
Overall, curved chisels are a great tool for any woodworking enthusiast looking to add versatility and detail to their craft.
Preparing Your Tools
Sharpening curved wood chisels can be a daunting task, but with the right tools and techniques, it can be easily accomplished. Before you begin, ensure that you have a few essential items on hand, including a sharpening stone or sandpaper, honing oil, a leather strop or buffing wheel, and a protective glove. When sharpening curved chisels, it’s important to maintain the shape of the blade.
Start by holding the chisel firmly and dragging it back and forth along the sharpening stone or sandpaper until the edge is sharp. Next, use a leather strop or buffing wheel with honing oil to refine the edge and remove any burrs. With the proper tools and technique, you can maintain the sharpness of your curved chisels for many years to come.
Gathering the necessary sharpening tools
Before you start sharpening your tools, it’s important to gather all the necessary materials. The most important tool you’ll need is a sharpening stone. There are several different types of sharpening stones on the market, including oil stones, water stones, and diamond stones, so it’s important to choose the right one for your needs.
In addition to the stone, you’ll also need honing oil or water, depending on the type of stone you choose. You’ll also need a strop, which is a piece of leather used to refine the edge of the blade after sharpening. Finally, you’ll need a jig or guide to help you maintain the correct angle when sharpening your tools.
Having these tools on hand before you begin will ensure that you’re prepared to sharpen your tools properly and efficiently, without having to interrupt the process to gather missing materials. This will save you both time and frustration in the long run.
Cleaning and de-rusting your chisels
Cleaning and de-rusting your chisels might seem like a daunting task, but it’s an essential step in maintaining the quality of your tools. Before starting any project, it’s crucial to prepare your chisels properly to ensure they perform to their maximum potential. To get started, remove any excess debris or dirt with a stiff-bristled brush or rag.
Next, inspect the chisel’s edges for any signs of rust or corrosion. If you notice any rust, use a rust remover solution to soak your chisel for a few hours. After removing the rust, use a fine-grit sandpaper to smooth out any rough edges.
Alternatively, you can use a wire brush to buff away any remaining rust. Once your chisel has been cleaned and de-rusted, coat the blade with a thin layer of oil to prevent future rusting. With a little bit of elbow grease and the right tools, you can easily prepare your chisels for your next big project.
Setting the Angle
When it comes to sharpening curved wood chisels, setting the angle is crucial for achieving the best results. Start by determining the angle recommended by the manufacturer, usually around 25-30 degrees. This can be checked with a protractor or angle gauge.
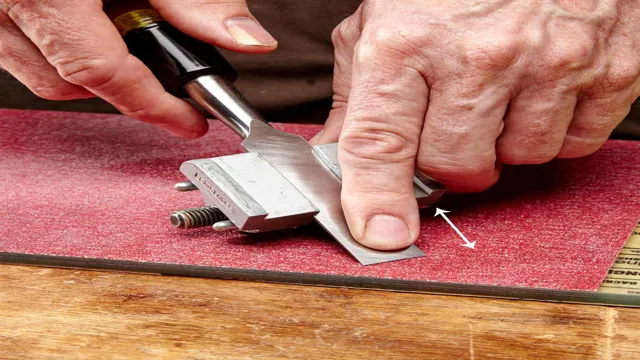
Next, use a honing guide to stabilize the chisel and maintain a consistent angle throughout the sharpening process. It’s important to keep the bevel flat against the sharpening stone and move the chisel in a circular motion to achieve an even grind. Don’t forget to periodically check the progress and adjust the angle as needed to achieve the desired sharpness.
With the right technique and attention to detail, sharpening curved wood chisels can be a satisfying and rewarding task for any woodworker.
Determining the correct angle for your chisels
When it comes to chiseling, getting the angle just right is crucial to achieving the desired result. Setting the correct angle can be daunting for beginners, but it’s actually quite simple. First, consider the type of wood you’ll be working on, as different species require different angles.
Then, set your chisel on a flat surface and take note of where the blade meets the surface. This is your chisel’s current angle. Using a honing guide or protractor, adjust the angle to the desired degree (usually between 25-30 degrees).
It’s important to maintain consistency with this angle throughout the entire sharpening process to ensure an even edge. Don’t forget to regularly check and maintain your chisels to keep them in top condition. With a little practice and attention to detail, you’ll soon be chiseling like a pro.
Using a honing guide to maintain consistency
Using a honing guide can be a game changer when it comes to maintaining consistency in your sharpening. One of the key factors is setting the angle correctly. The honing guide allows you to set the angle precisely, ensuring that it remains consistent throughout the sharpening process.
This is especially important if you are working with a range of different tools, each with their own unique bevel angle. By setting the angle accurately at the outset, you can achieve a razor-sharp edge that is consistent across all of your tools. This will not only improve the quality of your work but also save you time by avoiding the need to re-sharpen due to inconsistency.
It’s worth noting that honing guides are not just for beginners; even experienced sharpeners can benefit from the added accuracy and consistency they provide. So next time you’re sharpening your tools, give a honing guide a try and see the difference it can make.
Sharpening the Bevel
Sharpening curved wood chisels is a skill that takes practice, but with the right technique, you can easily sharpen your chisels in no time. First, you’ll want to make sure that your chisels are clean and free of any rust or debris. Next, secure the chisel in a vise or clamp for better control and safety.
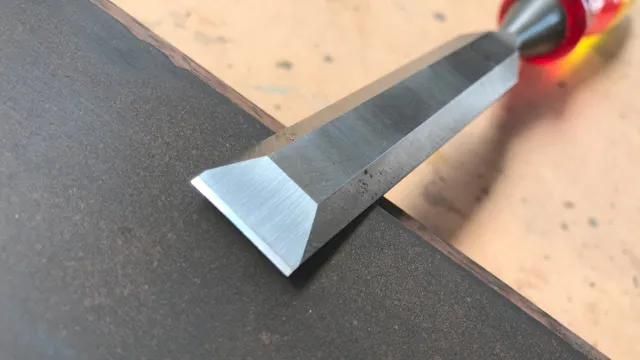
Use a sharpening stone or diamond stone and start at the beveled edge, maintaining a consistent angle throughout the process. Move the chisel in a circular motion to ensure even sharpening and check your progress frequently by running your hand along the bevel. Finally, finish off the process by honing the edge with a leather strop or honing compound to ensure a razor-sharp edge.
With this technique, you’ll be able to easily sharpen your curved wood chisels and revive their cutting capabilities smoothly and efficiently.
Using a coarse grit sharpening stone to reshape the bevel
When it comes to sharpening your knives, one of the most important steps is sharpening the bevel. To do this, you can use a coarse grit sharpening stone that is specifically designed for reshaping the edge of your knife. This process involves removing material from the blade to create a new edge, which can be challenging and requires patience.
The key is to maintain a consistent angle while working to avoid creating uneven spots or burrs. By using a coarse grit stone, you can efficiently remove the necessary material without damaging the blade or creating unnecessary wear and tear. With the right technique and practice, you can bring your knife back to its full cutting potential and ensure that it stays sharp for longer periods of time.
So, if you’re looking to improve the functionality of your knives, sharpening the bevel is a crucial step that you won’t want to skip.
Moving to a finer grit stone for honing
Moving to a finer grit stone for honing is an important step in sharpening the bevel of your blade. This process involves the removal of metal from the edge of your knife to create a sharper edge. A finer grit stone is necessary to complete this step because it will remove less metal with each stroke, making the process more precise and effective.
When you move to a finer grit stone, you will be able to see and feel the progress that you are making. It is essential to take your time and use a light touch when sharpening the bevel with a finer grit stone. This process requires patience and focus, but the end result will be a sharp and precise blade that is ready for any task.
So, if you want to improve the performance of your blade, consider moving to a finer grit stone for honing.
Removing any burrs or rough edges
When it comes to sharpening the bevel of a tool or blade, it’s important to not only remove any burrs or rough edges but also to ensure a consistent bevel angle. This can be achieved through the use of a sharpening stone or tool, such as a honing guide or angle adjuster. Start by identifying the angle at which the bevel was originally cut and replicate that angle as closely as possible during the sharpening process.
Once the angle is set, work on removing any nicks or chips in the blade through careful grinding or honing. Be sure to use even pressure and maintain a consistent angle throughout the process to avoid creating any uneven or lopsided bevels. Once the blade is sharpened, use a deburring tool or sandpaper to remove any remaining burrs or rough edges.
With a little patience and attention to detail, sharpening the bevel of your tool can be a quick and easy way to ensure precise cuts every time.
Honing the Edges
If you’re a woodworker using curved wood chisels, you know how important it is to keep them sharp. Sharpening these chisels can be tricky due to their unique shape, but with some practice and patience, you can learn how to do it effectively. First, you’ll need a sharpening stone with a curved surface.
Next, you’ll want to position the chisel at the same angle it was originally shaped to ensure proper alignment. Start sharpening by moving the chisel in a circular motion over the stone, maintaining consistent pressure. Repeat this on both sides until you’ve honed a smooth edge.
Then, use a leather strop to remove any burrs or rough edges. With this technique, you’ll be able to keep your curved wood chisels sharp and ready for any project.
Using a leather strop to polish and refine the edges
Using a leather strop to hone and refine knife edges is a tried and true method that has been used by craftsmen for generations. Honing a blade edge involves removing any burrs or rough spots that may have been left after sharpening, resulting in a smoother and sharper surface. This is where the leather strop comes in.
It provides a gentle, yet effective way to put the final touches on the blade. The leather surface of the strop works almost like sandpaper, gradually smoothing away any roughness on the edge. It’s important to remember to use the correct angle when honing the blade, usually around 20 degrees, and to apply even pressure while moving the blade over the strop.
The result is a finely polished edge that is sharp enough to make even the most precise cuts with ease. So the next time you sharpen your knife, don’t forget to take the extra step and hone it with a leather strop, and experience the satisfaction of a perfectly honed blade.
Testing sharpness and making final adjustments
To ensure that a knife is fully functional and ready for use, it’s important to hone the edges and test for sharpness. Honing involves refining the blade’s edge by removing any burrs or uneven areas that may have developed during use or sharpening. This can be done with a honing steel, which is essentially a long metal rod that’s used to realign the blade’s edge.
To test for sharpness, you can use a piece of paper or a tomato to see how easily the knife cuts through it. If it’s not sharp enough, you may need to repeat the honing process or even sharpen the knife further. Once the knife is sharp enough, you can make any final adjustments to the blade’s angle or edge to customize it to your specific needs.
With honed and sharpened edges, your knife will be ready to tackle any kitchen task with ease.
Maintaining Your Chisels
When it comes to maintaining your chisels, knowing how to sharpen curved wood chisels can be a game-changer. The first step is to select the right sharpening stone – a fine-grit model will do the job. Next, ensure the chisel is secure in a vice to prevent any mishaps.
Begin sharpening by honing the bevel using circular strokes. Ensure a consistent angle is maintained, and keep stopping to check progress. Finally, move to the back of the curved wood chisel, using the same technique to hone out any nicks or dings.
A well-maintained chisel will last longer and perform better, so follow these steps to get the most from your tools.
Storing chisels properly to prevent damage or dulling
Chisels are valuable woodworking tools, and they require proper care and maintenance to ensure they stay sharp and effective for many years. When storing your chisels, avoid tossing them in a drawer or toolbox where they can get damaged or dull. Instead, keep them in a chisel roll or holder that will protect their edges and keep them organized.
You can also add a bit of oil to each blade before storing them to prevent rust and corrosion. Additionally, avoid banging or dropping your chisels, and always use them with a steady hand to prevent unnecessary damage. By taking these simple steps to maintain your chisels, you can ensure they remain sharp and effective and get the most out of your woodworking projects.
So, don’t overlook the importance of proper chisel maintenance, and show your tools the care and respect they deserve.
Regularly inspecting and maintaining sharpness
Maintaining Your Chisels: Regularly inspecting and maintaining sharpness is essential for keeping your chisels in good working condition. Dull chisels not only make your work more difficult, but they can also cause damage to your projects if they slip or catch. To maintain the sharpness of your chisels, you should use a honing guide and sharpening stones.
Start with a coarse stone to remove any nicks or chips, then move on to a finer stone to hone the edge. It’s important to keep the bevel flat against the stone and maintain the proper angle for your specific chisels. Additionally, it’s helpful to strop the edge with a leather or honing compound to remove any small burrs and achieve an extra sharp edge.
With proper maintenance, your chisels will serve you well for many years.
Conclusion
Sharpening curved wood chisels may seem like a daunting task, but with the right technique and tools, it can be as satisfying as carving a flawless masterpiece. Remember to take your time, use consistent pressure, and always follow the curvature of the blade. And just like carving, sharpening is an art form that requires practice and patience, so keep at it, and soon enough you’ll have the sharpest curved wood chisels in all the land.
Happy carving!”
FAQs
What are curved wood chisels used for?
Curved wood chisels are used for carving and sculpting intricate designs into wood.
Can curved wood chisels be sharpened like normal flat chisels?
No, curved wood chisels require a specific sharpening technique that takes into account the shape of the curve.
What equipment do I need to sharpen curved wood chisels?
To sharpen curved wood chisels, you will need a sharpening stone, honing compound, and a honing guide.
How often should I sharpen my curved wood chisels?
It depends on how often you use them and how dull they become. Generally, it’s a good idea to sharpen them every few months or when you notice a decrease in performance.
Can I use an electric sharpener for curved wood chisels?
No, it’s not recommended to use an electric sharpener for curved wood chisels as it can damage the delicate and complex shape of the blade.
Should I use a honing guide when sharpening my curved wood chisel?
Yes, a honing guide will help ensure that you maintain the correct angle while sharpening your curved wood chisel.
What is the best technique for sharpening curved wood chisels?
The best technique is to use a circular motion while sharpening the curve of the blade. You should also use honing compound to achieve a razor-sharp edge.
