If you’re a homeowner who has noticed a sudden spike in their water bill or have noticed areas of your lawn looking dry, your sprinkler system might have a leak. Sprinkler system leaks can be tricky, and if not detected and fixed quickly, they can cause significant water damage to your home and yard. In this blog post, we will provide you with tips on how to find a leak in your sprinkler system and give you the knowledge to fix it.
Think of it like finding a needle in a haystack, but with our guidance, you’ll be able to locate that leak and get your sprinkler system working perfectly again. So, let’s get started!
Step 1: Turn Off the Water Supply
So you have noticed that your sprinkler system is showing signs of a leak, but where do you even begin to find the source of it all? The first step you should always take before doing anything else is to turn off the water supply. This will prevent any further water damage and give you a chance to assess the situation without making it worse. Once the water supply is shut off, take a look around the system and see if you notice any visible signs of damage or leakage.
This can include broken or cracked sprinkler heads, pipes with visible holes or cracks, or even a wet spot on the ground that may indicate a hidden leak. By doing this simple step of turning off the water, you are taking the first important step in finding the leak and preventing any further damage to your sprinkler system.
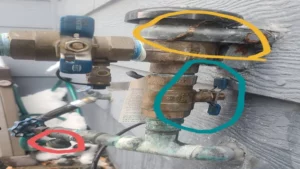
Locate the main valve and turn off the water supply to your sprinkler system.
When it comes to turning off the water supply to your sprinkler system, the first step is locating the main valve. This valve is typically found near your water meter or in your basement, garage, or crawl space. Once you’ve located the valve, turn the handle to shut off the water flow.
Why is this important? Well, if you’re planning on repairing or replacing your sprinkler system, shutting off the water supply is crucial to avoid any potential flooding or water damage. It’s like turning off the faucet when you’re not using it – you don’t want to waste water or risk causing a mess. So, take the time to find your main valve and turn off the water supply before proceeding with any sprinkler system maintenance.
It’s a simple step that can save you a lot of headache (and water) in the long run.
Step 2: Observe the System
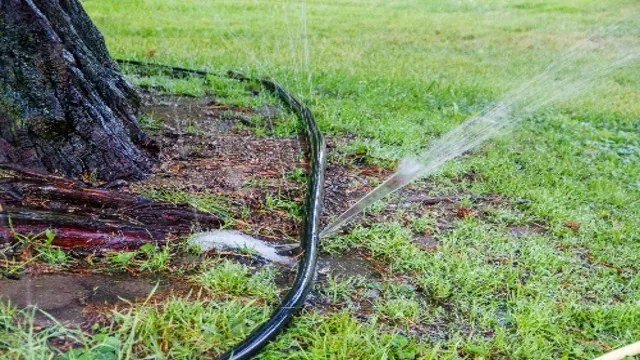
When it comes to finding a leak in your sprinkler system, observation is key. First, turn on the system and observe the water flow in each zone. Look for any areas where the water pressure seems weaker than in other parts of the lawn.
Note the location of any wet or soggy spots in the yard, as these could indicate a leak in the underground pipes. Additionally, walk around the sprinkler heads and check for any signs of damage or dirt buildup, which could also be a sign of a leak. It’s important to be thorough in your observations and take note of anything that seems out of the ordinary.
Once you have a clear idea of where the problem areas might be, you can move on to the next step in fixing the leak.
Check the ground around each sprinkler head for any signs of water.
One of the essential steps in maintaining your sprinkler system is observing it regularly. This doesn’t require any technical expertise, but it does require time and attention. During your observation, one of the things you’ll want to look out for is any water around the sprinkler heads.
If there’s water around the sprinkler head, it means there’s something wrong with the system, and it’s not working efficiently. The cause can be due to various factors, such as a broken or clogged sprinkler head, which can decrease the water pressure to other heads. Furthermore, water around a sprinkler head could be an indication of damaged pipes or a poorly done installation in the past.
To properly carry out your observation, walk around the sprinkler system, looking out for any leaks or visible damage. Check the ground around each sprinkler head for any signs of water. If you notice water, turn the system off and examine the issue to fix it promptly.
Regularly observing your sprinkler system can help you catch minor issues before they become major and costly problems. It can also keep your lawn or landscape looking beautiful and healthy. Therefore, make sure to dedicate time to maintain your sprinkler system, even if it’s just observing it.
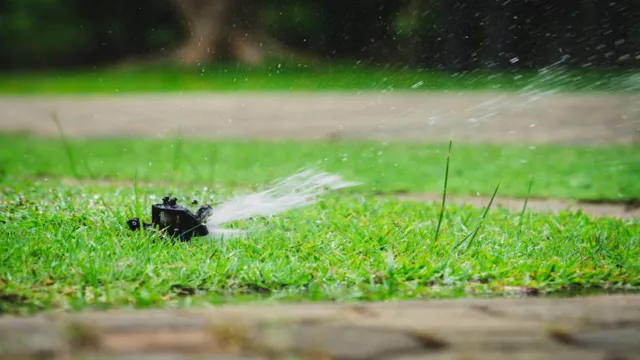
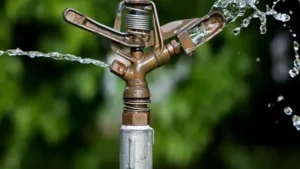
Look for any visible leaks or water shooting out of the sprinkler.
When it comes to checking your sprinkler system, observing it is crucial. This involves a careful scan of the entire system. Look for any visible leaks or water shooting out of the sprinkler.
This could be an indication of a broken sprinkler head or damaged pipe. Don’t forget to check if there is any water pooling around the lawn, which may suggest that the sprinklers are overwatering the area. Keep an eye out for any dry spots too, as this could mean that a specific sprinkler head isn’t working correctly or is blocked.
Observing the sprinkler system not only helps you to identify the problem areas, but it also ensures the system’s efficiency, which leads to a well-maintained lawn. Monitoring the sprinkler system’s performance is crucial because it helps save water and ensures that your lawn is getting the right amount of water without overuse. So, take some time to inspect and observe your sprinkler system, and if you notice any issues, don’t hesitate to call a professional to have it repaired.
Step 3: Pressurize the System
One of the crucial steps in finding a leak in your sprinkler system is pressurizing the system. This will help you identify any weak spots in your system that may be causing the leak. Start by closing the backflow prevention valve and gradually opening the main water valve.
You should see the pressure gauge on your system start to rise as you do this. Once the gauge reads approximately the right pressure level, you can then check for any leaks in the system. This may take a bit of time, but it will allow you to identify where the leak is coming from and take the necessary steps to address it.
Don’t overlook this step as it is an essential part of repairing your sprinkler system and ensuring that it works well for years to come.
Cap all of the sprinkler heads, except for one.
Now that all the sprinkler heads have been capped except for one, it’s time to pressurize the system. This step is critical in ensuring that the sprinkler system is working correctly and is ready to be tested for any potential leaks or malfunctions. To pressurize the system, you’ll need to turn on the water supply, allowing water to flow into the system until it reaches the open sprinkler head.
As water flows through the system, you should be able to hear it rushing through the pipes, indicating that the system is filling up. Once the water has reached the open sprinkler head, you need to ensure that it is spraying in the correct direction and pattern as designed. Then, turn off the water supply and wait a few minutes for the pressure to equalize throughout the system.
This step is critical in detecting any leaks or other potential problems that need to be fixed before the sprinkler system is ready for use. By following this step, you can ensure that your sprinkler system is fully operational and ready to provide reliable support for all of your watering needs!
Turn on the water supply and observe the single sprinkler head.
When it comes to installing a sprinkler system, one of the most important steps is pressurizing the system. This involves turning on the water supply and observing the single sprinkler head to ensure that water is flowing through the pipes at the correct pressure. It may seem like a simple task, but it’s important to get it right to ensure that your sprinkler system is working properly.
If the pressure is too low, the sprinkler heads may not be able to distribute the water evenly, resulting in dry spots on your lawn. On the other hand, if the pressure is too high, the sprinkler heads may become damaged or break off, causing water to spray in all directions. So take the time to test the pressure and make adjustments as needed to ensure that your sprinkler system is working at its best.
With proper pressurization, you can keep your lawn healthy and green all season long.
Repeat this process for each sprinkler head until you find the one that is leaking.
To find the leaking sprinkler head, the next step to take is to pressurize the system. Start by closing all the control valves, then open the main valve to pressurize the entire system. Slowly open the first control valve and let the water run through until it comes out from the sprinkler heads.
This process ensures that every sprinkler head is pressurized and inspected for leaks. Look for signs of water or soil disturbance around each sprinkler head. If you see any, it might be an indication that the sprinkler head is leaking.
Repeat the process for each sprinkler head until you find the one that is leaking. It’s important to address the problem as soon as possible to prevent any further damage to the system. Fixing leaks not only saves water but also saves you money on your water bill.
By identifying and fixing the leaking sprinkler head, your irrigation system will work better and be more efficient. Don’t let a small problem become a big one. Keep your system in top shape by performing regular maintenance and inspections.
Step 4: Replace or Repair
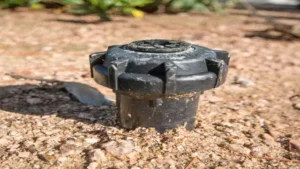
Once you’ve identified the location of the leak in your sprinkler system, it’s time to either replace or repair the affected part. If the leak is in a cracked or broken sprinkler head, it’s likely best to replace the entire unit. This ensures that the new head is fully functional and won’t start leaking again due to age or wear and tear.
However, if the leak is coming from a corroded joint or valve, it may be possible to simply repair the damaged area. This could involve replacing a section of pipe, tightening loose connections, or applying sealant to the affected area. Whatever the case may be, be sure to use high-quality parts and materials to ensure a long-lasting repair.
With proper maintenance, your sprinkler system should be in top condition and working efficiently for years to come.
Once you locate the leak, you will need to replace or repair the affected area.
Once you have located the leak in your plumbing system, it’s time to roll up your sleeves and tackle the necessary repairs. Depending on the extent of the damage, you may be able to fix the leak by simply replacing a pipe or tightening a loose connection. If the leak is more severe, however, you may need to remove a section of the damaged pipe and install a new one.
It’s important to use the right tools and materials for the job to ensure that the repair is done correctly and without any future leaks. Replacing or repairing a leak can seem like a daunting task, but it’s important to address the problem as soon as possible to prevent any further damage to your home. Additionally, a leak can waste a significant amount of water, which can lead to higher utility bills.
By taking the time to fix the issue, you’ll not only save money in the long run, but you’ll also ensure that your plumbing system is functioning properly. When replacing or repairing a leak, it’s important to take safety precautions to protect yourself from any potential hazards. Always wear gloves and safety glasses to protect your hands and eyes from any debris while working on the plumbing system.
Additionally, be sure to turn off the water supply before beginning any repairs to avoid any potential flooding. In conclusion, replacing or repairing a leak in your plumbing system can seem daunting, but it’s an essential task to keep your home in good shape. By using the right materials and safety precautions, you can quickly and efficiently resolve the issue and get back to enjoying worry-free plumbing.
Don’t let a pesky leak go unaddressed – take action today and fix the problem for good.
Preventing Future Leaks
If you’re experiencing water damage in your lawn or garden, it’s likely that your sprinkler system has a leak. It’s important to find and fix leaks to not only prevent further water damage but also save water and lower your utility bill. The first step is to turn off your sprinkler system and check your water meter.
If the meter is showing water usage, you likely have a leak. From there, check all visible sprinkler heads and pipes for any signs of damage or wear and tear. You may even need to dig up your lawn or garden to check the underground pipes.
Alternatively, you can hire a professional to perform a leak detection test using specialized equipment. Once you’ve found the leak, it’s important to fix it as soon as possible to prevent any further water damage and save water. With these steps, you can prevent future leaks and keep your lawn and garden healthy without wasting water.
Regularly check your system for leaks and signs of wear and tear.
Regularly checking your heating or cooling system for leaks and signs of wear and tear is essential in preventing future problems. A small leak can lead to major issues down the line, resulting in costly repairs or even a complete system replacement. It’s important to conduct routine maintenance checks, especially before the heating or cooling season begins.
Inspect the pipes and connections for any signs of moisture or rust, and make sure the seals are tight. Don’t forget to also visually check the actual unit and ensure it is free of any damage, cracks, or corrosion. It’s prudent to call in a professional HVAC technician to do a thorough checkup, as they have the expertise to catch any potential issues before they escalate.
By staying on top of regular maintenance and catching any issues early, you’ll ensure your system runs efficiently and effectively for many years to come.
Consider installing a shut-off valve to make it easier to turn off the water supply in case of future leaks.
If you’ve experienced a leak in your home, you understand the importance of preventing future leaks. One way to do this is to consider installing a shut-off valve. This valve can make it much easier to quickly turn off the water supply in case of any future leaks or plumbing emergencies.
It’s a small investment that can save you time, money, and stress in the long run. No one wants to deal with water damage and the potential loss of belongings due to a leak, and a shut-off valve can help prevent that. Think of it like a safety net for your home’s plumbing system.
Plus, it’s a relatively simple installation process that can be completed by a professional plumber. So don’t wait until it’s too late — consider adding a shut-off valve to your home’s plumbing system today.
Conclusion
In conclusion, finding a leak in your sprinkler system may seem like a daunting task, but with some detective work and a bit of patience, you can do it! Remember to start with the obvious signs like soggy patches and non-functioning sprinkler heads, then move on to more subtle clues like a drop in water pressure. And if all else fails, just follow your nose – the scent of damp earth and freshly cut grass can lead even the most clueless DIYer straight to the source of the problem. So grab your Sherlock Holmes hat, put on your best detective voice, and get ready to solve the mystery of the missing water.
Happy hunting!”
By following these steps, you can easily find and fix any leaks in your sprinkler system, ensuring it continues to operate efficiently.
To prevent future leaks in your sprinkler system, it’s important to regularly perform routine maintenance checks. This includes inspecting the system for any signs of wear or damage, such as cracked pipes or broken sprinkler heads, and replacing them as necessary. It’s also important to adjust the sprinkler heads to ensure they’re properly aligned and not spraying water onto sidewalks or other non-targeted areas.
Another key factor is monitoring the water pressure to ensure it’s not too high, as this can cause excess wear and tear on the system and increase the risk of leaks. Finally, make sure to properly winterize your system before the colder months to prevent any damage or leaks caused by freezing temperatures. By following these steps, you can help ensure that your sprinkler system operates efficiently and effectively for years to come.
FAQs
What are signs that indicate a leak in a sprinkler system?
Signs of a potential leak in a sprinkler system include low water pressure, standing water in certain areas, unexplained water usage on your water bill, and a noticeably wet lawn.
How can I locate a leak in my sprinkler system?
A leak in a sprinkler system can be located by checking for wet spots in the lawn, listening for the sound of running water, and utilizing a leak detection device or meter.
Can I fix a leak in my sprinkler system myself?
If you have experience with sprinkler systems, you may be able to fix a leak yourself. However, for most people, it is best to hire a professional to prevent further damage to the system.
How much does it typically cost to repair a leak in a sprinkler system?
The cost to repair a leak in a sprinkler system depends on the severity of the leak and any additional damage done to the system. In general, you can expect to pay between $100 and $500 for repairs.
How often should I inspect my sprinkler system for leaks?
It is recommended to inspect your sprinkler system for leaks at least once per year, preferably before the start of the watering season.
What are some preventative measures I can take to avoid leaks in my sprinkler system?
Preventative measures to avoid leaks in your sprinkler system include regular maintenance and inspection, adjusting your watering schedule depending on weather conditions, and avoiding mowing over sprinkler heads.
Can a leak in a sprinkler system waste a lot of water?
Yes, a leak in a sprinkler system can waste a considerable amount of water if left undetected and unrepaired. It is important to address leaks as soon as possible to prevent waste and damage to the system.
