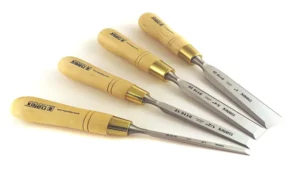
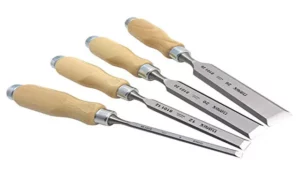
If you’re a woodworker, you know how important it is to have sharp tools. And when it comes to chisels, an essential tool in any woodworker’s arsenal, keeping them sharp is crucial to achieving beautiful, precise cuts. But how do you sharpen your chisels? Don’t worry, it’s not as complicated as you might think! In this blog, we’ll walk you through the necessary steps to take to get your chisels back in tip-top shape.
From the essential tools and equipment you’ll need to the techniques you should use, we’ve got you covered. So grab your chisels and let’s get started!
Tools You Need
When it comes to sharpening chisels, having the right tools is crucial. First and foremost, you’ll need a sharpening stone or set of stones with different grits. These stones will allow you to gradually sharpen and polish the edge of your chisel until it’s razor sharp.
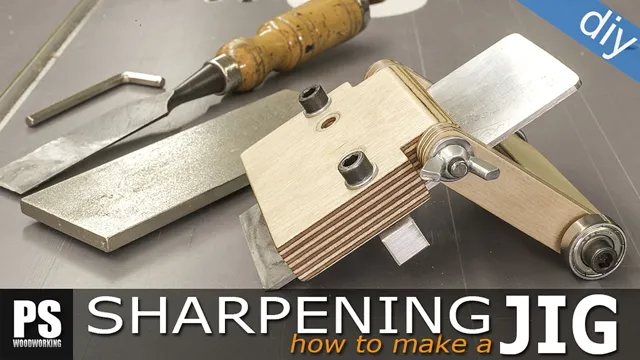
You’ll also need a honing guide, which will help keep your chisel at the correct angle while you sharpen it. A leather strop is another essential tool that will enable you to refine the edge of your chisel after it’s been sharpened. Optionally, you can use a diamond plate to flatten the back of your chisel before sharpening.
With the proper tools in place, you’ll be able to achieve a sharp, precise edge on your chisels that will allow you to work with confidence.
1. Honing Guide
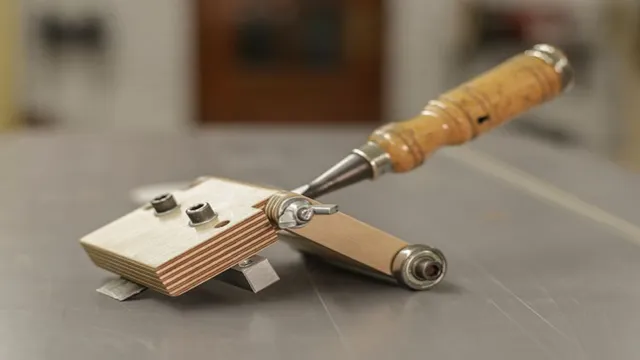
When it comes to sharpening your tools, one of the most important tools you’ll need is a honing guide. This simple tool helps you hold your blade at the correct angle, allowing you to sharpen it more precisely and efficiently. A honing guide can be especially helpful if you’re new to sharpening, or if you’re working with a blade that requires a very specific angle to achieve the best results.
There are many different kinds of honing guides available, from simple jigs that hold your blade at a fixed angle, to more advanced guides that allow you to adjust the angle as needed. No matter what type of honing guide you choose, it’s important to take the time to learn how to use it properly. With a little practice, you’ll be able to sharpen your tools like a pro!
2. Sharpening Stone or Sandpaper
If you want to keep your tools in top condition, you’ll need a sharpening stone or sandpaper. Sharpening stones come in a variety of materials such as natural Arkansas stones, silicone carbide, and aluminum oxide. The stone is held in a non-slip base and can be used to sharpen knives, scissors, chisels, and planes.
Sandpaper, on the other hand, is cheap and more accessible, but can be slightly tricky to use correctly. You’ll need a flat surface to place the sandpaper on and may need to use lubricant to prevent the surface from getting damaged. Using the correct grit is essential, as a higher grit means a finer finish, and a lower grit will remove more material.
Both methods have their pros and cons, but it mainly comes down to personal preference and the tools you need to sharpen. By using either technique regularly, you can keep your tools sharp, ensuring they are always in top condition when you need them.
3. Lubricant or Honing Oil
When it comes to honing or sharpening tools, one essential item you need is a lubricant or honing oil. This type of oil is specifically designed to reduce friction and heat during the honing process, which helps prolong the life of your tools and create a smoother and sharper edge. Honing oils come in various types and grades, from mineral oil to synthetic oil, and each one has its own set of benefits and drawbacks.
Some oils are formulated for specific types of tools, while others are suitable for general use. To find the best honing oil for your needs, it’s essential to research and consider factors such as viscosity, lubricity, and compatibility with different materials. A good quality honing oil can make all the difference in the outcome of your honed tools, so don’t skimp on this important item.
4. Flat Surface
When it comes to achieving a flat surface, you’ll need a few essential tools. The first and most important tool is a level since it enables you to determine whether the surface is flat or not. A rotary sander is another tool that can help you smooth out any rough spots, bumps, or ridges.
You’ll also need sandpaper to smooth out small rough patches. To help you get rid of imperfections, an accelerating hand saw will work wonders in making sure you have an even surface. Furthermore, a scraper can be utilized to remove any paint, awkward bumps, or adhesive materials that can be particularly troublesome.
In addition, a chisel can be helpful for eradicating any tiny pieces that may still be stuck to the surface. Finally, to keep dust and debris under control, it is recommended to wear a dust mask and have a shop vacuum nearby. By using these tools and taking the necessary precautions, you’ll be well on your way to achieving a smooth, level surface that is perfect for any application.
Steps to Sharpen a Chisel
If you’re wondering what you need to sharpen chisels, the answer might surprise you. Contrary to popular belief, you don’t need a fancy machine or expensive tools to get the job done. All you really need is a sharpening stone, some lubricant, and a bit of patience.
To get started, simply wet your sharpening stone with some oil or water and then place your chisel on top at a 25-degree angle. Gently move the chisel back and forth across the stone, being careful to maintain the angle. After a few minutes, flip the chisel over and repeat the process on the other side.
Once you feel a sharp edge starting to form, run the chisel over a honing stone or leather strop to polish and refine the edge. With a bit of practice, you’ll be able to sharpen chisels like a pro!
1. Preparing the Chisel
Sharpen a Chisel Before sharpening a chisel, it’s essential to prepare it first. Start by removing any dirt or rust from the blade and handle with a wire brush. Next, soak the chisel blade in a bucket of water for at least 10 minutes to soften the old edge.
Remove the blade from the water and clamp it in a vice or hold it with a bench hook to secure it in place while sharpening. Now you’re ready to begin sharpening the chisel. Start with a coarse-grit sharpening stone placed on a flat surface such as a workbench.
Hold the blade at the correct angle and apply pressure as you move the chisel blade back and forth over the stone. After a few strokes, switch to a finer-grit stone and repeat the process until you reach the desired sharpness. It’s important to maintain the same angle throughout the sharpening process to ensure the chisel sharpens evenly across the edge.
Remember to check the sharpness regularly by slicing through a sheet of paper. When you reach the desired sharpness, remove any burrs from the blade with a honing stone. Once you’ve completed these steps, your chisel should be ready for use.
With a little practice and patience, you’ll be able to sharpen your chisels like a pro in no time.
2. Setting the Angle Using the Honing Guide
When it comes to sharpening a chisel, one of the most important steps is setting the angle using a honing guide. This ensures that your chisel has a consistent and precise edge that will make your woodworking tasks a breeze. But how do you go about setting the angle? Firstly, make sure your honing guide is tightly secured to your chisel blade, and ensure that the angle you want to achieve is compatible with your honing guide.
Then, set the honing guide to the correct angle by adjusting the guide to the angle specified for your chisel. This is typically around 25-30 degrees for most chisels. Next, move the blade back and forth on the sharpening stone, keeping the angle consistent with the honing guide.
This will create a sharp edge on your chisel that will make woodworking a joy. Remember to take your time and be patient, as rushed sharpening can lead to uneven angles and inconsistent edges. With a bit of practice, setting the angle using a honing guide will become second nature, and your chisels will be sharper than ever before!
3. Sharpening the Chisel with a Sharpening Stone or Sandpaper
To sharpen a chisel, a sharpening stone or sandpaper can be used. The first step is to secure the chisel in a vice or clamp to prevent injury and ensure a stable surface. Next, identify the angle of the bevel on the chisel blade by using a sharpening guide or simply eyeballing it.
A bevel angle of 25-30 degrees is ideal for most chisels. Using a coarse grit on the sharpening stone or sandpaper, ensure the bevel is flat against the sharpening surface. Begin by sharpening the chisel starting from the heel, moving towards the tip of the blade, with smooth and consistent strokes.
Ensure that the angle of the blade is maintained throughout the sharpening. Once the blade’s edge has been shaped, it’s time to refine and polish the bevel using a finer grit on the sharpening stone or sandpaper. Again, start from the heel and work your way towards the blade’s tip.
It’s essential to keep the blade at the same angle as before and be patient during this process as it will take several strokes to achieve a sharp edge. Finally, hone the blade by using a leather strop with honing compound to remove any burrs and polish the blade. By following these steps and using the right tools, sharpening a chisel can be done with ease and precision.
Remember to maintain your tools and sharpen them regularly to ensure optimum performance.
4. Finishing the Chisel Edge
The final step in sharpening a chisel is to finish the chisel edge. This step is all about honing the edge to perfection. Using a honing guide, place the chisel in the guide and then sharpen the bevel using a fine-grit wet stone.
Start with the flattest side of the chisel and work your way towards the bevel. Keep the angle consistent throughout the process to ensure that the edge is perfectly straight. Once the bevel is sharp, flip the chisel over and work on the backside, using the same technique.
The goal here is to remove any burrs that may have formed during the sharpening process. Finally, strop the chisel blade, using leather or a similar material, to polish the edge even further. With this final step, you’ll have a chisel that’s razor-sharp and ready to tackle any woodworking project.
Tips for Maintaining a Sharp Chisel
Maintaining a sharp chisel is crucial for efficient and high-quality woodworking. So, what do you need to sharpen chisels? Firstly, invest in a good quality sharpening stone. While there are various types of stones available such as diamond, oil, water, or ceramic, ensure that the grit size is compatible with the type of chisel you have.
Secondly, get a honing guide to help you maintain the correct angle while sharpening. Without a guide, it’s difficult to achieve the necessary precision. Lastly, ensure that you have a good quality strop, or leather strap, to remove the burrs from the chisel’s edge.
By routinely sharpening your chisels and tools, you’ll be saving yourself time and effort in the long run, ensuring your tools always perform at their best.
1. Store the Chisel Properly
Maintaining the sharpness of a chisel can be a challenge, but with some simple tips, it’s possible to keep your tool in top condition. First and foremost, it’s essential to store your chisel properly. Leaving it in a damp environment can cause rust to form, which can damage the blade.
To avoid this, keep your chisel in a dry place, such as a toolbox or drawer with a dehumidifier. Another way to maintain the sharpness of your chisel is by using a honing stone. This helps to remove any burrs or nicks that may develop on the blade over time.
By honing your chisel regularly, you can keep it in prime condition and ensure that it always performs at its best. Remember, a well-maintained chisel is an essential tool for any woodworker and can last for years if you take care of it properly.
2. Regularly Hone the Chisel
Maintaining a sharp chisel is crucial for any woodworker, and it requires regular honing. One tip for keeping your chisel sharp is to invest in a high-quality honing stone. It’s essential to choose a stone with a grit that matches the level of dullness on your tool.
Start with a coarser grit and gradually move to a finer one. Remember to clean your honing stone after each use and store it safely. Another helpful technique is to sharpen the chisel at the correct angle.
Hold the blade at a steady angle and make sure it remains consistent throughout the sharpening process. Lastly, don’t forget to use honing oil to prevent rust and keep the blade lubricated. Regular honing with these tips will ensure your chisel stays sharp and ready for any woodworking project.
3. Avoid Using the Chisel on Hard Materials
When it comes to maintaining a sharp chisel, there are a few things you can do to ensure it stays in top condition. One of the most important tips is to avoid using the chisel on hard materials. While chisels are designed to be durable and strong, using them on materials that are too hard can cause the blade to chip or become dull.
Instead, it’s best to stick to softer materials that won’t damage the blade. Additionally, it’s important to keep the chisel blade clean and free from debris. This can be done by wiping it down after each use and storing it in a location that is dry and free from moisture.
By following these tips, you can ensure that your chisel stays sharp and effective for years to come.
4. Keep the Chisel Clean and Dry
Maintaining a sharp chisel is crucial for woodworking purposes. One of the essential tips to keep your chisel sharp is to ensure it is always clean and dry. Any dirt or debris left on the blade can make it blunt over time.
Therefore, make it a habit of wiping your chisel after every use. You can use a dry cloth or paper towel to wipe away any debris or moisture. It’s important to keep both the blade and the handle of your chisel dry to prevent the formation of rust.
Additionally, you should use a lubricant to keep the blade from sticking to the workpiece, but ensure to wipe off any excess lubricant before storage. By keeping your chisel clean and dry, you’ll be able to maintain its sharpness and longevity. So, if you are looking to produce top-quality woodworking projects, keeping your chisel clean and dry should be part of your maintenance routine.
Conclusion
In the end, sharpening chisels is all about finding the perfect balance between skill and the right tools. Just like any art form, it takes practice and patience to achieve the desired outcome. So, whether you’re a seasoned woodworker or a novice DIY enthusiast, make sure you have a good sharpening stone, some honing oil, and a steady hand.
With these tools in your arsenal, you’ll be able to achieve edges so sharp you could shave with them – okay maybe not, but you get the point. Happy chiseling!”
FAQs
What type of stone should I use to sharpen chisels?
You should use either a diamond stone or a water stone to sharpen chisels.
Do I need a sharpening guide to sharpen chisels?
While it is not absolutely necessary, using a sharpening guide can help ensure consistent angles and better results when sharpening chisels.
How often should I sharpen my chisels?
It depends on how often you use them, but generally chisels should be sharpened every few weeks to maintain their sharpness.
How do I know when my chisels need to be sharpened?
You can tell when your chisels need to be sharpened by examining the edge for dullness or nicks, or if they are not cutting as cleanly as they should.
Can I sharpen my chisels using a handheld sharpener?
While it is possible to use a handheld sharpener, it is generally recommended to use either a diamond stone or a water stone for better results and more control.
How do I avoid damaging my chisels while sharpening them?
Use gentle pressure and avoid grinding away too much metal, as this can damage the edge or ruin the shape of the chisel.
What is the best angle to sharpen chisels at?
The optimal angle for chisels varies depending on their intended use, but a bevel angle of 25-30 degrees is a good general guideline.
