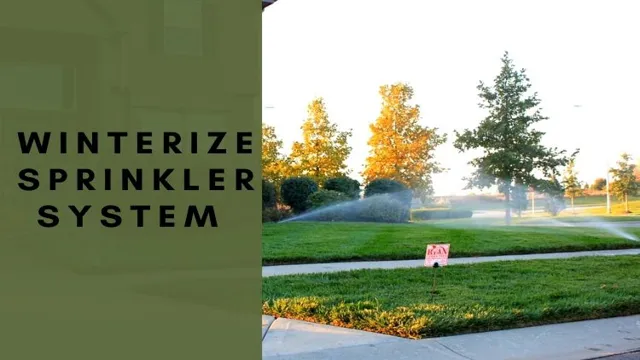
Winter is right around the corner, and as the temperature drops, it’s important to ensure that your irrigation system is ready for the colder months ahead. If left unchecked, water left inside pipes can freeze and expand, leading to costly repairs. That’s where winterizing your Rain Bird sprinkler system comes in.
By taking the necessary steps to prepare your system, you can protect it from the harsh winter weather and ensure it’s in good working order come springtime. In this blog post, we’ll cover all the essential steps you need to take to winterize your Rain Bird sprinkler system and keep it safe from the cold. From draining the system to cleaning your sprinkler heads, we’ll provide you with all the information you need to get the job done right.
So sit back, grab a cup of cocoa, and let’s get started!
Why Winterize Your Sprinkler System
Winterizing your rain bird sprinkler system is critical, especially if you live in areas that experience harsh winter weather conditions. Now, you might ask, “why is it necessary to winterize my sprinkler system?” Well, the answer is simple. Water expands when it freezes, and frozen water inside your sprinkler system can cause damage to the pipes, valves, and sprinkler heads.
This damage could lead to costly repairs, and you certainly don’t want to deal with that. To prevent this from happening, you need to make sure that you remove all water from your sprinkler system before the temperature drops below freezing. This process is called winterization.
By winterizing your rain bird sprinkler system, you can help prolong its lifespan, and in turn, save yourself from costly repairs in the future.
Protecting Your System from Freezing Damage
Winterizing your sprinkler system before temperatures drop below freezing is essential to prevent damage and costly repairs. Freezing water inside the pipes can cause them to burst, leading to leaks and flooding. The best way to winterize your sprinkler system is to shut off the main water supply and drain all remaining water from the lines, valves, and heads.
This will ensure that no water is left inside the system, which can expand and cause damage when it freezes. Additionally, it’s essential to disconnect and store any hoses, sprinklers, or other attachments that could retain water. By preventing water from remaining in your sprinkler system during the winter season, you can avoid expensive repairs and prolong the life of your system.
Don’t wait until it’s too late – winterize your sprinkler system today and protect your investment.
Avoiding Costly Repairs in the Spring
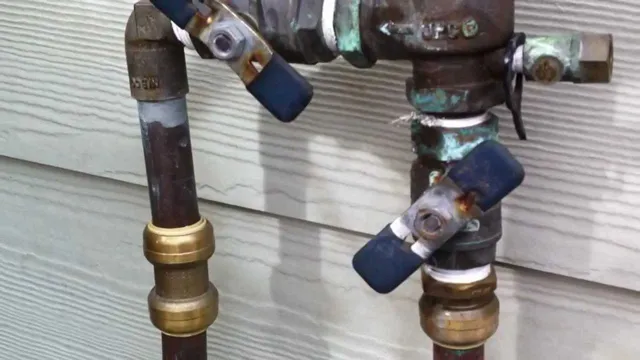
Winterizing your sprinkler system is a key step in avoiding costly repairs in the spring. When water freezes inside the pipes, it can cause them to crack or even burst, leading to leaks and other forms of damage. By draining the water from your sprinkler system before the cold weather hits, you can ensure that it remains in good working order throughout the winter months.
This involves shutting off the main valve and opening each of the sprinkler heads to let any remaining water drain out. If you’re not sure how to winterize your sprinkler system, it’s best to call in a professional to help. Doing so can save you money in the long run by preventing expensive repairs and prolonging the life of your system.
So why wait? Book your winterization appointment today and rest easy knowing your sprinkler system is protected from the cold.
Steps for Winterizing Your Rain Bird Sprinkler System
If you own a Rain Bird sprinkler system, preparing it for winter is an important maintenance step to protect it from damage and keep it functioning correctly. The good news is that winterizing your Rain Bird sprinkler system is a relatively simple process that you can do yourself without the need for a professional. Start by turning off the water supply and draining the pipes and sprinkler heads to prevent any remaining water from freezing and causing damage.
Next, use a compressor to blow excess water out of the system, and remove any batteries from the controller to prolong their life. Finally, cover the exposed parts of the system with insulation to protect them from cold temperatures and other environmental factors. Following these steps will help ensure that your Rain Bird sprinkler system lasts for years to come.
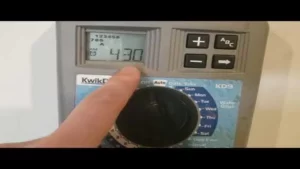
Step 1: Turn off Water Supply and Controller
Winterizing your Rain Bird sprinkler system is an essential task to ensure your irrigation system is in proper working order next spring. That said, it’s vital to turn off the water supply and the controller as step one. This step is necessary to avoid water entering the system, which can damage the pipes and other components by freezing and expanding.
Next, it’s paramount to drain any remaining water out of the system, using an air compressor or the manual drain valve, depending on your setup. You can also employ a backflow preventer to stop water from flowing back into your home’s main water supply. However, if you feel uncertain, it’s best to enlist the help of a professional to ensure all steps have been taken safely and correctly.
By winterizing your Rain Bird system, you can be confident that your lawn will receive the proper amount of water in the upcoming spring and summer months.
Step 2: Drain the System
Now that you’ve shut off the water supply, it’s time to drain the system. This is an important step to prevent any potential damage from freezing water. One way to drain the system is to use an air compressor.
Attach the compressor to the system and blow out all the water using the highest pressure possible. Start by opening the drain valves on the mainline, then work your way out to the valves on each individual zone. For each zone, open the valve manually to allow air to flow through the pipes until water stops spraying out.
Make sure to shut off each valve once all the water has been drained. Another option is to use a wet/dry vacuum to suck out any remaining water. Whichever method you choose, make sure to completely drain the system to ensure a successful winterization.
By taking these steps, you’ll protect your Rain Bird sprinkler system and ensure it’s ready to use again when spring rolls around.
Step 3: Blow Out the System with Compressed Air
Rain Bird sprinkler system Winterizing your Rain Bird sprinkler system is crucial to protect it from the damages caused by freezing temperatures. One of the essential steps involved in the process is blowing out the system with compressed air. This step can be done either by using a professional service or by following a DIY approach.
If you want to do it yourself, you will need an air compressor and a blow-out tool designed to work with your Rain Bird system. You should start by turning off the water supply and shutting down the controller. Then, you need to attach the blow-out tool to the system’s fitting and connect the air compressor to it.
Once you turn on the air compressor, it will blow compressed air through the system, forcing out all the excess water, which can freeze and cause damage. This process should be done carefully and thoroughly, ensuring all zones and valves are purged. By taking these steps, you ensure that your Rain Bird sprinkler system performs optimally and is ready for the next growing season.
Tips for Winterizing Your Sprinkler System
If you live in an area with harsh winter weather, then it’s essential to winterize your Rain Bird sprinkler system to protect it from freezing temperatures. Here are a few tips to get you started. First, turn off the main water supply and the irrigation valve.
Then open all the drain valves and let the water drain out of the system completely. Next, use compressed air to blow any remaining water out of the pipes. Make sure to hire a professional to do this, as using the wrong pressure or technique can damage your system.
Finally, install insulation covers on all the exposed pipes and valves to prevent them from freezing and cracking during the winter. By following these steps, you’ll ensure that your Rain Bird sprinkler system remains in good condition and ready to use when the warmer months arrive.
Consider Hiring a Professional
Winterizing your sprinkler system is an essential task to prevent damage, save water, and ensure the system’s longevity. However, if this sounds like an overwhelming task, it may be a good idea to consider hiring a professional. A professional can address any potential issues and ensure that your sprinkler system is adequately prepared for winter.
Plus, they have the right tools to blow out any remaining water, which prevents pipes from freezing and bursting. Additionally, a professional can also inspect your system for any damages and make necessary repairs, which can save you money in the long run. Keep in mind that hiring a professional may come at a price, but it’s an investment that can save you from costly repairs due to improper winterization.
Make Sure You Have the Right Tools
If you’re looking to winterize your sprinkler system, then one of the most crucial steps is to make sure you have the right tools for the job. This will ensure that you are able to properly drain your system and avoid costly repairs due to frozen pipes in the winter. Some of the essential tools you’ll need include a compressor, air hose, blow-out adapter, and a drain valve.
The compressor will be used to blow out any remaining water in the system, while the blow-out adapter will help you connect the compressor to your sprinkler system. Make sure to also have a drain valve installed so that any excess water can be easily drained from the system. With the right tools and a little bit of know-how, winterizing your sprinkler system can be a breeze!
Conclusion
In conclusion, winterizing your Rain Bird sprinkler system is like putting your irrigation on a seasonal vacation. Turn off the water, drain the pipes, blow out the lines, and remove the sprinkler heads for storage. It’s like sending them on a tropical getaway to the Bahamas while you hunker down in your winter coat.
By taking the time to winterize your sprinkler system, you’ll ensure a healthy start to the greenest lawn on the block come springtime. So, don’t let Jack Frost nip at your irrigation system, winterize your Rain Bird sprinklers and enjoy a worry-free winter.”
FAQs
Why is it important to winterize a Rain Bird sprinkler system?
It is important to winterize a Rain Bird sprinkler system to prevent any damage to the system due to freezing temperatures.
When is the best time to winterize a Rain Bird sprinkler system?
The best time to winterize a Rain Bird sprinkler system is in the fall before the first freeze of the season.
What are the steps involved in winterizing a Rain Bird sprinkler system?
The steps involved in winterizing a Rain Bird sprinkler system include turning off the water supply, draining the system, and blowing out any remaining water using an air compressor.
Can I winterize my Rain Bird sprinkler system myself or do I need to hire a professional?
It is possible to winterize your Rain Bird sprinkler system yourself, but it is recommended to hire a professional to ensure it is done correctly.
What happens if I don’t winterize my Rain Bird sprinkler system?
If you don’t winterize your Rain Bird sprinkler system, any water left in the system can freeze and cause damage to the pipes and sprinkler heads.
How often should I winterize my Rain Bird sprinkler system?
You should winterize your Rain Bird sprinkler system once a year before the first freeze of the season.
Can I use a Rain Bird sprinkler system during the winter months?
It is not recommended to use a Rain Bird sprinkler system during the winter months as any water left in the system can freeze and cause damage.
