Are you looking to end the watering season and get ready for the colder months ahead? Then you’ll need to know how to drain your RainBird sprinkler system! With proper draining, you can avoid costly damage from freezing water in the pipes and ensure a smooth restart in the spring. While it may seem intimidating, draining your RainBird sprinkler system is a relatively simple process that can be done in just a few steps. By following a few key guidelines and using the right tools, you can make sure your system is ready for the winter without any hassle.
In this blog, we’ll walk you through the step-by-step process of how to drain your RainBird sprinkler system. From turning off your water supply to using a drainage valve, we’ll cover everything you need to know to get the job done right. So let’s dive in and get your sprinkler system winter-ready!
Introduction
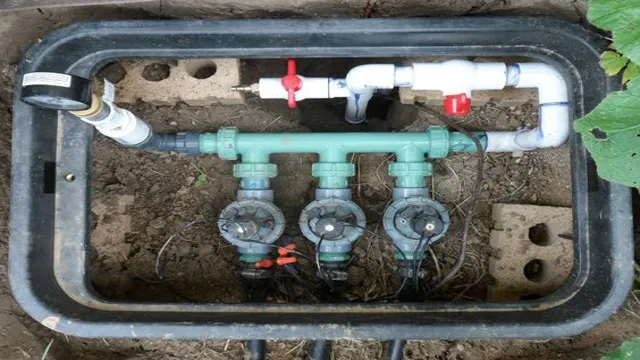
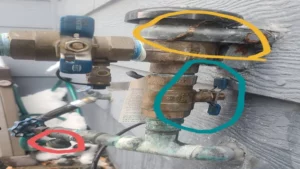
If you live in an area with harsh winter weather, it’s essential to drain your rainbird sprinkler system before the freezing temperatures set in. Not only can leaving water in the system cause damage to your sprinkler heads and pipes, but it can also lead to costly repairs come springtime. So, how do you drain a rainbird sprinkler system? First, turn off the water supply to the system and then locate the drain valve, typically found at the lowest point of the system.
Attach a hose to the valve and allow the water to flow out until it stops draining. Once the water has stopped flowing, open the manual drain valves and blow out any remaining water with compressed air. Finally, disconnect all hoses and store your rainbird sprinkler system equipment in a dry, safe place until spring.
By properly draining your sprinkler system, you’ll be protecting your investment and ensuring that it’s ready to go for the next growing season.
What is a RainBird Sprinkler System?
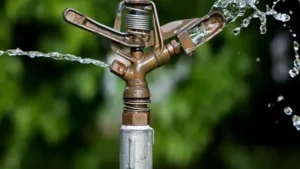
If you want to keep your lawn looking lush and green, then a RainBird sprinkler system is a fantastic investment. But what exactly is it? Simply put, a RainBird sprinkler system is an automated system that waters your lawn and garden periodically. This system is designed to ensure your lawn and garden receive the right amount of water at the right time, even if you’re not around.
It is a highly efficient and customizable system that allows you to control every aspect of your watering system. From the type of sprinkler head to the duration of each watering session, you can tailor your system to meet the specific needs of your lawn and garden. With a RainBird sprinkler system, maintaining a healthy and vibrant lawn has never been easier.
Why is it Important to Drain a RainBird Sprinkler System?
RainBird Sprinkler System Introduction: A RainBird sprinkler system provides a convenient and efficient way to water your lawn and garden. However, as the seasons change, it becomes important to take proper care of the system. One essential maintenance task is to properly drain the RainBird sprinkler system before the arrival of cold weather.
Failure to do so can result in costly damage that could have been prevented. In this blog, we’ll discuss in detail why it’s crucial to drain your RainBird sprinkler system and how to do it effectively. So, let’s get started!
Step-by-Step Guide
Are you looking for a step-by-step guide on how to drain a Rainbird sprinkler system? Well, look no further, because we’ve got you covered! First, turn off the water supply to the system and ensure that all valves are closed. Next, open the drain valve located at the lowest point of the system and let the water drain out completely. Once all the water has drained out, remove any remaining water with an air compressor or shop vacuum.
Finally, inspect the system thoroughly for any damages or leaks before closing the drain valve and turning the water supply back on. With these simple steps, your Rainbird sprinkler system will be drained and ready for the winter season!
Turn off the Water Supply to the System
When it comes to maintaining a plumbing system, turning off the water supply is often the first step. This crucial step can prevent water damage and costly repairs by minimizing the risk of leaks and bursts. To turn off the water supply to your plumbing system, locate the main shut off valve.
This valve is typically located near the water meter or where the main water line enters the house. Once you locate the valve, turn it clockwise until it stops. If you cannot locate the shut off valve, it’s best to contact a professional plumber to assist you.
By turning off the water supply, you can safely maintain your plumbing system without the risk of water damage or leaks. Remember, regular maintenance is key to prolonging the lifespan of your plumbing system and avoiding costly repairs.
Remove the Water from the System
Removing water from a system is an essential step in many industrial and household processes. Several methods are available to remove water from different systems such as distillation, evaporation, and drying. Some systems may require multiple steps to eliminate water completely.
The first step in removing water is to identify the source and location of water in the system. Once it is identified, the next step is to shut down the system and discharge any internal pressure in the system. The third step is to pump out the water from the system, using an appropriate method such as gravity relief or suction.
The fourth step is to inspect the system for any residual water, and, if present, repeat the pumping process. Finally, once all the water is removed, the system can be dried thoroughly to prevent any future water buildup. Remember, removing water from the system is crucial to maintain system efficiency and prevent damage caused by water corrosion and buildup.
Drain the Pipe Fittings and Valves
Before winter sets in, it’s essential to drain the pipe fittings and valves to prevent them from freezing over and bursting, causing havoc in your plumbing system. Here’s a step-by-step guide on how to do it. Firstly, locate the main valve that supplies water to your house and turn it off.
Then, use a hose or a bucket to drain all the water from the pipes, beginning at the highest points and gradually working your way downward. Next, open all the faucets inside and outside the house, including all the hot and cold-water taps. Turn on the drain valve that is located near the main shutoff valve to allow all the water to drain out of the pipes completely.
Remember to open the valve that releases air (usually located near the highest point of the pipeline) to allow all the water to flow out freely. Finally, put antifreeze in the drain traps and toilet tank to prevent ice from forming. By following these simple steps, you can ensure that your pipes and valves are protected from freezing temperatures during the harsh winter season, preventing any potential damage that could have otherwise been caused.
Blow out the System with Compressed Air
Blowing out your computer with compressed air can be a simple and effective way to keep your system running smoothly. Dust and debris can build up over time, causing your computer to overheat and slow down. By using compressed air, you can easily remove any unwanted debris without causing any damage to your system.
Here’s a step-by-step guide to blowing out your computer with compressed air: Turn off your computer and unplug it from the power source.
Take your computer outside or to a well-ventilated area to avoid inhaling any dust particles. Use compressed air to blow out any dust and debris from the keyboard, ports, and fans.
Hold the can of compressed air upright and spray in short bursts to avoid causing any moisture damage.
Be sure to focus on the fans and vents, as these areas tend to collect the most dust. Use a soft-bristled brush to remove any stubborn dust and debris that is stuck in hard-to-reach areas.
After blowing out all debris, let your computer sit for a few minutes to allow any remaining moisture to evaporate.
Conclusion
In conclusion, draining a Rainbird sprinkler system is like giving it a much-needed spa day. Just like how your body needs to release toxins, your sprinkler system needs to release water to prevent freezing and damage. So, grab your trusty air compressor, follow the steps with finesse, and give your sprinkler system the pampering it deserves.
Trust us, your lawn will thank you for it!”
Importance of Regular Maintenance
Regular Maintenance Regular maintenance is essential to ensure that your equipment, machines, or vehicles keep working efficiently. It can save you from costly repairs and unforeseen downtime. The best way to go about regular maintenance is to follow a step-by-step guide.
First, make a list of all the equipment that requires maintenance and create a schedule. The schedule should include details like when the equipment needs servicing, how often it needs to be serviced, and who will be responsible for doing it. Second, inspect the equipment regularly to identify any wear and tear or early warning signs of a breakdown.
Third, clean the equipment regularly to prevent long-term damage from dirt, debris, or corrosion. Fourth, lubricate all moving parts to avoid friction and wear. Fifth, replace parts that are worn out or damaged to avoid total break down.
Remember, preventative maintenance is always better and cheaper than reactive maintenance. Regular maintenance helps you avoid unexpected breakdowns and ensures that your equipment continues to perform optimally. So, keep your equipment in top condition with regular maintenance!
Conclusion and Final Thoughts
In conclusion, following a step-by-step guide is an excellent way to accomplish any task, and it can make a considerable difference. This is especially true when it comes to complicated and complex activities such as building websites, starting a business, or learning a new skill. By having a clear, well-defined plan, you are less likely to get sidetracked and more likely to achieve your goals.
Additionally, breaking down a task into smaller, manageable steps makes it easier to tackle, reduces feelings of overwhelm, and helps you stay organized. So whether you are building a website or starting a business, remember that a step-by-step guide is a powerful tool in your arsenal. By following the steps outlined, you can successfully accomplish what you set out to do, and with practice, you may even find yourself creating your own unique guides.
So go ahead and dive in, try it out, and see the results for yourself. Good luck!
FAQs
What materials do I need to drain a rainbird sprinkler system?
You will need a drain valve, a bucket or hose, and some towels or rags.
When should I drain my rainbird sprinkler system?
It is recommended to drain the system before the cold weather sets in and the temperature drops below freezing.
Can I drain my rainbird sprinkler system by myself?
Yes, with the proper tools and knowledge, you can drain your rainbird sprinkler system by yourself.
What happens if I don’t drain my rainbird sprinkler system before winter?
The water in the pipes can freeze, causing them to burst and potentially damaging your sprinkler system.
How do I locate the drain valve on my rainbird sprinkler system?
The drain valve is typically located at the lowest point in your sprinkler system.
Do I need to turn off the water main before draining my rainbird sprinkler system?
Yes, it is important to turn off the water main before draining your system to prevent any new water from entering the pipes.
Can I use an air compressor to blow out my rainbird sprinkler system instead of draining it?
Yes, using an air compressor to blow out your sprinkler system can be an effective alternative method to draining it.
