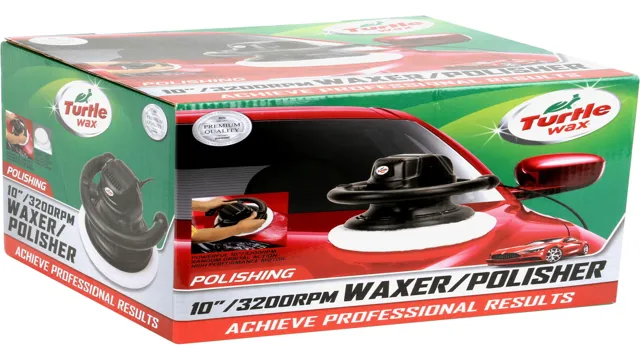
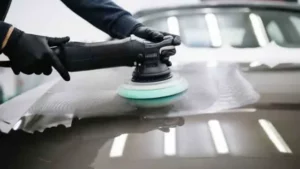
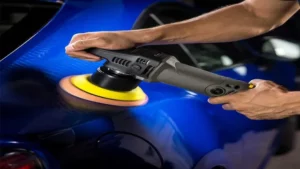
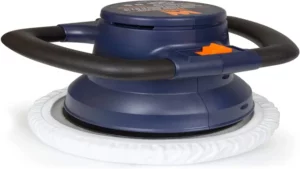
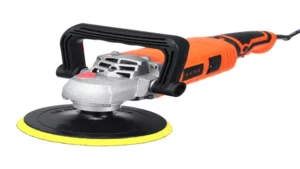
Waxing your car can be a daunting task, especially if you’re not using the right tools. A polisher can certainly make things easier, but using it correctly is key to achieving that perfect shine. If you’re new to waxing your car with a polisher, you may be wondering where to start.
Don’t worry, we’ve got you covered. In this blog post, we’ll take you through the steps of waxing your car with a polisher, so you can achieve that coveted showroom finish. But first, let’s talk about why waxing your car is so important.
Gather Your Supplies
Before you start waxing your car with a polisher, there are a few essential supplies you need to gather. Firstly, you’ll need a high-quality car wax that suits your car’s paintwork. It’s best to use a synthetic polymer or liquid wax that provides long-lasting protection.
Next, you’ll need a polishing pad or foam applicator pad that attaches to your polisher. Make sure to choose a pad that is compatible with the type of wax you’re using, and read the manufacturer’s instructions regarding which pad to use. Additionally, you need a microfiber towel or cloth to remove excess wax and buff your car to a high shine.
It’s important to use a soft, lint-free cloth that won’t scratch your car’s paintwork. Finally, make sure you have an extension cord to plug in your polisher if your power source is far from your car. By gathering these essential supplies, you’ll be well-prepared to start the process of waxing your car with a polisher and achieve a professional finish.
Car Wax
Car wax is an essential part of car maintenance that helps keep your vehicle looking shiny and new. Before you begin the waxing process, ensure you have all the necessary supplies. The first thing you’ll need is a good quality car wax.
Select one that’s appropriate for the type and color of your car. You will also require a few microfiber towels to apply and remove the wax. Additionally, a buffing or polishing pad can make the process simpler and faster.
It’s also a good idea to have a pre-wax cleaner to remove dirt and debris from your car’s surface before you apply the wax. Finally, make sure you have a cool, dry place for your car to dry completely before you offer the final buff. Combining all these supplies and using the right technique of waxing can make your car extra shiny and glossy, protecting it from harmful elements.
So, don’t forget to gather all the necessary supplies and give your car the care it needs.
Polisher
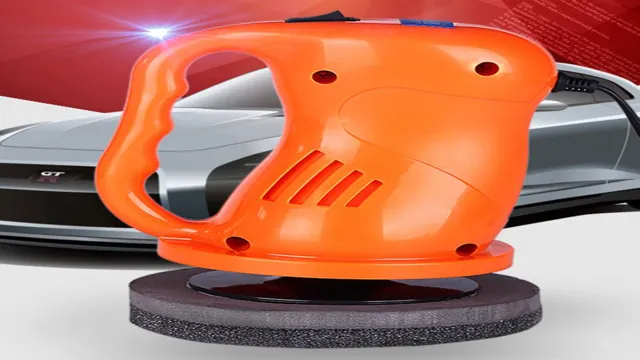
When it comes to polishing, having the right supplies is key to achieving a perfect finish. To start, gather soft microfiber cloths or buffing pads, a quality polishing compound, and a polishing machine with adjustable speeds. It’s important to select the appropriate compounds for the task at hand, such as ones for removing scratches or restoring shine.
Don’t forget to protect your work area with plastic or drop cloths and remember to wear gloves to avoid skin irritation from the polishing compounds. Using the right tools and materials will not only produce better results, but can also save you time and frustration. So, take the time to gather your supplies and get ready to achieve a flawless finish on your next polishing project.
Buffing Pads
Buffing pads are essential tools for anyone who takes detailing and car care seriously. Whether you’re a professional detailer or a car enthusiast, buffing pads are an important part of your toolkit. But before you buff away at your vehicle’s paintwork, it’s important that you gather all the necessary supplies.
To get the best results, you’ll need an appropriate buffing pad for the job, a buffer, and, of course, the right polishing compound. A good quality buffing pad is crucial in achieving a smooth and glossy finish on your vehicle’s paintwork. There are a variety of buffing pads available, including foam, wool, and microfiber pads, with different levels of abrasiveness to suit different types of paintwork.
By selecting the right buffing pad, you can achieve the perfect finish that leaves your car looking brand new.
Microfiber Towels
When it comes to microfiber towels, it’s important to gather all the supplies you’ll need to make sure you clean your surfaces properly. Of course, you’ll need your microfiber towels, but you may also want to consider investing in some cleaning spray or water to help loosen dirt and grime. It’s also helpful to have a few different towels on hand, so you don’t accidentally spread dirt from one surface to another.
When choosing your microfiber towels, look for ones with a high GSM (grams per square meter) to ensure they’re soft and absorbent. And don’t forget to wash your towels regularly to prevent buildup of bacteria and odors. With the right supplies and a little bit of effort, microfiber towels can leave your surfaces looking clean and shiny in no time!
Prepare the Car and Polisher
If you want to give your car a stunning finish, waxing it with a polisher is a great way to do it. To get started, you’ll need to prepare your car and polisher properly. First, be sure to wash your car thoroughly and dry it off with a microfiber towel.
Once it’s completely dry, you can begin to apply the wax using your polisher. Before you start, make sure your polisher is clean and free of any dirt or debris that could scratch your car’s surface. Then, attach the appropriate waxing pad to your polisher and apply the wax evenly across the surface of your car.
Move in a circular motion, overlapping each pass by about an inch, until the entire car is coated in wax. Finally, allow the wax to dry and remove it with a clean microfiber towel. With just a little bit of preparation and the right tools, you can easily wax your car with a polisher and achieve a professional-looking finish that will last for months to come.
Wash and Dry the Car Thoroughly
Before applying any polish or wax to your car, it is imperative that you wash and dry it thoroughly. This may seem like a no-brainer, but many car owners fail to properly clean their car before polishing it. This can result in swirl marks and other imperfections being sealed in, which will make it difficult to achieve that showroom shine.
To start the process, park your vehicle in a shaded area, away from direct sunlight. You can use a specialized car wash soap or any gentle, pH-neutral cleaner to remove any dirt, grime, and debris from the surface. Rinse with water thoroughly, making sure to get rid of any soap residue.
After the wash, dry the car using a microfiber towel or chamois, working from the top to bottom in straight motions. Once your car is completely dry, it’s time to prepare the car for polishing. Make sure to remove any loose dirt or debris that may scratch the paint.
It is recommended to clay your vehicle to remove impurities that washing won’t rid your car of. After that, follow the instructions of the polisher you are using. Apply a small amount of polish onto the pad, and work in small sections.
And don’t forget to always refer to the user manual. In conclusion, washing and drying your car thoroughly before polishing is a crucial step to get that ultimate shine. Remember, taking the time to properly prepare your vehicle will make all the difference.
By following these simple steps, you can achieve a professional-looking finish that will make your car look like it just rolled off the showroom floor.
Attach Buffing Pad to Polisher
One of the most important steps in polishing your car is attaching the buffing pad to the polisher. Before you start, make sure your vehicle is clean and dry, and that you have selected the appropriate pad for the type of polish you will be using. Take your polisher and remove any attachments or accessories that might be in the way of the pad.
Then, carefully align the pad with the backing plate and press it firmly into place. You want to make sure the pad is centered and secure, so take the time to double-check your work. Once the pad is securely attached, you can move on to applying the polish to your car’s surface, confident in the knowledge that you have prepared your tools properly for the job ahead.
With the right pad and a properly attached buffer, you can achieve a professional-looking finish that will make your car shine like new again.
Apply Wax
Now that you’ve polished your car’s exterior, it’s time to apply wax to protect the finish and keep your car looking like new. Wax adds a layer of protection to your paint and helps repel dirt and water. To wax your car with a polisher, prep your pad by adding a small amount of wax to it.
Turn on your polisher and apply the wax to your car in small sections, making sure to evenly spread it around. Work in a circular motion and apply gentle pressure to ensure an even coat. Once you’ve finished one section, move on to the next until you’ve waxed your entire car.
Remember to top off your polisher pad with wax every so often to ensure that it doesn’t dry out and cause damage to your car’s paint. And with that, you’ve finished waxing your car with a polisher, leaving it with a gorgeous, showroom-like appearance.
Apply Wax to the Car in Small Sections
When it comes to waxing your car, it’s important to take your time and work in small sections. Applying wax to your car all at once can lead to uneven coverage and unsightly swirl marks. Instead, break your car into small, manageable sections and work on one section at a time.
This will ensure that each area of the car receives the proper amount of attention and that the wax is applied evenly. To begin, start with a clean, dry car. Make sure the surface is free of any dirt or debris and that it is thoroughly dried off.
Next, apply a small amount of wax to a foam pad or soft cloth and start working on a small section of the car. Be sure to use gentle, circular motions and apply the wax evenly across the surface. Once you’ve covered the entire section, use a clean microfiber towel to buff away any excess wax.
Repeat this process on each small section of the car until the entire surface has been covered. Pay close attention to areas that are typically overlooked, such as the door jambs and beneath the hood and trunk. By taking your time and working in small sections, you’ll achieve a beautiful, long-lasting shine that will make your car look like new.
So, the next time you’re ready to wax your car, remember to break it into small sections and take your time. You’ll be amazed at how easy and effective this technique can be, and your car will thank you for it!
Use the Polisher to Spread the Wax Evenly
When it comes to applying wax to your car, one of the most important steps is using the polisher to spread the wax evenly. While it may seem like an easy task, it actually requires some finesse to get it just right. The key is to first apply the wax in small sections, using a foam or microfiber applicator pad.
Then, using a polisher with a soft buffing pad, work the wax into the paint in circular motions. Be sure to use light pressure, as too much pressure can cause the wax to streak or smear. The polisher not only helps to spread the wax evenly, but it also helps to remove any excess wax that may have built up in certain areas.
By taking the time to use the polisher, you’ll ensure that your car’s paint is protected and shines like new. Keyword: polisher.
Work One Section at a Time
When it comes to waxing your car, it’s important to work one section at a time to ensure you get the best results. Applying wax haphazardly can result in streaks and missed spots, leaving your car looking dull and lackluster. Start by selecting a small area, such as the hood or a door panel, and apply a thin, even layer of wax using a soft cloth or foam applicator.
Work in small circular motions, making sure to cover every inch of the section before moving on to the next. By focusing on one area at a time, you can ensure that you’ve applied an even coat of wax and that it has been properly buffed to a high shine. This will help to protect your car’s paint and keep it looking like new for years to come.
Buff and Finish
If you want to ensure that your car’s paint job stays looking shiny and new for as long as possible, then waxing it with a polisher is a great way to go. First, make sure the car is clean and dry. Then, using a foam applicator pad, apply a small amount of wax to the pad and spread it evenly on a small section of the car.
Turn on your polisher and use a buffing pad to work the wax into the paint. Pay attention to any areas where the wax might be building up and use a microfiber towel to wipe away the excess. Repeat this process over the entire car, taking care not to apply too much pressure or leave any areas unwaxed.
Once you’re finished, use a clean microfiber towel to give the car a final buff and get it looking its best. With a little bit of practice, waxing your car with a polisher can become a satisfying part of your car maintenance routine, and your car will thank you for it.
Use a Clean Microfiber Towel to Buff the Car
After you’ve washed your car thoroughly and dried it, it’s important to buff it with a clean microfiber towel. This helps to remove any remaining dirt or debris and gives your car a shiny finish. To do this, simply fold the towel in half and use light pressure to wipe over the surface of your car, using circular motions.
Pay close attention to any areas that may have water spots or residue from the washing process. It’s best to work in small sections at a time to ensure that every part of the car gets the attention it needs. A microfiber towel is ideal for this, as it’s gentle on the surface of the car and won’t scratch or damage it.
Once you’ve buffed the entire car, step back and check for any areas that may need a little extra attention. Repeat the process until you’re happy with the overall finish of your car. A well-buffed car is a beautiful sight, and it’s well worth the effort to ensure that your vehicle looks its best.
Remove Any Remaining Wax
Now that you’ve removed the bulk of the wax from your surface, it’s time to ensure that there isn’t any remaining residue left behind. To do this, you’ll need to use a clean cloth that you’ve dampened with mineral spirits or a wax-residue remover. Rub the cloth over the surface in a circular motion, taking care to remove all traces of wax.
If you find that there’s still some wax left, you may need to repeat this step until it’s all gone. Once you’re satisfied that the surface is free of wax, you can move on to the final step: buffing and finishing. Take a fresh cloth and apply a small amount of wax to it, then use it to buff the surface to a shine.
This will not only make the surface look beautiful, but it will also help to protect it from future damage. Using a wax-finish on wood may also seal and prevent any liquids from staining or damaging it. Remember to use a non-abrasive cloth and to buff lightly, as applying too much pressure can damage the finish.
By following these simple steps, you’ll have a beautifully restored surface that will be sure to impress!
Inspect Your Work
When it comes to buffing and finishing your work, a critical step to ensure a professional and polished look is to inspect your results thoroughly. While it can be tempting to rush through the process and call it good, taking the time to scrutinize the surface will pay off in the end. Regular examination ensures that you catch small defects such as scratches, pits, or uneven surfaces.
It also allows you to remove any fingerprints or residue left behind from the polishing compound. Inspecting your work can aid in fine-tuning your process and understanding how you can improve your technique. Any blemishes found can act as a teaching tool for next time.
One useful tip when inspecting your surface is to observe it from different angles and under different lighting conditions. The change in perspective can highlight any discrepancies in the surface. The buffing and finishing process is vital for projects that require a seamless and uniform surface.
Inspecting your work partway or at the end will guard against potential errors remaining unnoticed and ruining the final product. So next time you consider finishing a project, remember that taking the extra time to inspect your work can make a big difference in the end result.
Conclusion
In conclusion, waxing a car with a polisher may seem like a daunting task, but with the right tools and techniques, it can be a breeze. Just be sure to start with a clean surface, apply wax in small sections, and use a gentle touch with the polisher. As the saying goes, “Wax on, wax off,” and you’ll be left with a gleaming ride that turns heads on the street.
So, go ahead and give it a try – your car (and your ego) will thank you for it!”
Regular Waxing Protects Your Car’s Finish
Regular waxing is one of the most effective ways to protect your car’s finish over time. With daily wear and exposure to the sun’s UV rays, your car’s paint can fade, peel, and become dull over time. But by buffing and finishing your car’s surface regularly with a high-quality wax product, you can protect it from the elements and keep it looking new for longer.
Not only will this enhance the overall appearance of your vehicle, but it can also help maintain its resale value down the line. Think of it like applying sunscreen to your skin on a hot day – waxing provides a layer of protection that is crucial to keeping your car’s finish looking its best for years to come.
Polishers Can Make Waxing Faster and Easier
Polishers are a game-changer when it comes to waxing your car. They make waxing much faster and easier, leaving your car with a stunning finish. These tools can make your old car look brand new.
It’s important to get a quality buffer because it could make all the difference. With the right buffer, you can polish your vehicle with ease and have it ready for the road in no time. A good polisher will also get rid of small scratches and swirl marks on your car.
When using a polisher, make sure to start with a heavy-duty compound, then follow up with a lighter polish. By doing this, you’ll get the best possible result and your car will look brand new. If you’re looking to up your car waxing game, then investing in a good polisher is definitely worth it.
FAQs
What is the benefit of using a polisher to wax a car?
Using a polisher to wax a car can provide a more even and consistent coverage, resulting in a smoother and shinier finish.
Can any type of wax be used with a polisher?
Generally, yes. However, it is recommended to use a wax specifically designed for machine application to ensure the best results.
How often should I wax my car using a polisher?
It depends on a variety of factors, such as the type of wax used, the frequency of car washing, and the climate. In general, it is recommended to wax every 3-4 months or after every wash.
Is it necessary to remove old wax before applying new wax with a polisher?
Yes, it is recommended to remove old wax and thoroughly clean the surface of the car before applying new wax with a polisher. This ensures that the new wax adheres properly and provides the best possible protection and shine.
Can I use a polisher on a newly painted car?
Yes, but it is recommended to wait at least 60 days after the paint job to allow for proper curing. Additionally, it is important to use a light touch and low speed when working on a newly painted surface.
What type of pads should I use with a polisher for waxing a car?
Soft foam or microfiber pads are generally recommended for waxing a car with a polisher. It is important to use a fresh, clean pad for each step of the process.
Can I use a polisher to remove scratches before waxing my car?
Yes, a polisher can be used to remove light scratches before waxing. However, deeper scratches may require a different method of repair. It is important to use the correct type of polish and pad for the level of abrasion to avoid causing further damage.
