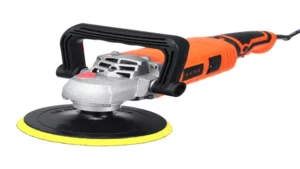
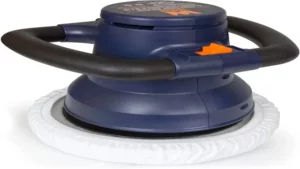
Waxing your car is not only necessary to keep it looking shiny and new, but it can also protect it from the elements and prevent damage from dirt and debris. However, manually applying wax can be a time-consuming and tiring task. That’s where a dual action polisher comes in handy.
This piece of equipment not only speeds up the waxing process but also ensures a smooth finish. In this blog post, we will explore how to properly wax your car using a dual action polisher and the benefits it provides. So, buckle up and let’s get started!
Preparation
Waxing your car with a dual action polisher can give it a showroom shine, but it requires a bit of preparation. Start by thoroughly washing your car to remove all dirt and grime. Make sure to completely dry it before moving on.
Next, inspect the paint for any scratches or swirl marks. If you find any, you can use a compound to remove them before waxing. It’s important to choose the proper wax for your car’s paint type.
Carnauba wax is a good choice for most paints, while synthetic waxes offer longer protection. Apply the wax in sections, working on one panel at a time, and let it sit for the recommended time. Finally, buff the wax with a microfiber cloth using the dual action polisher on a low speed setting.
By following these steps, you can achieve a professional-looking finish on your car.
Wash and Dry Your Car
When it comes to washing and drying your car, preparation is key. First, gather all the necessary supplies, such as soap, a sponge, a bucket of water, and towels for drying. Next, choose a location that provides enough space to move around your car freely without any obstruction.
It’s best to pick a spot that’s well-shaded to prevent water from drying out too quickly and leaving water spots on your vehicle. Before washing your car, make sure to remove any debris or dirt from your car’s exterior. This could include sweeping or using a leaf blower to get rid of any build-up of leaves and debris that could scratch your car’s paint.
Also, check your tires for any pebbles or rocks that may cause damage. Preparing your car for washing and drying can save you time and money by preventing any potential damage and making the job easier to complete. By taking proper preparation, you’ll get the best results with a shiny and sparkling clean car.
So go ahead and give your car the attention it deserves!
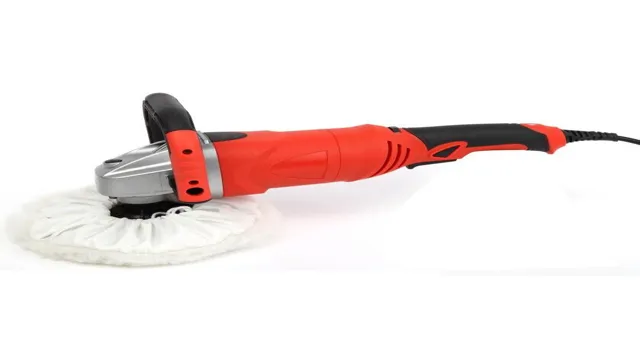
Clay Bar Your Car
If you’re looking to give your car a deep clean, clay barring the surface is an excellent place to start. Before diving in, it’s essential to prepare properly. Begin by washing your car with a high-quality car shampoo and drying it thoroughly.
Next, examine the paint closely and note any areas that have contaminants such as tar, tree sap, or industrial fallout. These contaminants can bond to the surface, making it difficult for the clay bar to remove them. Using detailing spray, generously mist the surface one panel at a time to lubricate it for claying.
The lubrication reduces friction and allows the clay bar to glide smoothly, minimizing the risk of scratches. Finally, break off a small piece of the clay, flatten it, and gently glide it over the paint in straight lines without applying too much pressure. By preparing your vehicle thoroughly, you can ensure optimal results and protect your paintwork for a long time.
Choose the Right Wax
When it comes to waxing, choosing the right wax can make all the difference. It’s important to consider the type of hair you have and the area you are waxing. Hard wax is ideal for coarse hair, while soft wax is better for fine hair.
Additionally, if you have sensitive skin, you may want to opt for a wax specifically designed for sensitive skin. Preparation is also key. Make sure the area you are waxing is clean and dry, and trim any excess hair if necessary.
Using a pre-wax oil can help minimize discomfort during the waxing process. Taking the time to choose the right wax and properly prepare can result in a more effective and comfortable waxing experience. Remember, the right wax is key for achieving the smooth and long-lasting results you desire.
Setting Up Your Dual Action Polisher
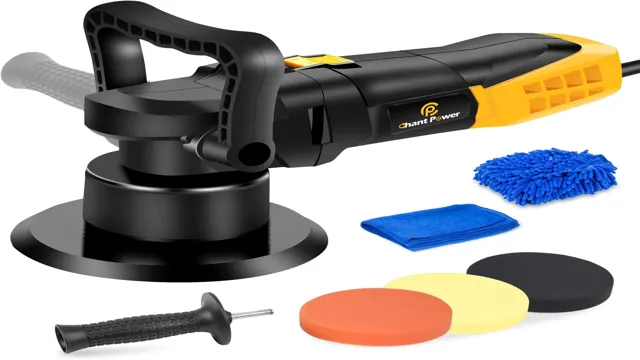
If you’ve invested in a dual action polisher, you’re probably eager to start waxing your car like a pro. But before you get started, there are a few steps you should take to set up your polisher for success. First, choose the right pads for the job.
If you’re using a heavy-duty compound, you’ll need a more aggressive pad to get the best results. For lighter polishing and waxing, a softer pad will do the trick. Next, attach the pad to your polisher, making sure to center it on the backing plate.
Then, add a small amount of wax or polish to the pad and spread it evenly over the surface of your car. Finally, turn on the polisher and work on one section at a time, moving the pad in a circular motion and applying even pressure. With a little practice, you’ll be able to achieve a smooth, shiny finish that will have your car looking like it just rolled off the lot.
So go ahead, give your car the TLC it deserves with your new dual action polisher!
Choose the Right Pad
Setting up your dual action polisher can seem a bit daunting, but with a few easy steps, you’ll get the hang of it in no time! One of the most important things to consider when using a dual action polisher is selecting the right pad. Pads come in a variety of materials and levels of abrasiveness, and choosing the right one for your needs can mean the difference between a smooth and shiny finish or a scratched and damaged surface. Pay attention to the level of damage on the surface you’re polishing, as well as the type of material you’re working with, as these factors will influence your pad selection.
For example, a foam pad may work well for lighter scratches on a painted surface, while a microfiber pad may be better suited for a heavily oxidized clear coat. By taking the time to choose the right pad, you’ll ensure that your dual action polisher works effectively and safely on your project.
Choose the Right Speed
When it comes to using a dual action polisher, it’s crucial to choose the right speed for the task at hand. Depending on the type of paint, the severity of the imperfections, and your particular goals, you’ll need to adjust the speed accordingly. Generally, the higher the speed, the more aggressive the action, and the more quickly you can get the job done.
However, if you’re working on a delicate surface or a unique paint type, a slower speed may be more appropriate. Plus, it’s important to note that using a high speed without the proper technique can result in damage to the paint, so taking the time to experiment and find the right speed and pressure is critical to achieving the results you desire. So, before you begin polishing, take the time to research the best speed setting for your specific situation to ensure the best possible outcome.
Applying Wax with Your Dual Action Polisher
If you’re wondering how to wax a car with a dual action polisher, it’s easier than you might think. First, choose the correct type of wax for your vehicle. Then, attach a soft foam or microfiber applicator pad to your polisher and apply a small amount of wax to the pad.
Spread the wax evenly across the surface of your car, working in small sections at a time to ensure complete coverage. Make sure to keep the polisher moving at a consistent speed and pressure to avoid uneven wax application. Once the wax has been applied, allow it to dry completely before buffing off any excess with a clean microfiber towel.
With a little practice and patience, using a dual action polisher can save you time and effort while achieving a professional-looking wax job. So, give it a try and get ready to see your car shine like new!
Apply Wax to Pad
When it comes to applying wax to your car’s surface with a dual action polisher, there are a few steps you need to follow to get the best results. First, you need to make sure that your pad is clean and free of any contaminants that could scratch or damage your paint. Once you have a clean pad, it’s time to apply the wax.
Start by placing a small amount of wax onto the pad, then spread it evenly across the surface. Make sure you don’t use too much wax, as this can result in a messy and uneven application. As you work, keep an eye on the pad to make sure it stays evenly coated, and be sure to switch out the pad if it becomes too saturated with wax.
By following these steps, you can achieve a smooth, glossy finish that will make your car look brand new.
Apply Wax to Your Car
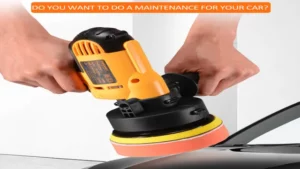
Applying wax to your car is an essential step in maintaining its appearance. But did you know that you can make the process faster and more efficient by using a dual action polisher? Not only does this tool save time, but it also ensures an even application of wax on your car’s surface. To start with, apply a small amount of wax to a foam pad attached to the dual action polisher.
Begin buffing the wax onto the car’s surface in a circular motion. Work in small sections and remember to overlap each area to avoid missing any spots. Once you have waxed the entire surface, let it set for a few minutes before removing the excess wax with a microfiber towel.
Using a dual action polisher not only saves time but also gives your car a professionally polished finish with minimal effort. Give it a try and see the results for yourself!
Polish Your Car
If you’re looking to give your car a gleaming shine, applying wax with your dual-action polisher is a great option. This process not only helps protect your car’s paint from damage but also gives it a show-worthy finish. First, select the right type of wax for your car.
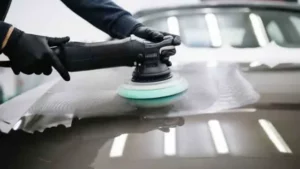
Next, attach a foam finishing pad to your polisher and apply a small amount of wax to it. Begin working in small sections, starting with the roof and working your way down. Move the polisher in a circular motion, applying even pressure until the wax disappears.
Then, use a microfiber towel to buff the area to a high shine. Remember, taking your time and being meticulous will result in a beautiful finish you’ll be proud to show off. So, why not give it a try and see the difference it makes to your car’s appearance?
Finishing Up
Now that you’ve completed the waxing process with your dual action polisher, it’s important to finish up with a few final steps. First, remove any excess wax residue from the surface of your car using a microfiber towel. Be sure to check all areas, such as cracks and crevices, to ensure they are free of wax buildup.
Next, take a step back and give your car a once-over, examining it from different angles and lighting conditions. This will help you identify any areas that may have been missed or have a hazy appearance. Finally, apply a sealant or glaze to protect your car’s newly waxed surface and give it a polished look.
Remember, maintaining this look requires regular upkeep and re-application of wax to protect against environmental damage. With these final steps, you can enjoy a sleek and shiny car for miles to come.
Buffing Your Car
As you’re buffing your car, it’s important to take your time and pay attention to detail to ensure the best possible finish. Once you’ve completed the process with a polishing compound, it’s time for the final touches. Start by wiping the entire car down with a microfiber towel to remove any remaining residue.
Then, apply a coat of wax or sealant to protect the surface and enhance the shine. Don’t forget to buff the wax off with another clean microfiber towel, working in small sections to ensure full coverage. This step will give your car a professional-looking finish that will make it stand out on the road.
So take your time and enjoy the process!
Tips for Maintaining Your Car’s Shine
In conclusion, maintaining your car’s shine is not as difficult as it may seem. Regular washing and detailing is the key to keeping your car looking like new. Investing in a good quality wax or sealant can also help protect the paint from the elements.
Remember to also take care of the interior by keeping it clean and adding protective covers to prevent wear and tear. By following these tips, you can ensure that your car maintains its shine and stays in great condition for years to come. So, go ahead and give your car some TLC!
Conclusion
In summary, waxing your car with a dual action polisher is like giving it a luxurious spa day. With the right tools and techniques, you can buff away imperfections and bring out the shine in your vehicle’s paint. So, grab your polisher and some quality wax, and treat your car to a day at the detailing salon – it deserves to look its best on the road.
Remember, a well-waxed car not only looks great, but also helps protect your investment for years to come. Happy polishing!”
FAQs
What is a dual action polisher and how does it work in waxing a car?
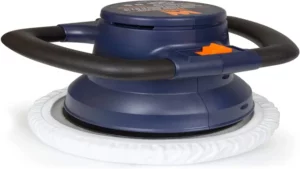
A dual action polisher is a machine used in car detailing and is specifically designed for waxing cars. It works by oscillating and rotating to evenly spread the wax on the car’s surface without causing any swirl marks or damage.
What supplies do I need to wax my car with a dual action polisher?
To wax your car with a dual action polisher, you will need a dual action polisher, wax, foam pads, microfiber towels, and detailing spray.
How much wax do I need to apply using a dual action polisher?
It is recommended to apply a thin and even layer of wax on your car using a dual action polisher. A pea-sized amount of wax on the foam pad can be enough to spread on a 2×2 ft. area of your car.
Is it necessary to clay bar the car before waxing with a dual action polisher?
Yes, it is recommended to clay bar your car before waxing with a dual action polisher. Clay bar removes contaminants and debris from your car’s surface that can cause scratches and swirl marks during the waxing process.
How often do I need to wax my car with a dual action polisher?
It is recommended to wax your car every 3-6 months using a dual action polisher to maintain its shine and protection from external factors such as UV rays, pollutants, and weathering.
Can I use the same foam pad for different waxing products while using a dual action polisher?
It is not recommended to use the same foam pad for different waxing products while using a dual action polisher. Using the same foam pad can cause cross-contamination and affect the performance of the wax and the machine.
How do I clean the foam pads after using a dual action polisher?
After using a dual action polisher, rinse the foam pads with clean water and squeeze out the excess water. Then, use a foam pad cleaner solution to remove any remaining wax or debris from the pad. Finally, rinse again and let the foam pads air dry.
