Have you ever noticed the way your car shines after a professional detailing? It’s like the vehicle wasn’t just washed, but polished to perfection. And while it may seem like a daunting task to achieve the same level of shine on your own, fear not! With the right tools and techniques, anyone can learn how to use a car polisher and achieve that professional-grade finish. So, grab your polisher and let’s get started!
What You’ll Need
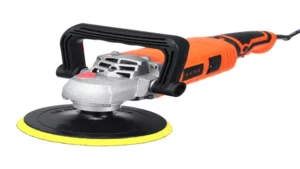
To give your car a showroom shine, you’ll need a dual action polisher, microfiber towels, and the appropriate polishing compound. Dual action polishers are perfect for beginners as they have a safer learning curve compared to high-speed polishers. Microfiber towels are essential to wipe off the excess product and to avoid swirl marks.
When choosing the polishing compound, consider the level of abrasiveness needed to remove scratches, swirls, and oxidation. For minor cosmetic issues, choose a less abrasive polish while heavier defects require a more aggressive one. Make sure to read the label and follow the instructions of the polish to achieve the desired results.
With these tools and products, you’re now ready to learn how to use a polisher on your car and take your detailing skills to the next level.
Polisher machine, polish pad, car polish
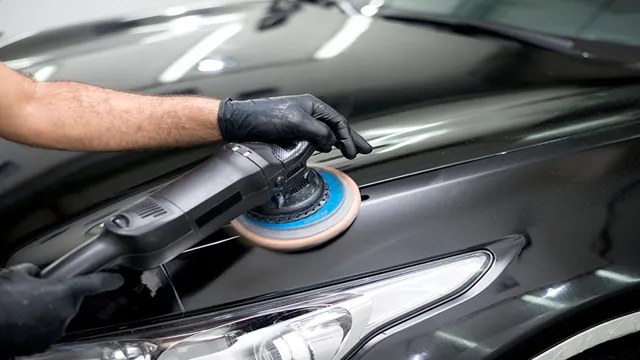
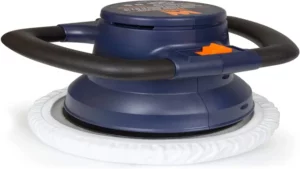
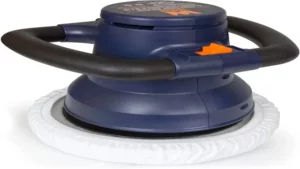
When it comes to polishing your car, there are a few things you’ll need to get started. Firstly, a polisher machine or buffer will be necessary to apply polish evenly to the surface of your car. You can choose between dual-action or rotary polishers, depending on your needs and skill level.
Next, you’ll need a polish pad to attach to your polisher machine. The pad will help to distribute the polish evenly, ensuring a smooth and glossy finish. Lastly, you’ll need car polish to apply to the pad.
Opt for high-quality car polish that’s free of harsh chemicals and abrasive materials. Using all of these items in combination will give your car a professional, showroom-worthy look in no time. So why not give it a try and see for yourself the amazing results you can achieve with a little bit of elbow grease and the right tools?
Preparing Your Car
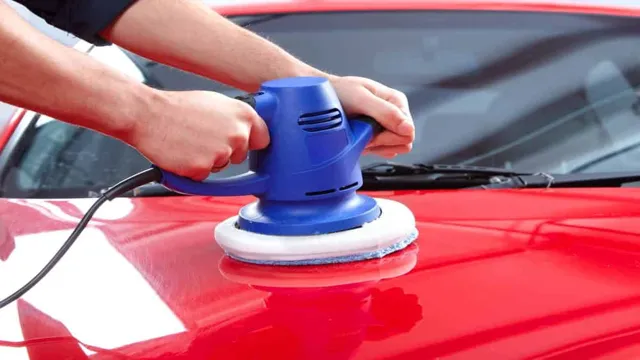
Learning how to use a polisher on your car can seem like a daunting task, but with the right preparation, it can be surprisingly easy. Before you begin, make sure that your car is clean and dry. Any dirt or debris left on the surface can cause scratches when the polisher is applied.
Additionally, be sure to remove any stickers or decals that could be damaged by the polisher. Once your car is clean and prepped, it’s time to choose the right polisher for the job. There are several types of polishers, including orbital and rotary, and each has its own strengths and weaknesses.
Once you have selected your polisher, choose the right pad to attach to it. Pads come in various materials and textures, from soft foam to rougher wool, so be sure to choose the right one for your needs. Finally, apply a small amount of polish to the pad and work in small sections, using a gentle circular motion.
With a little patience and practice, you’ll be able to use a polisher to buff your car to a mirror-like finish in no time.
Wash, dry and decontaminate your car
If you’re planning on taking your car out for a joyride, you’ll want to prepare it beforehand by washing, drying, and decontaminating it. Over time, your car’s surface can accumulate dirt, grime, and harmful chemicals from the environment. Washing your car removes these unwanted substances, allowing the paint to shine and preventing corrosion.
Use a pH-neutral car wash soap and a microfiber wash mitt to avoid scratching the surface. After washing, dry the car with a clean microfiber towel to prevent water spots. Finally, decontaminate the surface by using a clay bar or tar remover to get rid of any embedded contaminants that regular washing can’t remove.
By preparing your car properly, you’ll ensure that it looks great and lasts longer on the road.
Choosing the Right Polish
When it comes to using a polisher on your car, choosing the right polish is key. There are different types of polishes available, each with its unique purpose. For instance, if you have heavy scratches or oxidation, you’ll want a more abrasive polish to help remove them.
On the other hand, if you have minor imperfections or want to maintain a glossy shine, a light polish is ideal. It’s important to choose a polish that is compatible with your car’s paint or clear coat to avoid damaging your vehicle. Take the time to read the label and product description before selecting a polish.
Additionally, apply the polish in small sections, working carefully to ensure an even and consistent finish. Remember to use a clean microfiber cloth or buffing pad to avoid leaving residue or scratches. With the right polish and application techniques, your car will look stunningly shiny.
Consider the type of paint and level of damage
When choosing the right polish for your car, it’s important to consider the type of paint and level of damage. If you have a newer car with a clear coat finish, you’ll want to use a polish specifically designed for that type of paint. On the other hand, if your car has an older, single-stage paint job, you may need a more aggressive polish to remove any oxidation and restore its shine.
Additionally, if your car has minor scratches or swirl marks, you’ll want to choose a polish that contains abrasives to buff out those imperfections. It’s also a good idea to choose a polish that contains a sealant to protect your paint from future damage. Overall, taking the time to choose the right polish can make a big difference in the look and longevity of your car’s paint job.
So, whether you’re a car enthusiast or just looking to keep your ride looking its best, consider the type of paint and level of damage when selecting a polish. Your car will thank you!
Attaching the Pad and Applying Polish
When polishing your car, it all comes down to the prep work. To start, clean and dry your car thoroughly. This will ensure that the surface is free of any dirt or debris that can damage your paintwork.
Once you’ve prepped your car, it’s time to attach the pad to the polisher. Most polishers have a screw attachment or a hook and loop system that allows for easy attachment. Ensure that the pad fits securely, as an improperly attached pad can cause damage.
When selecting your polishing pad, consider the condition of your paintwork. A softer pad is recommended for newer cars, while a firmer pad may be better for heavily oxidized paintwork. Finally, it’s time to apply the polish.
Apply a dime-sized amount of polish onto the pad, using your finger or a polish applicator. Start with a low speed and gradually increase as you work across your car. Remember to keep the polisher flat and level to ensure an even finish.
By following these steps, you’ll be well on your way to achieving a polished and gleaming car.
Attach the pad to the polisher and apply small amounts of polish
Attaching the pad to your polisher and applying polish is an essential step in achieving a perfect finish on your surfaces. Start by selecting a foam or wool pad depending on the surface you want to polish, and attach it to the Velcro backing plate on your polisher. It’s important to ensure that the pad is centered and securely attached to the plate to avoid any accidents.
And now, the fun part starts – applying the polish. You don’t want to apply too much polish; start with small amounts and work your way up if needed. Gently apply the polish to the surface you’re working on and turn on your polisher at a low speed to avoid splatters.
Then, gradually increase the speed as you work the polish into the surface, ensuring that you cover the entire area evenly. You’ll want to use slow and steady movements when polishing to avoid leaving any marks or swirls on the surface. Remember, practice makes perfect – experiment with different pads and polishes until you find the right combination and technique that works best for you.
So go ahead and give it a try – you’ll be amazed at the results!
Using the Polisher Machine
If you’re looking to polish your car and give it the shiny finish it deserves, then a polisher machine will come in handy! To start, choose a polishing pad that is suitable for the task at hand, and be sure to clean your car thoroughly before starting. Apply the polishing cream to the pad and spread it out over the car’s surface. Using the polisher machine, move the pad in circular motions while exerting moderate pressure.
Keep moving the pad over the surface until the polish has been evenly distributed, and work in sections to ensure consistent results. Once you’ve finished, wipe the car down with a microfiber cloth to remove any excess cream before moving on to the next section. With a little practice, you’ll be able to use the polisher machine to get a professional-grade finish that will leave your car looking brand new!
Begin with low speed and gradually increase
When it comes to using a polisher machine, it’s essential to begin with low speed and gradually increase it. This is because the machine’s high speed can cause damage to the surface you’re working on. Starting at a lower speed will allow you to get used to the machine’s handling and ensure that you’re not damaging the surface.
Once you feel comfortable with the machine, you can gradually increase the speed to achieve the desired results. Remember, polishing requires patience and precision, so take your time and make sure you’re using the right technique. By starting at a low speed and gradually increasing it, you’ll be able to achieve a polished surface without causing any damage or harm.
Always remember to use caution and take your time when using a polisher machine.
Buffing and Finishing
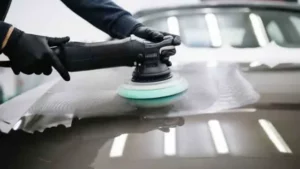
If you want to achieve a high-quality finish on your car, using a polisher is a great way to buff out imperfections and bring your car’s shine back to life. First, make sure your car is completely clean and dry before using the polisher. Apply a polishing compound to the pad and work on one section of the car at a time.
Move the polisher in straight lines, applying even pressure, and avoid staying in one spot for too long. Once you’re done with each section, wipe away any excess polishing compound with a clean microfiber towel. Repeat the process until your entire car has been polished.
To finish, apply a wax or sealant to protect your hard work and give your car a long-lasting shine. Remember, practice makes perfect, so take your time and don’t rush the process. With a little patience and effort, you can achieve a showroom-worthy finish on your car.
Buff off remaining polish with a microfiber towel and admire your shine
After you’ve applied polish to your car’s exterior, it’s time to buff and finish for a shiny, flawless look. First, use a microfiber towel to buff off any remaining polish. The gentle fibers will ensure that your finish is smooth and even.
Make sure to apply some pressure but not so much that you scratch the surface. Once you’ve buffed your whole vehicle, take a step back and admire the shine. You’ll be impressed by how the light reflects off the surface, reflecting your hard work.
It’s a satisfying feeling to see your car looking brand new again. So next time you give your car a polish, remember to buff and finish for the ultimate shine.
Conclusion
In summary, using a polisher on your car is like going to a spa for your vehicle. Just like how a good massage can invigorate and revitalize your body, a proper polishing session can restore and rejuvenate your car’s paint job. The key is to use the right technique, have patience, and let the polisher do its magic.
Think of it as a gentle dance between you and your car, as you carefully polish away imperfections and create a glossy, showroom-worthy finish. So go ahead and pamper your ride, and let it shine like the star it is!”
FAQs
What are the benefits of using a polisher on a car?
Using a polisher on a car helps remove imperfections, swirl marks, and scratches from the paint surface, leaving a smoother, brighter finish that looks like new.
How often should I use a polisher on my car?
It is recommended to use a polisher on your car every few months or as needed to maintain the shine and condition of your car’s paint.
How do I choose the right polisher for my car?
When choosing a polisher, consider the size of your car, the condition of the paint, and your level of experience. A dual-action polisher is a good choice for most car owners, while professionals may prefer a rotary polisher for tougher jobs.
What type of polishing pad should I use with my polisher?
The type of polishing pad you use will depend on the condition of your car’s paint surface. A foam pad is a good choice for general polishing, while a microfiber pad can be more effective for removing scratches and other imperfections.
Do I need to wash my car before using a polisher?
Yes, it is recommended to wash and dry your car thoroughly before using a polisher. This will help remove any dirt, debris, or contaminants that could scratch the surface during polishing.
What is the difference between polishing and waxing a car?
Polishing involves using a machine or by hand to remove scratches and imperfections from the paint surface, while waxing is a process of applying a protective layer to the surface to help prevent future damage.
Can I use a polisher on my car’s headlights and taillights?
Yes, a polisher can be used on headlights and taillights to remove yellowing and oxidation and restore clarity and brightness to the lenses. Use a polishing pad and a specialized plastic polish for best results.
