How to Use a Pipe Laser Level: A Beginner’s Guide to Accurate Alignments
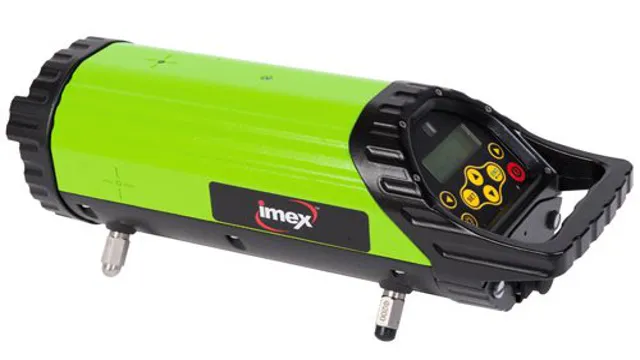
Have you ever wondered how to use a pipe laser level? If you’re a construction worker or a DIY enthusiast, then you’ve probably heard of this amazing tool used to level pipes. A pipe laser level is a specialized laser that projects a perfectly straight and level line onto a surface. It can be used in various applications, such as plumbing, drainage, and landscaping.
This device is especially useful when you need to ensure that your pipes are level and correctly aligned. Using a pipe laser level is not as complicated as it might seem. In fact, it’s relatively easy to operate even if you have no prior experience or training.
You only need to follow a few simple steps to get started. First, you must set up the device on a stable surface and align it with the pipe you want to level. Then, you turn on the laser and adjust it accordingly to create a level line around the pipe.
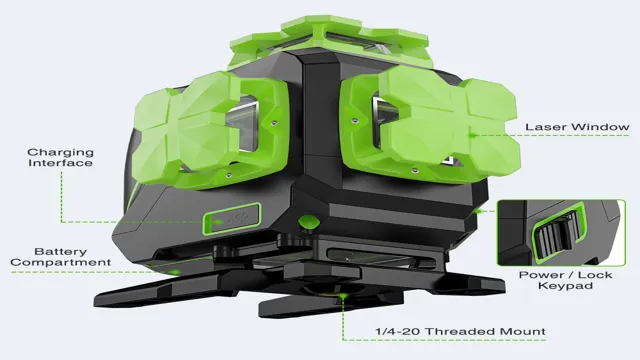
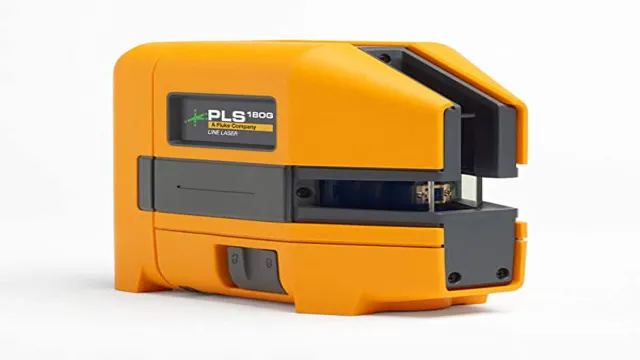
Pipe laser levels come in different models and have various features, such as automatic leveling, remote control, and rechargeable batteries. Some models are water-resistant, durable, and come with a carry case for easy transportation. You can choose a pipe laser level that best suits your needs and budget.
In conclusion, knowing how to use a pipe laser level can make a significant difference in your construction projects. It can save you time, money, and frustration by ensuring that your pipes are precisely leveled and aligned. And, with the right kind of pipe laser level, the job can be effortless and straightforward.
With experience, you will be able to level pipes with ease and be confident in your work.
What is a Pipe Laser Level?
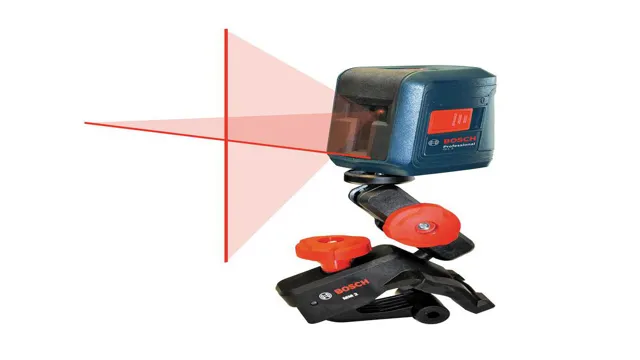
Using a pipe laser level is a fantastic option for those in the construction industry who want to elevate their work. At its core, a pipe laser level is a type of laser level specifically designed for use with pipes. It can shoot a laser beam in any direction, providing a highly accurate level line for plumbers, electricians, and other trades to follow.
But how do you use a pipe laser level effectively? First, make sure the laser is set up properly with a sturdy tripod and is level to the pipe or area you want to measure. Then, turn on the laser and adjust the settings to the desired beam width and intensity. Finally, line up the beam with your desired measurement area and measure away! With a pipe laser level, you can easily achieve a level result every time, saving you time and resources.
Remember, using a pipe laser level can be a real game changer for anyone in the construction industry, and is definitely worth considering for the next project you undertake.
Definition
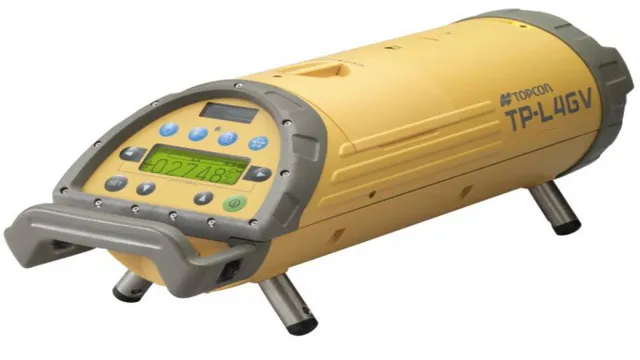
A pipe laser level is a tool that is widely used in construction and surveying to ensure that pipes are properly aligned and installed. This device projects a red or green beam of light along a horizontal or vertical axis, allowing workers to easily see if the pipes are level and straight. Pipe laser levels are particularly useful in situations where gravity and elevation changes make it difficult to maintain proper pipe alignment.
They often come with features such as high accuracy, adjustable beam intensity, and long battery life. Overall, the pipe laser level is a highly versatile and indispensable tool for anyone working with pipes in construction, agriculture, or other fields where precise leveling is required.
Benefits
A pipe laser level, also known as a “pipe laser” or “laser pipe,” is a specialized tool that is used in pipe laying projects. It emits a focused beam of light that is projected on a horizontal plane, allowing for accurate measurements and level readings. The main benefit of using a pipe laser level is the ability to ensure that pipes are installed at the correct angle and elevation for optimal performance.
This is especially important in construction or engineering projects that require precise measurements and accurate calculations. With a pipe laser level, contractors and engineers can save time and money by avoiding costly mistakes and rework. In addition, pipe laser levels are easy to use and highly portable, making them an ideal tool for projects of all sizes and complexities.
Overall, investing in a pipe laser level is a smart choice for anyone involved in pipe laying or installation projects.
Preparing for Use
If you’re planning on getting started with using a pipe laser level but aren’t quite sure where to begin, the first step is to prepare for use. Before starting your project, it’s important to ensure that your laser level is fully charged and calibrated to the correct specifications. You should also make sure that the area you plan to work in is clear of any obstacles or debris that could interfere with the laser’s accuracy.
Once you’ve done this, you can begin by setting up the level and attaching it securely to your pipe. It’s recommended to start with a lower power setting to ensure that your laser is aligned correctly before gradually increasing the intensity. Finally, take the time to double-check your measurements and make any necessary adjustments to ensure a high level of accuracy throughout your project.
By following these steps, you can ensure that your pipe laser level is ready to use and will provide you with precise measurements every time.
Choose a Level Site
When it comes to setting up a new site, one of the most important considerations is to choose a level location. It might not seem like a big deal, but even a small slope or grade can cause problems for your structure in the long run. That’s because gravitational force can pull water towards a slope, causing erosion and other complications.
Additionally, it can be more difficult to build on uneven terrain, making it harder to create a stable foundation for your structure. To avoid these issues, it’s essential to find a flat and level site for your project. This will help ensure that your building remains stable and secure for years to come.
So, before you start any construction work, take the time to carefully survey your site and choose the most level location available. Your project – and your long-term satisfaction with it – will thank you for it.
Set up the Tripod
Setting up your tripod properly is crucial for capturing steady, shake-free shots. Before using your tripod, it’s essential to prepare it for use. Firstly, make sure to outfit your tripod with a compatible and appropriately-sized camera mount.
Next, adjust the leg height to your desired shooting level to ensure stability and balance on uneven terrain. Be sure to tighten all clamps and locks securely to prevent slippage and wobbling. Lastly, double-check the weight capacity of your tripod to avoid overloading it with heavy camera equipment.
Properly preparing your tripod before use will maximize stability and help you capture sharp, clear images.
Mount the Laser Level on the Tripod
Before you start using your laser level, you must mount it on a tripod. First, check if your laser level comes with a mounting bracket that can fit on a tripod. Once you have the mounting bracket, attach it to the device by screwing it onto the bottom of the laser level.
Make sure it is securely attached to avoid accidents while in use. Then, screw the tripod onto the mounting bracket. The tripod legs should be fully extended to provide maximum stability, especially when working on uneven surfaces.
Position the tripod in a safe area to prevent any bumps or external factors that may affect the accuracy of the laser level. Once everything is set up, turn on the device and check the bubble level to ensure that it is level and ready to use. Remember, mounting your laser level on a tripod is crucial to achieving accurate and reliable measurements effortlessly.
Using the Pipe Laser Level
If you’re wondering how to use a pipe laser level, don’t worry, it’s not as complicated as it seems. First, make sure the laser level is set up properly, with the bubble level indicating that it’s balanced. Then, attach the laser level to the pipe being worked on, ensuring that it’s secured tightly.
Once the laser level is in place, turn it on and adjust the height and angle to match the desired elevation or slope. The laser beam should be pointed in the direction where work is being done, so it will be visible to the workers. The laser beam provides an accurate reference point for the workers to ensure that their work is level and straight.
Working with a pipe laser level can help speed up the process and ensure precision and accuracy when laying pipes.
Mark the Desired Elevation
When it comes to marking the desired elevation for a construction project, using a pipe laser level can simplify the process. With this tool, you can project a laser beam that will show you exactly where the pipe needs to be installed. First, you need to set up the pipe laser level on a tripod at the starting point of your project.
Then, adjust the level until the laser beam is pointing directly at the point where you want the pipe installed. Once it’s aligned, turn on the laser and walk along the length of the project, marking the desired elevation at regular intervals. This will ensure that the pipe is installed at the right height, reducing the risk of drainage problems later on.
By using a pipe laser level, you can save time and effort while ensuring that your construction project meets the required standards for quality and safety.
Set the Laser Level Height
If you’re using a pipe laser level, setting the laser level height is an essential step in ensuring accurate measurements. To do this, you’ll need to adjust the height of the tripod legs to level the laser level. This step is crucial as it determines whether your measurements are accurate or not.
Once you’ve got the tripod leveled, you can start measuring. However, keep it in mind that the laser beam should be at the same level as the pipe for the most precise results. One way to do it is by holding a target plate on the top of the pipe and adjusting the laser level height until the beam hits the center of the plate.
Always check for accuracy by measuring the distance between the pipe center and the beam’s center point. By following these steps, you’ll get the most accurate measurements, giving you results you can rely on for your construction project.
Rotate the Laser Level
When it comes to using a pipe laser level, one of the essential steps is rotating the device. This action allows the laser beam to project a complete 360-degree circle, providing a precise and consistent level line. To rotate the level, you need to adjust the tripod’s screws and ensure that the instrument is stable.
Then, by using the control panel, select the rotation direction and speed to match the project’s requirements. It is crucial to note that rotating the laser level correctly can help avoid errors and ensure that your measurements are accurate. So, take your time and rotate the pipe laser level carefully, ensuring that it is secure and aligned precisely.
Remember, precision is key, and even minor deviations can result in costly mistakes.
Check the Reading with a Rod or Sensor
If you’re looking for an efficient way to check the reading on your rod or sensor, using a pipe laser level may be the solution you need. This tool is designed to project a straight laser beam along the length of a pipe, providing an accurate reference point for measuring heights and levels. By attaching a receiver to your rod or sensor, you can easily check and adjust your readings as needed.
One of the great things about using a pipe laser level is that it eliminates any discrepancies that could occur from using a manual level, such as human errors or uneven surfaces. This means you can achieve precise and consistent readings every time. Additionally, this tool is versatile and can be used for a variety of applications, including plumbing, HVAC, and electrical work.
So, if you’re looking to streamline your measuring process and achieve reliable results, consider adding a pipe laser level to your toolkit.
Tips and Tricks
If you’re working on a construction project that requires precision leveling, a pipe laser level can be a valuable tool. Here are some tips and tricks for using a pipe laser level effectively. First, ensure that your laser level is properly calibrated before use.
Check for any damages to the casing or lens, and make sure that it’s secure on its tripod. When setting up the level, make sure that it’s positioned on a stable surface and levelled correctly. A tripod is an ideal tool for this.
When turning on the laser level, ensure that it’s on the correct setting for your needs. Depending on the model, you may need to adjust the level for different angles or elevations. Once the laser level is set up, use the laser detector to pick up the beam.
This will help you to see the laser in bright and outdoor settings. Finally, it’s important to always follow the safety guidelines provided by the manufacturer when using any laser level. By following these tips and tricks, you’ll be able to use a pipe laser level with ease and accuracy.
Calibrate the Laser Level
Calibrating your laser level is a crucial step in ensuring precision and accuracy in completing your projects. Before starting, make sure to choose a flat surface with no disturbances and proper lighting conditions. To calibrate the laser level, start by attaching it to a stable tripod or mount.
Turn the level on and let it self-level. Next, mark a point on the wall or surface where the laser is projected. Rotate the level 180 degrees and mark another point where the laser hits.
Finally, adjust the level until the laser is perfectly level between the two points marked. Repeat the process a few times to ensure consistent accuracy. By doing so, you’ll be sure to have a proper and functional laser level that helps you complete your projects without any mistakes.
Adjust for Slope
Golfing on an uneven ground or a course with uneven terrains can make the game challenging, but a golfer can always adjust for slope for better performance. One of the best ways to do so is by reading the slopes on the greens. A golfer can determine the slopes by looking at the grass, the way it grows, and the direction it leans.
Golfers must also consider the course’s design and the weather conditions when assessing the slopes. It is essential to keep in mind that uphill and downhill putts can act differently. An uphill putt is slower and requires more power, while a downhill one is faster and requires less power.
When adjusting for slope, golfers should also take into account the club type and the swing’s speed and angle. Adjusting for slope can make a massive difference in a golfer’s scorecard.
Maintain the Laser Level
Maintaining a laser level is essential for ensuring accurate and precise measurements. To help you keep your laser level in tip-top shape, here are some tips and tricks. Firstly, always check the batteries before using the laser level.
Dead batteries can cause inaccuracies, so it’s best to replace them regularly. Secondly, clean the laser level after every use. Dust and dirt can affect the laser’s accuracy, so use a soft cloth to wipe it down, especially the laser lens.
Thirdly, store your laser level properly. Keep it in a dry and safe place, ideally in its protective case. Finally, calibrate the laser level before each use.
This ensures the laser is projecting a straight and level line. By following these tips and tricks, you can extend the life of your laser level and ensure it provides accurate measurements every time you use it.
Conclusion
If you want to be a pipe-laying pro, using a pipe laser level is the way to go. With its precision accuracy and ease of use, you won’t have to fret about crooked pipes ruining your project. Just set it up, line it up, and let the laser do the rest.
So stop being a level amateur and start using a pipe laser level today. Your clients will thank you, and your pipes will be perfectly aligned!”
FAQs
What is a pipe laser level and how does it work?
A pipe laser level is a tool used to establish a straight and level line of sight along pipes and other similar structures. It works by emitting a highly visible laser beam that is projected onto a target placed on the opposite end of the pipe or structure.
What are the advantages of using a pipe laser level?
The advantages of using a pipe laser level include increased accuracy and efficiency in alignment of pipes, reduced labor time and cost, and improved safety for workers by reducing the need for manual measuring and marking.
What types of pipe laser levels are available in the market?
There are different types of pipe laser levels available in the market, including self-leveling or manual leveling models, with different features such as wireless communication, remote control, and compatibility with various pipe sizes and types.
How do I choose the right pipe laser level for my project?
To choose the right pipe laser level for your project, consider factors such as the size and type of pipes you are working with, the required accuracy and range of the laser level, and budget constraints. Consult with a trusted supplier or expert to help you make the best decision.
How do I set up and operate a pipe laser level?
Setting up and operating a pipe laser level involves several steps, including mounting the laser level securely on the pipe, aligning it with the target, and adjusting the laser height, rotation, and slope as needed. Refer to the user manual and follow proper safety procedures to ensure efficient and accurate results.
How do I troubleshoot common problems with my pipe laser level?
Common problems with pipe laser levels may include inaccurate readings, battery or power issues, or calibration errors. Refer to the user manual for specific troubleshooting tips, or contact the manufacturer or supplier for assistance with repairs or replacement parts.
How can I maintain and store my pipe laser level for maximum durability and longevity?
To maintain and store your pipe laser level properly, clean it regularly, protect it from moisture and extreme temperatures, and store it in a secure, dry location. Follow manufacturer recommendations for battery replacement, calibration checks, and maintenance procedures to ensure your pipe laser level lasts for many years.

