Looking to keep your lawn looking fresh and lush all season long? One essential step to achieving a healthy and beautiful lawn is ensuring your sprinkler system is in proper working order. Orbit sprinkler systems are a popular choice for homeowners due to their precision and reliability. However, like any piece of equipment, it’s important to regularly test and maintain your sprinkler system to ensure it is functioning optimally.
In this blog post, we’ll take a deep dive into the importance of testing your Orbit sprinkler system and how to do it effectively. From checking for clogged nozzles to ensuring proper water pressure, we’ll cover all the necessary steps to keep your lawn looking its best. So, strap on your gardening gloves and let’s get started!
Inspecting the Sprinkler Heads
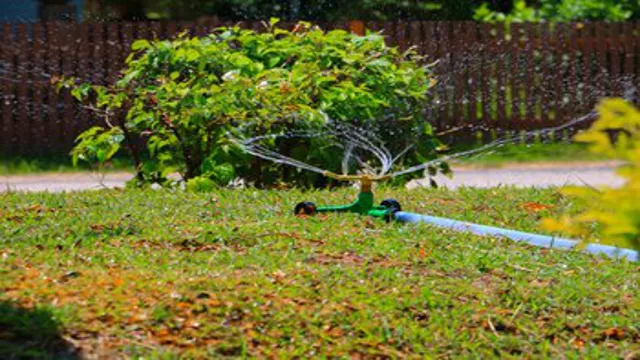
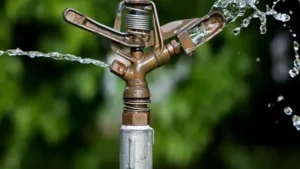
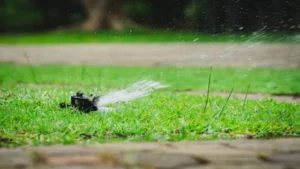
If you’re wondering how to test your Orbit sprinkler system, inspecting the sprinkler heads is a great place to start. This involves taking a closer look at each individual sprinkler head to make sure it’s functioning properly and not clogged with debris. First, turn on the sprinkler system and walk around to each sprinkler head.
Check to see if water is flowing evenly from each head and if any are spraying water in the wrong direction. If you notice any issues, the head may need to be adjusted or replaced. Additionally, check for any visible damage to the sprinkler heads, such as cracks or breakage, which may affect the performance of your system.
By regularly inspecting your sprinkler heads, you can ensure that your lawn is getting the water it needs to thrive. So, grab a hat and some sunscreen and get to inspecting those sprinkler heads!
Check for physical damage or blockages
When it comes to maintaining a healthy lawn, regular inspection of your sprinkler heads is key. One important factor to check is for any physical damage or blockages that may hinder the proper operation of your sprinklers. This means taking a close look at each individual head, assessing any cracks or breaks, or any visible signs of debris build-up around the nozzle.
Not only can damaged heads reduce the efficiency of your sprinkler system, but they can also lead to significant water waste and uneven watering, causing some areas of your lawn to be overwatered while others remain dry. By taking the time to inspect your sprinkler heads and addressing any issues, you can ensure a healthy, evenly watered lawn while also conserving water resources for the environment.
Look for worn out or broken parts
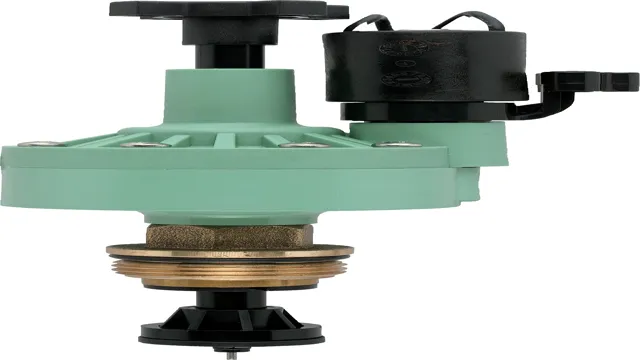
When it comes to maintaining your lawn’s irrigation system, inspecting the sprinkler heads is crucial. Look for worn out or broken parts that could potentially waste water and damage your lawn. Start by examining the nozzle to ensure that it is clear of any debris that may affect the water flow.
Next, check the filter screen for clogs, as this can restrict water flow and cause the system to malfunction. Lastly, inspect the casing and seal for any cracks or damage, which can lead to water leaks and further damage to your lawn. By regularly inspecting your sprinkler heads, you can prevent costly repairs and ensure that your lawn remains healthy and green.
So, what are you waiting for? Grab your garden hose and start inspecting those sprinkler heads today!
Checking Water Pressure
When it comes to maintaining your Orbit sprinkler system, checking your water pressure is an important part of ensuring its longevity. Testing your water pressure is a simple process that can be done with just a pressure gauge and some basic knowledge. First, locate the hose bib or faucet that is closest to your water meter.
Remove any attachments on the faucet, such as a nozzle or quick connect, and screw on the pressure gauge instead. Turn on the faucet and allow the water to run for a few seconds to establish a baseline pressure reading. The recommended pressure for most sprinkler systems is between 30 and 50 pounds per square inch (psi).
If your pressure reading is below this range, you may need to adjust the pressure regulator on your sprinkler system or contact a professional to address any issues. Regularly testing your water pressure can help prevent damage to your sprinkler system and ensure it operates at its full potential.
Use a pressure gauge to measure PSI
Water pressure can have a significant impact on the functionality of your plumbing system. Checking your water pressure is an essential task that can prevent expensive repairs and increase the lifespan of your plumbing. To check your water pressure, you need a pressure gauge.
A pressure gauge is an inexpensive tool that can provide valuable information about your plumbing system. It measures the PSI (pounds per square inch) of your water pressure. Ideally, your water pressure should fall between 40 and 60 PSI.
If your pressure gauge readings are below or above this range, it’s essential to take appropriate measures to correct the problem. Low water pressure can cause frustrating issues such as weak water flow and slow drainage, while high water pressure can damage your pipes and fixtures. Checking your water pressure with a pressure gauge can give you peace of mind and enable you to keep your plumbing system in good condition.
Make sure pressure is within recommended range
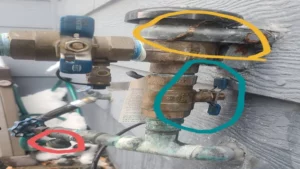
If you’re experiencing low water pressure or inconsistent flow, it might be time to check the pressure levels. Checking water pressure is relatively easy and can be done with a simple pressure gauge. First, locate your pressure regulator, which is typically near the main water shut-off valve.
Once you’ve located it, turn on a faucet and attach your pressure gauge to a nearby fixture. The recommended pressure ranges from 40 to 80 psi, with most homes requiring around 50 psi. If your pressure is too high, over 80 psi, it can cause damage to pipes and appliances; if it’s too low, under 40 psi, it can cause issues with water flow.
If you find that your pressure is outside of the recommended range, you may need to adjust your pressure regulator or contact a professional plumber to do it for you. Checking water pressure regularly can help with water efficiency and prevent costly repairs in the long run. So, make sure to check your water pressure and keep it within the recommended range to avoid any issues down the road.
Testing Each Zone
If you want to ensure your Orbit sprinkler system is working as it should, testing each zone is the way to go. But how do you do it? The first step is to turn off the water supply to the system and manually activate each zone one by one. To do this, locate your control valves and turn off the main water line.
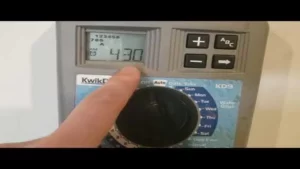
Then, use your control panel to activate each zone. Start with the first zone and check to make sure all the sprinkler heads pop up and irrigate the intended area. Walk around each zone and use a flag to mark the wet spots to make sure there are no dry areas.
If you notice any issues with any of the zones, it could mean a blockage or a problem with the sprinkler heads. Make sure to address these issues before turning the water supply back on. Overall, testing each zone of your Orbit sprinkler system is crucial for maintaining a healthy and functional lawn.
Manually turn on each zone and observe spray pattern
When it comes to maintaining a healthy and beautiful lawn, testing each zone of your sprinkler system is crucial. One way to do this is by manually turning on each zone and observing the spray pattern. By doing so, you can easily identify any areas that may require adjustment or repair.
A healthy spray pattern consists of a full, even coverage, without any blank spots or areas with excessive water flow. This will ensure that your lawn receives the proper amount of water without wasting any resources. Additionally, testing each zone can help you identify any leaks or malfunctions in the system, allowing you to address them promptly before they become larger issues.
Overall, taking the time to test each zone of your sprinkler system can help you maintain a beautiful and healthy lawn while also conserving water and resources. So, don’t neglect this crucial step in your lawn care routine!
Check for leaks or uneven coverage
When it comes to lawn irrigation systems, it is essential to check for leaks or uneven coverage regularly. Testing each irrigation zone separately is an effective way to detect problems before they become big issues that damage your lawn. Start by turning on each zone and observing how long it takes for the water to start flowing.
If there is a delay, it is a sign of a blockage or air in the line. An uneven spray pattern means some areas are receiving too much or too little water. Check the nozzles, sprinkler head, and valves as they can get clogged or damaged over time.
Garden hoses can also cause leaks, so be sure to check their connections and replace any worn-out washers. A well-maintained irrigation system can save you water, time, and money while keeping your lawn healthy and green. Don’t wait for signs of damage; test each zone regularly to ensure your irrigation system is working correctly.
Final Tips and Conclusion
In conclusion, testing your Orbit sprinkler system is as easy as 1-2-3 (or maybe 4). Simply check for any leaks, adjust the spray patterns to ensure even coverage, pay attention to the water pressure and make sure your timer settings are correct. With a little bit of maintenance and a few adjustments here and there, your Orbit sprinkler system will have your lawn looking lush and green in no time.
So don’t wait – get out there and give your Orbit sprinkler system a good test today!”
FAQs
What are the common issues faced while testing an Orbit sprinkler system?
The common issues faced while testing an Orbit sprinkler system include incorrect water coverage, obstruction in the water pressure, broken or cracked sprinkler heads, and improper sprinkler system alignment.
What is the best way to test the Orbit sprinkler system?
The best way to test an Orbit sprinkler system is to manually run each zone and observe the water coverage. This would help in identifying the issues such as low water pressure, broken or missing sprinkler heads, or misaligned sprinklers.
How often should I test my Orbit sprinkler system?
It is recommended to test your Orbit sprinkler system at least once a month to ensure its proper functioning. In addition, it is also recommended to test the system after any maintenance or repair work.
Can I test my Orbit sprinkler system if it is raining?
No, it is not recommended to test your Orbit sprinkler system when it is raining as it can affect the accuracy of the test results. It is better to wait until the rain stops and the ground is dry.
What tools are required for testing an Orbit sprinkler system?
The tools required for testing an Orbit sprinkler system include a screwdriver, a sprinkler head pull-up tool, a pressure gauge, and a flow gauge.
Why is it important to test an Orbit sprinkler system?
It is important to test an Orbit sprinkler system to ensure that it is functioning properly and providing adequate water coverage to the lawn or garden. Regular testing can also help in identifying any issues or defects in the system, which can be repaired timely to avoid any further damage.
How can I fix issues identified during the testing of my Orbit sprinkler system?
The issues identified during the testing of an Orbit sprinkler system can be resolved by replacing the broken or damaged sprinkler heads, adjusting the water pressure, realigning the sprinklers, or repairing any leaks in the system. It is recommended to seek professional help if the issues are complex or require technical expertise.
