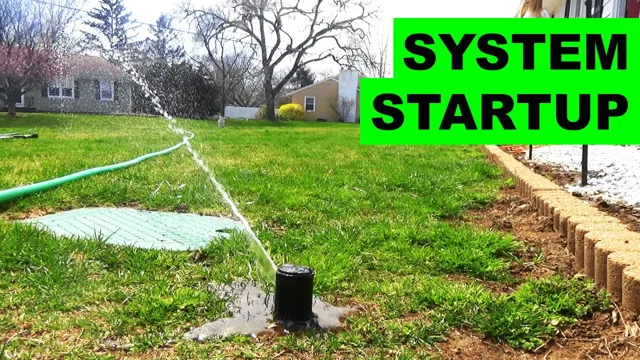
Are you excited to start watering your lawn and garden with a sprinkler system? If you’re new to owning a sprinkler system, the thought of starting one up for the first time might seem daunting. But fear not! In this blog, we’ll guide you through the steps of starting your sprinkler system, from checking for leaks and adjusting heads to programming your controller. Just think of it like starting a car: once you get the hang of it, you’ll be cruising in no time! So grab a cup of coffee, roll up your sleeves, and let’s get started on creating the lush lawn and garden of your dreams.
Check Your Equipment
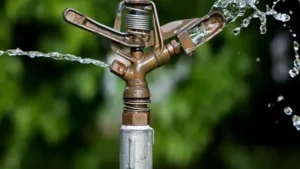
Before starting your sprinkler system for the season, it’s essential to check your equipment to ensure everything is in working order. Start by inspecting the sprinkler heads for any damage or blockages. Look for cracks, cuts, or any other signs of wear and tear that would affect the water flow.
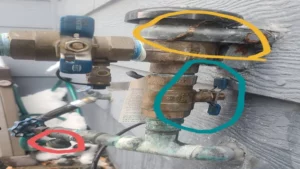
Also, check the valves and pipes for leaks and corrosion, which can lead to water wastage and higher utility bills. If you have a controller or timer, make sure it’s set correctly for your area’s watering restrictions and your lawn’s watering needs. Keeping your equipment well-maintained is crucial to the system’s efficiency and longevity, so take the time to troubleshoot any issues before you start watering.
By doing so, you’ll save water, energy, and money in the long run while enjoying a healthy and green lawn.
Inspect Your Sprinkler Heads
Inspect your sprinkler heads regularly to ensure they’re in good working condition. Your sprinkler system plays a crucial role in keeping your lawn lush and attractive, but if neglected, faulty or broken heads could cause costly damage to your yard and garden. Start with a visual inspection of each head and look for signs of wear and tear such as rust, cracks, or leaks.
If you notice any damage, replace the head as soon as possible to prevent further damage to your lawn. Also, check the water pressure and ensure that each head is spraying an adequate amount of water in the desired pattern. Proper maintenance and care of your sprinkler system will help extend the life of your equipment and ensure optimal performance in delivering the right amount of water to your lawn and garden.
Check Valves and Pipes
Check valves and pipes are essential components of any plumbing system. These devices prevent backflow, which can lead to contamination of your water supply. It’s crucial to check your valves and pipes regularly to ensure that they are functioning correctly.
A faulty check valve can cause significant damage to the plumbing system. When a check valve fails, it can cause water to flow back into the water supply, which can contaminate the entire system. This can result in costly repairs to the pipes and fixtures, as well as health hazards to anyone in contact with the contaminated water.
To avoid these potential issues, it’s crucial to inspect your check valves and pipes regularly. Doing so will ensure a safe and healthy water supply for your home or business. Remember, prevention is always better than fixing a problem after it has already occurred.
Turn on Your Water Supply
Starting up your sprinkler system can be a bit intimidating if you’re not sure where to begin. The first step is to turn on your water supply. Locate the valve that controls the water flow into your sprinkler system and ensure it’s turned on.
If your system has been dormant for an extended period, it’s a good idea to turn on the water slowly to allow the pipes to fill gradually. This can prevent bursting or other damage to the irrigation system. Once the water is flowing, make sure to check for any leaks or issues with your sprinkler heads.
If you notice any problems, address them before moving on to the next steps in starting up your sprinkler system. With this first step complete, you’re well on your way to having a lush, green lawn all season long.
Find Your Main Valve
One of the most important things that every homeowner should know is how to find their main valve and turn on their water supply. It may seem like a daunting task, but rest assured that with a little bit of knowledge, it’s actually quite easy. Your main valve is typically located near the meter box and is responsible for controlling the flow of water into your home.
To turn it on, you simply need to turn the valve handle clockwise until it’s fully open. It’s also a good idea to label the valve with a permanent marker or tag so that it’s easy to find in case of an emergency. Remember, the main valve plays a crucial role in your home’s plumbing system, so take the time to familiarize yourself with its location and operation.
Open the Main Valve Slowly
If you’re starting a plumbing project or just need to turn your water supply back on after maintenance, it’s important to remember to open the main valve slowly. Rushing into it could cause a sudden burst of water, which can damage your pipes and lead to costly repairs. Before you turn on your water supply, it’s a good idea to double-check that all the faucets and appliances in your home are turned off.
Then, locate your main valve, which is typically near your water meter or in your basement. Turn the valve slowly and listen for any noises or leaks. If you notice anything unusual, turn the valve off and call a professional plumber for help.
Taking your time when turning on your water supply can save you time and money in the long run. So, remember to always open the main valve slowly and carefully.
Check for Leaks
When it comes to getting your water supply running, it’s crucial to check for leaks. Before turning on the water supply, take a look around your plumbing system and check for any signs of wear and tear. Keep in mind that even small leaks can lead to significant problems in the long run, so it’s worth taking the time to be thorough.
Once you’ve inspected all visible pipes and connections, it’s time to turn on the water and monitor for any leaks or drips. If you do notice any problems, be sure to address them as soon as possible to avoid further damage. By being proactive and taking the time to check for leaks, you can ensure a steady and reliable water supply for your home or business.
So don’t hesitate to take the necessary steps to keep your plumbing system in top condition.
Program Your Controller
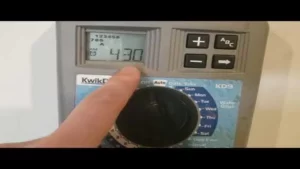
If you want to start your sprinkler system, you need to program your controller. This might seem like a daunting task, especially if you’re new to sprinkler systems, but it’s actually pretty straightforward. First, locate your controller and read the manual to understand how it works.
Then, turn on the power and set the date and time on the controller’s display. Next, set the watering schedule for each zone in your yard. This will vary depending on the type of plants you have and how much water they need.
You’ll also need to set the duration and frequency of the watering cycle. Once you’ve programmed your controller, you’re ready to turn on your sprinkler system and let it do its job. Just remember to check your system regularly and adjust the settings as needed to ensure your plants are getting the right amount of water.
With a little bit of patience and experimentation, you’ll have a lush and healthy lawn in no time!
Set Your Time and Date
When setting up your controller, the first thing you need to do is set the correct date and time. This is important because it ensures that your controller operates on the correct schedule and avoids accidentally watering your plants at 2 AM! To program your controller, begin by pressing the “time/date” button. From here, you’ll be prompted to enter the current date and time.
It’s important to be as accurate as possible, so take your time and double-check everything. Once you’ve entered the correct information, hit the “enter” button, and your controller will be all set and ready to go. Remember, setting the date and time is just the first step in creating an effective watering schedule.
Be sure to take into account the types of plants you have, the weather forecast, and other environmental factors to ensure your plants receive the right amount of water at the right time. By programming your controller correctly, you can help your garden thrive and enjoy a healthy, beautiful yield.
Set Your Watering Schedule and Duration
When it comes to keeping your lawn and garden hydrated, programming your controller is an essential step for setting your watering schedule and duration. With the right settings, you can ensure that your plants receive the optimal amount of water without wasting it. Start by determining the appropriate watering frequency for your lawn and plants based on the climate and soil conditions.
Then, program your controller accordingly and adjust it as necessary throughout the year. Consider using a smart controller that can adjust its watering schedule based on weather data, so you don’t have to manually make changes. With the right watering schedule and duration, your lawn and garden will thrive, and you’ll conserve water in the process.
So take the time to set up your controller properly, and enjoy a lush, healthy landscape all year round.
Test Your System
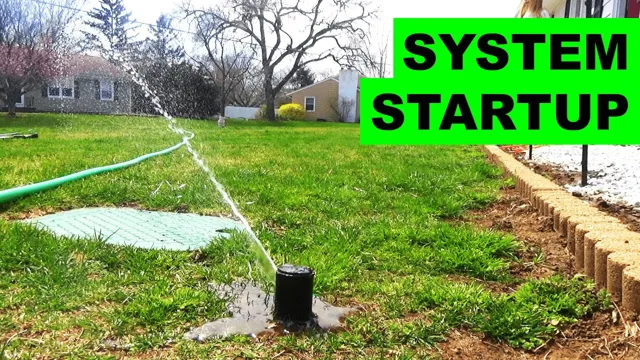
If you’re a homeowner, one of the essential tasks you need to perform every spring is starting your sprinkler system. But before you turn on the tap, it’s crucial to ensure that your system is functioning correctly. One of the best ways to do this is by conducting a test run.
To test your sprinkler system, turn on your water supply and activate the sprinkler control valves. After that, go to each sprinkler to check if water is properly flowing in and out of each one. If you notice any issues, such as leakages, blockages, or low pressure, you may need to call an expert to resolve the issue.
Performing this simple yet crucial test can prevent costly repairs and ensure your lawn stays green throughout the season. So give it a try today and get ready to enjoy a lush and healthy lawn all summer long!
Run Each Zone for a Short Time
When it comes to testing your sprinkler system, running each zone for a short period of time is essential. This allows you to detect any potential issues such as broken heads, leaks, or over/under watering. Start with the first zone and allow it to run for a few minutes, then move on to the next zone.
This process not only helps you identify any problems, but it also ensures that each zone is receiving the correct amount of water. It’s important to remember that different zones may require different watering times depending on the plants and soil in the area. By testing your system regularly, you can address any issues before they become major problems, which saves you time and money in the long run.
Keep in mind that regular maintenance is key for keeping your system functioning properly, so it’s a good idea to schedule a check-up at least once a year. Your landscape will thank you for it!
Inspect for Coverage and Adjust Accordingly
Testing your system is a crucial step in software development, and inspecting for coverage is an essential aspect of assessing its quality. It’s important to ensure that every functionality of your software is tested appropriately and provides accurate results. It’s crucial to check whether your system meets the requirements specified and whether it functions correctly.
To achieve this, you can perform various types of testing, such as unit, integration, system, and acceptance testing, depending on the complexity of your software. Once you have done the testing, you should examine the coverage report to verify the test cases’ effectiveness. The coverage report displays the code that has been tested and identifies any untested areas that require attention.
Analyzing this information helps you determine if your testing is adequate enough to cover all of the critical functions in your system. The coverage report helps you provide feedback about the code quality and how well it matches the specification. However, suppose the coverage analysis indicates a low percentage.
In that case, it means some parts of the code have not been tested, leading to low confidence in the software system’s resilience and consistency. You need to adjust your testing approach to ensure that every line of code exercised to improve code coverage. Increasing code coverage means that more code has been tested, leading to higher quality of the software.
In conclusion, testing your system and inspecting for coverage helps you identify issues early in the development, improving the software’s performance, reliability, and stability.
Conclusion
Starting a sprinkler system may seem daunting, but with the right know-how, anyone can become a lawn irrigation expert. First, make sure your system is properly installed and maintained. Then, turn on the water source and activate the controller.
Finally, sit back and enjoy watching your garden come to life. Just remember, if at first you don’t succeed, don’t hose it – try again!”
FAQs
What are the necessary steps for starting a sprinkler system?
Firstly, locate the main water supply valve and ensure it is off. Then, attach the backflow preventer and connect the sprinkler control valves. Finally, turn on the main water valve and set the sprinkler timer.
How often should I start up my sprinkler system?
It is recommended to start up your sprinkler system at least once every year, ideally before the summer season begins.
What happens if I don’t properly start up my sprinkler system?
If you don’t properly start up your sprinkler system, it may cause damage to the system, cause leaks, or even result in the need for expensive repairs.
Can I start up my sprinkler system myself or should I hire a professional?
While you can start up your sprinkler system yourself, it is recommended to hire a professional to ensure proper installation and to avoid costly mistakes.
What should I do if my sprinkler system doesn’t turn on after starting it up?
Check your main water supply valve to ensure it is turned on, and then check for any loose connections or broken sprinkler heads.
When should I shut down my sprinkler system?
It is recommended to shut down your sprinkler system before the winter season begins to prevent damage from freezing temperatures.
What maintenance should I perform on my sprinkler system?
Regular maintenance includes checking for leaks, cleaning sprinkler heads, replacing damaged parts, and adjusting sprinkler settings for optimal coverage.
