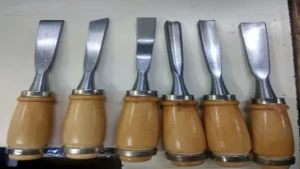
Woodturning is a satisfying and fulfilling hobby that anyone can pick up with practice. It requires skill and creativity, and one of the essential aspects of this practice is sharpening your wood lathe chisels. Without proper sharpening, your chisels will not perform well, and your woodturning projects will suffer.
But, where and how do you get started with sharpening wood lathe chisels? In this blog post, we will guide you through the process of sharpening your lathe chisels. You will learn about the basic tools and techniques you need to sharpen your chisels properly. We will give you tips on how to maintain your chisels so that they stay sharp and last longer.
Whether you are a beginner or an experienced woodturner looking to improve your skills, this post will show you everything you need to know to sharpen your wood lathe chisels like a pro. So, let’s dive in and start honing your skills! Whether you’re turning bowls or spindles, sharpening is an essential prerequisite to getting those clean and precise cuts. Sharpening tools are easy to use, and once you get the hang of it, you’ll find that it’s a quick and satisfying activity.
By the end of this post, you’ll have all the knowledge and tools you need to sharpen your wood lathe chisels and start making beautiful woodturning projects.
Understanding the Parts of a Wood Lathe Chisel
Are you looking to sharpen your wood lathe chisels but not sure where to start? Understanding the various parts of a wood lathe chisel can help you to better identify how to properly sharpen it. The five main parts of a wood lathe chisel include the handle, blade, bevel, grind, and tang. The handle serves as the grip for the user while the blade is the part that makes contact with the wood.
The bevel refers to the angle of the blade’s edge, which can vary depending on the type of chisel. The grind is the shape of the blade’s bevel, with various grinds producing different cutting effects. Finally, the tang refers to the part of the chisel that extends into the handle and provides stability and balance.
By understanding these different parts and their role in the overall chisel design, you can begin to properly sharpen and maintain your wood lathe chisels for optimal performance and longevity.
The Bevel
The bevel is an important part of a wood lathe chisel. It refers to the slanted edge of the blade that helps cut through the wood. The size and angle of the bevel can vary depending on the type of wood you are working with and the type of cut you want to make.
Some chisels have a single bevel, while others have a double bevel. A single bevel chisel is sharpened on one side only, while a double bevel chisel is sharpened on both sides. By understanding the parts of a wood lathe chisel, including the bevel, you can create clean and precise cuts on your project and achieve the desired end result.

The Cutting Edge
When it comes to woodturning, one of the most important tools in your arsenal is the wood lathe chisel. But with so many different shapes and sizes available, it can be difficult to know which one to choose. Understanding the anatomy of a wood lathe chisel can help you make the right decision.
The first part of a wood lathe chisel is the handle, which is typically made of wood or plastic and provides grip and control. The blade is the most important part of the chisel and comes in a variety of shapes, including gouges, scrapers, and parting tools. The cutting edge is the portion of the blade that actually removes material from the wood.
In order to perform well, a wood lathe chisel should be made of high-quality steel that can hold a sharp edge. Additionally, it should be properly sharpened and honed to ensure maximum cutting efficiency. By choosing the right wood lathe chisel and maintaining it properly, you’ll be able to create beautiful turned wood pieces with ease.
The Shank
When it comes to wood lathe chisels, it’s essential to understand the different parts to use them properly. One critical part of a chisel is the shank. It’s the portion of the tool that goes into the handle, and it’s often tapered to fit securely.
The shank’s size and shape can determine the tool’s overall strength and durability, so it’s essential to choose one that suits the project. Some shanks are round, while others are square or even octagonal, providing a comfortable grip for different hand sizes. The shank’s length can also affect the tool’s balance and the control the user has over it.
Understanding the shank’s role in a wood lathe chisel is necessary for any woodworker looking to create precise cuts and shapes with their tools.
Choosing the Right Sharpening Tools
Sharpening wood lathe chisels doesn’t need to be a chore – with the right tools, it’s actually pretty simple! One of the most important factors is selecting the appropriate equipment for the job. Diamond sharpening tools are a popular option, as they are very durable and long-lasting. If you prefer traditional methods, a sharpening stone is also an excellent choice.
Be sure to select a fine grit, as this will achieve a sharper edge. Regardless of your tool choice, it’s essential to maintain a consistent angle while sharpening. A honing guide can help with this.
When it comes to sharpening, honing, and buffing your wood lathe chisels, you’ll need high-quality grinding wheels as well. To get started, it’s essential to consider your preferences and needs. Remember, investing in high-quality sharpening tools will ensure your wood lathe chisels are always sharp and ready to use.
Sharpening Stone
Sharpening stone When it comes to sharpening knives and other tools, choosing the right sharpening tools is essential. One of the most commonly-used tools is the sharpening stone. However, not all sharpening stones are created equal.
To choose the right sharpening stone, you need to consider a few factors. First, decide on the grit you need. A lower grit stone will remove more material and is ideal for repairing damaged edges, while a higher grit stone is suitable for sharpening and refining the edge.
Second, consider the material of the stone. Natural stones like Arkansas stones are traditional and effective, but can be expensive. Synthetic stones like diamond stones are durable and cost-effective.
Finally, consider the size of the stone. A larger stone is more versatile and can be used to sharpen larger tools like axes and machetes, while a smaller stone is more portable and convenient for use on smaller blades like pocket knives. With the right sharpening stone and technique, you can keep your tools sharp and in top condition for years to come.
Diamond Hone
When it comes to sharpening tools, choosing the right one can make all the difference in achieving a sharp edge. One popular tool is the diamond hone, which uses a diamond-coated abrasive to sharpen knives, scissors, and other blades. Diamond hones offer several benefits over traditional sharpening stones, including faster sharpening times and a more consistent angle.
They also tend to last longer and require less maintenance. However, it’s important to choose the right grit for your specific blade and to use the hone correctly to avoid damaging your tools. If you’re new to sharpening, consider starting with a lower grit and practicing on knives or blades that you’re not worried about damaging.
With enough practice, you’ll be able to achieve a razor-sharp edge with your diamond hone.
Belt Sander
Belt Sander When it comes to sharpening tools, there are a variety of options to choose from, but choosing the right one can make a huge difference in the outcome of your sharpening process. A belt sander is a powerful tool that can quickly and efficiently sharpen your tools. However, not all belt sanders are created equal, and it’s important to choose the right one for the specific sharpening task at hand.
Look for a belt sander that has adjustable speed control, a dust collection system, and a reliable motor. It’s also important to choose the right grit size for the belt, as this can affect the outcome of the sharpening process. With the right belt sander and the proper technique, you can achieve sharp and precise edges on all of your tools.
So, take your time, do your research, and choose the best belt sander for your sharpening needs!
Preparing the Chisel for Sharpening
Sharpening wood lathe chisels is an essential skill for any woodworker. Before you can begin the sharpening process, it’s crucial to prepare the chisels properly. Begin by wiping the blades clean with a cloth or paper towel to remove any debris and dirt.
Ensure that the steel isn’t pitted or damaged in any way, as this could impact the sharpening process. Next, inspect the bevels of the chisels to determine whether they need to be reground before sharpening. If it’s necessary to reground the bevels, use a coarse grit sharpening stone or sandpaper to remove nicks or chips.
Finally, secure the chisel in a sharpening jig or by hand to begin the sharpening process. Remember to keep the angle consistent and to use progressively finer grits until you achieve a razor-sharp edge. With these preparation steps in mind, you’ll be able to sharpen your wood lathe chisels like a pro.
Cleaning the Chisel
Cleaning your chisel is an essential step in the sharpening process. Before you get started, you need to make sure that your chisel is free of any debris or dirt that may damage the sharpening stone. To do this, you should use a cleaning solution that’s designed specifically for chisels.
You’ll want to soak the chisel in the solution for a few minutes, making sure that all of the dirt and debris are thoroughly removed. Once you’ve finished soaking the chisel, you should rinse it under cold water to remove any remaining solution. The next step is to dry the chisel completely using a clean and dry cloth.
Doing this will make sure that your chisel is ready for the sharpening process and that it will not rust or corrode over time. Remember that a clean chisel is the key to a sharp and precise cut.
Removing Nicks and Burs
When it comes to chisel sharpening, preparing the tool for the process is just as important as the sharpening itself. One crucial step in the preparation process is removing any nicks and burs from the chisel blade. These imperfections can become problematic during sharpening, causing the blade to become unevenly sharpened or even damaged.
To remove nicks and burs, start by placing the blade flat on a coarse diamond sharpening stone. Use a circular motion while applying pressure to the blade, moving it back and forth until the burr disappears. Next, use a honing stone to smooth out the blade and remove any remaining nicks.
Once this step is complete, the chisel is ready for sharpening. It’s essential to note that taking the time to properly prepare the chisel will result in a razor-sharp edge that will enhance the tool’s performance and lifespan.
Sharpening the Chisel
Sharpening your wood lathe chisels is a crucial step to take if you want to achieve precise and clean cuts. The first thing you need to do is choose the right abrasive medium for sharpening. Many people prefer to use a sharpening stone with a grit size of 3000 or higher.
Once you have your abrasive medium, you need to carefully hold your chisel at a 30-degree angle against the stone and make small circular motions. Make sure you maintain the same angle throughout the entire process. After a few minutes of sharpening, you should be able to feel a burr on the back of the chisel.
At this point, flip the chisel over and remove the burr by gently sweeping the back of the chisel against the stone. Remember to take your time and be patient; rushing through the process can result in a poorly sharpened chisel that won’t cut efficiently. With a bit of practice, sharpening your wood lathe chisels will become second nature, and you’ll be able to turn out high-quality woodwork in no time.
Setting the Angle
Sharpening a chisel can be a tricky task, but setting the correct angle is crucial to achieving a sharp edge. The angle at which you sharpen your chisel will determine its durability and effectiveness. Most chisels have either a 25 or 30-degree angle, but the angle may vary depending on the intended use of the chisel.
To set the angle, you can use a honing guide or simply hold the chisel at the correct angle with your hand. It’s important to keep the angle consistent throughout the sharpening process to avoid uneven wear and tear on the chisel. With some practice and patience, sharpening your chisel at the correct angle will lead to more precise and efficient work.
Remember, a sharp chisel is a craftsman’s best friend!
Starting with the Bevel
If you’re new to woodworking, one of the first skills you’ll need to master is sharpening a chisel. Before you start sharpening the chisel, you’ll want to make sure the bevel is in good condition. The bevel is the flat, angled surface along the cutting edge of the chisel.
A dull or damaged bevel will make it difficult to sharpen the chisel properly. To check the bevel, hold the chisel up to the light and look for any nicks or burrs. If you see any, use a fine-grit sharpening stone or sandpaper to remove them.
Once the bevel is smooth and even, it’s time to move on to sharpening the chisel itself. With a little practice, you’ll be able to get your chisels razor-sharp and ready for all your woodworking projects.
Creating the Cutting Edge
Sharpening your chisel is an essential part of creating quality cuts. Just like any other tool in the workshop, a chisel needs to be sharpened regularly to maintain its efficiency. However, sharpening a chisel is not a task that should be taken lightly.
It requires a steady hand, patience, and a bit of skill. There are several different methods you can use to sharpen a chisel, including using a sharpening stone, sandpaper, or a bench grinder. Whichever method you choose, it’s important to ensure that you maintain the correct angle and apply consistent pressure throughout the process.
Remember, a sharp chisel not only produces quality work but also reduces the risk of accidents in the workshop. So take the time to hone your chisel, and you’ll reap the benefits of clean and precise cuts in all your woodworking projects.
Testing the Sharpness of the Chisel
Sharpening wood lathe chisels is an essential skill for any woodworker. A sharp chisel allows for precise and clean cuts, while a dull one can result in sloppy and uneven work. Testing the sharpness of the chisel is crucial before starting any project.
To do this, simply hold the chisel up to a light source and examine the edge. A sharp chisel should have a razor-thin edge that reflects the light evenly. If the edge looks dull or uneven, it’s time to sharpen it.
There are various sharpening methods, such as using a sharpening stone or sandpaper, but the key is to maintain a consistent angle throughout the process. With a little practice, sharpening your wood lathe chisels will become a breeze, and your projects will look more professional than ever before. Don’t underestimate the importance of a sharp chisel – it can make all the difference in the world!
Using a Test Cut
When it comes to woodworking, having a sharp chisel is essential for creating clean and precise cuts. One way to test the sharpness of your chisel is by using a test cut. Start by selecting a piece of scrap wood and making a shallow cut with your chisel.
Pay attention to how easily the chisel cuts through the wood and the amount of force you need to use. If the chisel cuts smoothly and effortlessly, then it’s sharp and ready for use. However, if you need to apply too much force or the cut is not clean, then it’s time to sharpen the chisel using a sharpening stone or sharpening system.
Remember that a dull chisel not only makes your work harder, but it can also be dangerous. It’s worth taking the time to test and sharpen your chisels regularly to ensure optimal performance and safety in your woodworking projects.
Feeling the Edge
When it comes to woodworking, testing the sharpness of a chisel is essential. Feeling the edge of the chisel with your fingertips is a great way to determine its sharpness. A sharp chisel will have a crisp feeling, while a dull one will feel rounded or fuzzy.
It’s important to test the chisel on various materials, such as softwood and hardwood, to ensure its sharpness is consistent. A dull chisel can not only make your work more difficult but can also lead to injuries. Sharpening your chisels regularly is crucial to working safely and efficiently.
Don’t underestimate the importance of feeling the edge of your tools before starting any woodworking project!
Maintaining the Sharpness of Your Chisel
Keeping your wood lathe chisels sharp is essential to any woodworking project. Dull chisels can ruin your workpiece and can be dangerous to use. There are several methods you can use to sharpen your chisels, but the most common is with a sharpening stone.
To start, moisten the sharpening stone and place it on a stable surface. Then, hold the chisel blade perpendicular to the stone and move it back and forth across the stone in a circular motion. Repeat this process until you see a thin, shiny, and flat edge on the blade.
Then, hone the edge by stroking the chisel blade across the stone several times at a low angle. Remember to check the sharpness of the edge frequently by lightly tapping it with your fingertips. Once you achieve a razor-sharp edge, your chisel is ready to use! With regular sharpening, you can maintain the sharpness of your chisel and ensure your woodworking projects turn out perfectly every time.
Honing
Keeping your chisel sharp is the key to achieving clean and precise cuts in wood. Honing, or sharpening, your chisel can be done using various methods such as using sharpening stones or a honing guide. The first step in honing your chisel is to ensure that the blade is clean and free of any rust or debris.
Next, select the appropriate grit level for your sharpening stone and begin sharpening the blade at a consistent angle, usually between 20-30 degrees. Once you’ve achieved a sharp edge, you can use a leather strop to polish the blade and remove any burrs that may have formed. It’s important to regularly maintain the sharpness of your chisel to prevent it from becoming dull and making difficult and unsightly cuts in your woodwork.
With a little bit of practice and routine maintenance, you can keep your chisel sharp and ready for any woodworking project.
Stropping
Stropping is an essential technique to maintain the sharpness of your chisel. It involves running the chisel blade along a leather or felt strop to refine and polish its edge. Stropping helps to remove any burrs or roughness that may have formed on the blade during use, restoring it to its original sharpness.
It also helps to align the edge of the blade, making it more effective at cutting and reducing the risk of accidents. To use a strop, simply apply a small amount of abrasive compound over the leather or felt surface and then drag the chisel blade gently along the length of the strop, maintaining a consistent angle throughout the process. Over time, stropping will become second nature, and you’ll notice a significant improvement in the quality of your chisel work.
So, don’t forget to make stropping a part of your regular chisel maintenance routine to ensure the best results and prolong the life of your tools.
Conclusion and Additional Tips
In conclusion, sharpening wood lathe chisels doesn’t have to be an edge-of-your-seat experience. By following these simple steps, you’ll be able to cut and carve with precision and ease. And who knows, you might even surprise yourself with the results.
So grab your chisels, take a deep breath, and get ready to sharpen your way to success. Your projects will thank you for it!”
FAQs
What are wood lathe chisels and how do they work?
Wood lathe chisels are tools used to shape wood on a lathe machine. They work by removing small pieces of wood through cutting, scraping, or gouging techniques.
How often should you sharpen wood lathe chisels?
It is recommended to sharpen wood lathe chisels after every use or as needed during the shaping process to ensure smooth and efficient cuts.
What is the best way to sharpen wood lathe chisels?
The most effective way to sharpen wood lathe chisels is by using a sharpening stone or abrasive paper. Begin by finding and maintaining a consistent angle and focusing on removing any burrs or nicks in the blade.
How can you tell when wood lathe chisels need to be sharpened?
You can tell wood lathe chisels need to be sharpened when they begin to produce rough or uneven cuts, or if they require more force to remove wood from the lathe.
Are there different types of wood lathe chisels available?
Yes, there are many different types of wood lathe chisels available, each with their own unique shape and cutting abilities. These include skew chisels, gouges, parting tool, and more.
Can wood lathe chisels be sharpened by hand, or are specialized tools required?
While specialized sharpening tools are available, wood lathe chisels can be effectively sharpened by hand using a sharpening stone or abrasive paper.
What are some common mistakes to avoid when sharpening wood lathe chisels?
Some common mistakes to avoid when sharpening wood lathe chisels include using too much pressure, not maintaining a consistent angle, and neglecting to remove burrs or nicks from the blade.

