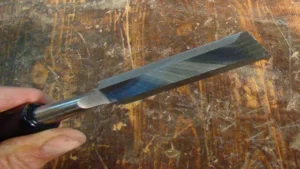
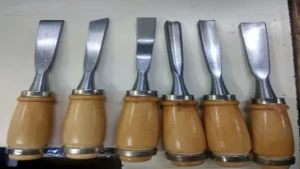
Have you ever struggled with achieving a sharp edge on your wood chisels? Few things are more frustrating than working with dull or inefficient tools, especially when it comes to woodworking. Fortunately, there is a simple solution that can help you quickly and easily sharpen your wood chisels: a bench grinder. A bench grinder is a versatile and widely used tool that can help you produce sharp edges on a variety of blades and tools.
The process of sharpening your wood chisels on a bench grinder involves a few simple steps, including preparing your grinder, selecting the right wheel, and carefully grinding your chisels to a razor-sharp edge. In this blog post, we’ll dive into the specifics of sharpening wood chisels on a bench grinder, providing detailed instructions, tips, and tricks to help you get the most out of your tool. Whether you’re a beginner or an experienced woodworker, sharpening your chisels is an essential skill that can help you achieve better results and improve the efficiency of your work.
So grab your bench grinder and let’s get started!
Tools and Materials
Sharpening your wood chisels on a bench grinder can save you time and effort, while making your projects look more polished. To get started, you’ll need the right tools and materials. First, make sure you have a well-maintained bench grinder with a steady speed and a clean grinding wheel.
You’ll also need a sharpening jig or holder to keep your chisels in place while you work. Additionally, pick out a reliable set of honing stones with grits ranging from coarse to fine, and a leather strop to give your chisels a final polish. Once you have your tools and materials ready, follow these simple steps to sharpen your wood chisels like a pro.
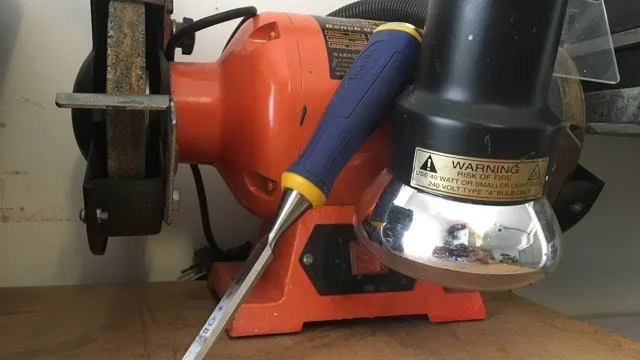
Bench grinder
As a DIY enthusiast or professional craftsman, having the right tools and materials is paramount to achieving quality results. When it comes to grinding and sharpening metal surfaces, a bench grinder is an essential tool. It is a versatile machine designed to grind and polish objects made of metal, including blades, screws, and cutting tools.
The bench grinder consists of two grinding wheels that spin at high speeds to remove rust, shave off old paint, sharpen a dull blade, and create clean, smooth edges. With its powerful motor and adjustable settings, a bench grinder can handle a range of tasks, from light metalwork to heavy-duty industrial applications. In summary, the bench grinder is a valuable addition to any workshop that deals with metalwork.
Its ability to create precise edges and smooth finishes makes it a trusted tool for professionals and DIY enthusiasts alike.
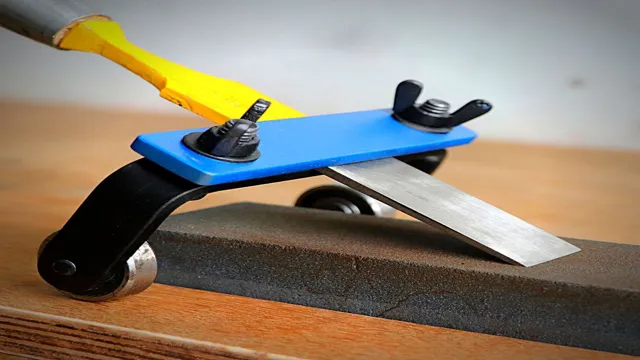
Chisels
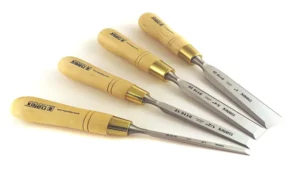
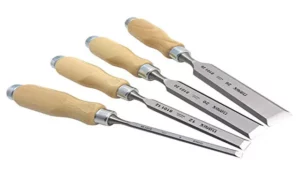
Chisels are a must-have tool for anyone working with wood, stone or metal. These hand-held cutting tools are designed to remove material by scraping or chipping, and come in a variety of shapes and sizes to suit different applications. From delicate carving to rough shaping, chisels are an essential part of any artisan’s toolkit.
When choosing chisels for your project, consider the type of material you will be working with and the level of precision required. Be sure to choose quality, well-crafted chisels that are comfortable to hold and properly honed. With the right chisels, you’ll be able to create intricate details and achieve perfect finishes, whether you’re a seasoned pro or just starting out.
So, don’t hesitate to invest in a set of chisels or add to your collection today and see what a difference they can make in your craft.
Safety glasses
When it comes to DIY projects, having the proper tools and materials is essential for ensuring a successful outcome. One such tool that is often overlooked or forgotten about is safety glasses. While it may seem like a small detail, wearing safety glasses can make a huge difference in protecting your eyes from injury or damage.
Whether you’re working with power tools, drilling, or even just hammering, small pieces of debris can easily fly into your eyes and cause harm. Investing in a good pair of safety glasses can help prevent accidents and ensure that you can work on your project with confidence. So, the next time you’re getting ready to tackle a home improvement project, don’t forget to add safety glasses to your list of necessary tools and equipment!
Preparing the Grinder
If you’re wondering how to sharpen wood chisels on a bench grinder, the first step is to properly prepare the grinder. Make sure you have the appropriate wheel installed, such as a fine-grit abrasive wheel, to avoid taking off too much material from your chisels. It’s also recommended to adjust the tool rest so that it’s close to the wheel but not touching it, and angled at a slight degree away from the wheel.
This will allow for better control and stability while sharpening your chisels. Before you begin, take the time to test the wheel’s rotation and ensure it’s spinning in the correct direction. Now that your grinder is ready to go, you can move on to sharpening your chisels with confidence.
Adjusting the tool rest
Preparing the grinder can seem like a daunting task, but it’s important to get it right before you start grinding. One key step to prepare your grinder is adjusting the tool rest. The tool rest is the platform that holds the item you’re grinding, and it needs to be adjusted properly to ensure accuracy and safety.
To begin, make sure the grinder is turned off and unplugged. Next, adjust the position of the tool rest so that it’s about 1/8 inch away from the grinding wheel. This will give you enough clearance to move your item while still keeping it secure.
Once the tool rest is in position, tighten the wing nut to lock it in place. Remember, the tool rest should be level with the top of the grinding wheel to prevent any potential accidents. With these adjustments made, you’ve successfully prepared your grinder and you’re ready to start grinding!
Securing the grinder
“Grinder Security” Securing your grinder is crucial to ensure the safety of yourself and others. Before starting to use the grinder, there are preparations that need to be made to guarantee its proper functioning. First, check the stability of the surface where you plan to use the grinder.
It should be flat and sturdy to hold the weight of the machine and the workpiece. Then, inspect the power source to make sure it is compatible with the grinder’s voltage requirement. Make sure to wear appropriate clothing, including eye and ear protection, gloves, and a mask to avoid inhaling dust and debris.
Also, be sure to remove any flammable materials or liquids from the vicinity to avoid fire hazards. Finally, never leave the grinder unattended while in use, and turn it off immediately after finishing the task. By following these simple steps, you can ensure a safe and secure environment while using your grinder.
Installing the appropriate wheel
When it comes to preparing your grinder for use, one of the most important steps is installing the appropriate wheel. This will determine how well your grinder performs and how effective it is for your specific needs. To begin, you need to make sure that you have the correct type of wheel for the task at hand.
There are different types of wheels available, such as grinding wheels, cutting wheels, and wire brushes, each designed for different purposes. Once you have the correct wheel, you can then move on to installing it properly, which typically involves loosening the nut that holds the old wheel in place, removing the old wheel, and then mounting the new wheel in its place. It’s essential to ensure that the new wheel is aligned correctly and tightened securely to avoid any accidents or damage to the grinder.
By taking these steps, you can be confident that your grinder will be ready to use when you need it, and you’ll get optimal results every time.
Sharpening the Chisel
If you’re looking to sharpen wood chisels on a bench grinder, it’s important to follow proper techniques to ensure a sharp, durable edge. The first step is to ensure that your bench grinder is set up correctly. You’ll want to adjust the tool rest so that it’s just below the center of the grinding wheel.
This will help to prevent your chisel from catching or bouncing on the wheel during grinding. Next, you’ll want to select the appropriate grinding wheel. For wood chisels, we recommend using a fine-grit wheel, as this will give you a sharp, precise edge.
Once you’ve selected your wheel, it’s time to start grinding. You’ll want to hold your chisel at a 20-degree angle to the wheel, and make sure to apply even pressure across the surface of the blade. Take your time, and make sure to use light, fluid movements to prevent overheating or warping your chisel.
With a little practice, you’ll be able to sharpen your wood chisels on a bench grinder like a pro!
Preparing the chisel
Preparing the chisel requires sharpening it to ensure precise and clean cuts. The process of sharpening the chisel involves grinding the blade against a sharpening stone or sandpaper until the edge is sharpened and polished. Before beginning, ensure the chisel is clean and free of rust or debris.
To sharpen, hold the chisel at a 25-degree angle and grind the edge in a back-and-forth motion against the stone. Repeat the process until the desired sharpness is achieved, and then hone the blade with a leather strop. Using a sharp chisel is essential for woodworking, as it creates clean and accurate cuts without causing damage to the wood.
Proper care of the chisel is key to ensuring its longevity and effectiveness, so be sure to keep it clean and sharpened before each use. Keyword: Sharpening the chisel
Holding the chisel against the wheel
Sharpening a chisel is a necessary task for any woodworker or DIY enthusiast, and it can be easily done with the right tools and techniques. The key to sharpening a chisel is maintaining the correct angle and ensuring a sharp edge. To start the process, secure the chisel in a vice and place a sharpening stone on a level surface.
Hold the chisel at the correct angle (usually around 25 degrees) and move it back and forth across the stone, keeping consistent pressure and ensuring an even wear pattern. Once you have sharpened the bevel, move on to honing, which removes any burrs or imperfections on the edge. Holding the chisel against the wheel of a honing machine or leather strop can achieve this.
A sharp chisel will make your woodworking projects much easier and more precise, so take the time to properly sharpen yours.
Checking the progress
As you work towards your goals, it’s important to check in on your progress regularly. It’s like sharpening a chisel – you don’t want to be hacking away at your work with a dull tool. It’s much more efficient and effective to take the time to make sure your chisel is sharp and your cuts are precise.
Similarly, taking the time to evaluate your progress allows you to make adjustments and course correct if necessary. You can celebrate your successes and identify areas that need improvement. This way, you can continue to refine your approach and get closer to achieving your goals.
So take the time to sharpen your chisel and check your progress – it’s an essential part of the journey.
Finishing touches
Sharpening wood chisels on a bench grinder is a skill that can take some time to master, but with a bit of practice, you can get great results. The first step is to adjust the grinder’s tool rest so that it is at the right angle for your chisel. The angle should be between 20 and 30 degrees, depending on the type of chisel you are sharpening.
Once you have set the angle, turn on the grinder and lightly touch the chisel to the grinding wheel, keeping it at the correct angle. Move the chisel slowly back and forth across the wheel, being careful not to overheat the blade. Finally, hone the chisel on a honing stone to refine the edge even further.
With a sharp chisel, you’ll be able to make precise cuts and get great results on your woodworking projects.
Honing the secondary bevel
After honing the primary bevel and creating a micro bevel, it’s time to focus on the finishing touches by honing the secondary bevel. This step involves using a finer grit stone to ensure a sharp and polished edge. The secondary bevel should be a narrower angle than the primary bevel, usually around 20 degrees.
It’s important to maintain a consistent angle throughout the honing process to avoid over-sharpening or creating uneven angles. Take your time with this step and make sure to check the edge frequently to ensure it’s sharp and even. With the right tools and technique, honing the secondary bevel can result in a razor-sharp edge that’s perfect for precision cutting and woodworking.
Checking for burrs
When it comes to finishing off a project, checking for burrs is a crucial step. Burrs are small, metal shavings that can be left over after cutting, drilling or shaping metal. They may seem small, but they can cause big problems.
Burrs can cause injury, as they can be sharp and difficult to see. They can also affect the performance of certain parts by causing damage to nearby machinery or equipment. That’s why it’s so important to identify and remove any burrs that may be present.
You can do this by running your finger over any exposed edges or by using a special deburring tool. The deburring process is a quick and easy way to ensure that your finished product is safe and free from any leftover metal debris. So whether you’re working on a DIY project or a product for your business, remember to check for and remove any burrs before considering your work complete.
Conclusion
In conclusion, sharpening your wood chisels on a bench grinder may seem intimidating at first, but with proper technique and safety precautions, you can sharpen those blades to a razor-sharp edge! Just remember to always wear protective gear, use the appropriate grinding wheels, and take your time to ensure a precise and accurate grind. With a little practice and some patience, your wood chisels will be ready to carve their way through any project with ease. So go ahead, embrace your inner lumberjack, and bring your chisels back to life with a good ol’ bench grinder sharpening session!”
FAQs
What is the proper angle to sharpen wood chisels on a bench grinder?
The proper angle for sharpening wood chisels on a bench grinder is typically around 25 degrees.
Can any bench grinder be used to sharpen wood chisels?
While any bench grinder technically can be used to sharpen wood chisels, it is recommended to use a grinder with a low-speed motor to avoid burning the blade.
How often should wood chisels be sharpened on a bench grinder?
The frequency of sharpening wood chisels on a bench grinder depends on how often the chisels are used. A good rule of thumb is to sharpen them after every few uses.
Is there a specific type of grinding wheel to use for sharpening wood chisels?
Yes, it is recommended to use a grinding wheel specifically designed for sharpening tools. A high-quality aluminum oxide wheel is often the best choice.
Can a honing guide be used when sharpening wood chisels on a bench grinder?
Yes, a honing guide can be used to help maintain the correct angle while sharpening wood chisels on a bench grinder.
How can you tell when a wood chisel is dull and needs to be sharpened?
A dull wood chisel will produce rough and uneven cuts, and may even produce sawdust instead of shavings. If the chisel feels like it is slipping or dragging, it is likely in need of sharpening.
Are there any safety precautions to take when sharpening wood chisels on a bench grinder?
Yes, it is important to wear eye protection and a dust mask while sharpening wood chisels on a bench grinder. It is also important to use the grinder’s tool rest to maintain a consistent angle and avoid accidentally catching the blade in the wheel.
