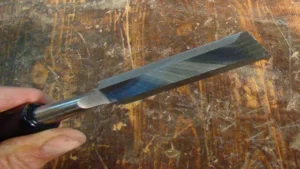
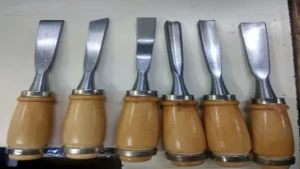
Stone carving is an ancient art form with roots that date back to the dawn of civilization. Using chisels and hammers, skilled artisans can transform raw blocks of stone into intricate sculptures, monuments, and architectural elements. However, even the most talented carvers need sharp tools to achieve precision and finesse in their work.
That’s why sharpening stone carving chisels is an essential skill that every carver needs to master. In this blog post, we’ll guide you through the process of sharpening your stone carving chisels, from selecting the right tools to honing the edges to perfection. Whether you’re a seasoned pro or a beginner, you’ll find useful tips to improve the quality of your work and extend the lifespan of your tools.
So, grab your chisels and let’s get sharpening!
Understanding Stone Carving Chisels
Sharpening stone carving chisels is a crucial skill for sculptors and stone carvers. Stone carving chisels come in various shapes and sizes, with each having a specific purpose. The process of sharpening involves using a sharpening stone to remove the dull edge and restore it to its former sharpness.
The process requires patience and precision, as sharpening too much can damage the chisel’s structure. A sharp chisel can make the difference between a successful carving and a frustrating one. It ensures that the artist has precise control over their chisel and can create intricate details.
The best way to sharpen a stone carving chisel is by using a honing guide to help maintain the correct angle. Keeping the chisels sharp by regularly sharpening them can save time and effort and produce better results.
Types of Stone Carving Chisels
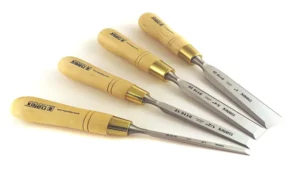
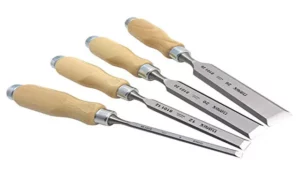
Understanding Stone Carving Chisels Stone carving is an age-old art form that requires skill and precision, and the right tools to get the job done. One of the most important tools in any stone carver’s arsenal is the chisel, which comes in a variety of types and shapes. First and foremost is the point chisel, so named for its sharp, pointed end.
Point chisels are used for creating fine details and sharp edges, and are ideal for roughing out the basic shape of a design. Another popular chisel type is the claw chisel, which has a flat, wide blade with a claw-like end. Claw chisels are best used for removing large, flat areas of stone, and for creating deep grooves and channels.
The tooth chisel, meanwhile, has small tooth-like projections along its blade that are perfect for creating texture and adding depth to a design. Finally, the rondel chisel is a circular chisel with a pointed tip, used for shaping and carving concave surfaces. Each type of chisel has its own unique purpose, and skilled stone carvers know how to use them to achieve the desired effect.
So, whether you’re a seasoned pro or just starting out, understanding stone carving chisels is an essential part of mastering this timeless craft.
Common Chisel Deformities and Causes
Understanding stone carving chisels is essential if you want to create beautiful and intricate designs on stone surfaces. However, it’s not just about knowing how to use the chisels, you should also understand the common chisel deformities and causes. Cracks, chips, and blunted edges are among the most common problems encountered when working with chisels.
These issues can be caused by a variety of factors, such as using excessive force or striking the chisel at the wrong angle. In some cases, chisels may also become deformed due to poor maintenance or faulty materials. To avoid these deformities, it’s crucial that you choose high-quality chisels that are designed for your specific task and maintain them properly.
By doing so, you’ll be able to extend their lifespan and ensure that they perform optimally every time you use them.
Preparing Your Sharpening Tools
Sharpening your stone carving chisels is an essential task that requires a few important steps. First, inspect your chisels and make sure they are clean and free from any debris or residue. Then, select the appropriate sharpening tool, whether it be a sharpening stone or diamond file, and secure it in place.
Next, use the proper technique when sharpening the chisel, maintaining a consistent angle and pressure throughout the process. It’s important to periodically check the sharpness of your chisel by making test cuts on a piece of scrap wood or stone. Remember, a dull chisel not only produces poor results, but it can also be dangerous to use.
By following these steps, you’ll be able to maintain the sharpness of your stone carving chisels and produce high-quality carvings every time.
Sharpening Stone Types and Grits
When it comes to sharpening your tools, it’s important to have the right type of sharpening stone and grit. Different types of stones include oil stones, water stones, diamond stones, and ceramic stones. Oil stones are great for sharpening, while water stones are better for honing.
Diamond stones are perfect for heavy-duty sharpening, and ceramic stones are great for finishing. The grit of your sharpening stone is just as important as the type. Lower grits, such as 100-400, are great for reshaping and repairing dull blades.
Higher grits, such as 800-1000, are perfect for honing and sharpening. It’s important to match the type of stone and grit to the specific tool you are sharpening to ensure the best results. So next time you are preparing to sharpen your tools, make sure you have the right sharpening stone and grit for the job at hand.
Tools for Sharpening
Sharpening tools are essential for maintaining a sharp edge on your knives and other cutting tools. But before you start sharpening, it’s important to prepare your tools properly. Begin by cleaning any dirt or debris off the blades and sharpening stones.
Next, make sure your sharpening stones are properly flattened to give you a consistent surface to work with. Check that your honing oil or waterstone is fresh and not contaminated with debris. Finally, make sure you’re using the correct sharpening angle for your specific blade.
With the right preparation, your sharpening tools will give you better results and make the process of sharpening easier and more effective. Keep your tools in good condition for optimal performance, and you’ll be on your way to sharper blades in no time!
Sharpening Your Stone Carving Chisels
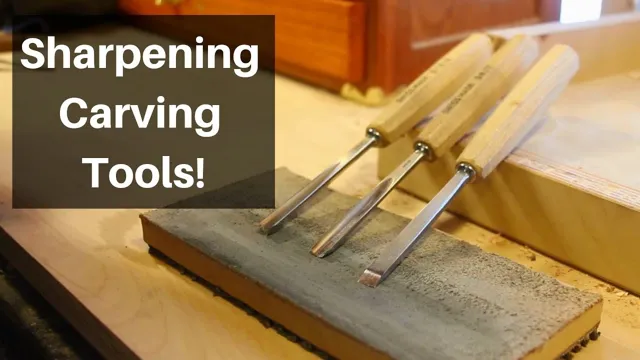
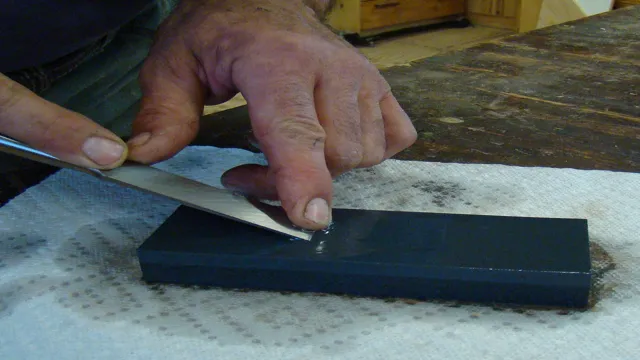
As a stone carver, keeping your chisels sharp is essential to achieve precision and detail in your work. Here’s how to sharpen stone carving chisels: firstly, choose the right sharpening stone based on the type of steel of your chisel for best results. Begin by oiling the stone, then lay the chisel flat on the sharpening stone and move it back and forth, creating a straight edge or a slight curve that matches the contour of the stone.
Use the coarse grit side of the sharpening stone first and gradually move to the finer grit to smoothen and refine the edge. Keep the chisel flat on the stone at all times while sharpening and apply even pressure throughout the process. Sharpening also means honing the chisel’s bevel, holding it at a consistent angle and lightly running it along the sharpening stone to create a razor-sharp edge.
Regular maintenance of your chisels will not only make your work easier, but it will also increase their longevity. So grab your sharpening stone and give your chisels the edge they need to carve with precision!
Step-by-Step Guide to Sharpening Chisels
Sharpening your stone carving chisels may seem daunting, but with the right tools and techniques, you can keep your tools in top condition. To begin, select the appropriate sharpening stone. Look for one that is coarser grit on one side and finer grit on the other.
Next, secure the chisel in a honing guide to maintain a consistent angle. Begin by sharpening the rough side of the stone, moving the chisel back and forth in a circular motion, using even pressure. Once you have worked on one side, flip the chisel and repeat on the other side.
After sharpening each side, move to the finer side of the stone, repeating the same circular motion until a burr forms on the opposite side. Finally, remove the burr by using light strokes on the finer grit on the stone. With patience and practice, you can sharpen your stone carving chisels like a pro and get back to creating beautiful works of art.
Filing and Grinding Techniques
Sharpening your stone carving chisels may seem like a daunting task, but it’s an essential part of keeping your tools in top condition. Filing and grinding techniques can make a huge difference in the sharpness and precision of your chisels. First, ensure that you’re using the right tools for the job.
A flat file can be used to remove any nicks or chips in the blade. Then, you’ll need a diamond cone or other grinding tool to restore the chisel’s bevel. When grinding, it’s important to keep the angle consistent and avoid overheating the blade.
Once you’ve re-shaped the bevel, finish off with honing stones to achieve a razor-sharp edge. Remember to keep your chisels lubricated during the process to prevent damage from heat and friction. Sharpening your chisels regularly will save time and improve the quality of your stone carving work.
Maintaining Your Sharpened Chisels
Sharpening stone carving chisels is an important maintenance task to ensure your chisels remain effective and efficient. First, gather the necessary tools, including a sharpening stone, honing oil, and a guide for consistent angles. Next, secure the chisel in the guide and begin by sharpening the bevel edge, using a 600-800 grit stone for a rougher edge and a 1000-1200 grit stone for a finer edge.
Be sure to maintain a constant angle and sharpen evenly on both sides. Once the bevel edge is sharp, move on to honing the flat side of the blade, using a 1200-1500 grit stone to remove any burrs. After honing, wipe down the chisel with a cloth to remove any oil or debris.
Regular sharpening and maintenance will prolong the lifespan of your chisels, keep them sharp and ready for use at all times.
Storing Your Chisels
When it comes to maintaining your sharpened chisels, proper storage is key. Storing your chisels in a dry place can prevent rust and maintain their sharp edges for longer. Consider using a chisel roll or a dedicated chisel rack to keep them organized and protected.
Avoid storing them in wet areas or places with high humidity, as this can cause the chisel handles to expand and contract, leading to cracks over time. Another important factor in maintaining your chisels is to always clean them after use. Wipe off any excess debris or dust with a dry cloth, and use a honing stone or sharpening accessory to keep your chisels sharp and ready for their next use.
With proper storage and maintenance, your chisels can provide precise and accurate cuts for years to come.
Tips for Prolonging the Life of Your Chisels
Maintaining your sharpened chisels is critical for prolonging their lifespan. One tip is to keep them clean and dry after each use. Moisture can cause rust and compromise the sharpness of the blade.
Another useful practice is to store them in a container or rack to prevent damage. Be careful not to hit the blades against each other or other tools. Oil the blades with a thin layer of lubricant or mineral oil to keep them protected from corrosion.
Check the edges of your chisels regularly, sharpening them whenever they become dull. Always use a honing guide and a sharpening stone to maintain the angle and consistency of the bevel. With proper maintenance, your chisels can last for years, providing you with clean and precise cuts for your woodworking projects.
Conclusion
In conclusion, sharpening stone carving chisels can be a daunting task, but with the right tools and technique, it can be as effortless as carving butter. Remember to take your time and keep your angles consistent, and your chisels will be sharper than a pun at a comedy club. Happy carving!”
FAQs
What are the different types of stone carving chisels that need sharpening?
There are several types of stone carving chisels that include pointed chisels, flat chisels, tooth chisels, and gouges which need regular sharpening.
What equipment is needed to sharpen stone carving chisels?
You will need sharpening stones, honing oil, and a leather strop to sharpen your stone carving chisels.
How can I tell when my stone carving chisels need sharpening?
You can tell when your chisels need sharpening when they start to feel dull, slip while carving, or produce uneven carvings.
What is the process of sharpening stone carving chisels?
To sharpen your stone carving chisels, you need to first soak the sharpening stones in honing oil, then hold the chisels at a consistent angle and move it back and forth across the sharpening stone until you achieve the desired sharpness.
How often should I sharpen my stone carving chisels?
You should sharpen your stone carving chisels before every use or at least once a week if you use them frequently.
Is it possible to over-sharpen my stone carving chisels?
Yes, it is possible to over-sharpen your chisels, which can cause them to lose their shape and become unusable. Be careful to not over-sharpen your chisels.
Can I use a machine to sharpen my stone carving chisels?
Yes, you can use a machine to sharpen your stone carving chisels, but it is not recommended as it can cause them to overheat and lose their temper, making them ineffective for carving. It is best to sharpen them by hand.
