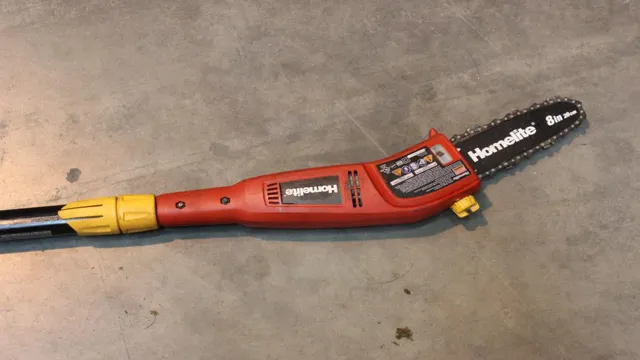
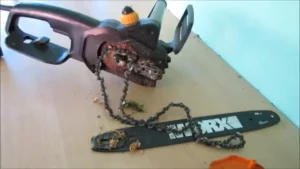
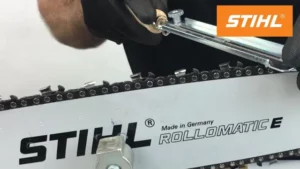
Are you tired of struggling to cut through branches and tree limbs with your pole saw? It may be time to replace the chain. A dull or damaged chain can make your pole saw ineffective and even dangerous. So, don’t wait any longer to learn how to replace the chain.
Think of your pole saw as a chef’s knife. Over time, the blade dulls and needs to be sharpened or replaced for optimal performance. The same goes for the chain on your pole saw.
By replacing the chain, you can ensure that it cuts through branches cleanly and efficiently, making your yard work a breeze. But where do you start? Don’t worry, we’ve got you covered. In this guide, we’ll walk you through the steps to replace the chain on your pole saw.
We’ll cover everything from choosing the right chain to safety precautions you should take. So, grab your safety gear and let’s get started. By the end of this guide, you’ll be able to confidently replace the chain on your pole saw and get back to cutting those stubborn branches.
Let’s get to work!
Safety First!
When it comes to maintaining your pole saw, safety should always be your top priority. One of the most important tasks is to replace the chains when they become dull or damaged. The process sounds simple enough, but it can be dangerous if you don’t follow the correct steps.
To replace the chain on a pole saw, start by ensuring the saw is turned off and unplugged. Next, use a flathead screwdriver to loosen the tensioning screw and remove the old chain. Carefully install the new chain, making sure it is properly tensioned and lubricated.
Finally, test the saw to make sure it is running smoothly before you start using it again. Remember, always wear protective gear such as safety glasses and gloves while operating power tools, and never hesitate to seek professional help if you are unsure about any step. By following these simple safety guidelines, you can keep your pole saw running smoothly for years to come.
Before You Begin
“Before You Begin” When embarking on any DIY project, it’s important to prioritize safety above all else. This means taking the time to carefully read and follow all instructions, wearing appropriate protective gear, and using tools and equipment as intended. Don’t try to cut corners or rush through steps – this can lead to accidents and injuries that could have been easily avoided.
Be sure to also take regular breaks to avoid fatigue and maintain focus. Remember, there’s no shame in seeking out professional help if you’re unsure about how to proceed or encounter unexpected roadblocks. By prioritizing safety, you’ll be able to complete your project with confidence and peace of mind.
Gather Your Tools
When starting any project, it is essential to have all the necessary tools on hand. However, before anything else, safety should be your top priority. Some of our tools can be sharp, electric, or even toxic.
That is why we need to make sure we have the necessary safety equipment before we start working. Safety goggles, gloves, and a dust mask can be lifesavers when working on a project. It is also helpful to know your way around a first aid kit, just in case.
Once you have your safety equipment, it’s time to gather your tools. Depending on what project you’re working on, you may need a variety of tools, such as a hammer, a saw, a wrench, or a screwdriver. As you collect your tools, make sure they’re in good working order.
Dull blades, rusty screws, or damaged handles can put you at risk, so always inspect your tools before using them. With these precautions in mind, you’re all set to start your next project with confidence and safety!
Step-by-Step Guide to Replacing Your Chain
Replacing the chain on your pole saw can seem like a daunting task, but with the right tools and a little bit of know-how, you can do it yourself! First, make sure that your saw is unplugged or that the battery is disconnected before you begin. Then, remove the bar nuts and the cover plate to expose the chain. Loosen the tension on the chain by adjusting the tensioning screw and then remove the chain from the bar.
Use a sharpening tool to sharpen any dull teeth on the chain before installing your new chain. Slide the new chain onto the bar and adjust the tension once again before tightening the bar nuts and cover plate. Give the chain a few test cuts to make sure that everything is working properly.
And voila, your pole saw is ready to tackle any pruning job once again! Remember to use protective gloves and eyewear while replacing the chain to avoid injury, and to dispose of the old chain properly.
Step 1: Remove the Chain Cover
Replacing your chain can be a daunting process, but it doesn’t have to be. Step 1 involves removing the chain cover. Start by locating the cover on your bike, which should be where the chain is enclosed.
Then, using a wrench, remove all bolts and screws holding the chain cover in place. Once you’ve done this, gently remove the chain cover and set it aside in a safe place. Keep in mind that some bikes may have a few extra screws holding the cover in place, so be sure to locate them all before attempting to remove the cover.
This is an important first step in the chain replacement process and helps make the following steps easier. By following these steps, you’ll be well on your way to replacing your bike chain and getting back on the road in no time.
Step 2: Loosen the Tension Screw
When it comes to replacing your chain, it may feel overwhelming at first. But fear not, we have you covered with a step-by-step guide. After removing the old chain, it’s time to loosen the tension screw.
This screw is essential to adjust the tension of the chain, and it’s typically located near the rear wheel axle. Use a wrench to turn the screw counterclockwise, which will move the rear wheel back and loosen the chain. It’s important to find the right tension, not too loose and not too tight.
A loose chain can jump off the sprocket, while a tight chain can cause unnecessary wear and tear on the parts. We recommend consulting your bike’s manual to find the correct tension specifications. Loosening the tension screw may seem like a small step, but it’s crucial to ensure the smooth functioning of your chain.
Step 3: Remove the Old Chain
Now that you have the tools ready, it’s time to get started on removing the old chain. Start by placing your bike upside down or in a bike stand for support. Next, locate the quick link or master link on your chain.
This is a removable link that makes the removal and installation of your chain much easier. Use a pair of pliers or your fingers to release the link and separate the chain. Be sure to keep the link and pin together in a safe place.
If your chain does not have a quick link, you will need to use a chain tool to push out one of the pins and remove the chain in two separate pieces. This can be a bit more challenging but with a bit of patience, it can be done. Once your old chain is removed, it’s time to move on to the next step – measuring the new chain.
Step 4: Install the New Chain
Now that you have removed the old chain, it’s time to install the new one! The first step is to match the new chain with the old one in terms of links and length. Lay out the new chain and compare it to the old one, removing any extra links as needed. Once you have the correct length, it’s time to string the new chain through the derailleur and onto the cassette.
Start by attaching one end of the chain to the derailleur, making sure to follow the proper route through any pulleys. Then, thread the chain through the cassette, ensuring that it is sitting properly in each gear. After threading the chain, connect the two ends using a quick-link or chain tool.
Finally, carefully test your new chain by shifting through the gears and adjusting the derailleur if necessary. Keywords: replacing chain, install new chain, length, derailleur, cassette, quick-link, chain tool, adjusting derailleur.
Step 5: Tighten the Tension Screw
Now that you’ve successfully replaced your bike chain, the final step is to tighten the tension screw. This small but important part of the process ensures that your chain is properly tensioned and your bike runs smoothly. The tension screw is usually located near the rear derailleur on the right-hand side of the bike frame.
To tighten it, use a hex wrench to turn the screw clockwise until the chain is taut and there is no slack. However, be careful not to overtighten the screw as this may cause unnecessary wear and tear on your chain and gears. With the tension screw adjusted correctly, you’re ready to hit the road and enjoy a smoother ride.
Always remember to double-check your work and test your new chain before taking your bike out for a spin.
Step 6: Check for Proper Tension and Alignment
After installing your new chain, the next step is to check the tension and alignment. First, shift the chain to the largest chainring and the smallest rear cog. Then, pull the chain up and down at the midpoint between the front and rear chainrings.
The chain should have a little bit of slack, about 1/2 inch or so. If it’s tighter than that, loosen the back wheel and move it slightly backwards until the chain is at the proper tension. Make sure the wheel is centered and straight in the frame before tightening the axle bolts.
Once your wheel is aligned, check the chain’s lateral alignment. Viewing from above, the chain should run in a straight line through the derailleur cage, jockey wheels, and cassette cogs. If it looks like it’s running at an angle, then adjust by using the barrel adjuster on the derailleur until the chain runs straight.
Checking the tension and alignment is an essential step to make sure your shifting is smooth and your new chain doesn’t wear out too soon.
Maintenance and Tips
If you own a pole saw, you may eventually need to replace the chain. Fortunately, replacing the chain on a pole saw is a fairly simple process that can be done with just a few tools. First, make sure to turn off the saw and unplug it from its power source.
Next, loosen the chain tension by turning the tensioning screw counterclockwise. Use a wrench to remove the bolts holding the guide bar in place. Carefully remove the old chain from the saw and then place the new chain onto the guide bar, ensuring that it’s facing the correct way.
Replace the guide bar and bolts, tightening them with a wrench. Finally, adjust the chain tension by tightening the tensioning screw and then test the saw to make sure the chain is correctly aligned and tight enough. With a little bit of effort, you can easily replace the chain on your pole saw and keep it running in top condition.
Regular Maintenance Tips
Regular maintenance is essential to keep a vehicle in tip-top shape, providing better performance, longevity, and safety. One of the crucial things to do is to perform a regular oil change, ensuring the engine lubrication is at optimal levels, avoiding wear, and increasing fuel efficiency. Checking and replacing air filters is also vital in providing clean air to the engine, reducing emissions, and preserving the engine’s life.
Likewise, keeping an eye on the tire pressure, brakes, and battery will prevent unexpected breakdowns and accidents on the road. Regularly detailing the car’s exterior and interior will help maintain its value and appearance, ensuring that it’s clean and pleasing to the eye. Additionally, keeping records of all maintenance performed will help in tracking the car’s progress and valuable information if it’s time to sell.
Taking care of a car is similar to taking care of one’s health, and neglecting maintenance can lead to costly repairs or a complete overhaul. Therefore, it’s necessary to make regular maintenance a priority and a habit to save money in the long run and improve driving experience.
Chain Replacement Schedule
Maintaining your bicycle chain is important in ensuring that your ride is smooth and efficient. Regularly replacing your chain can prevent costly repairs and extend the lifespan of your bike. The general rule of thumb is to replace your chain every 2,000-3,000 miles, depending on usage and conditions.
However, it’s also important to regularly check for chain wear using a chain checker tool. If the chain is stretched beyond 0.75%, it’s time to replace it.
It’s also important to clean and lubricate your chain regularly to prolong its lifespan. In addition to proper maintenance, choosing a high-quality chain can also make a significant difference in longevity and performance. Consider factors such as weight, durability, and compatibility with your drivetrain when selecting a replacement chain.
By following these tips and maintaining a regular replacement schedule, you can keep your chain in top shape and enjoy a more efficient and reliable ride.
Final Thoughts
Replacing the chain on a pole saw can be a daunting task, but with the right tools and a little patience, anyone can do it. First, it’s important to make sure the saw is switched off before attempting to replace the chain. Next, use a wrench to loosen the nuts on the chain cover.
This will allow you to remove the cover and access the chain. Carefully remove the old chain and lay it out so you can easily identify the correct replacement chain. Take note of the direction the old chain was installed, and insert the new chain in the same direction.
Once the new chain is in place, adjust the tension so it is snug against the bar, and ensure that the teeth are facing in the correct direction. Tighten the nuts on the cover, and you’re done! With a new chain in place, your pole saw will be ready to tackle any task you throw its way. Remember, always follow the manufacturer’s instructions and take appropriate safety precautions when operating power tools.
Conclusion
In conclusion, replacing a chain on a pole saw is a simple process that anyone can learn. With the right tools and a bit of patience, you can have your saw cutting like new again in no time. And who knows, maybe after a successful chain replacement, you’ll feel inspired to tackle even more DIY projects.
But if all else fails, just remember the wise words of Tim Allen from Home Improvement, “More power!” Happy sawing, friends.
FAQs
What tools do I need to replace the chain on my pole saw?
You will need a screwdriver, a wrench, and a chainsaw file.
How do I know when it’s time to replace the chain on my pole saw?
Signs that it’s time to replace the chain include dull or broken teeth, excessive vibration, and difficulty cutting through wood.
Can I replace the chain on my pole saw myself, or do I need to take it to a professional?
While it is possible to replace the chain yourself, it’s important to have a good understanding of chainsaws and their safety features. If you’re unsure, it’s best to seek professional assistance.
What are some common mistakes people make when replacing a chainsaw chain on a pole saw?
Common mistakes include not properly tightening the chain tension, not properly lubricating the chain, and installing the chain backwards.
How often should I replace the chain on my pole saw?
This will depend on how often you use your saw and the type of wood you are cutting. As a general guideline, you should replace your chain every 100-150 hours of use or when it becomes dull or damaged.
What type of chain should I use to replace my pole saw chain?
The type of chain you should use will depend on the make and model of your pole saw. Be sure to consult your owner’s manual for recommendations.
Is it safe to replace the chain on my pole saw while it’s still connected to the power source?
No, it’s important to always disconnect the saw from its power source before attempting any maintenance tasks, including replacing the chain.
