How to Read a Digital Caliper: A Step-by-Step Guide to Accurate Measurements
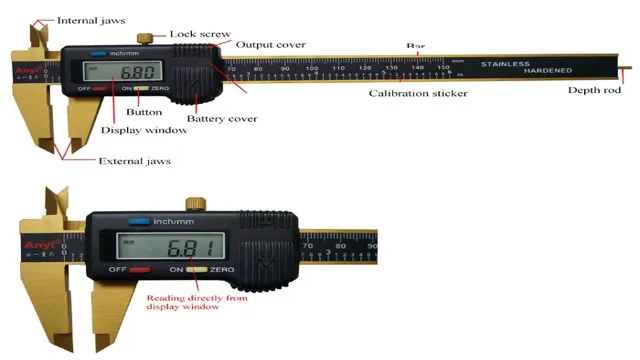
Are you trying to figure out how to read a digital caliper but don’t know where to start? Don’t worry, you’re not alone. Reading a digital caliper can be intimidating, especially if you’ve never used one before. But it doesn’t have to be.
In this blog post, we’ll take you through the process step-by-step and help you understand exactly what you need to do to read a digital caliper accurately. Think of a digital caliper like a high-tech tape measure. Instead of measuring length, however, it’s used to measure the distance between two points with great precision.
This makes it an essential tool for anyone who needs to take precise measurements in their work such as machinists, engineers, woodworkers or for DIYers. The good news is that using a digital caliper is easy once you understand how it works. So, let’s take the mystery out of it and walk you through the process.
With this knowledge, you’ll be able to master the digital caliper in no time at all!
Introduction
If you’re new to using a digital caliper, it may seem confusing at first. However, with a little bit of practice, you’ll find that it’s a useful tool for making precise measurements. To properly read a digital caliper, start by ensuring that the display is set to zero.
Then, use the jaws to grip the object you want to measure. Take note of the measurement displayed on the screen, which will show you the width or thickness of the object. It’s important to be careful when using a digital caliper, as even the slightest bit of pressure can impact the accuracy of your measurements.
By following these simple steps, you can easily learn how to read a digital caliper and use it to get precise measurements every time.
What is a Digital Caliper?
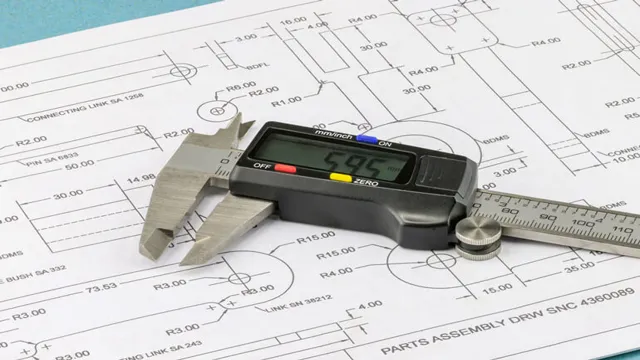
A digital caliper is a versatile tool used to measure small distances and dimensions with great accuracy. It operates by utilizing electronic components such as a microcontroller, linear encoder, and display unit to provide precise measurements in different units of measurement such as inches, millimeters, or centimeters. The digital caliper’s advanced technology and functions make it an essential tool in industries such as engineering, manufacturing, and metalworking.
It is also useful in various applications such as jewelry making, woodworking, and scientific research. In summary, a digital caliper is a handheld instrument used to measure dimensions with high precision and accuracy, making it a must-have tool for any professional, craftsman, or DIY enthusiast who needs to measure accurately.
Why Use a Digital Caliper?
If you’re someone who often measures objects for work, hobbies, or DIY projects, then you’ll find a digital caliper handy. It offers high accuracy readings, is easy to use, and provides quick measurements. Unlike traditional calipers, digital calipers are electronic devices, which provide digital readings of small distances and thicknesses.
They come with a digital display and a control button, which makes them perfect for precise and delicate measuring tasks. Additionally, they have a zero button to reset the device’s starting point, making it easier to use and save time. By using this device, you can increase accuracy, save time and energy, and get precise readings for your projects.
So, if you’re into precise measurements, investing in a digital caliper is worth your money, and it’s a device that you won’t regret owning.
Step-by-Step Guide
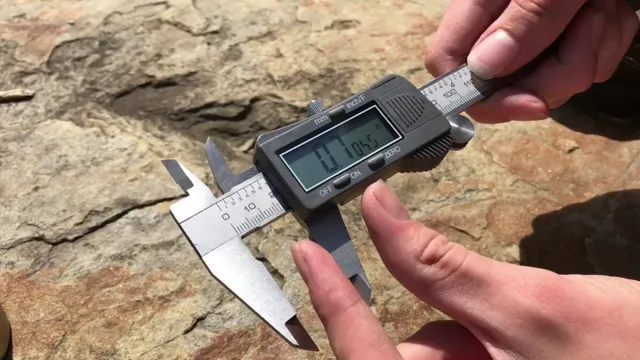
Learning how to read a digital caliper involves following a few simple steps. Firstly, turn on the device and set it to inches or millimeters as per your preference. Next, place the object you wish to measure between the two jaws of the caliper, making sure it is held securely in place.
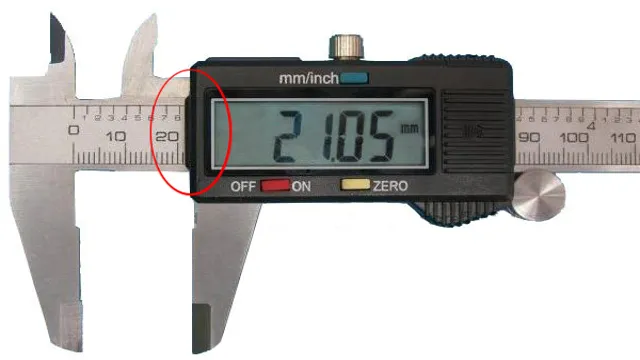
Use the thumb roller to move the jaws until they touch the object’s edges. The caliper will display the measurement on the digital screen in its default unit of measure. Make sure to read the screen from top to bottom, including any decimal places.
Lastly, turn off the device when you are done using it to conserve battery life. Remember, practice is key to becoming proficient at using a digital caliper.
Step 1: Turn On the Digital Caliper
The first step in using a digital caliper is to turn it on. This may seem obvious, but it’s important to know how to properly turn on the device in order to use it correctly and get accurate measurements. Most digital calipers will have a button somewhere on the tool to turn it on.
Depending on the model, you may need to hold the button down for a few seconds to turn it on, while others may have a simple on/off switch. Once the digital caliper is turned on, you’ll want to check that the display is reading “0.00” before you start your measurements.
This will ensure that you’re starting from a baseline of zero and getting the most accurate readings. Keep in mind that some digital calipers may require batteries, so be prepared to replace them as needed to keep your tool working effectively. With your caliper turned on and ready to go, you can start taking precise measurements with ease.
Step 2: Set the Measurement Scale
When it comes to measuring anything, the first step is to set the measurement scale. This means that you need to decide on a specific unit of measurement that you will use to track whatever it is that you are measuring. This is important because it creates a standard by which you can compare results over time.
For example, if you are measuring weight loss, you need to decide if you will use pounds, kilograms or some other unit of measurement. Once you have settled on a unit of measurement, it’s important to stick with it as you track progress. This ensures that your measurements are consistent, and that any changes you see are truly reflective of progress.
If you’re not sure what unit of measurement to use, you can check industry standards or consult with experts in your field. It’s also important to make sure that the unit of measurement you choose is relevant to your goals. For example, if you are measuring website traffic, using hits per day may not be as relevant as unique visitors per day.
In setting the measurement scale, it’s also important to consider factors such as accuracy and precision. Accuracy means that your measurements are close to the true value, while precision means that your measurements are consistent. When selecting a measurement scale, it’s important to balance these factors carefully.
If you choose a unit of measurement that is too precise, you may find it difficult to get accurate measurements. On the other hand, if you choose a unit of measurement that is not precise enough, you may miss important changes. Setting the measurement scale is just one step in effective measurement.
But it’s an important one, as it lays the foundation for tracking progress and making improvements over time. By selecting the right unit of measurement and considering factors such as accuracy and precision, you can ensure that your measurements are both relevant and reliable.
Step 3: Place the Caliper Jaws Around the Object
To accurately measure an object using calipers, the next step is to place the caliper jaws around the object. This can be done by carefully positioning the jaws on either side of the object with a firm grip. The caliper arms should be parallel to the object being measured, ensuring that there are no gaps or spaces between the jaws and object.
Once the jaws are in place, take a closer look at the measurement scale on the caliper and make note of the reading. This measurement will give you an accurate dimension of the object’s size and shape. Remember to take multiple measurements for objects that may have varying widths or thicknesses.
By thoroughly following these steps, you can be sure to accurately calculate the measurements of any object, making the process much more efficient and easy.
Step 4: Read the Measurement Display
After successfully measuring distances and calculating the area and volume using a laser distance measure, the next important step is to read the measurement display. The display is usually found on the device itself and provides you with the measurements you need. It is important to take note of the units of measurement used as well as the visible decimal places.
This will ensure that you get accurate results and that there are no errors when recording or using the data collected. Some laser distance measures also have additional features such as the ability to save and organize measurements, display angle indicators, or even calculate Pythagorean functions. Understanding these features can help optimize your use of the device and make your tasks more efficient.
With proper understanding of the measurement display, you will be able to easily measure distances and make precise calculations for your construction, renovation, or DIY projects.
Tips for Using a Digital Caliper
If you’re new to using a digital caliper, reading the measurements may seem overwhelming at first. However, with a few tips, you’ll become a pro at using this handy tool in no time. First, make sure the caliper is zeroed before taking a measurement.
To do this, close the jaws and press the zero button. Next, when taking a measurement, ensure the object you’re measuring fits snugly between the jaws. To avoid parallax errors, read the measurement from directly above the digits, ensuring you’re looking at them straight on.
Another tip is to check the calibration of your caliper regularly to ensure accurate readings. With these tips and a little practice, you’ll be confidently using your digital caliper for precision measurements in no time.
Use the Locking Screw to Secure the Jaws in Place
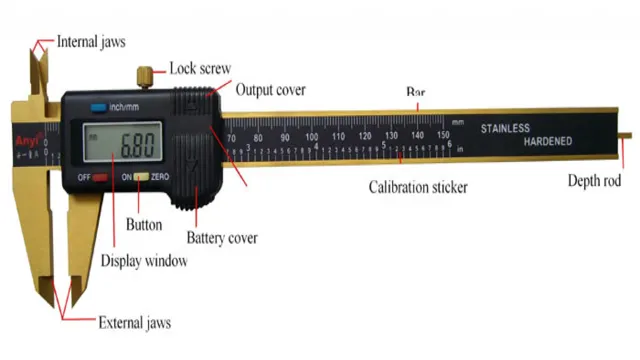
If you’re using a digital caliper, one important tip to keep in mind is to use the locking screw to secure the jaws in place. This is especially important when taking precise measurements, as any movement in the jaws can result in inaccurate readings. Once you’ve positioned the digital caliper where you need it, simply tighten the locking screw to ensure that the jaws are firmly in place.
This will enable you to take accurate and consistent measurements every time you use your caliper. Additionally, it’s important to ensure that the jaws are clean and free of debris before taking any measurements, as foreign particles can also impact the accuracy of your readings. By following these tips, you can make the most of your digital caliper and achieve precise measurements with ease.
Keep the Caliper Clean and Dry
Digital calipers are widely used in various industries for measuring distances, depths, and diameters precisely. However, to get the most accurate readings, it is essential to keep the caliper clean and dry. Any debris or moisture on the caliper’s surface can lead to inaccurate measurements, making it imperative to wipe it down with a dry cloth or brush.
It is also recommended to store digital calipers in a dry container to prevent any moisture or dust from accumulating on the surface. A clean caliper will ensure that you get the right measurements every time you use it, preventing any costly mistakes. So, make sure to give your digital caliper the cleanliness and upkeep it deserves – your accuracy and efficiency will thank you for it!
Be Gentle with the Caliper and Avoid Dropping It
If you’re new to using a digital caliper, there are a few things to keep in mind to ensure accurate measurements and prevent damage to your tool. One important tip is to be gentle with the caliper and avoid dropping it. Even a slight fall can cause the delicate internal components to shift and give inaccurate readings.
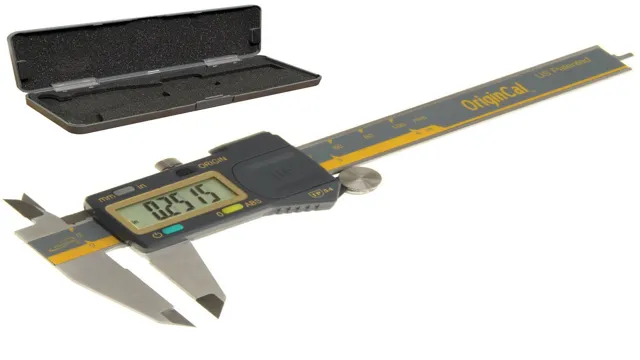
Additionally, you’ll want to make sure you’re using the correct measuring jaws for the job at hand. There are different types of jaws that can be used for measuring inside and outside diameters, depths, and steps. It’s also important to take regular care of your caliper, such as cleaning the jaws after use and storing it in a protective case or pouch.
By taking these simple steps, you’ll be able to get the most out of your digital caliper for years to come.
Conclusion
In conclusion, reading a digital caliper may seem daunting at first, but with a little practice and patience, anyone can master it. Just remember to start by zeroing the device, read the main scale first, then the sliding scale, and finally the digital display. And if all else fails, just remember the words of the great philosopher Aristotle: ‘Patience is bitter, but its fruit is sweet.
‘ Happy measuring!”
FAQs
What is a digital caliper and how does it work?
A digital caliper is a measuring tool that is used to take precise measurements. It works by using a digital display that shows the measurements in a clear and easy to read format.
How accurate are digital calipers?
Digital calipers are extremely accurate and are capable of taking measurements down to the thousandth of an inch.
What makes digital calipers more precise than traditional calipers?
Digital calipers are more precise than traditional calipers because they use a digital display to show the exact measurement. This eliminates the possibility of misreading the scale on a traditional caliper.
Can you use a digital caliper to measure depth?
Yes, most digital calipers come with a depth gauge that allows you to accurately measure the depth of an object.
Are digital calipers easy to use for beginners?
Yes, digital calipers are very user-friendly and easy to use. Simply turn on the device and start measuring.
How do you change the battery on a digital caliper?
To change the battery on a digital caliper, simply remove the battery cover and replace the old battery with a new one.
How do you clean and maintain a digital caliper?
To clean a digital caliper, wipe it down with a clean, dry cloth after each use. Also, make sure to keep it in a protective case when not in use to prevent damage.

