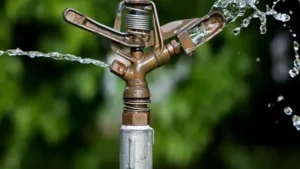
It’s time to get your sprinkler system up and running again, but the thought of opening it up may fill you with dread. Don’t worry, opening your sprinkler system is easier than you might think. In fact, as long as you have the right tools, it’s a job that can be handled in just a few easy steps.
First things first, it’s important to understand why you need to open your sprinkler system. The winter months can wreak havoc on your irrigation system, causing ice to form and potentially damaging your pipes. By opening your system, you can flush out any debris or buildup that may have accumulated during the off season and make sure everything is in working order.
So, what exactly do you need to get the job done? You’ll need a few basic tools, including a screwdriver, pliers, and maybe even a pair of gloves. Once you have everything you need, you can start by turning off the water supply to your sprinkler system. From there, you’ll need to locate the valve box, which is usually located near the main water supply.
Once you’ve opened the valve box, you’ll need to remove the cover and locate the valves themselves. Use your screwdriver or pliers to turn the valves counterclockwise, which will release the water pressure in the system and allow you to flush out any accumulated debris. Once you’re sure everything is flushed out, you can turn the valves back clockwise and close the valve box cover.
In just a few easy steps, you’ll have successfully opened your sprinkler system and ensured everything is working correctly. Don’t be intimidated by the process – with the right tools and a little bit of know-how, it’s a job that can be tackled by just about anyone. So get to work and start enjoying that lush, green lawn once again!
Check Your Water Pressure
When opening your sprinkler system for the season, it’s crucial to check your water pressure. This may seem like a small detail, but it can have a big impact on the efficiency of your sprinklers. A simple tool called a pressure gauge can be used to measure the water pressure.
If the pressure is too low, your sprinklers may not be able to reach all areas of your lawn or garden, resulting in dry spots and uneven watering. On the other hand, if the pressure is too high, it can cause the sprinkler heads to burst or become damaged over time. It’s important to find the sweet spot and adjust your system accordingly.
By taking the time to check your water pressure, you can ensure that your sprinkler system runs smoothly and effectively all season long.
Locate Your Sprinkler System’s Main Valve
One important aspect of maintaining your sprinkler system is knowing how to locate the main valve. This is especially crucial in cases of emergencies or repairs to the system. The main valve controls the flow of water to your sprinkler system, so it’s important to know its location and how to turn it off in case of leaks or other issues.
But before you go searching for your main valve, it’s essential to check the water pressure. Low-pressure levels can lead to uneven water distribution, while high pressure can cause damage to the sprinkler heads and pipes. Checking the water pressure helps ensure your sprinkler system is functioning correctly and that your lawn and garden receive the right amount of water to thrive.
So, before you go searching for your main valve, make sure to check your water pressure.

Turn Off the Main Water Valve to Your Sprinkler System
When it comes to maintaining your sprinkler system, turning off the main water valve is an important step. This is particularly crucial during winter months when freezing temperatures can cause pipes to burst and cause extensive damage to your system. Shutting off the valve ensures that water is not actively flowing through the system, protecting it from damage.
Another important step in maintaining your sprinkler system is checking your water pressure. High water pressure can damage your sprinkler heads and cause inefficient watering. To check your water pressure, attach a water pressure gauge to your hose bib and turn on the water.
The gauge will measure the pressure and allow you to adjust it accordingly. By taking these steps, you can ensure your sprinkler system is protected and functioning efficiently.
Removing the Cover From the Sprinkler Valves
Opening your sprinkler system might seem like a daunting task, but with the right tools and steps, it can be done with ease. Before getting started, make sure that the system is turned off to prevent any accidents. To open the system, the first step is to remove the cover from the sprinkler valves.
Most covers can be removed by using a flathead screwdriver to pry it open gradually. Be careful not to damage the cover or any wires connected to it. If it seems stubborn, try using a rubber mallet to tap the sides of the cover gently.
Once the cover is removed, you should be able to access the sprinkler valves, which can then be checked for any damage or obstruction. Remember to turn off the system before closing the cover back up. By taking these simple steps, you can keep your sprinkler system functioning efficiently and maintain a well-watered lawn all year round.
Unscrew the Valve’s Lid or Cap
Removing the cover from your sprinkler valves is a crucial step to fix or maintain your irrigation system. Unscrewing the valve’s lid or cap is the first step in accessing the inner workings of your sprinkler system. Before you begin, make sure to turn off the water supply to avoid any accidental water damage.
Then, remove any debris or dirt from around the valve to prevent it from getting inside the system. Use a wrench or pliers to gently turn the lid or cap counterclockwise until it comes off. Be careful not to apply too much force, as this can damage the lid and make it difficult to put back on.
Once you’ve removed the cover, take a moment to inspect the internal components for any signs of damage or wear and tear. If you notice any issues, it’s best to consult with a professional to ensure proper repairs and maintenance for your sprinkler system. With a little bit of care and attention, you can keep your irrigation system running smoothly for years to come.
Slowly Turn the Control Valve Open
When it comes to maintaining your sprinkler system, there may be times when you need to remove the cover from the sprinkler valves. This may be necessary to perform repairs or simply to inspect the valves for wear and tear. To remove the cover, you’ll first need to locate it, which is typically near the ground.
Once you’ve found the cover, carefully lift it off and set it aside. Now, you’ll be able to access the valves. When working with the valves, it’s important to take your time and work slowly.
One of the most crucial steps is to slowly turn the control valve open. This will allow water to flow into the system and will help you to identify any leaks or issues with the valves. By taking your time and being cautious, you can ensure that you properly maintain your sprinkler system and avoid any costly repairs in the future.
The main keyword used organically: sprinkler system.
Flush the Pipes Out
When it comes to maintaining your sprinkler system, one important task is to flush out the pipes to keep them free of debris and buildup. To do this, you’ll need to remove the cover from your sprinkler valves. This can be done by using a flathead screwdriver to unscrew any visible screws or tabs holding the cover in place.
Once the cover is removed, you’ll have access to the valves and pipes inside. From here, you can use a flush kit or a simple garden hose to flush out any buildup or debris that has accumulated. It’s important to do this at least once a year to keep your sprinkler system running smoothly and efficiently.
By taking the time to flush out your pipes, you’ll ensure that your sprinkler system is ready to deliver the water your lawn and plants need to thrive.
Turn on the Main Water Valve and Energize the System
Before you open your sprinkler system for the season, it’s important to turn on the main water valve and energize the system. This may sound simple, but it’s a crucial step that should not be overlooked. First, locate the main water valve that controls the water supply to your irrigation system.
This valve is usually located near the water meter or at the main shut-off valve for your home’s water supply. Once you have located the valve, make sure it is in the “on” position. This will allow water to flow through the system and to your sprinkler heads.
Next, energize the system by turning on the controller or timer. This will power the valves and allow them to open and close as scheduled. Make sure to check that each zone is operating properly before you set your watering schedule.
By following these simple steps, you can ensure that your sprinkler system is ready for the season and will keep your lawn healthy and hydrated.
Slowly Open the Valve to Your Sprinkler System
If you’re excited to turn on your sprinkler system as the warmer weather approaches, it’s essential to slowly open the valve to avoid any damage. After locating the primary water valve, turn it on and wait patiently. If you have connected the sprinkler system for the first time, you may have to wait for a couple of minutes to let the pipes fill with water and get rid of any air pockets.
Now, go to the sprinkler system and ensure that all the valves are closed. Once you have confirmed that everything is closed, and there is no leaking, slowly open the valve to allow the water flow. By gradually opening the valve, you are preventing water from bursting the pipes and creating a potential water damage problem.
Burst pipes can be costly to repair, and you don’t want to start your summer with an expensive repair bill. So, take your time and be patient with opening the valve, and before long, you can enjoy a lush-looking lawn along with a reliable sprinkler system.
Check the Sprinkler Heads and Pipes for Any Leaks or Damage
Before turning on the main water valve, it’s essential to check your sprinkler heads and pipes for any leaks or damage. Failure to do so can result in nothing more than a damp mess. A leaky sprinkler system doesn’t just mean water wastage—it can cause substantial property damage and, if located near the house, cause a foundation to weaken.
So, before you get the system running, walk around and inspect the sprinkler heads. Initially, examine each sprinkler head for any visible damage to their nozzles, which can cause water to spray in the wrong direction. Check the riser pipes leading to each head for any cracks or leaks that can reduce water pressure and waste water.
A quick inspection of the hose connections and backflow prevention device will also ensure that you have a functioning and efficient system. Once you’re satisfied with the inspection, turn on the main water valve and watch it come to life. If you’re still not feeling confident, it’s always best to call in a professional irrigation technician to provide a more comprehensive inspection.
By following these simple steps, you can ensure your lawn is well-watered and lush green, while saving water and preventing unnecessary water bills.
Conclusion
In conclusion, opening your sprinkler system can be a breeze when done properly. It’s all about freeing the water trapped in the pipes and letting it flow freely onto your lawn. Think of it as turning on the faucet for your grass to quench its thirst.
So grab your tools, put on your thinking cap, and get ready to give your greenery the hydration it deserves. And remember, the key to a successful sprinkler system opening is patience, perseverance, and perhaps a good luck charm. Happy watering!”
FAQs
What tools do I need to open my sprinkler system?
You will need a sprinkler key or a pair of pliers, a screwdriver, and a wrench.
How do I locate the valve box for my sprinkler system?
Look for a rectangular or circular lid that is flush with the ground in your yard. This is likely the valve box for your sprinkler system.
How do I remove the valve box lid?
Use a sprinkler key or a pair of pliers to turn the lid counterclockwise until it comes off.
What should I do if I can’t find the valve box for my sprinkler system?
Check for any markings or flags in your yard that indicate the location of the valve box. If you still can’t find it, contact a professional for assistance.
How do I turn off the water supply to my sprinkler system?
Locate the main water shut-off valve for your property and turn it off. This will stop the water flow to your sprinkler system.
How do I drain my sprinkler system to prepare it for winter?
Turn off the water supply, open all the valves on your sprinkler system, and let the water drain out. You can also use an air compressor to blow out any remaining water.
Can I open my sprinkler system myself or should I hire a professional?
If you have experience working with plumbing or irrigation systems, you can open your sprinkler system yourself. However, if you are unsure of what to do, it’s best to hire a professional to avoid causing any damage.
