Are you tired of paying a hefty sum each time for pruning trees and shrubs in your backyard? Perhaps it’s time to take matters into your own hands and create your very own pole saw. Not only will this save you money in the long run, but it will also give you the satisfaction of creating something from scratch. Making a pole saw might sound like a daunting task, but with the right tools and instructions, it can be a fun and fulfilling project.
With a few simple steps, you can saw through branches and limbs that were once out of reach, all while standing safely on the ground. The best part about making your own pole saw is that you can customize it to meet your needs. Whether you need a longer blade or a shorter pole, the possibilities are endless.
Plus, by using materials that you already have, you can save even more money on this DIY project. So, if you’re ready to take control of your pruning needs, grab some supplies and let’s get started on making a pole saw together!
Introduction
If you’re looking to tackle some outdoor pruning, tree trimming or bush trimming projects, a pole saw can be a great option to help you do the job with ease. While commercial pole saws are readily available in the market, building your own pole saw is also relatively easy and cost-effective. To make a pole saw, you’ll need a few hardware tools like a cordless drill, jigsaw, drill bits, screwdrivers, and saw blades, along with materials such as a wooden saw blade, aluminum tubing, and PVC pipes.
The process involves attaching the saw blade to the top of the aluminum tubing, attaching the tubing to a PVC pipe, and finishing it off with comfortable handle grips. Not only is building your own pole saw an enjoyable DIY project, but it also offers the satisfaction of having made a practical tool for your garden that you can use over and over again.
What is a Pole Saw?
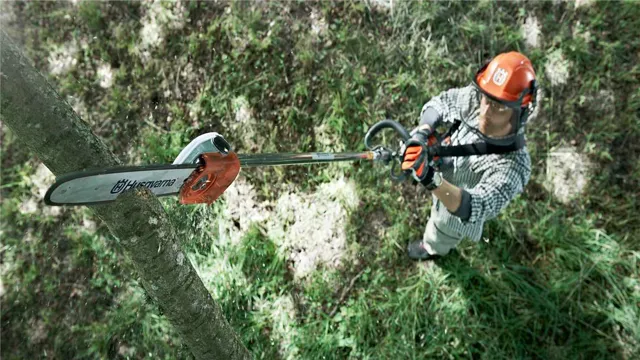
Pole saws are a type of power tool designed for trimming branches and removing unwanted growth from trees and bushes. They are long and have a saw blade at the end, making it easier to reach high and difficult-to-reach areas. The primary purpose of pole saws is to make pruning and trimming easier and more efficient, allowing you to maintain your yard and keep it looking beautiful.
Whether you’re a professional landscaper or just a homeowner looking to keep your trees healthy and well-kept, a pole saw can be an essential tool in your arsenal. So if you’re tired of struggling with ladders, climbing trees, or hiring expensive tree-trimming services, investing in a pole saw might be a wise choice.

Benefits of Having a Pole Saw
Pole saws are a great tool for homeowners to have in their arsenal of gardening equipment. With its long reach, it makes trimming and pruning trees and shrubs a breeze. This nifty tool can help make your garden look pristine and well-manicured with ease.
One of the main benefits of having a pole saw is that it allows you to reach high branches that are otherwise out of reach, reducing the need for climbing ladders and risking accidents. Its telescopic feature allows you to adjust the length of the pole according to your needs. Additionally, pole saws are lightweight, making them easy to maneuver, which cuts down yard work time considerably.
Overall, a pole saw is definitely a worthwhile investment for homeowners looking to maintain a neat and tidy garden without breaking a sweat.
Materials and Tools Needed
If you’re looking for a cost-effective way to trim tree branches, then making your own pole saw may be just what you need. Before starting, you will need a few essential materials and tools. Firstly, purchase a high-quality pruning blade that can handle wood and branches of different sizes.
You will also need an extendable pole that can reach the branches you want to trim, such as a telescopic pole or a broom handle. Make sure to measure the height of the branches you want to cut to ensure you get a pole with the right length. Other necessary tools include a drill, screws, nuts, and bolts to attach the blade to the pole securely.
To prevent accidents, it’s also essential to have safety equipment such as gloves, goggles, and a protective mask. Once you have all the necessary materials and tools, you’re ready to begin building your pole saw.
Essential Tools
“Essential Tools: Materials and Tools Needed” If you’re considering starting a new DIY project, you need to have all the essential tools and materials to make things go smoothly. Having the right items can make all the difference in your project’s outcome, and so it’s important to ensure you have them before getting started. Firstly, you’ll need a range of hand tools such as screwdrivers, hammers, drills, and pliers.
You’ll also need measuring tools such as a tape measure, ruler, and level to ensure precision in your work. Furthermore, specific materials will depend upon the task at hand, for instance, for a painting project, you will require paint, brushes, and rollers. And if you’re working with wood projects, you’ll require saws, sandpaper, and wood glue.
Remember, having all the necessary materials and essential tools at your disposal can make the difference between a successful project and a failed one, so always try to be well-prepared before starting any new task.
Optional Tools (for customization)
When it comes to designing and customizing your own crafts or projects, there are a plethora of optional tools that can come in handy. These tools can help elevate your work and allow you to add unique touches that can make your creation stand out. Some popular optional tools include stencils, which can offer clean and precise outlines for your designs, or stamping pads, which can help add pops of color and texture to your work.
Additionally, heat transfer vinyl or iron-on transfers can be used to add intricate designs and logos to fabric or clothing items. While these tools are not essential for completing a project, they can provide additional customization options and can help bring your overall vision to life. Whether you’re a seasoned crafter or just getting started, exploring different optional tools can be a fun and exciting way to add personality and uniqueness to your work.
Step-by-Step Guide on Making a Pole Saw
If you’re looking to save some money and take on a DIY project, making your own pole saw can be a great option. Not only will you have a tool that’s customized to your needs, but the process can also be a fun and rewarding experience. To get started, you’ll need a few materials, including a chainsaw blade, a long metal pipe or wooden dowel, some bolts and screws, and safety gear like gloves and eye protection.
Once you’ve gathered your materials, it’s time to craft your saw. First, attach your chainsaw blade to the end of your metal or wooden pole using bolts and screws. Then, make sure everything is tightened and secure.
Finally, put on your gloves and eye protection and test out your newly made pole saw. While making your own pole saw does require some time and effort, the end result is a tool that can make outdoor projects a breeze and save you a ton of money in the process.
Step 1: Preparing the Pole
If you’re looking to create a pole saw, the first step is preparing the pole. This is a crucial step in ensuring the overall stability and durability of your pole saw. The type of pole you use will depend on the type of job you intend to tackle with your saw.
For light-duty pruning tasks, you can use a wooden or aluminum pole that’s between six and eight feet long and has a diameter of about one inch. For heavier tasks, you’ll need a sturdier pole made from materials like fiberglass or metal. Once you have your pole, it’s important to prep it properly.
This involves removing any rust or rough spots, cutting it down to size, and attaching any necessary hardware, like a saw blade or pruning head. Overall, taking the time to prepare your pole will result in a safer and more efficient pole saw.
Step 2: Preparing the Saw Blade
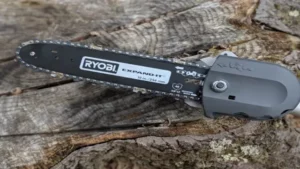
When making a pole saw, the second step after preparing the pole is to prepare the saw blade. Start by selecting a suitable saw blade for your project, ensuring that it is compatible with your pole saw and the type of cutting you will be doing. You can choose from a range of blade styles, including curved, straight, and serrated blades.
Once you have your blade, carefully examine it for any damage or signs of wear and tear. Sharpen the blade if necessary, using a file or a saw blade sharpener. It is important to note that a dull blade will make your job much harder and may cause damage or harm.
After sharpening, ensure that the blade is properly secured to the saw using the manufacturer’s directions. Take the time to clean and lubricate the blade, as this will help to prolong its life and ensure that it operates smoothly during use. With a well-prepared saw blade, you will be able to tackle your pole saw project with ease and precision.
Step 3: Attaching the Saw Blade to the Pole
Attaching the saw blade to the pole is the final step in making a pole saw. This is an essential step and must be done carefully to ensure that the saw blade is firmly attached to the pole. First, locate the nut and bolt that came with your saw blade.
Then, position the blade onto the end of the pole. Make sure that the pole is securely attached to the blade. Once the blade is in place, use the nut and bolt to attach the blade to the pole.
Tighten the nut and bolt until the blade is securely fastened to the pole. Ensure that the blade is perpendicular to the pole to ensure a straight cut. It is recommended to double-check that the blade is properly attached before using it.
Now that you have your pole saw ready, you can confidently trim your branches without having to use a ladder or hiring a professional. By making a pole saw yourself, not only have you saved some money but gained the satisfaction of a job well done.
Step 4: Finishing Touches
To give your homemade pole saw a professional look, you need to add the finishing touches. Start by sanding down any rough edges on the handle and pole. Use a fine-grit sandpaper to achieve a smooth surface.
You can then treat the wooden surfaces with linseed oil to protect them from moisture and make the material shine. Next, attach the blade to the pole securely using a bolt and nut. Make sure the blade is straight and aligned with the pole.
Finally, wrap the grip with a rubber sleeve or tape for better handling. Adding these final touches not only ensures your safety but also makes your homemade pole saw look like a store-bought one. Don’t be afraid to add your flair to the design by incorporating bright colored tape or adding a personalized touch.
Happy sawing!
Tips and Tricks on Making a Pole Saw
If you’re looking to tackle your own tree-trimming and pruning work, making a DIY pole saw can save you money and offer a rewarding experience. To create your own pole saw, you’ll need a few basic tools and materials. First, select a high-quality saw blade and a sturdy wooden pole.
Cut the pole to the desired length, being sure to sand down any rough edges. Then, attach the saw blade to the top of the pole with screws and bolts. For added stability, wrap the connection point with duct tape.
Finally, attach a pruning rope to the other end of the pole, allowing you to control the blade from the ground. With some patience and a little elbow grease, you can create a pole saw that is affordable, effective, and tailored to your specific needs. So why not give it a try and enjoy the satisfaction of making your own tool?
Safety Tips to Keep in Mind
When it comes to making a pole saw, safety should be your topmost priority. Keep in mind that pole saws can be dangerous tools, so you need to take precautions to avoid accidents. Always read the manual before using the saw, and wear the appropriate safety gear such as gloves, goggles, and a hard hat.
Never use the saw near power lines, and make sure to keep children and pets away from the area. Before you start, make sure the saw is properly assembled and lubricated. Additionally, check the chain tension and adjust it if necessary.
By taking these precautions, you can make sure that your pole saw is safe to use and reliable for years to come.
Maintenance Tips for your Pole Saw
If you want to keep your pole saw in optimal condition, regular maintenance is key. Here are a few tips to help you do just that. Firstly, after every use, be sure to wipe down the blade and the pole with a dry cloth to remove any dirt, sap, or debris.
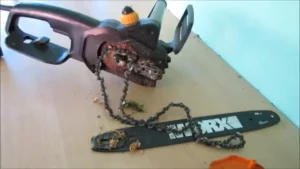
If you notice any damage to the blade, make sure to either sharpen or replace it to prevent any potential hazards. Additionally, check the chain tension regularly and tighten it as needed to prevent it from coming off during use. Another important aspect of maintenance is keeping your pole saw lubricated.
Be sure to oil both the blade and the chain regularly to reduce friction and prolong the lifespan of your tool. Lastly, store your pole saw in a safe and dry place when not in use to prevent any damage or rust from occurring. By following these simple tips, you can ensure that your pole saw will be in good condition for years to come.
As for making a pole saw, it may seem like a daunting task, but it is actually quite simple. First, you will need a long and sturdy pole. You can either purchase one or use a wooden pole that you find.
Next, you will need a saw blade that is compatible with your pole. Once you have these materials, simply attach the blade to the end of the pole using screws or bolts. It is important to ensure that the blade is securely attached to the pole to prevent any accidents during use.
Additionally, you may want to invest in a pruning saw blade for your pole saw to make it more versatile and effective. With a little bit of effort and ingenuity, you can create your own pole saw to help you with all of your landscaping and pruning needs.
Conclusion
In conclusion, making a pole saw is easier than you might think, and with a little creativity and resourcefulness, you can craft a powerful tool for trimming trees and branches. Whether you choose to repurpose old materials or start from scratch, this project offers a great opportunity to flex your DIY muscles and demonstrate your innovative spirit. So grab your tools, roll up your sleeves, and get ready to impress your neighbors with your newfound pole saw prowess.
Who knows? You might just inspire a few others to try their hand at DIY woodworking and bring a little ingenuity to the world of tree trimming.”
FAQs
What is a pole saw used for?
A pole saw is a gardening tool used for trimming tree branches that are out of reach.
How do you assemble a pole saw?
To assemble a pole saw, attach the saw blade to the end of the pole, making sure it is secure. Then, attach the handle to the top of the pole.
What is the optimal length for a pole saw?
The optimal length for a pole saw depends on the height of the trees you will be trimming. Generally, a range between 8 to 12 feet is suitable for most tasks.
Can a non-professional use a pole saw?
Yes, a non-professional can use a pole saw with proper guidance and safety precautions.
How do you safely operate a pole saw?
Before using a pole saw, ensure that the saw blade is sharp, the chain is lubricated, and all components are securely fastened. Wear protective gear such as gloves, goggles, and earplugs. Keep both hands on the pole at all times and never extend the saw blade beyond your reach.
What kind of trees and branches can a pole saw cut?
A pole saw is suitable for trimming thin and medium-sized branches up to 6 inches in diameter. It can cut branches from trees such as maple, pine, oak, and hickory.
How do you maintain a pole saw?
To maintain a pole saw, always keep the blade sharpened and the chain lubricated. After using the saw, clean it with a damp cloth and store it in a dry place. Check for any loose parts before and after use.
