If you have a sprawling lawn or garden, a manual sprinkler system might not suffice. Therefore, adding a new zone to your sprinkler system becomes an unavoidable expansion. A zone, in a sprinkler system, is a designated area with a specific set of sprinkler heads controlled by specific valves.
Rain Bird, a popular brand in the sprinkler industry, manufactures a range of irrigation products that offer flexibility, coverage, and versatility. If you plan to extend your Rain Bird sprinkler system and add a new zone, this guide is for you. Whether you are a DIY enthusiast or a professional landscaper, we will provide easy-to-follow steps to make the process smooth.
Stay with us and learn how to add a zone to your Rain Bird sprinkler system.
What You Will Need
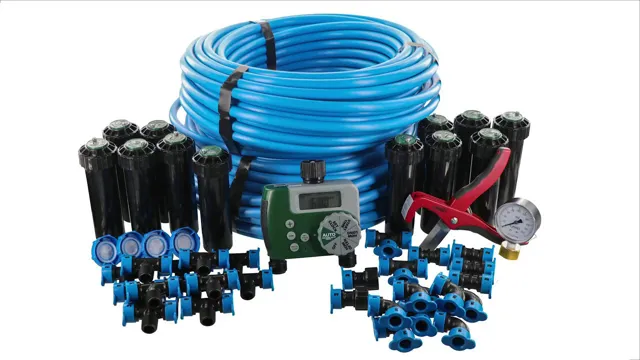
If you’re wondering how to add a zone to your Rain Bird sprinkler system, you’re in luck! With a few tools and supplies, it’s a relatively simple process that you can do on your own. First and foremost, you’ll need a Rain Bird sprinkler controller that can accommodate additional zones. This will allow you to adjust and control the flow of water to each area of your lawn or garden.
Next, you’ll need a new sprinkler valve and the necessary piping and fittings. Depending on the layout of your existing system, you may also need a trenching tool to dig a trench for the new piping. Finally, you’ll need some basic plumbing tools like a pipe cutter, PVC glue, and pipe wrenches to install the new valve and connect the piping.
With these supplies in hand, you’re ready to start adding a new zone to your Rain Bird sprinkler system!
Rain Bird Sprinkler System Manual
If you are looking to install or operate a Rain Bird sprinkler system, the first thing you will need is the Rain Bird Sprinkler System Manual. This comprehensive guide provides all the necessary information you need to ensure that your sprinkler system is installed correctly and functioning optimally. In the manual, you will find step-by-step instructions for installation, maintenance, troubleshooting, and repairs.
Additionally, you will learn about the different components of the system, how they work, and how to adjust them to meet your specific watering needs. Whether you are a DIY enthusiast or a professional landscaper, having access to the Rain Bird Sprinkler System Manual is essential to ensure that your sprinkler system performs at its best and keeps your lawn and garden healthy.
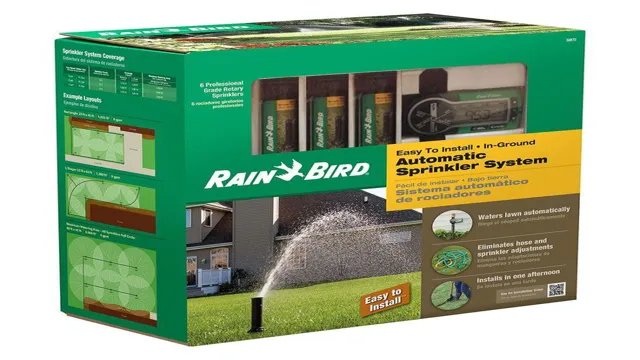
New Sprinkler Heads and Tubing
When it comes to upgrading your sprinkler system, there are a few things you will need to get started. First and foremost, you will need new sprinkler heads and tubing. These two components work together to ensure that your lawn and garden receive the right amount of water without any waste.
Sprinkler heads come in various shapes and sizes, and you will need to choose the right ones depending on your lawn or garden’s needs. Tubing, on the other hand, connects the sprinkler heads to the water source. It is essential to choose the right tubing materials based on your local climate and soil conditions.
So, before you begin your sprinkler system upgrade, make sure you have the right sprinkler heads and tubing to ensure efficient and effective watering. With the right tools, you can keep your lawn and garden healthy and beautiful all year round.
Sprinkler Head Wrench
If you want to make your lawn look healthy and well-manicured, you must have a reliable sprinkler system. However, like any other equipment, it may require maintenance from time to time, especially when you notice that some of your sprinkler heads are malfunctioning. In such an event, you will need a sprinkler head wrench to fix the problem.
To get started, you will need to purchase a sprinkler head wrench that fits your sprinkler heads. You may find different types of sprinkler head wrenches in your local hardware store or online. Make sure to choose one that is well-made, durable, and compatible with the brand and size of your sprinkler heads.
In addition to the wrench, you may need other tools such as a Phillips or flat-head screwdriver, pliers, and a wire cutter. You will use these tools to remove and replace the sprinkler heads, check the filters and nozzles, and adjust the water flow and direction. By having the right tools and equipment, you can save time and money by fixing your sprinklers yourself instead of hiring a professional.
Moreover, you will have the satisfaction of knowing that you have successfully completed a DIY project and improved the curb appeal of your property. In summary, when it comes to maintaining your sprinkler system, having a sprinkler head wrench is essential. Make sure to choose a high-quality one, and have other tools on standby to help you diagnose and repair any issues.
With these tools, you can have a lush and healthy lawn all year round.
Identifying the Right Location for the Zone
If you’re considering adding a new zone to your Rain Bird sprinkler system, the most critical aspect to consider is finding the right location. Before you start digging, take some time to evaluate your property and analyze its needs. Consider the areas that require watering, such as garden beds, lawns, and shrubs.
Take note of the sun’s orientation and the soil type in each area, as these factors can affect the plant’s water needs. Additionally, make sure to check your water pressure to ensure that your new sprinkler head will receive enough water to operate efficiently. Once you’ve identified the appropriate location, you can begin to plan the layout of your new zone.
Remember to include enough sprinkler heads to cover the entire area and ensure even watering. With a little planning and some elbow grease, you can add a new zone to your Rain Bird sprinkler system and keep your lawn and garden looking green and healthy all season long.
Assessing the Water Pressure and Flow
When it comes to setting up an irrigation system, it’s crucial to assess the water pressure and flow before selecting a location for the zone. Water pressure refers to the force of water that moves through the pipes, while flow is the volume of water that passes through a certain point in a given timeframe. These factors are essential as they dictate how much water can be distributed to each zone and how quickly it can be distributed.
By identifying the right location for the zone, you can guarantee that the water pressure and flow will be adequate, ensuring that your plants receive the correct amount of water. It’s essential to select a location that is not too far from the source and has suitable soil conditions. Overall, by considering these factors, you can ensure that your irrigation system runs efficiently, saving you time and money in the long run.
Marking Out the Zone
When it comes to setting up a zone, one of the most crucial steps is determining the perfect location for it. It’s important to choose a spot that’s easily accessible, visible, and won’t interfere with other activities taking place. If it’s an outdoor zone, make sure there’s enough space for the zone to expand and that the terrain is safe and stable.
If it’s an indoor zone, check that the space has adequate lighting and ventilation. Consider factors such as foot traffic, noise levels, and nearby attractions that could potentially draw attention to the zone. By carefully marking out the zone and identifying the right location, you can ensure that it will be a successful and thriving part of your space.
Digging the Trenches
Finding the ideal location for digging trenches is essential to ensure effective and efficient installation of a zone irrigation system. The first step in identifying the right place for the trenches is to determine the area to be irrigated and map out the layout. Observe the topography of the area, looking for potential problem areas such as high spots that could cause water runoff or low spots that could get flooded.
The next consideration is the location of the water source or pump station, as these will dictate where the mainline should be placed. Ideal placement of the trenches is in a straight line from the water source to the farthest point of irrigation. Doing so ensures that the water pressure is consistent throughout the zone.
It is also essential to take into account the type of soil in the area as it can affect the uniformity of the water distribution. Choosing the right location requires careful planning, accurate measurements, and thorough consideration of various factors.
Laying the Tubing and Sprinkler Heads
When it comes to laying the tubing and sprinkler heads, it’s crucial to identify the right location for the zone. This means taking into consideration factors such as the layout of your lawn, the types of plants you have, and the climate in your area. For example, if you have a lot of trees and bushes, you may want to place your sprinkler heads in areas where they can reach the roots without being obstructed.
Additionally, if you live in a hot and dry climate, you may want to ensure that your sprinkler heads are placed in areas where they can provide ample water coverage to keep your plants healthy. By carefully considering the unique needs of your lawn and garden, you can create a well-designed irrigation system that will help your plants thrive and keep your lawn looking beautiful all year round.
Connecting the Zone
If you’re looking to add an extra zone to your Rain Bird sprinkler system, it’s a straightforward process that you can do yourself. First, identify the nearest sprinkler head to the area you want to add a zone. Then, dig a trench from the existing sprinkler head to the new zone location.
Next, connect a new sprinkler head and a control valve to the new zone location using PVC pipe. Make sure the control valve is compatible with your existing controller. Finally, turn on the water and test the new zone to ensure it’s working correctly.
By following these simple steps, you can easily expand your sprinkler system and keep your lawn looking great all season long.
Splicing into the Main Line
If you’re wondering how to connect to the main line from your zone, splicing is the way to go. Splicing simply means joining two fibers together to create a continuous path for data to flow. It’s not uncommon for different networks to use different types of fibers, so splicing ensures compatibility and a seamless connection.
But before you start splicing, there are a few things you need to know. Firstly, splicing requires some expertise and the right tools. You can hire a professional to do it for you, or you can invest in the necessary equipment and learn to do it yourself.
Secondly, you need to ensure that the fibers you’re splicing together are clean and undamaged. Even a small amount of dirt or a tiny scratch can affect the quality of your connection. Lastly, consider the location of the splice.
Ideally, it should be in a protected area, away from potential dangers like water or rodents. With these considerations in mind, splicing into the main line can be a straightforward and effective way to connect your zone.
Connecting the Tubing
When it comes to connecting tubing, ensuring that the zone is properly setup is crucial. Before attaching the tubing, make sure that the zone is correctly mapped out, with valves and water supply lines properly installed. Once the zone is ready, connecting the tubing becomes a relatively straightforward process.
First, place the tubing into the fitting and tighten the compression nut onto the tubing until it is securely in place. Make sure not to overtighten, as this can damage the tubing and cause leaks. Once everything is secure, turn on the water supply and check for leaks.
If everything looks good, your tubing is now connected to the zone and ready for use. By following these simple steps, you can ensure that your irrigation system is functioning optimally and providing your plants with the water they need to thrive.
Setting Up the Control Valve
When it comes to setting up a control valve for your irrigation system, one of the most important steps is connecting the zone. This involves connecting the valve to the specific zone or area of your yard that you want to water. The first thing you’ll need to do is locate the zone valve box, which typically contains a series of valves that control different areas of your yard.
Once you’ve located the correct valve for your desired zone, you’ll want to make sure that the wires leading to the valve are securely connected. This will ensure that the valve is receiving the proper signals from the irrigation controller and will be able to function properly. Additionally, it’s important to make sure that the valve itself is securely connected to any pipes or hoses that are needed to deliver water to the designated area.
By taking the time to ensure that everything is securely connected, you can enjoy a well-functioning irrigation system that keeps your yard looking lush and green all season long.
Testing and Adjusting the Zone
Adding a new zone to your existing Rain Bird sprinkler system is a great way to enhance your lawn’s watering efficiency and save on water costs. Before adding the zone, you need to perform a few tests and adjustments to ensure the system is working at peak performance. First, verify that the water pressure is consistent across all zones.
Then, adjust the sprinkler heads to ensure they’re spraying in the correct directions and distances. Next, set the timer for the new zone, making sure it doesn’t run at the same time as other zones. Finally, test the system to ensure there are no leaks or malfunctions.
By following these steps, you can easily and effectively add a new zone to your Rain Bird sprinkler system and enjoy a lush, healthy lawn all season long.
Testing the Water Flow
When it comes to testing the water flow for your irrigation system, it’s important to also test and adjust the zone. This means examining each area that is being watered and making sure the water is being distributed evenly. To do this, you can use catch cups or rain gauges to measure how much water is reaching each area.
If you notice that one area is receiving significantly less water than the others, you can adjust the sprinkler head or increase the water pressure to that zone. It’s also important to consider the type of plants or grass being watered in each zone, as some may require more or less water than others. By taking the time to test and adjust the water flow in each zone, you can ensure that your plants are getting the right amount of water and avoid wasting water in areas that don’t need it.
Remember, a little extra effort in the beginning can save you time and money in the long run.
Adjusting the Sprinkler Heads
Adjusting sprinkler heads can be a tricky process, but once you have it down, your lawn will thank you for it. Before making any adjustments, it’s important to test the zone to see if you’re getting the desired coverage. Start by turning on the sprinklers and letting them run for 15 minutes.
Then, check for dry spots or areas where there may be too much water. This will give you an idea of where to make adjustments to the sprinkler heads. If you notice a dry spot, adjust the head to increase water flow to that area.
If you notice an area with too much water, adjust the head to decrease water flow to that area. It may take a few tries to get it just right, but with a little patience and persistence, you’ll have a perfectly watered lawn in no time.
Programming the Control Valve
Programming a control valve for your HVAC system can seem like a daunting task, but with a bit of patience and some know-how, it can be done with ease. Once the valve is installed, the next step is to test and adjust the zone. This involves ensuring that the valve is properly calibrated to open and close at the right times, and that it is providing the correct amount of air flow to each zone of the building.
It’s important to start with one zone at a time, making sure that the valve is adjusted correctly before moving on to the next one. You should also make a note of any adjustments you make, so that you can refer back to them later if needed. With some practice, you’ll be able to get your control valve programmed and adjusted in no time!
Conclusion
In conclusion, adding a new zone to your Rain Bird sprinkler system isn’t rocket science, but it does require some patience and a willingness to get your hands dirty. You’ll need to do some digging, piping, and programming, but with a little effort and a lot of love for a lush lawn, you can expand your irrigation network like a boss. Just remember to turn off the water before making any connections, mark your zones clearly, and test everything thoroughly before firing up your system.
And if all else fails, just call in a sprinkler wizard to help you out. After all, the grass is always greener on the side with the Rain Bird sprinkler system!”
Maintaining Your Sprinkler System
Maintaining Your Sprinkler System: Testing and Adjusting the Zone Testing and adjusting the zone of your sprinkler system is one of the most vital aspects of maintaining your lawn. There are various factors that you need to consider while testing and adjusting the zone. Firstly, you need to check for any leaks in the system.
A leak can cause your system to lose water pressure, which means that the sprinklers will not function properly. To detect leaks, turn off all the water sources in the house and check the water meter. If the meter is still running, you might have a leak in your sprinkler system.
Secondly, you need to ensure that the sprinkler heads are correctly positioned. Improperly positioned sprinkler heads can cause water to spray onto the pavement or road instead of the lawn. Additionally, you need to adjust the timing and frequency of watering in each zone according to the different moisture levels in your lawn.
This will ensure that the lawn receives the adequate amount of water it needs, without wasting water. By testing and adjusting the zone of your sprinkler system, you can save a lot of money on water bills and keep your lawn healthy and green throughout the year.
Troubleshooting Common Problems
When troubleshooting common problems in sprinkler systems, it’s important to test and adjust the zone. This involves checking the water pressure, inspecting the sprinkler heads, and making any necessary adjustments to the spray pattern or coverage area. One common issue is uneven watering, which can cause dry spots or areas that are too wet.
This can be caused by clogged or misaligned sprinkler heads, low water pressure, or incorrect spacing between heads. Another problem to look out for is leaks, which can waste water and damage the surrounding landscape. A simple way to test for leaks is to turn off the water supply and check the pressure gauge for any drop in pressure.
If you suspect a leak, inspect the pipes and connections for cracks or damage. By testing and adjusting the zone, you can ensure that your sprinkler system is working efficiently and effectively, providing optimal watering for your lawn and garden.
Enjoying Your Beautiful Lawn
If you’re someone who takes pride in maintaining a green and lush lawn, it’s important to test and adjust your sprinkler system to ensure that your grass stays healthy and vibrant. Whether you’re troubleshooting a dry patch or oversaturation, checking the individual zones of your sprinkler system can help you pinpoint and rectify any issues. Begin by turning on each zone individually and observing the coverage area; this will give you a good idea of whether certain areas are being under or over-watered.
If you notice dry spots, increase the watering time or adjust the angle of the sprinkler heads to ensure full coverage. Similarly, if you see large pools of water or runoff, reduce the watering time or adjust the sprinkler heads to avoid oversaturation. With a little testing and adjusting, you’ll be able to keep your lawn looking beautiful all season long.
FAQs
What is a rain bird sprinkler system?
A rain bird sprinkler system is a type of irrigation system that uses a series of sprinkler heads to water a designated area.
What is a zone in a sprinkler system?
A zone in a sprinkler system is a designated area that is controlled by a specific valve and set of sprinkler heads.
How do I determine how many sprinkler zones I need for my rain bird system?
The number of sprinkler zones you need for your rain bird system will depend on the size of your lawn or garden. It is recommended to consult with a professional to determine the appropriate number of zones.
How do I add a zone to my rain bird sprinkler system?
To add a zone to your rain bird sprinkler system, you will need to install a new valve and connect it to the existing water source. You may also need to install additional sprinkler heads and adjust the system programming to include the new zone.
Can I add a zone to my rain bird sprinkler system myself or should I hire a professional?
While it is possible to add a zone to your rain bird sprinkler system yourself, it is recommended to hire a professional to ensure the job is done correctly and to avoid causing damage to the system.
Do I need a permit to add a zone to my rain bird sprinkler system?
The need for a permit to add a zone to your rain bird sprinkler system will depend on your local building codes and regulations. It is recommended to check with your local authorities before making any modifications to your sprinkler system.
What is the cost of adding a zone to my rain bird sprinkler system?
The cost of adding a zone to your rain bird sprinkler system will depend on various factors, such as the size of the zone, the required materials, and whether or not you hire a professional. It is recommended to obtain a quote from a professional before beginning any work.
