As the cold weather approaches, it’s time to start thinking about winterizing your camper. While some people prefer to use an air compressor to blow out the water lines, not everyone has access to one. Don’t worry though, there are still several steps you can take to ensure your camper is protected from the frigid temperatures.
Winterizing your camper without an air compressor might require a little extra effort, but it’s worth it to prevent costly repairs in the spring. So, grab a cup of hot cocoa and let’s dive into some ways you can winterize your camper without an air compressor.
Introduction
Winter is a great time to head out in your camper and explore the beauty of the great outdoors, but before you do, it’s important to winterize it to protect it from the harsh weather conditions. Winterizing your camper without an air compressor might seem like a daunting task, but it’s actually quite simple. The first step is to drain all of the water from the tanks and the pipes, including the hot water heater.
You can use a gravity-based drain system or a bucket to ensure that all water is removed. Next, pour about a quarter cup of non-toxic RV antifreeze into each drain and toilet bowl to keep them from freezing. Finally, close all the faucets and valves, turn off the propane gas, and disconnect all electrical connections.
By taking these simple steps, you’ll be able to protect your camper from the winter elements and ensure that it’s ready to go when warmer weather returns.
Why You Need to Winterize Your Camper
Winterizing your camper is an essential process that should not be overlooked. Not winterizing your camper can lead to serious and expensive damage to your beloved recreational vehicle. Taking the time to properly winterize your RV will help maintain its longevity and ensure that you are ready to hit the road again come spring.
Winterizing includes a number of crucial tasks, such as draining the water from the plumbing system and adding antifreeze. Failure to winterize your camper can result in cracked pipes, water damage, and mold growth. By properly winterizing your RV, you can rest assured that your vehicle will be ready to use when the weather warms up again.
Don’t let neglecting this important task leave you high and dry next season.
What You’ll Need for Winterizing Your Camper
Winterizing your camper is an essential task for every camper owner. It is important to protect your investment from the harsh winter weather and ensure that it is ready to use when the weather warms up. To properly winterize your camper, you’ll need a few things.
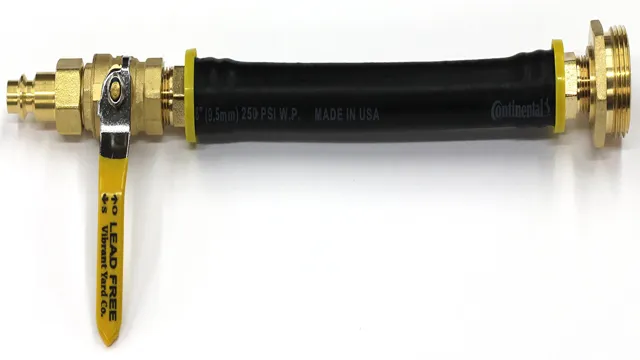
One of the most important things you’ll need is anti-freeze. Anti-freeze will protect your plumbing system from freezing and prevent any damage to your camper’s pipes. Other things you’ll need include a water pump, a water heater bypass kit, a tire gauge, and a battery, among others.
Ensuring that you have all the necessary supplies beforehand will make the winterizing process easier and more efficient. So, be sure to take the time to gather all the supplies you’ll need before getting started.
Steps for Winterizing Your Camper
Winterizing your camper is an essential process to protect it from the harsh winter conditions. If you don’t have an air compressor, there are still some easy steps to follow to complete the winterization process. The first step is to drain all the water from your camper’s water system, including the water heater, tanks, and pipes.
Use a water pump to remove any remaining water and ensure that the system is completely dry. Next, you’ll want to add antifreeze to your water system to prevent any remaining water from freezing and damaging your camper’s plumbing. Make sure to use antifreeze designed explicitly for RVs.
Additionally, you’ll want to protect your camper’s exterior by covering it with a breathable cover. Finally, make sure to remove any perishable items from your camper, including food, toiletries, and batteries, to prevent any damage or spoilage. By following these simple steps, you can quickly and easily winterize your camper without the need for an air compressor.
Step 1: Drain the Water
Winterizing your camper is an essential step to ensure it remains in good condition during the colder months. The first step in the winterization process is to drain all of the water from the various systems running throughout your camper. This includes draining the fresh water tank, hot water heater, and waste tanks.
If any water remains in the system, it can freeze and cause damage to the pipes and tanks. To drain the system, first turn off the water pump and disconnect any hoses or connections. Open all of the taps, including the outdoor shower and toilet valve, until no more water flows out.
Then, use the water pump to force any remaining water out of the system by opening the pressure relief valve. Once all of the water has been drained, the camper is ready for the next step in the winterizing process. By properly winterizing your camper, you can protect it from damage caused by freezing temperatures and ensure it’s ready for the next camping season.
Step 2: Protect Your Plumbing System
Winterizing your camper is an essential task to ensure that it remains in good condition throughout the winter months when it’s not in use. When it comes to protecting your plumbing system, there are a few important steps you can take to avoid potential damage caused by freezing temperatures. Firstly, make sure all the water is drained from your pipes and tanks.
You can do this by opening all the faucets and allowing all the water to flow out. Secondly, add RV antifreeze to your plumbing system to prevent any remaining water from freezing and damaging the pipes. This will ensure that your pipes are protected from bursting due to ice expansion.
Remember, taking the necessary precautions to protect your plumbing system can save you a lot of money and trouble in the long run. So, it’s essential to take the time to winterize your camper before storing it away for the season.
Step 3: Add Antifreeze to the Water Pipes
Antifreeze, Winterizing Your Camper Step 3 in Winterizing Your Camper involves adding antifreeze to the water pipes. This step is essential to prevent your water system from freezing during the winter months. Begin by locating the water pump and the water heater bypass valve.
Turn off the water pump and open all the faucets, including the shower and toilet valves. This will drain all the water from your water system. Next, connect a hose from the water pump to a container of antifreeze and turn on the pump.
This will pump the antifreeze into the water lines, displacing any remaining water. Make sure to follow the instructions on the antifreeze container for the appropriate amount to use. Once the antifreeze has passed through all the water lines, turn off the taps and close the faucets.
It’s important to remember that antifreeze is toxic, so ensure that all the faucets and water tanks are thoroughly flushed out before using your water system again. By adding antifreeze to your water pipes, you can rest assured that your water system will remain functional and undamaged throughout the winter.
Additional Tips
If you don’t have an air compressor at your disposal, there are still plenty of ways to winterize your camper effectively. First, start by draining every drop of water from your camper’s plumbing system. This includes emptying your freshwater and wastewater tanks, as well as opening all faucets and showerheads to let any remaining water drain out.
Next, remove any water filters or cartridges and store them separately. Don’t forget to blow out any excess water from your water lines with a handheld air pump or by using a wet-dry vacuum. Once you’ve completed these steps, add RV antifreeze to your plumbing system.
It’s important to use non-toxic, RV-specific antifreeze, as regular automotive antifreeze can be harmful to humans and pets. Simply pour the antifreeze into your plumbing system using a funnel or hand pump until you see it coming out of all your faucets and showerheads. Finally, make sure all doors, windows, and vents are sealed tightly to prevent any drafts.
By following these steps, you can confidently winterize your camper without the need for an air compressor.
Clean Your Camper before Winterizing
As we know, cleaning your camper before winterizing is essential to keep it in good condition during the off-season. But, there are a few additional tips that you should keep in mind to ensure that your camper stays in top-notch shape. First, make sure to remove all the food items from the cabinets and the refrigerator as they can rot and spoil while unused.
Next, take out the bedding and curtains to wash them thoroughly before storing. Consider removing the batteries and storing them separately to extend their life. Lastly, don’t forget to clean the exterior of the camper, get rid of any debris, and cover it up with a suitable cover.
These simple additional steps will help your camper stay fresh and functional for next year’s adventures. Keyword: winterizing, camper, clean, additional tips.
Use a Water Heater Bypass Kit
If you’re planning on winterizing your RV, using a water heater bypass kit is essential to prevent potential damage to your system. It’s a straightforward process that involves connecting a pipe to bypass the heater and create a direct flow of water to the faucets. However, to ensure that everything runs smoothly, there are a few additional tips to keep in mind.
Firstly, make sure to turn off the water pump and disconnect the RV from the water supply before beginning the installation process. Secondly, check for leaks once everything is hooked up, as any leakage can cause serious damage. Finally, keep in mind that using a water heater bypass kit doesn’t mean you should neglect properly draining your water tanks and pipes before storage.
By following these steps, you can ensure that your RV’s water system is safely winterized and ready to use when spring rolls around.
Conclusion
And there you have it – winterizing your camper without an air compressor is a simple yet effective process that can protect your vehicle from damage. With just a few basic tools and some elbow grease, you can ensure that your camper is ready to brave the cold winter months ahead. So put on your warmest sweater, crack open a hot cup of cocoa, and get to work! Your camper will thank you for it.
“
FAQs
FAQs:
1. What are some alternative methods for winterizing a camper without an air compressor?
Some alternative methods for winterizing a camper include using a hand pump, manual gravity draining, or using a wet/dry shop vac.
2. How do I use a hand pump to winterize my camper without an air compressor?
When using a hand pump, you’ll need to bypass the water heater and pump antifreeze through the water system using the hand pump. Follow the manufacturer’s instructions for specific details.
3. Can I use the manual gravity drain method to winterize my camper without an air compressor?
Yes, you can use the manual gravity drain method to winterize your camper by draining water from the faucets and connection points and using antifreeze to prevent any remaining water from freezing.
4. Is using a wet/dry shop vac an effective method for winterizing a camper without an air compressor?
Yes, using a wet/dry shop vac is an effective method for winterizing a camper. You can use it to blow out the water lines and then use antifreeze to prevent any remaining water from freezing.
5. How much antifreeze do I need to winterize my camper without an air compressor?
You’ll typically need at least two to three gallons of antifreeze, depending on the size of your camper. Follow the manufacturer’s instructions for specific details.
6. Can I use RV antifreeze in my freshwater tanks?
No, RV antifreeze should not be used in freshwater tanks. Use fresh potable water to rinse the tanks before use.
7. How often should I winterize my camper without an air compressor?
You should winterize your camper before the first freeze of the season and repeat the process every year. It’s important to protect your camper from potential damage caused by frozen water.
