How to Use a Marking Gauge for Accurate Woodworking: Tips and Tricks
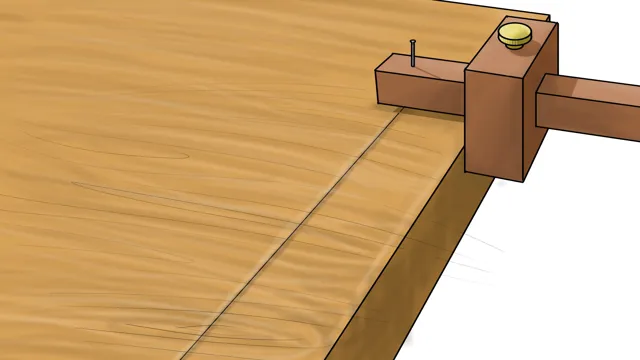
If you’re a woodworker or carpenter, then you’re probably familiar with the importance of making precise measurements before cutting your materials. One of the tools you’ll need to achieve accurate measurements is a marking gauge. This handy tool enables you to make consistent and precise marks on your materials, ensuring that your cuts are straight and even.
Using a marking gauge may seem daunting at first, but it’s actually quite simple once you get the hang of it. In this blog post, we’ll take a closer look at what a marking gauge is, how it works, and some tips for using it effectively. So, let’s get started!
Introduction
If you’re new to woodworking or wanting to step up your woodworking game, using a marking gauge is essential. A marking gauge is a tool used to mark a parallel line from the edge of a board, ensuring precision and accuracy in your cuts. To use a marking gauge, start by adjusting the fence or stem to the desired distance from the cutting edge.
Then, press the gauge down onto the edge of the board and run it along, making a groove. This groove acts as a guideline for your saw or chisel and ensures that your cuts are straight and consistent. With practice, using a marking gauge will become second nature and an invaluable tool in your woodworking kit.
What is a marking gauge?
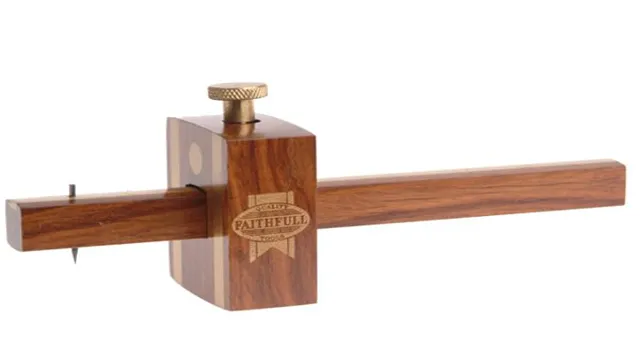
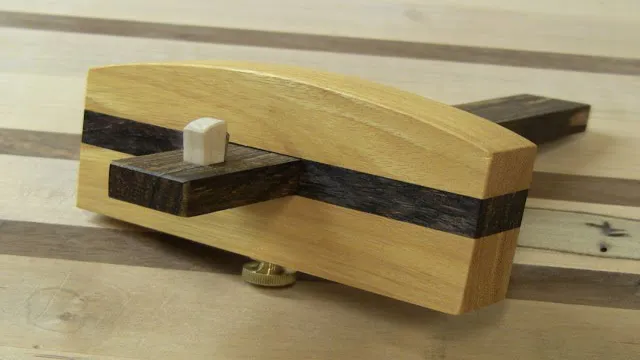
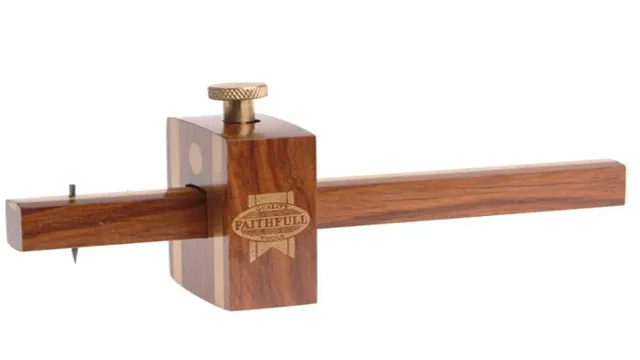
A marking gauge is a woodworking tool that helps to ensure precise and accurate measurements and markings when working with wood. Its main purpose is to mark out lines on the wood’s surface to ensure that cuts and joints are made in the right place. The device has a blade that is equipped with a round or flat shaft and an adjustable fence or guide that can be set to a specific width or depth.
The blade is used to score the wood’s surface, and the fence helps to keep the mark in line. The marking gauge is a versatile and essential tool for any woodworker, from novice to professional. Its accuracy and consistency are crucial in achieving the desired results in any woodworking project.
Step-by-Step Guide to Using a Marking Gauge
If you’re new to woodworking, the marking gauge may seem like a strange and intimidating tool, but it’s really quite simple to use once you get the hang of it. First, you’ll want to adjust the marking gauge to the desired width of your mark. Tighten the thumbscrew and slide the gauge to the appropriate distance.
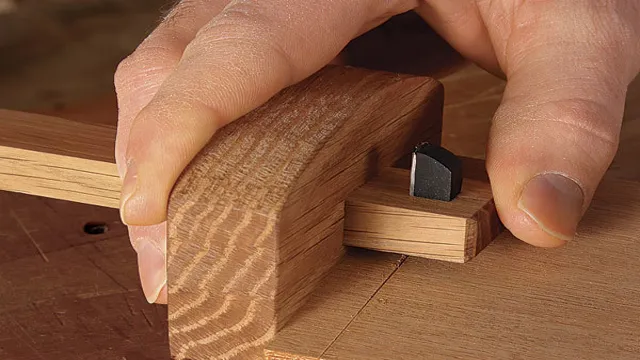
Then, place the gauge against the edge of the board with the cutter facing down. Press the gauge against the wood and slide it along the length of the board, keeping a steady hand. The blade will leave a sharp and precise line, which you can use as a guide for your saw or chisel.
Remember to only use gentle pressure, letting the gauge do the work for you. By mastering the use of a marking gauge, you’ll be able to create accurate and clean cuts in your woodworking projects.
Step 1: Adjust the gauge
If you’re ready to take on a woodworking project, one of the essential tools you’ll need is a marking gauge. But if you’ve never used one before, it can feel overwhelming to get started. Don’t worry – we’ve got you covered with this step-by-step guide to using a marking gauge.
The first step is to adjust the gauge to the desired measurement. This tool is used to make straight and accurate lines on wood, so it’s essential to ensure that it’s set up correctly. To adjust the gauge, loosen the screw at the end of the arm, move the arm to the desired position, and then tighten the screw to lock it in place.
Testing it on a scrap piece of wood can help ensure the setting is correct. By taking this first step, you’ll be on your way to using a marking gauge with confidence and accuracy in no time.
Step 2: Choose a starting point
When using a marking gauge, choosing a starting point is crucial for accuracy. A marking gauge is a simple yet effective tool used to mark lines parallel to the edge of a board. To use it, you need to set the distance between the cutting edge and the marking tip to the desired measurement.
Once you have set the gauge, you need to choose a starting point for the line you want to mark. This can be done by aligning the gauge with the edge of the board and making a light indentation with the marking tip. This point will act as a reference for the rest of the marking.
It’s important to note that the starting point should be made on the face of the board because this is where the marking gauge will be referencing from. By choosing a proper starting point, you ensure that the lines you mark with the gauge will be accurate and parallel to the edge of the board.
Step 3: Mark the wood
When it comes to working with wood, using a marking gauge is an essential tool for ensuring precision and accuracy. This step-by-step guide will walk you through the process of using a marking gauge. The third step is to mark the wood.
This is where you will use the marking gauge to create reference lines on the wood. Simply place the gauge on the wood and slide the gauge along the edge, making sure to press down firmly. You can then use a pencil or knife to mark the wood according to the reference line created by the gauge.
By using a marking gauge, you can easily mark multiple pieces of wood with the same measurements for a perfect fit every time. With this technique, you can create quality results that will impress any woodworker.
Step 4: Repeat as necessary
When working with delicate materials, a marking gauge is an essential tool for precise measurement and marking. Once you have set the gauge for your desired width or depth, it is important to test it on a scrap piece of material before marking your actual project. This will ensure that the measurements are accurate and prevent any mistakes or wastage of material.
After the initial marking, double-check the accuracy of your measurements and continue as necessary. Remember to adjust the gauge as needed for each new measurement and repeat the process until you have marked all necessary lines. By taking the time to properly use the marking gauge, you’ll be sure to achieve the precise and consistent marks you need for a successful project outcome.
Tips and Tricks
Marking gauges are essential tools for precision woodworking. They allow you to make accurate marks on your boards and make cuts that are straight and even. However, if you’re unfamiliar with how to use a marking gauge, it can be a bit confusing.
The first thing you should do is adjust the gauge to the desired measurement. This can be done by loosening the screw that holds the gauge pin in place and sliding it to the desired position. Once you’ve set the gauge, you can use it to mark your board by running the gauge along the edge of the board.
Make sure to keep the gauge in contact with the wood and apply even pressure. If you need to make multiple marks, you can adjust the gauge as necessary, or use a combination of gauges to achieve the desired cuts. By utilizing a marking gauge, you’ll be able to improve the accuracy of your woodworking and achieve professional-looking results.
Use a pencil first
When it comes to sketching or drawing, starting with a pencil can be beneficial for artists of all levels. Using a pencil first allows for flexibility and the ability to make changes easily without ruining the work. This gives artists the chance to explore different options and get a feel for the subject they’re drawing.
Additionally, using a pencil allows for shading and creating different tones, which can add depth and realism to a piece. By lightly sketching out the subject with a pencil first, an artist can refine the drawing with more detail and precision, before moving onto pen or other materials. Overall, starting with a pencil is a great tip for anyone looking to improve their drawing skills.
Hold the gauge properly
When it comes to measuring things with a gauge, holding it properly is crucial. This may sound like common sense, but believe it or not, many people don’t know how to hold a gauge correctly. First and foremost, always grip the gauge firmly with both hands.
This will help keep it stable and prevent it from slipping or wobbling as you measure. Additionally, make sure you position the gauge at the correct angle; holding it too flat or too steep can affect the accuracy of your measurements. Remember, taking accurate measurements is important in many fields, from construction to manufacturing to cooking.
So if you want to ensure your measurements are spot-on, make sure you’re holding the gauge properly.
Practice on scrap wood first
When it comes to woodworking, practice makes perfect. If you’re just starting out in this craft, it’s a good idea to practice on some scrap wood first before moving on to more expensive and complex projects. This will not only help you get a feel for the tools, but it will also allow you to refine your technique and develop your skills without the pressure of ruining a pricier piece of wood.
Plus, working with scrap wood can be a lot of fun – it gives you the freedom to experiment and try new things without worrying about making mistakes. So the next time you’re feeling inspired to start a new woodworking project, take some time to grab some scrap wood and practice your skills. Who knows? You might just surprise yourself with what you can create.
Remember, practice makes perfect!
Conclusion
Now that you’ve learned all about marking gauges, it’s time to put them to use and give your woodworking projects the precision they deserve. Remember to always lock the gauge before making a cut, and keep it sharp to ensure accurate marking every time. With a marking gauge in hand, you’ll be the talk of the woodshop with your sharp lines and perfectly aligned cuts.
So go forth and gauge away, my friend. Your projects will never be the same.”
FAQs
What is a marking gauge and how does it work?
A marking gauge is a woodworking tool used to make precise marks on wood. It consists of a beam, a fence, and a marking wheel. The fence is adjusted to the desired distance from the edge of the wood, and the marking wheel is used to score a line along the wood, ensuring consistent and accurate markings.
What are the different types of marking gauges available?
There are several types of marking gauges, including single pin gauges, dual pin gauges, mortise gauges, cutting gauges, and wheel gauges. Each type has a different purpose and is suitable for a specific woodworking task.
Can you use a marking gauge to mark both straight and curved lines?
Yes, you can use a marking gauge to mark both straight and curved lines. For straight lines, you can use the fence to guide the marking wheel, while for curved lines, you can adjust the fence to the desired curve and follow it with the marking wheel.
How can you ensure the accuracy of your markings with a marking gauge?
To ensure the accuracy of your markings, make sure you set the fence at the right distance from the edge of the wood, and check it with a ruler or caliper. Also, use a sharp marking wheel and apply consistent pressure while marking.
Can a marking gauge be used on both softwood and hardwood?
Yes, a marking gauge can be used on both softwood and hardwood, as long as the marking wheel is sharp enough to score the wood effectively.
When should you use a wheel marking gauge instead of a cutting gauge?
A wheel marking gauge is better suited for marking across the grain of the wood, while a cutting gauge is better for marking along the grain. So, if you need to mark a line across the grain, use a wheel marking gauge.
How do you maintain a marking gauge to ensure its longevity?
To maintain a marking gauge, keep the marking wheel sharp by honing it regularly. Also, keep the gauge clean and dry, and store it in a dry place to prevent rusting or warping.

