How Do You Use a Marking Gauge? Step-by-Step Guide for Woodworkers.
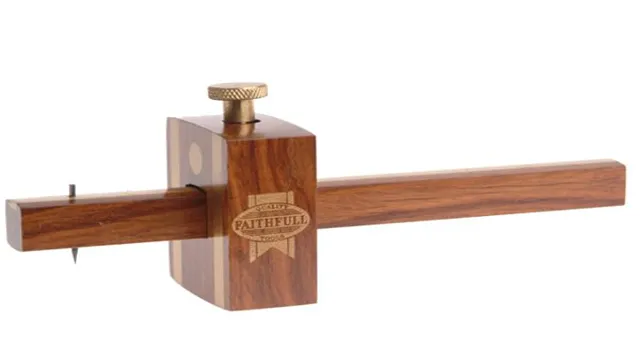
Are you someone who loves to work on precise woodworking projects? If yes, then you surely must be familiar with the importance of using the right tools. One such tool that can make all the difference in your precision work is the marking gauge. Marking gauges are simple yet incredibly useful tools that allow woodworkers to accurately mark and measure wood for cutting and fitting.
They come in different styles, such as the mortise gauge, cutting gauge, and combination gauge, each with its own unique features and uses. For instance, the mortise gauge is ideal for marking the width and depth of mortises, while the cutting gauge is designed for marking the wood grain before making a cut. On the other hand, the combination gauge is an all-in-one tool that can be used for various marking and measuring tasks.
Using a marking gauge can save you time, effort, and materials by ensuring that your cuts are accurate and your joints fit perfectly. With a marking gauge at hand, you can say goodbye to inaccurate measurements, misaligned cuts, and wasted wood. In this blog, we will explore the benefits of using a marking gauge in your precision work, discuss the different types of gauges, and provide tips on how to use them effectively.
Whether you are a beginner or an experienced woodworker, this guide will surely help you take your precision work to the next level. So, let’s get started!
What is a Marking Gauge?
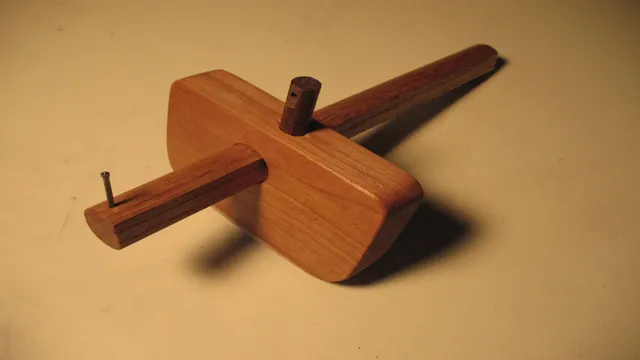
A marking gauge is an essential tool for measuring and marking lines accurately on wood surfaces. It consists of a beam, a fence, and a sharp marking point or a wheel that scribes a line into the wood. To use a marking gauge, first, loosen the locking mechanism and adjust the fence and marking point to the desired measurement.
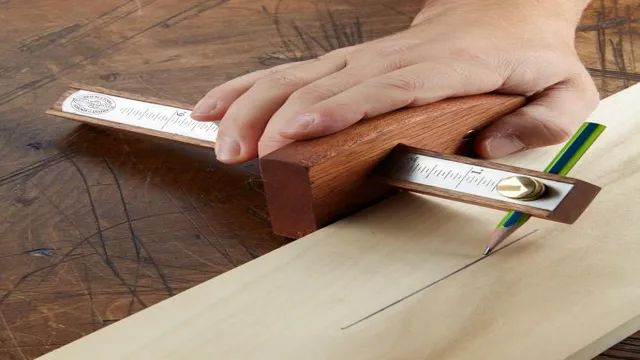
Then, hold the gauge perpendicular to the wood surface, slide it along the edge of the board, and gently press the marking point against the wood to create an accurate line. You can also use the marking gauge to scribe parallel lines by locking the fence into place and making multiple passes over the board. Using a marking gauge is an easy and effective way to ensure your woodwork is precise and of excellent quality.
So, whether you are a professional woodworker or a hobbyist, mastering the use of a marking gauge can make a significant difference in the outcome of your woodworking projects.
A tool used to mark lines parallel to an edge or end grain.
A marking gauge is a woodworking tool that is used to mark lines parallel to an edge or end grain. It consists of a rod or blade and a fence that can be adjusted in distance from the blade. To use a marking gauge, the fence is set at the desired distance from the blade and then the gauge is run across the wood.
This creates a parallel line that can then be used as a guide for cutting or shaping the wood. The benefits of using a marking gauge are that it allows for precise and accurate measurements, as well as consistent results. This is especially useful in woodworking projects where the measurements need to be exact.
It also allows for the marking of multiple lines at once, saving time in the process. Overall, a marking gauge is an essential tool for any woodworker who wants to achieve accurate and precise results. By using this tool, woodworkers can ensure that their finished products are of the highest quality, with straight lines and precise measurements.
So if you’re looking to improve your woodworking skills, be sure to add a marking gauge to your toolkit!
Step-by-Step Directions for Use
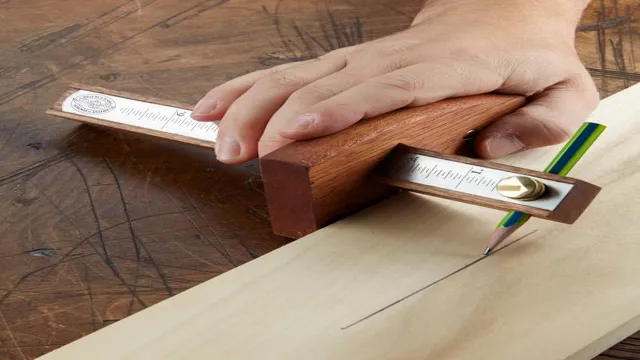
When it comes to woodworking, a marking gauge is an essential tool to have in your toolbox. But if you’re new to woodworking or have never used a marking gauge before, you may be wondering how to use it. Here are some step-by-step directions to get you started: First, adjust the marking gauge to the desired measurement.
Next, place the gauge flush against the edge of the workpiece. Then, firmly hold the gauge in place with one hand and slide the marking tool along the workpiece with the other hand, making sure to keep the gauge perpendicular to the work surface. Once you have marked the desired distance, you can use a saw, chisel, or other cutting tool to make your cuts.
With a little practice, using a marking gauge will become second nature. So, don’t be intimidated by this useful tool and give it a try.
1. Adjust the gauge to desired measurement.
When it comes to measuring, a precise gauge is a must-have tool. In order to use it correctly, you need to follow a few simple steps. First, adjust the gauge to your desired measurement.
This will ensure that you get accurate and consistent readings every time. Once you have adjusted the gauge, you can start using it to measure whatever it is you need to. It may take a few tries to get the hang of it, but with a bit of practice, you’ll be measuring like a pro in no time.
Remember, the key to getting the most out of your gauge is to make sure it is calibrated correctly and that you are using it in the correct way. With these things in mind, you can confidently measure any object or surface with ease. Whether you’re a DIY enthusiast or a professional, having a reliable and accurate gauge in your toolbox will make all the difference.
So why wait? Get your gauge today and start measuring like a pro!
2. Slide the fence against the edge or end grain of the piece.
When working with a table saw, it’s crucial to slide the fence against the edge or end grain of the piece you’re cutting. This step ensures accurate cuts and minimizes the risk of kickback. To use the table saw properly, follow these step-by-step directions: first, adjust the fence to the desired distance from the saw blade.
Then, turn on the saw and wait for the blade to reach full speed before making your cut. When you’re ready, position the piece to be cut against the fence and hold it firmly in place with your hands or a push stick. Slowly push the wood through the saw blade, keeping your fingers a safe distance away from the blade.
Once the cut is complete, turn off the saw and wait for the blade to come to a complete stop before removing the piece. By following these steps and sliding the fence against the edge or end grain of the piece, you can work with a table saw safely and accurately every time.
3. Hold the gauge firmly and slide along the piece to create the mark.
If you’re new to woodworking, learning how to use a marking gauge can be daunting. But fear not! Follow these step-by-step directions to master the art of using a marking gauge. First, adjust the gauge according to the desired measurement.
Second, place the gauge on the edge of the piece you want to mark and press the end of the gauge against the wood. Third, hold the gauge firmly and slide it along the piece to create the mark. It’s important to keep the gauge perpendicular to the wood to ensure accuracy.
And that’s it! With practice, you’ll be able to create precise markings like a pro in no time. The marking gauge is an invaluable tool for creating furniture, cabinetry, and other wooden items. So don’t be scared to give it a try and see how it can up your woodworking game.
4. Repeat as needed.
Repeat as needed is the final step in accomplishing a task or achieving a goal. To repeat as needed means to evaluate the results of your efforts and determine if you need to make any further adjustments or start the process over again. This step is critical as it allows you to fine-tune your actions and improve your output.
It also gives you the opportunity to measure progress and celebrate your successes. Some tasks may require multiple repetitions before you achieve the desired outcome, while others may only need a couple of rounds. Either way, it’s important to know when to pause, evaluate, and repeat as needed.
Whether you’re working on a personal or professional project, applying this step can help you succeed. So, when you feel like you need to make progress or reach a goal, don’t hesitate to repeat as needed.
Tips for Best Results
If you’re wondering how to use a marking gauge, rest assured it’s not as complicated as it might sound. Essentially, a marking gauge is a tool designed to help make precise markings on wood. To use it, first adjust the distance between the cutting edge and the fence to the desired width.
Then, holding the gauge firmly against the wood with one hand, use the other hand to slide the gauge along the edge of the wood, keeping the cutting edge in contact with it. This will create a perfectly straight marking that can be used as a guide for a saw or other cutting tool. It’s important to keep the gauge steady and apply even pressure throughout the process to ensure the markings are straight and consistent.
With a little practice, using a marking gauge can become second nature, and you’ll be able to create accurate markings quickly and easily.
1. Keep the fence flat against the piece.
As a beginner in woodworking, it’s not uncommon to struggle with using a fence properly. It’s important to keep the fence flat against the piece to achieve the best results. One way to ensure the fence stays in place is by using clamps to secure it to the workbench.
Another trick is to use a straightedge to ensure the fence is in-line before making your cuts. Keeping the fence flat also helps prevent snipe, which is when the thickness of the wood changes at the beginning or end of the board. In short, keeping the fence flat is crucial to achieving clean, precise cuts on your woodworking projects.
So next time you’re in the workshop, don’t forget to check your fence and make sure it’s flat against the piece before you start cutting.
2. Avoid pressing too hard as it may damage the wood.
When it comes to woodwork, pressing too hard on the material can cause it more harm than good. It’s important to take note of the amount of force you’re applying at all times. If you’re working on intricate designs or curves, a light touch is always better.
You might think that pressing harder will make your carving or engraving more distinct, but what it will actually do is cause cracking or splitting of the wood. So, as a rule of thumb, go easy on the wood and trust that a steady, gentle hand will give you the best results. Remember that woodworking is not a race, it’s a craft that requires patience and practice.
With each project you undertake, aim to improve your technique and develop a feel for the wood. By doing so, you’ll gradually learn just how much pressure you need to apply to create the perfect piece.
3. Use a sharp blade for clean and precise marks.
When it comes to getting clean and precise marks on your projects, using a sharp blade is absolutely essential. Having a dull or damaged blade can lead to jagged edges or uneven cuts, which can ruin the overall look of your work. It’s important to invest in high-quality blades and to make sure they’re properly maintained.
You can sharpen most types of blades yourself using a honing stone or sharpening tool, or you can take them to a professional for sharpening. When using your blade, be sure to apply consistent pressure and avoid twisting or angling the blade, which can cause it to slip or create uneven marks. With a sharp blade and proper technique, you’ll be able to achieve flawless results every time.
So, when working on your next project, don’t forget to keep your blade sharp and ready to go!
Conclusion
So, there you have it folks, the ultimate guide on how to use a marking gauge. It’s a tool that may seem daunting at first, but with a little practice, you’ll be marking lines with precision like a magician. Remember, the key is in the adjustments and the pressure you apply.
It’s not about marking too deep or too lightly, but finding that sweet spot to make your mark without damaging the material. And who knows, with enough practice, you might just become the next Picasso of marking gauges. Happy marking!”
FAQs
1. What is a marking gauge and what is it used for? A marking gauge is a woodworking tool used to mark measurements on wood in a precise manner. It consists of a metal or wooden beam with a small, sharp blade that can be adjusted to the desired marking depth. It is used to make repetitive markings or to transfer measurements from one piece of wood to another. 2. How do you set the depth of a marking gauge? To set the depth of a marking gauge, first, loosen the thumbscrew at the end of the beam. Then, adjust the blade so that it protrudes from the bottom of the beam to the desired depth. Finally, tighten the thumbscrew to secure the blade in place. 3. What are the different types of marking gauges available? There are several types of marking gauges including wheel gauges, cutting gauges, mortise gauges, panel gauges, and combination gauges. Each one is designed for a specific woodworking task. 4. How do you use a marking gauge to make a mortise? To use a marking gauge to make a mortise, first, set the depth of the gauge to the desired depth of the mortise. Then, use the gauge to mark out the sides of the mortise. Finally, use a chisel or mortising machine to remove the wood between the markings. 5. Can a marking gauge be used to mark curved lines? Yes, a marking gauge with an adjustable fence can be used to mark curved lines by adjusting the fence to the desired curve and running the gauge along the edge of the wood. 6. How do you maintain a marking gauge? To maintain a marking gauge, regularly sharpen the blade and oil any moving parts to prevent rust. Also, make sure to store the gauge in a dry place to prevent moisture damage. 7. What is the difference between a marking gauge and a measuring tape? A marking gauge is used to mark measurements directly on the wood, while a measuring tape is used to measure and transfer measurements from one piece of wood to another. A marking gauge provides more accuracy and precision in marking measurements on wood.

