How to Build a Marking Gauge: Step-by-Step Guide for Woodworkers
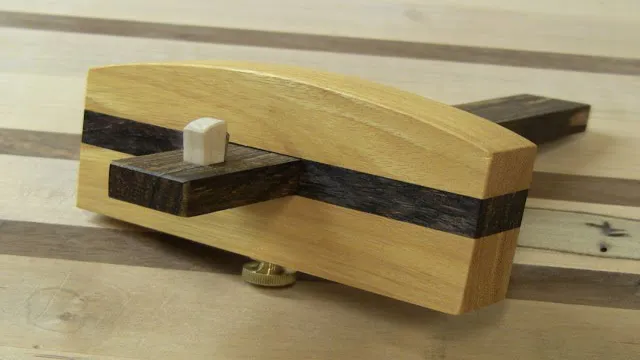
Are you looking to up your woodworking game? One of the essential tools every woodworker should have in their arsenal is a marking gauge. A marking gauge is a simple but effective device used to create precise and repeatable markings on your workpieces. Building your own marking gauge is a great way to not only save money but also create a tool customized to your specific needs.
It’s a relatively simple project that even novice woodworkers can tackle. In this blog post, we’ll outline the step-by-step process of building your own marking gauge, including the materials you’ll need, the tools required, and the techniques involved. You don’t need any prior experience to build a marking gauge, just a willingness to learn.
So grab your tools and let’s get started on creating a precise, versatile, and valuable tool that will make a great addition to your woodworking collection.
Gather Your Materials
When it comes to building a marking gauge, the first step is to gather all the necessary materials. This includes a piece of hardwood, a marking wheel, a locking mechanism, and screws or nails to hold the gauge together. For the hardwood, it’s best to choose a dense wood like maple or cherry that will withstand the pressure of the marking wheel.
The marking wheel, which is the wheel that makes contact with the wood surface to create the mark, can be purchased at a hardware store or online. A locking mechanism is also important to secure the marking wheel in place once you have set the desired measurement. Lastly, screws or nails will hold all the components of the gauge together.
With all the materials in hand, you can begin the process of building your own marking gauge and creating perfectly marked pieces of woodwork.
List of Required Tools and Materials
To begin any project, it is crucial to gather all the necessary tools and materials. When embarking on a new DIY project, take the time to create a list of required items to avoid running back and forth to the store. Depending on the project, you may need items such as measuring tape, screwdrivers, clamps, saws, sandpaper, paint, brushes, and safety equipment.
It is essential to have the right tools to ensure you can complete your project efficiently and effectively. With the correct materials, you can transfer your vision into a beautiful reality. So, take the time to prepare a list of tools and materials before starting, making sure you have everything needed to create your masterpiece seamlessly.
Prepare Your Materials
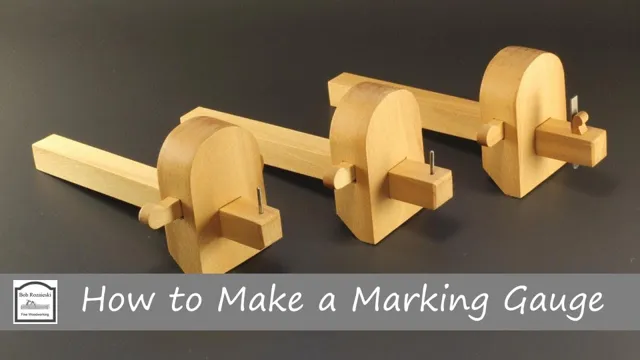
Preparing for any task requires you to have the right tools and materials. Similarly, when it comes to creating something new, whether it’s a piece of art or a business proposal, gathering your materials is crucial. Start by identifying what you’ll need for the project and then search for those materials online or at a store.
Ensure that you have all the necessary items before beginning to avoid unnecessary setbacks. Moreover, it’s essential to keep your work area neat and clean to avoid misplacing items during the process. In summary, assembling what you need beforehand will enable you to work efficiently and effectively, thus saving you time and effort in the long run.
Create the Body of the Gauge
When it comes to building a marking gauge, the body is an essential component. To create the body, you will need a hardwood that is strong and durable to hold up against wear and tear. Some examples of suitable hardwoods include maple, oak, and walnut.
Start by cutting a rectangular piece of wood to the desired length and width of your gauge. Next, using a marking tool, sketch out the design of your gauge body on the wood. Then, use a saw to cut out the design, being careful to follow your markings accurately.
When the body of the gauge is complete, drill a hole in the center of the stock for the marking wheel to fit in. Finally, sand the wood smooth and add a finish if desired. The body of the gauge may seem like a simple part, but it is an essential component that you cannot do without.
Mark and Cut the Stock
To create the body of the gauge, the first step is to mark and cut the stock. This process involves selecting a suitable piece of wood for the gauge and measuring and marking the required dimensions on it. Once the markings are in place, using a saw, the wooden stock is then cut to shape.
The most important thing to keep in mind during this process is precision as accuracy is crucial when creating the body of the gauge. The wooden stock used for the gauge body should be of a sufficient thickness to provide the necessary stability and sturdiness to the gauge. The choice of wood used can also affect the overall appearance and durability of the gauge, so it is important to choose carefully.
The right kind of wood can make all the difference in creating a gauge that is not only functional but also visually appealing. By focusing on precision and using high-quality wood, one can create a gauge body that is both reliable and aesthetically pleasing.
Drill Holes for the Hardware
Now that you have all the necessary tools and materials, it’s time to create the body of your gauge. The first step is to drill holes for the hardware. Ensure that the drill bit you’re using is smaller than the screws’ diameter to avoid damaging the wood.
Measure and mark where you want to place the hardware on the board and use a drill to create the holes. This step is crucial for securing the hardware in place as it will prevent any movement or wobbling when in use. Once the holes are drilled, you can attach the metal hardware, including the screws, nuts, and washers, to the board.
By creating the body of the gauge and drilling precise holes for the hardware, you’re one step closer to having a functional and accurate measuring tool. Remember, take your time with this step to ensure everything is straight and secure. Once all the hardware is in place, you can move on to the next step of creating the sliders for your gauge.
With some patience and focus, you’ll soon have a handmade measuring tool that you can use for woodworking projects and other DIY tasks.
Sand and Finish the Body
Creating the body of a gauge is an important step in making sure it functions properly. The first step to creating the body is to choose the right wood for the job. Hardwoods like maple, cherry, and walnut are good options as they are strong and can withstand wear and tear.
Once the wood has been chosen, it’s time to sand and shape it. Sanding is the process of using abrasive materials to smooth out rough surfaces, and it’s crucial in creating the body of a gauge. The final step in creating the body is to finish it.
This step involves applying a protective layer to the wood to prevent damage from moisture or other external factors. The right finish for the job will depend on the intended use of the gauge. If it’s going to be used in a workshop, then an oil-based finish would be ideal as it’s more durable.
On the other hand, if it’s going to be used as a decorative piece, then a water-based finish would be a good option as it’s less likely to change the colour of the wood. No matter what type of finish is chosen, sanding and finishing the body of the gauge is an essential step in creating a high-quality tool.
Attach the Hardware
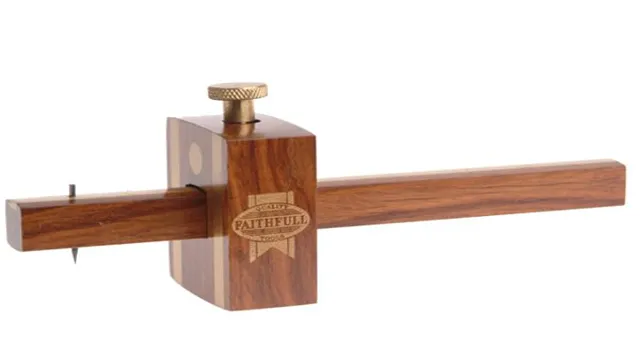
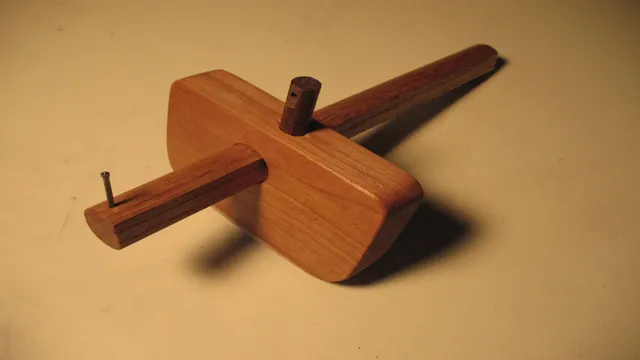
Now that you have your marking gauge body assembled, it’s time to attach the hardware. You’ll need to grab your brass thumbscrew and insert it into the threaded hole on the end of the marking gauge beam. Once in place, use a screwdriver to tighten the thumbscrew until it’s snug.
This will secure the fence in place and allow you to adjust it easily for different working conditions. Next, insert the sharpened marking pin into the marking gauge body, using the same screwdriver to secure it firmly in place. Congratulations, you’ve now attached all of the hardware necessary to use your marking gauge.
With a little practice, you’ll be able to accurately mark even the most complex woodworking projects.
Insert and Tighten the Blade
When it comes to attaching and tightening the blade of your cutting tool, it is important to have the right hardware in place. This will ensure that the blade is secure and won’t come loose while you’re using it. The first step is to look for the blade attachment on your tool.
Sometimes, it is a small knob or screw that is located near the blade housing. Once you have identified the attachment, it’s time to add the hardware. This usually involves using a wrench or screwdriver to tighten the bolt that holds the blade in place.
Be sure to check the manufacturer’s instructions to determine the correct size of wrench or screwdriver to use. Tightening too much or too little can lead to the blade coming loose or not cutting properly. Once the blade is attached and tightened, give it a firm shake to ensure it’s secure.
With the right hardware and attention to detail, you can confidently use your cutting tool to complete any project with ease.
Install the Thumb Screw
Now it’s time to attach the hardware and install the thumb screw. This step is crucial as it ensures that your equipment is secure and in place. First, make sure you have the appropriate screwdriver to fit the screw.
Then, insert the screw into the designated hole and begin twisting the screwdriver clockwise. As you do this, you will notice the equipment begin to tighten and become more stable. It’s important to not over-tighten the screw, as this can lead to damage or breakage of the equipment.
Instead, firmly but gently tighten the screw until it is snug. Once the thumb screw is securely in place, you can rest easy knowing your equipment is firmly installed. Remember to double-check all screws and hardware before using your equipment to ensure it is safe and secure.
Test and Adjust the Gauge
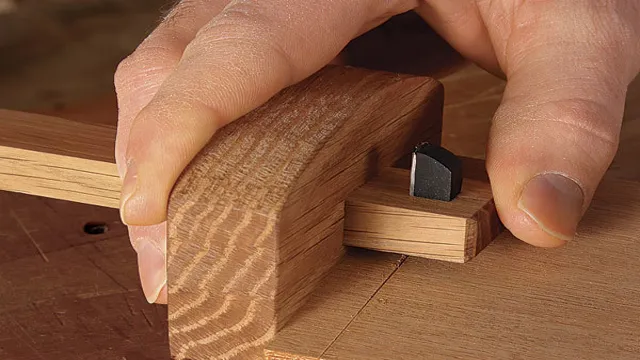
After building your marking gauge, the next step is to test and adjust the gauge to ensure that it performs accurately. First, place a piece of wood on your workbench and use the gauge to mark a line. Then, measure the distance between the line and the edge of the wood with a ruler.
If the distance is off, adjust the gauge by tightening or loosening the thumbscrew until it produces an accurate marking. It’s important to note that different wood types may require different amounts of pressure and adjustment, so it may take some trial and error to get it right. Once you have calibrated your gauge, test it on different types of wood to ensure consistent and accurate results.
With a properly adjusted marking gauge, your woodworking projects will be more precise and efficient. So, don’t rush this step and take the time to test and adjust your gauge properly.
Test the Marking Gauge on Scrap Wood
To ensure your marking gauge is correctly adjusted, it’s essential to test it on a piece of scrap wood. Start by identifying a suitable piece of wood, preferably one with a clear, straight grain. Next, grab your marking gauge and adjust the cutting wheel or pin to the desired depth.
Then, firmly press the wheel or pin against the surface of the wood and slide the gauge along the grain. If the gauge leaves a clear, deep line, you’re good to go. However, if the line is faint or uneven, you’ll need to make some adjustments to the gauge.
One way to adjust the gauge is by loosening the locking mechanism and moving the cutting wheel or pin slightly. Test the gauge again and repeat until you achieve the desired results. Take some time to experiment with different depths and pressures, as this can affect the outcome.
Additionally, keep in mind that the type and hardness of the wood can also impact the results. Overall, testing your marking gauge on scrap wood can help you fine-tune and perfect your woodworking projects, ensuring accurate, precise markings every time.
Adjust the Blade if Necessary
If you’re experiencing issues with the precision of your cuts, it could be due to your blade and gauge not being properly adjusted. One way to test and adjust the gauge is by using a micrometer to measure the thickness of the stock being cut. If the measurement is off, the gauge needs to be adjusted accordingly.
Most machines have a simple adjustment mechanism that can be easily accessed and tweaked. It’s important to note that a poorly calibrated gauge can result in uneven cuts, which can cause problems when fitting pieces together. Therefore, it’s crucial to make sure everything is perfectly calibrated to ensure clean and accurate cuts.
By taking the time to test and adjust your gauge, you’ll be able to work with confidence, knowing that your equipment is functioning at its best.
Conclusion
In conclusion, building a marking gauge is a perfect exercise in the art of woodworking and essential for precision marking on your projects. With just a few basic tools and materials, you can create an incredibly useful tool that will last a lifetime. And unlike purchased gauges, a homemade version has the added benefit of being unique to you, reflecting your personal style and woodworking capabilities.
So get cracking and start building! Your woodworking projects will thank you for the accuracy and precision that only a homemade marking gauge can provide.”
FAQs
What is a marking gauge used for?
A marking gauge is a woodworking tool used to mark out lines parallel to the edge of a board.
What materials are needed to build a marking gauge?
To build a marking gauge, you will need a piece of wood, a dowel rod, a cutting tool, and a measuring tool.
Can a marking gauge be used for curved lines?
No, a marking gauge is designed to mark straight lines or parallel lines to the edge of a board.
How do you set the depth of a marking gauge?
To set the depth of a marking gauge, loosen the locking screw and adjust the gauge pin to the desired depth. Then, tighten the locking screw.
What is the advantage of using a marking gauge over a pencil or other marking tool?
A marking gauge provides a consistent and accurate measurement, which is especially important for joinery and other precise woodworking tasks.
Can a marking gauge be used on metal or other materials besides wood?
Yes, a marking gauge can be used on any material that can be marked with a cutting tool, including metal, plastic, and leather.
Is it necessary to sharpen the gauge pin of a marking gauge?
Yes, keeping the gauge pin sharp is important for achieving accurate and clean markings. It is recommended to sharpen the pin before each use.

