Carving chisels are essential tools for any carpenter or woodworker who wants to create beautiful designs and intricate details on their projects. But if you’re new to using these tools, you might be wondering how to get started. Where do you begin, and how do you avoid making mistakes? In this blog post, we’ll explore some tips and tricks for using carving chisels effectively.
Whether you’re a beginner looking to learn the basics or an experienced woodworker looking to improve your skills, you’ll find plenty of valuable information here. From selecting the right chisels for your project to mastering the correct grip and technique, we’ll cover everything you need to know to become a master carver. So grab your chisels and let’s get started!
Introduction
Carving chisels are a great way to bring your woodworking projects to life. If you’re just starting out, learning how to use carving chisels can seem daunting at first, but with practice, you’ll be able to create intricate designs that will impress your friends and family. Before getting started, it’s important to choose the right type of carving chisel for your project.
There are different sizes and shapes of chisels, each with their own unique purpose. Once you have your chisel, it’s important to hold it correctly and maintain a comfortable grip. The best way to learn how to use carving chisels is to start with basic techniques and practice until you feel confident enough to move on to more complex designs.
With patience and practice, you’ll be able to take your woodworking skills to the next level and create beautiful pieces that you can be proud of.
What Are Carving Chisels?
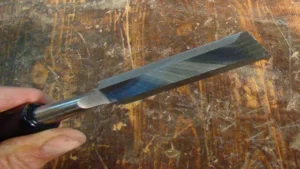
Carving chisels are specialized tools used for shaping and carving wood, stone, or other materials. They typically consist of a narrow steel blade and a sturdy handle, designed to provide precision and control during use. These tools come in a variety of shapes and sizes, each with a specific purpose, from removing large chunks of material to detailing intricate designs.
Carving chisels are essential for artists, craftsmen, and tradespeople who require a high degree of expertise and skill in their work. They are used to create everything from intricate sculptures and furniture to decorative ornaments and figurines. Whether you are a novice or a professional, having the right carving chisel for the job is essential to achieve the desired result.
Types of Carving Chisels
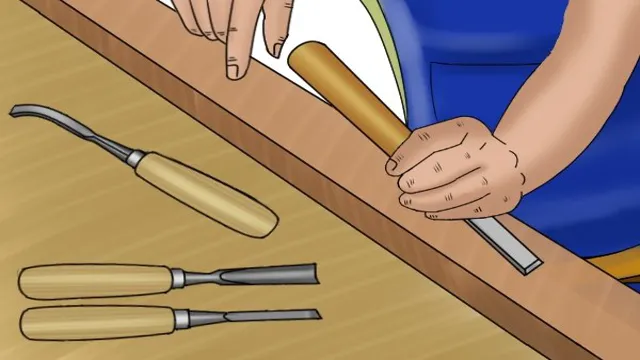
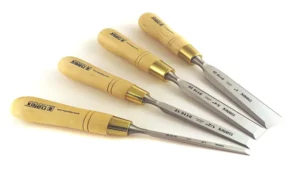
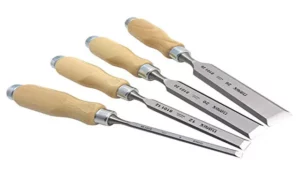
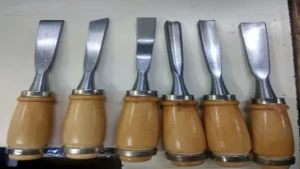
Carving chisels are tools that are used to create intricate designs and shapes in wood, stone, or other materials. There are many types of carving chisels available, each designed for specific tasks and materials. These types of chisels include straight chisels, bent chisels, V-shaped chisels, gouges, and skew chisels.
Each type of chisel has a unique cutting edge and shape, making it ideal for different carving techniques and styles. Some chisels are used to create fine details, while others are used to shape larger areas. By understanding the different types of carving chisels available, you can select the right tool for your carving project and achieve the desired results.
Preparing Your Chisels
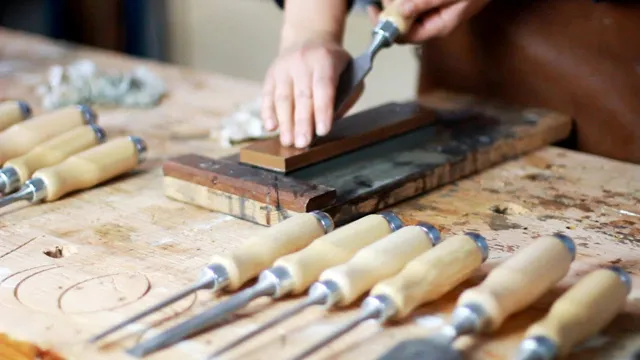
If you want to learn how to use carving chisels, one of the first things you need to do is prepare your tools properly. This means sharpening your chisels so that they are ready to cut through wood with ease. Start by using a honing guide to hold the chisel at the correct angle while you sharpen it against a sharpening stone or diamond plate.
Move the chisel back and forth over the stone until you see a burr form on the opposite side. Then, flip the chisel over and repeat the process on the other side. Use a finer grit stone or plate to remove any burrs and achieve a razor-sharp edge.
Once your chisels are sharp, you are ready to begin your carving project. Remember to always use a pushing motion with your chisels to avoid damaging the blade. With a bit of practice and patience, you can master the art of carving with chisels.
Sharpening Your Chisels
Sharpening your chisels is a crucial task that every woodworker should be familiar with. The first step is to prepare your chisels by cleaning them thoroughly. Start by wiping the blade with a cloth to remove any dust or debris.
Then, use a honing guide to adjust the angle of the bevel. Ensure that the bevel is flat and matches the angle of the guide. Once you have set the angle of the blade, sharpen it using a sharpening stone.
Use water or honing oil to lubricate the stone and ensure a smooth sharpening experience. Remember to run the blade along the stone in a continuous fluid motion, moving from the coarsest to the finest grit to get the desired sharpness. After you’re done, remove the burr by running the blade’s flat back across the stone lightly.
With these simple steps, you can prepare your chisels to work smoothly, giving you that perfect chisel cut you deserve.
Choosing the Right Chisel for Your Project
When it comes to choosing the right chisel for your project, there are a few things to keep in mind. First and foremost, you’ll want to consider the type of material you’ll be working with. For softer materials like wood or plastic, a lighter chisel will work best, while harder materials like stone or metal require a heavier chisel for more precision and control.
Additionally, you’ll want to make sure your chisels are properly prepared before each use. This means sharpening them regularly and keeping them clean and free of rust or damage. By taking these factors into consideration, you’ll be able to choose the right chisel for the job and ensure that it performs at its best when you need it most.
Using Your Chisels
Carving chisels are a crucial tool for any woodworker or sculptor. But how do you use them effectively? Firstly, it’s essential to choose the right chisel for the task at hand, as each one has a unique shape and size. Once you’ve selected the appropriate chisel, hold it firmly in your hand and slowly begin to push it into the wood, using smooth and even pressure.
Be sure to always cut with the grain, using your other hand to steady the wood if necessary. If you encounter any knots or difficult areas, take your time and gently work around them, as forcing the chisel can cause damage to both the wood and the chisel. Constantly inspect your progress, checking for depth and precision.
Finally, it’s advisable to keep your chisels sharpened regularly to ensure they are always working at their best. With a bit of practice and care, you’ll soon be creating stunning pieces with your carving chisels.
Grip and Posture
When it comes to using your chisels, grip and posture are crucial factors that can make or break the success of your woodworking project. Your grip should allow you to have complete control over the chisel while also being comfortable enough to use for extended periods of time. The right grip can prevent slipping and ensure that you can achieve the desired level of precision.
Good posture is also essential to avoid fatigue and prevent injuries such as back or neck pain. When using a chisel, you should stand with your feet shoulder-width apart, keep your back straight, and avoid bending too much. Remember, the key is to have a stable and balanced stance.
By focusing on your grip and posture, you can improve your chiseling technique and create beautiful woodworking projects with ease.
Making Your First Cut
When it comes to making your first cut in woodworking, using chisels can be an excellent choice. Chisels come in various shapes and sizes, allowing you to make different types of cuts with precision. Before starting, you need to ensure that your chisels are sharp and in good condition.
You can use a sharpening stone to achieve that perfect edge, and once you’re ready, it’s time to make your cut. Position the chisel at a 30-degree angle and make a shallow cut, almost like making a groove. Repeat this process until the desired depth is obtained.
It’s crucial to keep the chisel sharp throughout the process, so take a break frequently to sharpen the blade. Creating a perfect cut using chisels takes patience and practice, but it’s worth it. Once you get the hang of it, making intricate cuts and shapes becomes easy.
Remember to choose the right type of chisel for the task at hand, as different chisels are suited for various cuts. Don’t forget to wear safety gear, including eye protection and gloves, to minimize the risk of injuries. With practice, you’ll get better at using chisels, and soon, it will become one of your favorite woodworking tools.
Keyword: chisels.
Working with the Grain
When it comes to using your chisels, it’s important to work with the grain. This means paying attention to the direction of the wood grain when making your cuts. Chiseling against the grain can lead to splintering and a rough surface, while chiseling with the grain will result in a smoother and cleaner surface.
Before you start chiseling, take a close look at the wood grain and determine the direction it is running. Once you know which way the grain is going, adjust the angle of your chisel so that the blade is cutting with the grain. This will give you greater control and precision as you work, and will help you achieve the best possible results.
Don’t be afraid to experiment and practice different techniques to find what works best for you and the particular piece of wood you are working with. By working with the grain and using your chisels in the right way, you can achieve beautiful and professional-looking results every time.
Finishing Your Carving
Finishing your carving can be both exciting and nerve-wracking at the same time. After all the hard work you’ve put into carving your piece, you’ll want to make sure that your final touches are just as perfect. Using carving chisels is a great way to add intricate details to your carving, but knowing how to use them properly is essential.
You’ll want to make sure that your chisel is sharp and angled correctly to create clean and precise cuts. Depending on the type of wood you’re working with, you may need to use a different type of chisel. For instance, a gouge chisel works well for removing large areas of wood, while a V-chisel is great for making fine lines.
Remember to work slowly and be patient; carving is a delicate process that requires skill and practice. With time and experience, you’ll be able to create a beautifully crafted masterpiece.
Sanding and Polishing
When it comes to carving, sanding and polishing are two important steps towards achieving a smooth and polished final product. Sanding is the process of using sandpaper to smoothen the surface of your carving, by removing any rough or uneven areas. The finer the sandpaper, the smoother the finish.
Polishing, on the other hand, involves using abrasive compounds to buff the surface for a high gloss finish. It’s important to note that both sanding and polishing should be done in order, starting with the coarser grits and moving to the finer ones. The end result of these finishing touches is a beautiful and polished carving that is both visually appealing and smooth to the touch.
So, if you want to take your carving to the next level, be sure to make sanding and polishing an essential part of your finishing process.
Protecting Your Carving
Carving knife Carving can be a very satisfying hobby, but if you want your carving to look its best then you’ll need to finish it properly. The last step in the carving process is to protect your work by finishing it. One of the best ways to finish a carving is by using a carving knife.
A carving knife can give you the precision and control you need to make your carving look perfect. To use a carving knife for finishing, begin by smoothing the surface of your carving with sandpaper. Once this is done, you can use the carving knife to carefully carve away any small imperfections or rough spots.
Finally, apply a protective coating to your carving to keep it looking great for years to come. With the right tools and a little bit of patience, anyone can create a beautiful, finished carving that they’ll be proud to show off.
Conclusion
Carving chisels are the artist’s magic wand, capable of transforming a mundane piece of wood into a masterpiece. But beware, for just like with any wand, one must wield it with finesse and precision. From choosing the right chisel for the job, to maintaining its sharpness and keeping your fingers intact, carving with chisels is an artform that requires practice, patience, and a steady hand.
So go forth, young padawan, and let your creativity flow through your chisels, as you carve your way to infamy in the world of woodworking. May the force be with you, always.”
FAQs
What are carving chisels used for?
Carving chisels are used for carving and shaping wood or other materials by removing small chips or layers.
How many types of carving chisels are there?
There are various types of carving chisels available, such as skew chisels, straight chisels, bent chisels, gouges, parting tools, etc.
Which type of carving chisel is suitable for carving intricate details?
A bent chisel or a gouge is usually preferred for carving intricate details as it allows for greater control and precision.
How to sharpen carving chisels?
Carving chisels can be sharpened using a sharpening stone or honing guide. It is important to maintain the correct angle while sharpening to ensure optimal performance.
How to handle carving chisels safely?
Always keep your fingers away from the sharp edge of the chisel. Use a carving glove or wrap a cloth around your hand to protect it. In addition, always keep the chisels clean and sharp to avoid any accidental slips.
What kind of wood is best for carving with chisels?
A relatively soft wood, such as basswood or pine, is best suited for carving with chisels as it is easier to work with and provides a smoother surface.
Can carving chisels be used to carve other materials besides wood?
Yes, carving chisels can be used to carve other materials such as stone, bone, or leather, depending on their sharpness and durability. However, it is important to select the appropriate type of chisel for each material.
