How to Use an Angle Finder for Miter Cuts: A Comprehensive Guide
Miter cuts can be tricky to execute with precision. The angle of the cut needs to be just right to ensure a seamless joint. That’s where an angle finder comes in.
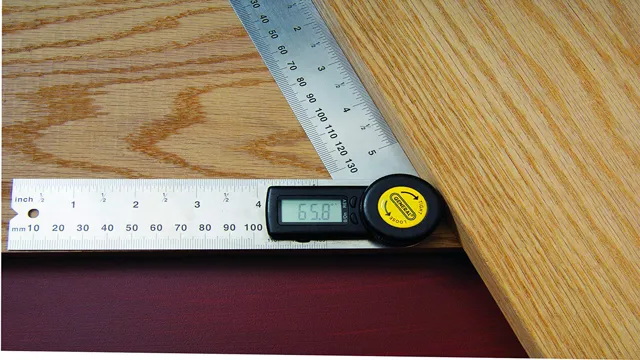
This handy tool can help you take accurate measurements, ensuring that your miter cuts are spot-on. Think of an angle finder as a protractor on steroids. Unlike the flimsy plastic version you used in math class, this tool is made of sturdy materials and has a digital readout that displays the angle to the nearest degree.
Whether you’re a professional carpenter or a DIY enthusiast, an angle finder can help you achieve professional-quality cuts. It’s easy to use and will quickly become a staple in your toolbox. In this post, we’ll walk you through the basics of using an angle finder for miter cuts, so you can get started on your next project with confidence.
What is an Angle Finder
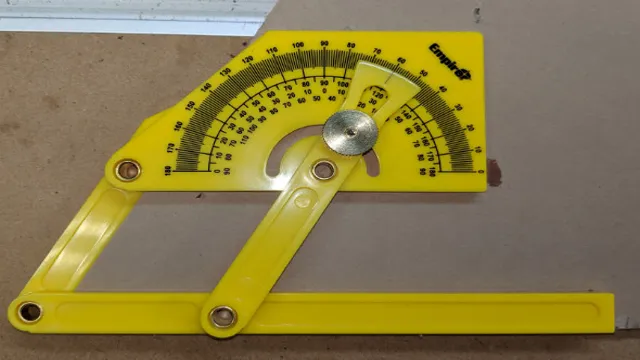
An angle finder is a tool used to measure angles accurately. If you want to make precise miter cuts, using an angle finder can be a game-changer. The tool usually has two arms with a pivot point in the middle that allows you to determine the angle between them, and a gauge that shows you the degree of the angle.
To use an angle finder for miter cuts, start by placing one arm against the surface you want to cut and move the other until it meets the blade. Once you have the angle you need, you can set your saw to that angle and make your cut with confidence. With the help of an angle finder, you can easily and accurately cut angles without trial and error, saving you time and producing more pleasing results.
So next time you embark on a woodworking project that involves angles, make sure to use an angle finder for precise cuts every time.
Explanation of what an angle finder is and how it works
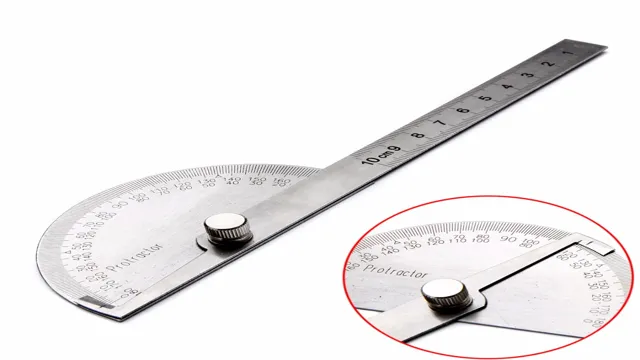
An angle finder, also known as a protractor, is a tool used to measure angles accurately. It comes in different types, including digital and manual, but they all operate on the same principle. An angle finder essentially consists of two arms or blades that are connected at a joint, which enables them to move freely.
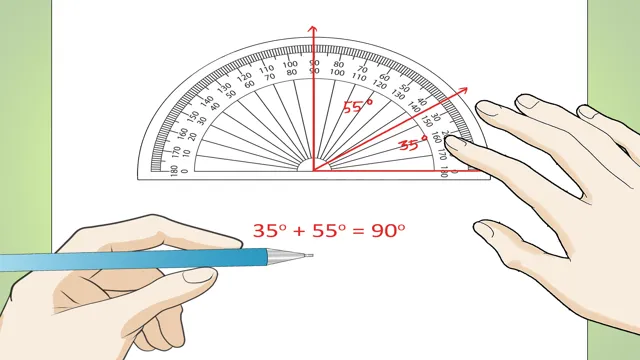
The blades are marked with degrees to facilitate precise angle measurement. To use an angle finder, you place the tool on the edge of the surface or object whose angle you want to measure, ensuring that one of the blades aligns with the surface. You then rotate the other blade until it lines up with the angle you wish to measure.
Once you have aligned the blades, you can read the degree markings to determine the angle accurately. Angle finders are useful tools in various settings, including woodworking, construction, engineering, metalworking, and more. They are essential for creating precision cuts, building accurate structures, and ensuring proper angles for machinery and tools.
By investing in an angle finder, you can save time and frustration and achieve professional-level precision in your projects.
Measuring Angles with an Angle Finder
If you’re looking to achieve precise miter cuts on your woodworking projects, using an angle finder can be incredibly helpful. To use an angle finder, there are a few simple steps to follow. First, make sure that the base of the angle finder is flush against the surface you want to measure the angle of.
Then, adjust the arm of the angle finder until it lines up with the angle you’re measuring. In some instances, you may need to read the angle measurement from a digital display, while other angle finders feature a bubble level that can help you ensure your angle is perfectly level. Once you have your angle measurement, you can transfer that to your saw and adjust it accordingly to make your perfectly angled miter cuts.
Overall, using an angle finder can help take the guesswork out of angle measurements and ensure your cuts come out just right. So, why not give it a try and see how it can improve your woodworking results?
Step-by-step process for measuring angles with an angle finder
If you’re working on a project that requires accurate angle measurements, an angle finder is an essential tool to have in your toolkit. Measuring angles with an angle finder may seem intimidating at first, but it’s actually a straightforward process that can be broken down into a few simple steps. First, position the angle finder against the surface you want to measure, ensuring the base of the tool is flush with the material.
Next, adjust the tool until the indicator points directly at the angle you want to measure. The angle will be displayed on the tool, allowing you to make precise cuts or adjustments. It’s important to note that angle finders come in different types, and the process may vary slightly depending on the specific tool you’re using.
But overall, measuring angles with an angle finder is a quick and easy way to ensure your project is accurate and professional-looking. So, next time you need to measure an angle, give an angle finder a try. It just might become your new favorite tool in the toolbox.
Using the Angle Finder to Set the Miter Saw
If you want to know how to use an angle finder for miter cuts, then you’ve come to the right place! Using an angle finder is a great way to ensure that you get precise and accurate miter cuts every time. First, make sure your miter saw is set up correctly, with the blade perpendicular to the saw table. Then, place the angle finder on the surface where you’ll be making your cut and adjust it until it shows the angle you want to cut.
Once you have this angle, you can set your miter saw to the same angle and make your cut. It’s important to double-check your measurements before cutting, as even a small mistake can ruin your entire project. With a bit of practice, you’ll be using the angle finder like a pro and producing beautiful miter cuts every time!
Steps for setting up the miter saw using the angle finder to ensure accurate cuts
Setting up your miter saw can be a bit of a challenge, but a little effort goes a long way to ensure accurate cuts. Using an angle finder is a great way to set up your saw to achieve precise angles. To start, place the angle finder on the surface that needs to be cut.
Ensure that the bubble in the angle finder is level and note the angle reading. Next, adjust the miter saw to the desired angle on the angle gauge. If you’re using a saw with a bevel feature, adjust the bevel also.
Before making any cuts, double-check that everything is set up accurately. If everything looks good, you can now cut your material. Using an angle finder takes some practice initially, but once you get the hang of it, you’ll be creating perfect angles in no time.
Tips for Using an Angle Finder for Miter Cuts
If you’re a woodworker, then one of the essential tools that you need in your arsenal is an angle finder for making precise miter cuts. To use an angle finder for miter cuts, you first need to determine the angle at which you want to cut your material. Once you know the angle, you can then adjust your saw blade accordingly.
Place your angle finder against the edge of your material and adjust it until the angle measures accurately. Be sure to lock it in place before you start cutting. When making the cut, keep the saw blade aligned with the angle finder to ensure that you achieve the desired angle.
By using an angle finder for miter cuts, you can achieve precise cuts every time, ensuring that your joints fit together perfectly. So, if you haven’t tried using an angle finder for miter cuts before, give it a try! You’ll be amazed at the difference it can make in your woodworking projects.
Tips for getting the most out of using an angle finder for miter cuts
An angle finder is a handy tool that helps to ensure accurate miter cuts, whether you are working with wood or any other material. When using an angle finder for miter cuts, there are several important tips to keep in mind to ensure that you get the most out of this tool. Firstly, make sure your angle finder is properly calibrated before use to ensure the accuracy of your measurements.
Second, be sure to take multiple measurements from different angles to ensure the accuracy of your cuts. Third, when making your cuts, it’s important to carefully align your saw blade with the markings on your material to ensure that your cuts are precise and accurate. Finally, always keep safety in mind when working with power tools, and be sure to wear proper safety gear.
By following these tips and using your angle finder correctly, you can ensure precise and accurate miter cuts every time, making your DIY projects a success.
Conclusion
In summary, using an angle finder for miter cuts is like having a secret weapon in your woodworking arsenal. With its accuracy and precision, it takes the guesswork out of making angled cuts, ensuring that your projects will turn out perfect every time. So, whether you’re a beginner or a seasoned pro, don’t be afraid to unleash the power of the angle finder – your future projects will thank you for it!”
Summary of how to use an angle finder for miter cuts and its benefits
An angle finder is a must-have tool for anyone working on woodworking projects that require precise miter cuts. To use an angle finder effectively, start by ensuring that the tool is calibrated correctly and that it’s set to measure angles in the correct units of measurement. Next, place the angle finder against the object you want to cut, making sure that it’s flush against the surface.
Take note of the angle measurement that the tool gives you, then use this information to set your miter saw to the correct angle. Cut your piece of wood and check its fit against the rest of your project. Using an angle finder offers numerous benefits.
It allows you to make more precise cuts, reducing the risk of mistakes and minimizing wastage. It also saves you time and effort that you might otherwise spend measuring and making calculations. Having an angle finder on hand means that you can complete your woodworking projects more efficiently, giving you more time to work on other things.
Additionally, using an angle finder can help you improve your overall accuracy and gain more experience working with different angles, which is an essential skill for anyone looking to advance their woodworking skills. Overall, incorporating an angle finder into your woodworking toolkit is an excellent investment that will pay off in the long run.
FAQs
What is an angle finder and how does it work for miter cuts?
An angle finder is a tool that helps you measure angles accurately. To use it for miter cuts, you need to place it on the surface you want to cut, align it with the angle you want to cut, and then transfer that angle to your saw.
Can an angle finder be used for different types of miter cuts?
Yes, an angle finder can be used for different types of miter cuts, including inside and outside corners, bevel cuts, and compound miter cuts.
How do I calibrate my angle finder for accurate measurements?
To calibrate your angle finder, you need to hold it against a known 90-degree angle, adjust it until it reads 90 degrees, and then it should be accurate for other angles.
What are some common mistakes to avoid when using an angle finder for miter cuts?
Common mistakes to avoid include not ensuring the angle finder is firmly in place before measuring, not transferring the angle accurately to your saw, and not double-checking the angle measurement before cutting.
Is an analog or digital angle finder better for miter cuts?
Both analog and digital angle finders can be effective for miter cuts. It depends on personal preference and which type of angle finder you find easier to use.
Do I need a specific type of saw to use an angle finder for miter cuts?
No, an angle finder can be used with various types of saws, including circular saws, miter saws, and table saws.
Are there any safety precautions I should take when using an angle finder for miter cuts?
Yes, it’s essential to wear eye and ear protection, follow the manufacturer’s instructions for your saw and angle finder, and make sure your workspace is well-lit and clutter-free to prevent accidents.

