How to Use an Angle Finder: A Beginner’s Guide to Perfect Measuring Angles
Are you struggling to find the right angle for your project? Whether you’re a carpenter, DIY enthusiast or a professional woodworker, getting the perfect angle is not easy. However, there’s an easy solution to your problem: an angle finder. This simple tool can help you find the right angle for any project, from building a bookshelf to installing kitchen cabinets.
In this post, we’ll take a closer look at what an angle finder is and how to use it effectively. So, if you’re ready to learn more, grab your pencil and paper and let’s get started.
What is an Angle Finder?
If you’re wondering what an angle finder is and how to use it, you’re in the right place. An angle finder is a tool that helps you measure angles accurately. It’s not only useful for carpentry but also for any DIY or construction work that requires precise angle detection.
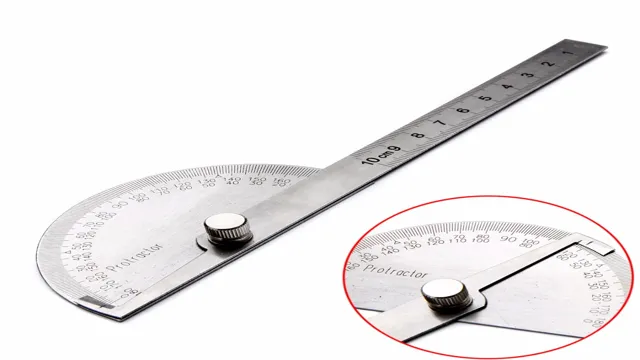
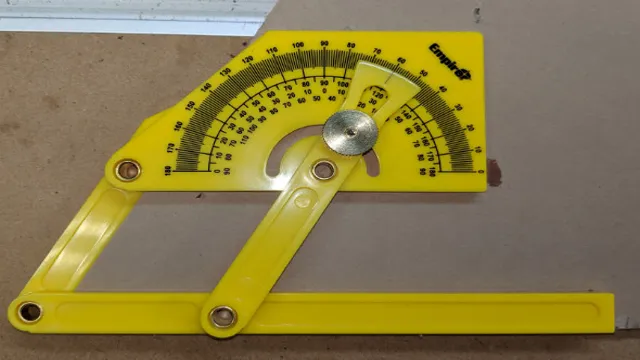
There are different types of angle finders available in the market, including digital ones or the more traditional mechanical models. To use an angle finder, first, place it on the surface or object that needs to be measured. Then, adjust the tool to align with the angle you want to measure.
Depending on the model, readings can appear on either a digital or analog display. You can also use an angle finder to measure the slope of a surface or to create compound angles for more complex cuts. With an angle finder, you can achieve perfect cuts and angles, making your DIY or construction projects a success.
Definition and Types
An angle finder is a tool that helps to measure angles in various projects such as woodworking, metalworking, or construction. This tool can make the process of finding angles that would otherwise be difficult to measure by hand much easier and more accurate. There are several types of angle finders on the market, including digital and mechanical options.
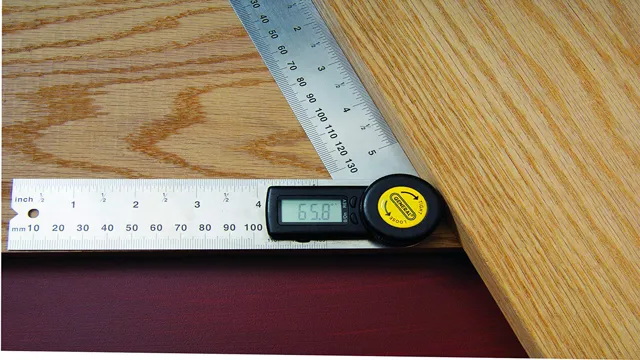
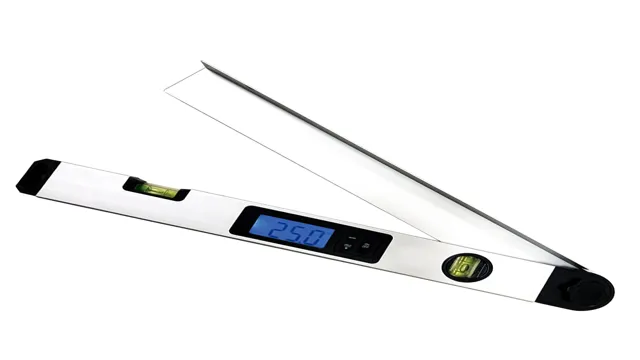
Digital angle finders are generally more precise and easier to read, while mechanical angle finders are more affordable and simpler to use. Both options have their benefits and drawbacks, so it’s important to choose the one that best suits your needs. Whether you’re a professional contractor or a DIY enthusiast, an angle finder is an essential tool that can help you achieve the precise results you need.
Importance of Angle Finders in DIY Tasks
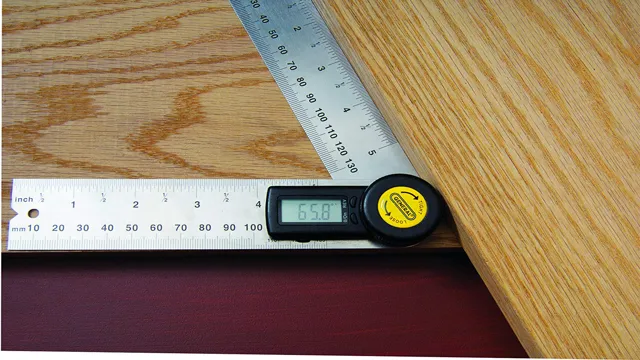
Angle finder If you’re a DIY enthusiast, you know how important it is to have the right tools for the job. One of the most important tools for any DIY task involving angles is an angle finder. So what is an angle finder? It’s a small tool that helps you measure angles with precision.
With its help, you can determine the exact angle of a corner or surface, making it easy to cut or position materials correctly. Angle finders come in different types, from digital to manual ones. Whatever type you choose, an angle finder will help you save time and avoid costly mistakes.
It’s an essential tool for any DIY lover who wants to achieve accuracy and efficiency with their projects. Using an angle finder can be likened to using a compass when navigating in the dark, making it a crucial tool to have in your DIY toolbox. Don’t go into your next project without an angle finder and end up wasting time and money.
Get yourself an angle finder and be sure to measure your angles with precision.
Steps to Use an Angle Finder
Angle finders are extremely helpful tools when it comes to measuring angles, especially in DIY projects or woodworking. Knowing how to use an angle finder is essential to achieve the right measurements. Firstly, you need to place the angle finder against the surface that requires measurement.
Then you need to adjust the arm and bring it into a position where the two arms of the angle finder are parallel to the surface. This particular angle is the reference point or 0 degrees on the angle finder. After achieving the reference angle, move the arm of the angle finder to the position that is in line with the angle you need to measure.
The display on the angle finder will show the precise measurement of the angle. Once you have the required measurement, you can confidently cut or shape the material according to your needs. By following these simple steps, you can use an angle finder effectively to achieve accurate angle measurements every time.
Step 1: Choose the Correct Angle Finder
An angle finder is a essential tool for any DIY enthusiast or professional carpenter. However, before using it, you need to pick the right one for the job. The two most common types of angle finders are digital and analog.
Digital angle finders have an electronic display and have a variety of features, such as the ability to transfer measurements and save data. Analog angle finders, on the other hand, have a dial or gauge that shows the angle. Choose the type that works best for the job at hand.
The digital type is best for those who need more precision, while the analog version is best for traditional work like carpentry. Ultimately, choosing the correct angle finder is the first step in getting the job done right.
Step 2: Place the Angle Finder on the Surface
When using an angle finder, the second step is to place it on the surface. This may seem straightforward, but there are a few things to keep in mind. First, ensure that the angle finder’s base is flush against the surface and not wobbling.
Use your hand to apply pressure to keep it steady if necessary. Second, check that the gauge is set to 0 degrees. If it’s not, adjust it so that it’s reading correctly.
Finally, make sure that you’re measuring the correct angle. Double-check your measurements and take your time to be accurate. By following these simple steps, you’ll be able to accurately and confidently measure angles with an angle finder in no time.
Whether you’re a professional carpenter or just someone looking to do some DIY projects, an angle finder can be a handy tool to have in your toolbox!
Step 3: Measure the Angle and Lock it in Place
Using an angle finder may seem intimidating, but it’s actually fairly easy with a few simple steps. Once you’ve found your starting point and positioned the base of the angle finder firmly, the next step is to measure the angle. This is where the tool really comes in handy – simply move the adjustable arm until it lines up with the angle you want to measure.
Once you’ve found the correct degree, lock the arm securely in place to ensure an accurate reading. This is essential for precision carpentry and woodworking projects, where even a fraction of a degree can make a big difference in the final outcome. With your angle finder set and locked, you’re ready to move on to the next step in your project with confidence.
So don’t be intimidated – embrace this simple but effective tool and take your precision work to the next level.
Examples of Using an Angle Finder
If you’re looking to accurately measure angles in your carpentry or DIY projects, an angle finder can be a handy tool. Not only does it save you time by giving you quick and precise measurements, but it’s also easy to use. One common example of using an angle finder is when installing baseboards.
By placing the angle finder against the wall and baseboard, you can easily determine the angle to cut the ends of the baseboard for a perfect fit. Another example is when cutting crown molding for a room. By placing the angle finder against the corner where the molding will be installed, you can determine the angle to set your saw for accurate cuts.
Overall, an angle finder can be a valuable addition to your tool kit, saving you time and frustration on your next project. So, next time you’re wondering how to use an angle finder, keep in mind these practical examples to get the most out of this handy tool.
Example 1: Finding the Angle of a Corner for Crown Molding
One of the most common uses for an angle finder is finding the angle of a corner for crown molding installation. Crown molding is a beautiful finishing touch that adds character and elegance to any room. However, it can be challenging to determine the correct angle to cut the molding pieces to fit the corners properly.
This is where an angle finder comes in handy. By placing the tool on the corner, the angle finder will measure the angle and display it on a digital screen, making it easy to transfer the measurement to the saw for accurate cuts. With the help of an angle finder, you can achieve a seamless and professional-looking crown molding installation.
Example 2: Measuring the Slope of a Roof
In construction and roofing projects, accurately measuring the slope of a roof is essential to ensure a successful and safe installation. An angle finder, also known as a protractor, is a valuable tool for determining the angle of a roof’s pitch. With an angle finder, you can accurately measure the rise and run of the roof, allowing you to calculate the slope and make necessary adjustments during installation.
This tool is especially useful for roofs with non-standard angles or slopes, as manual measurements can be complex and prone to error. A good angle finder should have a user-friendly design, a clear display, and accurate measurements. Using an angle finder can save you time and money in the long run, ensuring that your roofing project is safe and stable for years to come.
Conclusion and Tips
And that, my dear friends, is how you put some precision in your corner-cutting game! With your new angle finder in hand, you now have the power to measure every angle with ease and accuracy, making those complicated tasks a breeze. So go forth and create, knowing that every corner will be cut to perfection thanks to your trusty angle finder. Happy measuring, and may your cuts be ever so precise!”
Summary of Steps and Key Points
Angle Finder If you’re working on a DIY project where precision is crucial, an angle finder can be an extremely useful tool. This tool can help you measure angles accurately, making sure that every piece fits together perfectly. There are a number of different uses for an angle finder, but some of the most common examples include woodwork, metalwork, and construction.
When working with wood, an angle finder can be used to measure the angle of a miter saw blade, while in metalwork, this tool can be used to measure the angle of a pipe or bar. In construction, angle finders can be used to ensure that walls are straight and floors are level. Using an angle finder is a simple process – just place the tool on the appropriate surface and read the measurement.
With practice, you’ll be able to use this tool to take accurate measurements quickly and easily. So if you’re planning a project where precision is key, be sure to consider using an angle finder.
Additional Tips and Tricks for Using Angle Finders
Angle Finders Angle finders are handy tools that can come in multiple forms and be used for a variety of tasks. They can measure and duplicate angles, find the slope of a roof or determine the angle of a saw blade, amongst others. To use an angle finder, users should place it against the surface being measured and adjust it until the gauge stops moving.
It is essential to make sure the tool is level before taking your reading for the most accurate result. By utilizing an angle finder, tasks that seemed daunting can be done more efficiently, and projects can be completed with greater precision. One example of using an angle finder is in creating mitered corners in carpentry work or framing.
Setting the angle finder to the desired angle ensures the corners are cut correctly and match up perfectly. Another example is in metalworking, where angle finders can be used to create flanges in ductwork or bend pipes at a precise angle. With a little imagination, there are plenty of situations where an angle finder can make life a lot easier.
Recommended Angle Finder Brands and Models
Angle Finder Angle finders are essential tools for carpenters, woodworkers, metalworkers, and DIY enthusiasts. They help in measuring angles with high precision, ensuring perfect cuts and joints. There are numerous brands and models of angle finders to choose from.
Some of the top brands include Bosch, General Tools, and Wixey. These brands offer a wide range of angle finders with different features and specifications, ensuring that you get the right tool for your specific needs. Angle finders have a variety of applications, from determining the angle of a roof pitch to setting up equipment and machines to be level.
They can even help in finding the slope of surfaces, making them perfect for anyone who works with inclined planes. You can use an angle finder when making cuts for mitered corners, fitting pieces together, or in installations that require an accurate angle. Using an angle finder is relatively straightforward.
Simply place the tool on the surface you want to measure, adjust it until the level is centered, and read the angle measurement off of the scale. Some angle finders even come equipped with digital displays that provide readings in degrees, making the process even easier. No matter what your level of expertise, an angle finder is a tool that can help you achieve professional results.
FAQs
What is an angle finder tool used for?
An angle finder tool is used to measure and transfer angles accurately in DIY and professional projects.
How do you use an angle finder to measure an angle?
To measure an angle using an angle finder, place the base of the tool on one of the surfaces and align the arm of the tool with the other surface until it displays the angle on the digital or analog readout.
What is the difference between a digital and analog angle finder?
A digital angle finder displays the measurements on a digital readout, while an analog angle finder uses a pointer and a scale to show the measurements.
Can an angle finder be used to measure both inside and outside angles?
Yes, an angle finder can be used to measure both inside and outside angles by adjusting the tool’s arms or legs accordingly.
How do you calibrate an angle finder tool?
To calibrate an angle finder tool, place it on a flat and even surface and adjust it until it reads 0 degrees on the readout or scale.
Can an angle finder tool also measure bevel angles?
Yes, some angle finder tools can also measure bevel angles using adjustable arms or legs.
What are some common applications of an angle finder in woodworking?
An angle finder is commonly used in woodworking for applications such as cutting angles for molding and trim work, joining corners accurately, and creating joints at precise angles.

