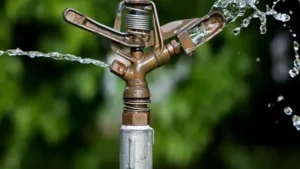
Have you ever switched on your underground sprinkler system only to find out that it won’t turn on? It can be frustrating, especially if you have a lush garden that needs regular watering. But don’t worry! Turning on your underground sprinkler system is not as complicated as it seems. With a few simple steps, you can have your system up and running in no time.
Think of your underground sprinkler system like a sleeping giant. It’s there, hidden underground, just waiting to be awakened. And, much like waking up from a long nap, it might need some coaxing to start functioning properly again.
Thankfully, with a few straightforward steps, you can get your irrigation system back in tip-top shape and keep your garden looking beautiful. In this blog post, we’re going to cover everything you need to know about how to turn on your underground sprinkler system. We’ll walk you through the steps to take, explain what you need to check, and offer some troubleshooting tips if you encounter any issues.
So let’s get started and wake up that sleeping giant!
Locate Your Sprinkler Control Box
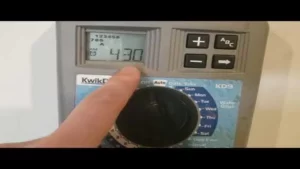
If you’re looking to turn on your underground sprinkler system, the first step is to locate your sprinkler control box. This might be positioned near the water source or near the lawn or garden, so take some time to look around for it. Once you’ve found the control box, open it up and take a look at the manual or instructions inside.
Depending on your specific system, you may need to turn some valves to allow water to flow through the pipes. You’ll also need to turn on the system itself, which may involve flipping a switch or pressing a button. Once everything is turned on and the water is flowing, you should see your sprinkler heads start to pop up, ready to water your lawn or garden.
Just be sure to adjust the settings as needed, based on the weather and specific needs of your plants. With a little bit of practice, turning on your underground sprinkler system will become second nature to you.
Check for Power
When it comes to troubleshooting your sprinkler system, the first step is to locate your sprinkler control box. Once you’ve found your control box, the next step is to check for power. Power outages or tripped circuit breakers can cause your sprinkler system to malfunction, so it’s important to check that everything is properly connected and receiving power.
If you’re unsure whether your control box is receiving power, you can use a voltage meter to test the electrical connections. If you do find that your control box is not receiving power, you may need to check any wiring or connections yourself or call in a professional to help. By checking for power and addressing any issues early on, you can ensure that your sprinkler system continues to function properly and keep your lawn and garden looking their best.
Identify Sprinkler Zones
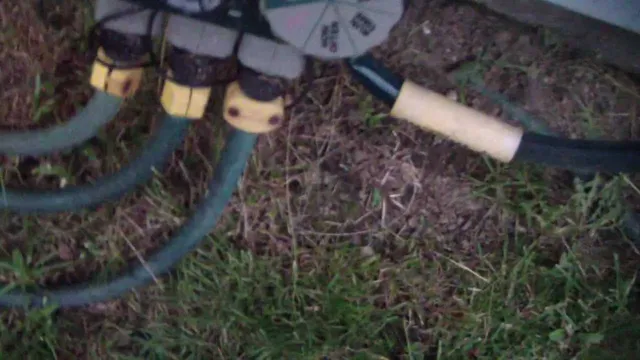
Identifying sprinkler zones can be a daunting task, but it all starts with locating your sprinkler control box. This box holds the key to turning on and off specific sprinkler zones, allowing you to water different areas of your lawn or garden as needed. To find the control box, start by walking around the perimeter of your house to look for an inconspicuous metal or plastic cover on a valve.
Sometimes, the control box can also be found near the water supply or at the base of an outdoor faucet. Once you locate the control box, open it up and familiarize yourself with the settings and buttons. Each zone should be labeled, and you can adjust the watering time and frequency as needed based on the specific needs of each area.
By taking the time to locate your sprinkler control box and understand its settings, you’ll be able to efficiently water your lawn and garden for optimal growth and health.
Turn On the Water Supply
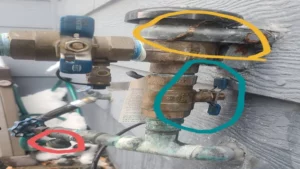
If you’re looking to turn on your underground sprinkler system, the first step is to make sure that your water supply valve is turned on. This is typically located somewhere near your water meter or main shut-off valve. Turning on the water supply will fill the pipes with water and allow the system to pressurize.
Once the system is pressurized, you can turn on your controller and run a test cycle to make sure that all of your sprinkler heads are working properly. It’s important to note that if you’re turning your sprinkler system back on after the winter months, you’ll want to take the time to inspect your system for any damage that may have occurred during the colder months. This includes checking for any leaks or broken pipes, as well as making sure that all of your sprinkler heads are in good working order.
By taking the time to properly turn on your sprinkler system, you can ensure that your lawn and garden stay healthy and vibrant all season long.
Open the Main Valve
When you’re ready to start using your water supply, it’s important to open the main valve first. This valve controls the flow of water into your home, and without it, you won’t be able to use any of your plumbing fixtures. To turn on the water supply, you’ll need to locate the main valve – it’s usually located on the street side of your property, in a box called a water meter pit.
Once you’ve found the valve, use a wrench or a special tool to turn it counterclockwise, slowly and steadily. You should hear the water rushing into your home, and it’s a good idea to turn on a faucet to check that the water is flowing properly. Remember to be cautious when opening the main valve – sudden increases in water pressure can cause burst pipes or damage to your plumbing system.
By taking the time to open the main valve properly, you’ll be able to enjoy all the benefits of a reliable water supply.
Check for Leaks
When it comes to checking for leaks in your plumbing system, the first step is to turn on the water supply. This may seem like an obvious step, but it’s crucial to ensure that you have a steady flow of water to test your pipes properly. Once you’ve turned on the water supply, you should check all the visible pipes and fixtures for any signs of leakage.
Look out for damp areas, pools of water, or discoloration on the walls or floors around your pipes. It’s also essential to check for any unusual sounds, such as hissing or gurgling noises, which may signal a leak within your walls. Don’t forget to check your water meter before and after testing for leaks to determine whether there has been any loss of water during the process.
Taking the time to check for leaks regularly can help you to identify and repair any issues before they cause significant damage to your home. Remember, prevention is always better than cure!
Turn On the Sprinkler Valves
To get your sprinkler system back up and running after a long winter, the first thing you need to do is turn on the water supply. This might seem obvious, but it is a critical step that is often overlooked. Start by locating the main water valve and turning it on slowly.
This will allow water to flow through the pipes and into your sprinkler system. As you turn on the water, listen for any unusual sounds such as gurgling or hissing. These could be signs of leaks or other issues that need to be addressed before you activate your sprinklers.
Once you are confident that the water supply is flowing smoothly, you can turn on the individual sprinkler valves. This can generally be done using a controller or manual valve, depending on the type of system you have. As you turn on each valve, pay close attention to the sprinkler heads, making sure that they pop up and spray evenly.
By following these steps, you can ensure that your sprinkler system is ready to go for the spring and summer seasons, keeping your lawn and garden looking lush and healthy. Keywords: sprinkler valves, water supply, main water valve, leaks, sprinkler heads.
Set Your Sprinkler System Schedule
If you’re wondering how to turn on your underground sprinkler system, don’t worry – it’s easier than you might think. First, locate your system’s controller, which is usually mounted on a garage or basement wall. Next, turn the controller on and set the date and time.
Then, program the watering schedule according to the needs of your lawn and plants. Most controllers allow you to set different zones for different areas of your yard, so you can adjust the watering times based on sun exposure and soil type. Once you’ve programmed your system, make sure to check it occasionally to ensure that it’s working properly and adjust the settings as needed.
With a little bit of knowledge and effort, you can enjoy a healthy, green lawn all season long. So go ahead and turn on that sprinkler system – your plants will thank you for it!
Program Your Control Box
Setting your sprinkler system schedule is essential for ensuring that your lawn and garden receive the appropriate amount of water to grow and flourish. Program your control box carefully, taking into account the plant types, soil type, and weather patterns in your area. You may need to make adjustments throughout the year as the weather changes, so schedule regular checks to ensure your system is functioning optimally.
Burstiness can be a problem if your sprinkler system is not programmed correctly, causing unwanted puddles and wasted water. Your control box should allow you to customize each zone’s watering times, so you can give your lawn, garden, and landscape plants the appropriate amount of water without wasting resources. By setting your sprinkler system schedule correctly, you’ll save water, time, and money while improving the look of your landscape, allowing for a healthy and productive garden.
Set Watering Times
Setting a schedule for your sprinkler system is a crucial step in maintaining a healthy and vibrant lawn. It not only ensures that your grass and plants receive the amount of water they need, but it also helps conserve water and reduce your water bill. The first step in setting your watering times is to determine how much water your lawn needs based on your soil type, grass type, and climate.
Once you have a good understanding of your lawn’s watering needs, you can create a watering schedule using the sprinkler system’s timer. You can set your system to water during the early morning hours when the sun is low and temperatures are cooler, giving your grass and plants time to absorb the water before the heat of the day sets in. Alternatively, you can water in the late afternoon or early evening when the sun is less intense, giving your lawn ample time to dry before nightfall, reducing the risk of fungal growth.
Whatever schedule you choose, make sure it is consistent and adjust it seasonally as needed. With a well-planned watering schedule, you can keep your lawn healthy, conserve water, and save money.
Conclusion
In conclusion, turning on an underground sprinkler system may seem daunting at first, but with a little bit of know-how, it’s a breeze. Think of it like conducting an orchestra – locate and turn on the main valve, then gradually increase the pressure to get the perfect flow. And voila! Your plants will be singing praises to you in no time.
Just remember to show your sprinkler system some love and maintenance every now and then, and it’ll keep harmoniously watering your lawns and gardens for years to come.”
FAQs
What is an underground sprinkler system and how does it work?
An underground sprinkler system is a type of irrigation system that is buried beneath the ground. It works by distributing water through a network of pipes and sprinkler heads to water your lawn and garden.
How do I turn on my underground sprinkler system?
To turn on your underground sprinkler system, locate the control box and follow the instructions to activate the system. Typically, this involves turning on the water supply and activating the control panel.
How often should I water my lawn with my underground sprinkler system?
The frequency of watering your lawn will depend on a variety of factors such as the type of grass, climate, and rainfall. However, typically, most lawns require watering once or twice a week for an hour or two per session.
How do I check the underground sprinkler system for leaks?
To check for leaks in your underground sprinkler system, turn off the water supply and observe the water pressure gauge. If there is a drop in pressure, it could indicate a leak. Additionally, inspect each sprinkler head for damage or signs of leaking.
Can I adjust the water flow rate of my underground sprinkler system?
Yes, you can adjust the water flow rate of your underground sprinkler system by using the flow control valves within the control box. By adjusting these valves, you can control the volume of water distributed to each sprinkler head.
How do I winterize my underground sprinkler system?
To winterize your underground sprinkler system, turn off the water supply and drain all the water from the system. This will prevent freezing and damage to the pipes and sprinkler heads during the winter months.
What maintenance is required for my underground sprinkler system?
Routine maintenance of your underground sprinkler system includes checking for leaks, replacing damaged sprinkler heads, cleaning or replacing filters, and adjusting water flow rates. It is also recommended to have the system inspected and serviced by a professional every few years.
