As the winter season comes to an end and the spring season approaches, it’s important to prepare your lawn for the new season. One of the essential tasks is to turn on your Rainbird sprinkler system to ensure your lawn gets the right amount of water. However, turning on a sprinkler system that has been inactive for months can be a bit tricky, and you may not even know where to start.
In this blog, we’ll guide you through the process of turning on your Rainbird sprinkler system in the spring, step by step, so you can keep your lawn healthy and beautiful all season long. So, let’s dive in!
Check for Damages
Spring is the perfect time to turn on your RainBird sprinkler system and get your lawn back into top condition. But before you do that, you should first check for any damage that may have occurred over the winter months. A common issue is broken pipes or sprinkler heads due to the freezing temperatures.
Inspect your system thoroughly and replace any damaged parts before turning it on. This will not only prevent any leaks or water waste, but also ensure the system is working efficiently and effectively. Don’t skip this important step in your spring lawn care routine, as it can save you time, money, and headaches in the long run.
Once you’ve made any necessary repairs, you can then proceed to turn on your RainBird sprinkler system and enjoy a lush, healthy lawn all summer long.
Inspect sprinkler heads for any cracks or leaks.
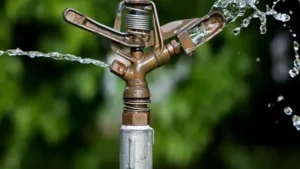
When it comes to maintaining your sprinkler system, it is essential to keep an eye out for any damages that might occur, and that includes checking for cracks and leaks in the sprinkler heads. This step is crucial for ensuring that your system functions correctly and efficiently. Damaged sprinkler heads can cause water to be wasted, leading to higher water bills and potential harm to your lawn.
Inspecting your sprinkler heads can be done easily by looking for any visible cracks or leaks, which can be caused by aging, impact damage, or weather conditions. If you notice any damages, it’s important to replace the sprinkler head right away. By being proactive in your maintenance routine, you can save yourself from costly repairs in the long run.
So, take the time to check your sprinkler heads regularly, and keep your lawn healthy and green all year round!
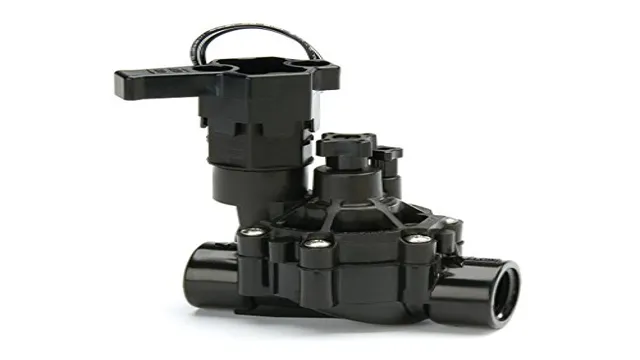
Examine hoses for any signs of wear and tear.
As the saying goes, prevention is better than cure. This is particularly true when it comes to checking your hoses for signs of damage. Even the slightest damage or wear and tear can lead to major problems if not addressed in time.
To ensure that your hoses are in excellent condition, inspect them regularly. Check for cracks, cuts, or tears which can cause leaks, leading to potential damage. Start by examining the ends of the hoses where they attach to the engine and radiator.
Make sure the hose clamps are securely tightened and not corroded. Give the hoses a gentle squeeze to detect any soft or mushy spots and replace any hoses that you suspect are damaged. Lastly, always take note of the manufacturer’s recommended timeframe for replacing hoses to avoid any potential damage.
By doing so, your vehicle will remain roadworthy, and you can enjoy a smooth ride.
Replace any damaged parts before turning on the system.
When it comes to setting up a new electronic system, it’s essential to check for damages before turning it on. Even the slightest scratch or broken piece could lead to significant issues down the line. It’s always better to be safe than sorry and inspect all components of the system thoroughly.
Look for any visible damages to the exterior as well as the internal components. If something appears to be damaged, it’s best to replace it before turning on the system. One faulty component could have a significant impact on the entire system’s functionality.
So if you want to avoid any unexpected surprises, take some extra time to examine any potential damages so that you can replace any parts right away and have a fully functional system without any issues. Remember, it’s always better to be cautious and thorough when it comes to electronic systems.
Water Source
As spring arrives, it’s time to prepare your yard for the warmer months. To turn on a Rainbird sprinkler system, start by locating the water source that will supply the system. This could be your home’s main water line or a separate irrigation line.
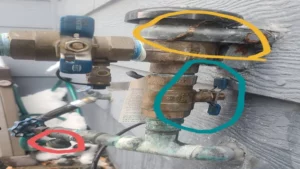
Once you’ve found the water source, turn on the supply valve to begin filling the pipes with water. You’ll need to make sure all drain valves are closed and all sprinkler heads are in their proper position. From there, you can turn on the controller and begin programming your sprinklers to run at your desired times and durations.
A properly functioning Rainbird sprinkler system will ensure even watering throughout your yard, keeping your plants healthy and vibrant throughout the growing season.
Ensure the water source is turned on and providing adequate water pressure.
When it comes to ensuring your plumbing system is running smoothly, one of the key components to check is your water source. It’s crucial that the water source is turned on and providing adequate water pressure to ensure everything works as it should. Without enough pressure, your faucets will dribble, your showerhead will flow weakly, and your toilet may not flush properly, causing a slew of problems.
Checking your water source doesn’t take much effort, but it’s important to make sure it’s functioning properly before diving into other plumbing fixes. Think of it like trying to have a conversation with someone who’s whispering – without enough volume or pressure, communication just won’t work. By taking the time to ensure your water source is turned on and providing enough pressure, you’ll set yourself up for success when it comes to maintaining your home’s plumbing system.
Check for any blockages in the water lines.
One of the most important components of any household water system is the water source. Without a steady and reliable source of water, the entire system is rendered useless. So, if you’re experiencing low water pressure or no water at all, the first thing you should do is check your water source.
Make sure that your incoming water supply valve is fully open, and that there are no obstructions in your water lines. Blockages can occur due to a variety of reasons, such as rust deposits, mineral buildup, or debris in your pipes. If you suspect that there may be a blockage in your water lines, it’s important to have a professional plumber inspect and repair the problem, as attempting to remove the blockage yourself can potentially cause further damage to your system.
Stay on top of your water source maintenance and keep your water flowing smoothly!
Clear any debris from the water lines before turning on the system.
When it comes to turning on your irrigation system, it’s important to first inspect and clear any debris from the water lines. This is especially true for systems that have been inactive for a while, as debris can accumulate and cause blockages. Clearing the lines can be done by flushing them with water or using a special tool to remove any obstructions.
It’s also important to check the water source and make sure it’s free from any contaminants or pollutants that could harm your plants. And don’t forget to check for leaks or other issues that could affect the system’s performance. By taking these simple steps, you can ensure that your irrigation system is working properly and delivering the water your plants need to thrive.
So before you turn on your system, take the time to inspect and clear the water lines – your plants will thank you for it!
Controller Settings
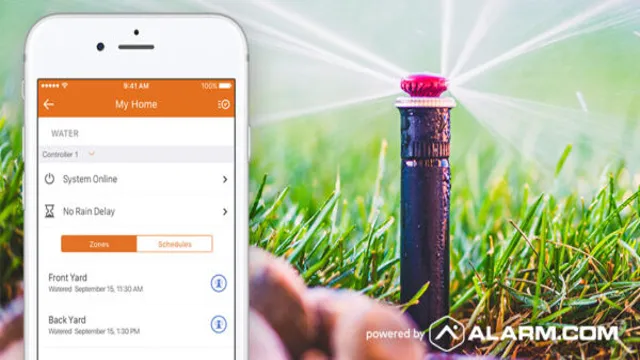
It’s finally springtime, and that means it’s time to turn on your rainbird sprinkler system to keep your lawn and garden healthy. The good news is that it’s easy to do with just a few steps. First, locate your sprinkler system’s controller, typically found near your water source.
Make sure it’s plugged in and turned on. Next, locate the “Program” button on the controller and press it. From there, select the current time and date and any specific watering schedules you want to set up.
After that, turn on the water valve outside that controls the sprinkler system. Finally, press the “Manual Start” button on the controller to test your sprinkler heads to make sure they’re working correctly. And there you have it – a healthy yard starts with a well-functioning sprinkler system in the springtime.
Adjust controller settings to fit the watering needs of the lawn.
When it comes to maintaining a pristine lawn, controlling the amount of water it receives is critical. The key to doing this is by adjusting the settings on the lawn’s irrigation controller. These settings determine when and how much water is applied to the lawn.
Before making any changes to the controller, it’s important to understand the watering needs of the lawn. Factors such as the type of grass, soil type, and weather conditions all play a role in determining how much water the lawn needs. Once these factors have been taken into account, the controller can be adjusted to ensure that the lawn receives the right amount of water at the right time.
This can be as simple as adjusting the watering schedule or as complex as changing the amount of water delivered by each sprinkler head. Doing this will not only save water but will also help keep the lawn healthy and looking its best. So, if you’re looking to improve the health of your lawn, make sure to adjust your irrigation controller settings accordingly.
Make sure the system is set up to water at the appropriate times of day.
When it comes to efficiently watering your plants, it’s crucial to set up your irrigation system to run at the appropriate times of day. This is where your controller settings come in. Depending on the type of plants and soil conditions, you’ll want to water during early morning or late evening hours when the temperatures are cool, and the sun isn’t too strong.
This will allow your plants to fully absorb the water before it evaporates. Make sure to adjust your controller settings based on the weather conditions and seasons too. For instance, during the hot summer months, you may need to increase the watering frequency to prevent plant stress.
Moreover, to conserve water and minimize water runoff, you should consider dividing your irrigation system into zones based on plant types and water needs. By doing so, you’ll have more control over the timing, duration, and frequency of watering, which are essential factors for maintaining a healthy garden.
Turn on the System
Spring is the perfect time to get your lawn and garden ready for the warmer months ahead, and that means turning on your Rain Bird Sprinkler System. While it may seem like a complicated task, turning on your sprinkler system is actually quite simple. Firstly, locate your main valve and ensure it’s turned on before turning on your timer.
Most systems will have a manual override button that can be used to test the system, but it’s always a good idea to conduct a full system test to ensure everything is working correctly. Once you’ve confirmed that your system is functioning correctly, it’s important to adjust your settings to suit your lawn’s specific needs. By setting your system to water your lawn or garden in the early morning or evening you can ensure maximum water absorption and efficiency.
With these easy steps, your Rain Bird Sprinkler System will be up and running, and your lawn and garden will be looking lush and healthy in no time.
Turn on the water source and activate the controller to start the system.
When it comes to starting up your irrigation system, the first step is turning on the water source. This might sound straightforward, but it’s crucial to ensure you’re turning on the right water source and adjusting the flow rate according to your system’s needs. Once you’ve got the water flowing, it’s time to activate the controller.
This device is the brain of your irrigation system, and it’s responsible for managing the timing and duration of your watering cycles. Depending on your controller, you may have a programmable schedule or the ability to adjust settings manually. Make sure you’ve familiarized yourself with the controller’s features and settings before starting up the system.
With the water source and controller activated, your irrigation system should be up and running, working hard to keep your plants healthy and vibrant. Remember, regular checks and maintenance are crucial to keep your irrigation system operating at peak efficiency and to prevent costly water waste.
Allow the system to run for a few minutes to check for any malfunctions.
Before using a new system or equipment, it’s essential to ensure that it functions correctly to avoid any mishaps. To check the system’s operation, you should turn it on and allow it to run for a few minutes to detect any possible malfunctions. This step is crucial because it helps to identify and fix any issues before you begin using the equipment.
During the system’s operation, make sure you observe it closely to check for any unusual sounds or movements that could indicate malfunction. For instance, if you notice strange noises or vibrations, you should switch off the equipment immediately and investigate the problem. Look out for warning signs like smoke or burning smells, which are a clear indication that something is wrong.
It’s important to allow the system to run for some time to ensure that its performance is stable and predictable. In some cases, the system may experience initial hiccups, but allowing it to run for some time helps to identify and fix any problems before they escalate. Once you’ve confirmed that the system is functioning correctly, you can proceed with its full use confidently.
In conclusion, turning on a new system and allowing it to run for a few minutes is a crucial step when starting out. It helps to identify any potential malfunctions early before they damage the equipment or cause harm to the operator. Remember to observe the system carefully and contact a professional if you notice anything unusual.
Conclusion
After all the digging, untangling, and head-scratching, it’s time to turn on your Rainbird sprinkler system like a boss. With a spring in your step and a clear plan in your head, you can revive your dormant lawn and let your garden thrive. Just remember to check for leaks, clear the debris, set the timers, and let the magic of Rainbird do the rest.
So go ahead, turn that knob, and let the waterworks commence. Your lush green paradise awaits!”
FAQs
What are the steps to turn on a Rainbird sprinkler system in spring?
The steps to turn on a Rainbird sprinkler system in spring are:
1. Turn on the water supply to the irrigation system
2. Set the controller to the correct date and time
3. Check each sprinkler head for damage or debris
4. Adjust the watering schedule as needed for the spring season
Can I turn on my Rainbird sprinkler system in spring if there is still a chance of freezing temperatures?
It is not recommended to turn on your sprinkler system if there is still a chance of freezing temperatures. It is best to wait until the threat of freezing has passed to avoid any damage to your system.
How often should I water my lawn with a Rainbird sprinkler system in spring?
The frequency of watering will depend on factors such as weather, soil type, and plant type. As a general rule, it is recommended to water your lawn 1-2 times per week in spring, with each watering session providing around 1 inch of water.
How do I adjust the sprinkler heads on my Rainbird system for optimal coverage in spring?
To adjust the sprinkler heads on your Rainbird system, first turn the adjustment screw clockwise to decrease the spray distance or counterclockwise to increase it. You can also adjust the spray pattern by using the tabs on the sides of the sprinkler head.
Should I hire a professional to turn on my Rainbird sprinkler system in spring?
If you are unsure of how to properly turn on your Rainbird sprinkler system, it may be best to hire a professional to ensure that everything is functioning correctly and to avoid any damage to the system.
How can I prevent my Rainbird sprinkler system from getting clogged with debris in spring?
To prevent your sprinkler system from getting clogged with debris in spring, make sure to regularly check and clean the sprinkler heads. Additionally, having a filter installed on your system can help to prevent debris from entering and clogging the pipes.
What should I do if I notice any leaks or damage to my Rainbird sprinkler system during spring use?
If you notice any leaks or damage to your Rainbird sprinkler system during spring use, turn off the water supply to the system and contact a professional for repair. Continuing to use a damaged system can result in further damage and costly repairs.
