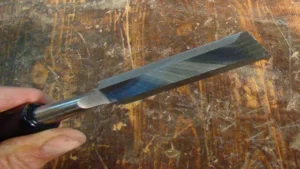
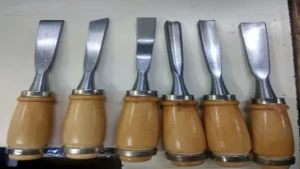
Are you tired of your mortise chisels not living up to expectations? Whether you’re a woodworking enthusiast or a professional woodworker, having properly sharpened mortise chisels is crucial for making accurate and clean cuts. Sharpening mortise chisels may seem daunting, but it’s actually easier than you think! In fact, following this complete guide, you’ll be able to sharpen your mortise chisels like a pro in no time. Think of a mortise chisel like a pencil.
Just like how you need to sharpen a pencil to get a crisp line, you need to sharpen your mortise chisel to get a clean cut. While it may take some practice to get the hang of it, the rewards of having well-sharpened mortise chisels are worth it. You’ll have smoother cuts and less frustration during your woodworking projects.
This complete guide will cover everything you need to know about sharpening mortise chisels, including the necessary tools, the correct sharpening technique, and tips and tricks to ensure your chisels stay sharp for longer. Whether you’re a beginner or an experienced woodworker, this guide will be an invaluable resource for you. So, grab your mortise chisels and let’s start sharpening!
What You Will Need
If you’re looking to sharpen mortise chisels, you’ll need a few essential tools to get started. First, you’ll need a sharpening stone or sandpaper to hone the edge of your chisel. Depending on the type of stone or sandpaper you use, you may also need honing oil or water to lubricate the surface and prevent the chisel from overheating.
You’ll also need a honing guide, which helps you maintain the correct angle as you sharpen the chisel. Finally, you’ll need a strop to polish and refine the edge of the chisel after sharpening. With these tools in hand, you’ll be ready to sharpen your mortise chisels and achieve clean, precise cuts every time.
Chisels
When it comes to woodworking, chisels are one of the most essential tools you will need. But what exactly will you need to get started? The first thing is a good set of chisels in various sizes, ranging from 1/4 inch to 2 inches. You’ll want to find chisels with comfortable handles that fit well in your hand.
Sharpening tools such as a honing guide, water stones, and a strop are also necessary for maintaining your chisels. A bench or work table to secure your wood piece while you work is a must-have as well. Finally, safety equipment such as gloves and goggles should never be overlooked.
With these tools in hand, you’ll be well on your way to creating beautiful woodworking projects.
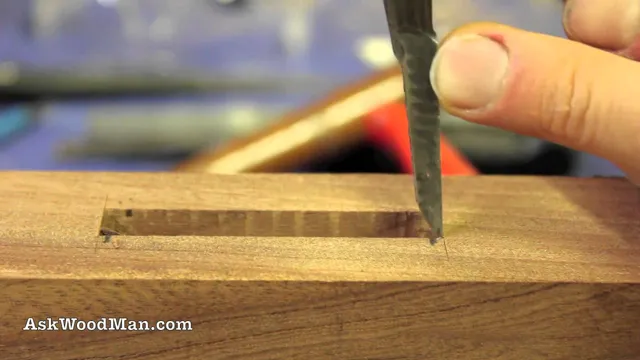
Water/oil stone
If you’re looking to sharpen your dull knives and tools, you need a water/oil stone. But before you start, you’ll need a few other tools as well. First and foremost, you need the stone itself.
Choose the type of stone that suits your needs, whether it’s a water stone or an oil stone. You also need a lubricant, which is either water or oil, depending on the type of stone you have. This helps keep the blade cool and prevents it from overheating while being sharpened.
Next, consider using a honing guide to keep the blade angle consistent. Finally, you’ll need a good-quality cloth to wipe the blade and stone clean, and a towel to keep your work area tidy. With these tools on hand, you’re ready to give your knives and tools a great edge.
Remember to take your time and be patient, as sharpening is a slow and deliberate process that requires attention to detail for the best results. So why wait? Grab your stone and start sharpening today!
Leather strop
If you’re looking to keep your knives and other cutting tools sharp, then investing in a good quality leather strop is a must. This tool works by honing the edge of your blades, giving them a razor-sharp finish. To get started, you’ll need a few things.
Firstly, you’ll need to choose a quality strop. Look for one made from high-quality leather, ideally with a linen or cotton backing. You’ll also need some honing compound, which is designed to be rubbed into the leather to help sharpen your blades.
Finally, you may want to invest in a honing guide to help you maintain a consistent angle while sharpening. With these essentials in hand, you’ll be well on your way to keeping your cutting tools sharp and effective. Remember to keep your strop clean and well-maintained to ensure it lasts for years to come.
Honin oil
If you’re looking for a natural way to achieve healthy and glowing skin, then Honin oil is just what you need! This oil is extracted from the honeycombs of bees, making it a completely organic and safe solution for your skincare regimen. To get started, you’ll need to purchase Honin oil from a trusted source. You’ll also need a clean and dry face, as well as a soft towel to gently wipe away excess oil after application.
It’s best to use Honin oil at night, before bed, as this allows your skin to absorb it fully without interference from environmental factors. Simply apply a few drops to your fingertips and massage onto your face and neck, focusing on any problem areas. The oil will work to moisturize, brighten, and reduce inflammation, leaving you with a youthful and radiant complexion.
With regular use, you’ll see a significant improvement in your skin’s texture and overall appearance. Say goodbye to harsh, chemical-laden skincare products and hello to natural, nourishing Honin oil!
Preparing the Chisels
As one of the most common tools used in woodworking, chisels require routine maintenance to ensure optimal performance. This task is especially true for mortise chisels due to their frequent use and the amount of stress they undergo. Before starting any project, it is essential to sharpen mortise chisels properly.
First, one should remove any existing dents or nicks using a diamond stone or a grinder, if necessary. Next, hone the bevel’s primary edge using a honing guide and a coarse-grit waterstone. Once the primary edge is sharp, switch to a fine-grit waterstone to finish the honing process, ensuring a razor-sharp edge.
Finally, check the edge’s sharpness by cutting into a softwood surface; if the edge slides smoothly without resistance, then the chisel is ready to use. Sharpening mortise chisels is vital to a woodworker’s success, as these chisels are fundamental to many projects, and their sharpness determines the quality and accuracy of the work produced.
Cleaning the Chisels
When it comes to woodworking, good chisels can quickly become your best friends. But, just like any friend, they require a little bit of maintenance from time to time. Keeping your chisels clean and sharp is essential for achieving clean and precise cuts, so let’s talk about how to prepare your chisels for cleaning.
First, make sure your chisels are completely dry and free of any debris. Using a wire brush or steel wool, remove any rust or grime that may have accumulated on the blades. Next, sharpen their cutting edges using a sharpening stone or diamond plate.
This will ensure a clean and precise cut every time you use them. Once the edges are sharp, wipe down the blades with a soft cloth and some oil to prevent rust and keep them lubricated. Now that your chisels are clean and sharp, you’re ready to tackle your next woodworking project with ease!
Inspecting the Edges
When it comes to woodworking, it’s essential to prepare your chisels before getting started with your project. Inspecting the edges of your chisels frequently will help ensure they’re sharp and ready to use. One of the most important steps in chisel preparation is honing the edges using a sharpening stone or diamond plate.
You’ll need to use different grits of stone to achieve the perfect edge, starting with a coarse grit and gradually moving to a finer one. Another important aspect of chisel preparation is ensuring the back of the chisel is flat and free of any nicks or damage. You can achieve a flat surface by using a honing guide to maintain consistent angles while sharpening.
With a properly prepared chisel, your woodworking projects will be much easier, and your results will be more precise. So take the time to inspect your edges regularly and keep your chisels in top condition.
Sharpening the Chisels
If you want to create beautiful and precise mortise joints, you need to make sure your chisels are sharp as a razor. Sharpening mortise chisels may seem like a daunting task, but with the right technique and tools, you can quickly get your chisels razor-sharp. Start by securing the chisel in a honing guide at the correct angle.
Then use a coarse sharpening stone to remove any nicks or chips in the blade and follow up with a finer stone to hone the edge to a razor-sharp finish. Make sure to use consistent and even pressure throughout the process, and don’t forget to regularly check your progress by using a magnifying glass to inspect the blade. With a little practice, you’ll be able to sharpen your mortise chisels quickly and easily, and enjoy precise and accurate mortise joints in your woodworking projects.
Setting the Bevel Angle
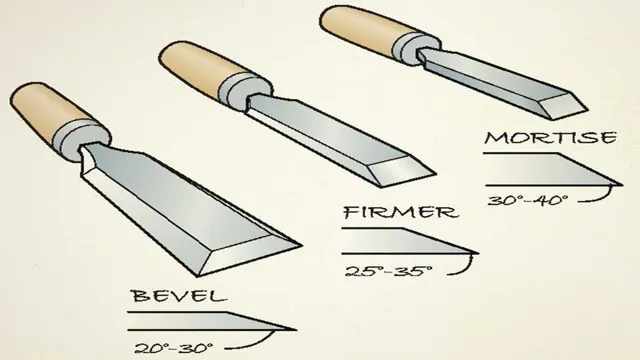
To get the most out of your chisels, you need to sharpen them regularly. One important aspect of sharpening that is often overlooked is setting the bevel angle. This angle determines how sharp the edge of the chisel will be and how well it will perform.
It is important to set the bevel angle correctly for each chisel you own, as the angle will vary depending on the type of work you will be doing. A general rule of thumb is that the bevel angle should be around 25 degrees for most woodworking tasks, but for more delicate work, such as carving or cutting intricate joints, a lower angle of around 20 degrees may be more appropriate. Setting the bevel angle can be done using a honing guide or by freehand grinding, but whichever method you choose, it is important to take your time and be consistent.
Once you have set the bevel angle correctly, you will notice a significant improvement in the performance of your chisels.
Grinding the Primary Bevel
When it comes to sharpening chisels, the first step is to grind the primary bevel. This is the initial angle that is ground onto the blade of the chisel, which will then be honed to create a sharp cutting edge. It is essential to get this angle correct to ensure that the chisel is as sharp as possible and can perform its task effectively.
The angle will vary depending on the type of chisel and the wood being cut, but it is typically around 25 degrees. It is best to use a honing guide to ensure that the angle is consistent across all of your chisels. Once the primary bevel is established, you can move on to honing the edge to create a razor-sharp cutting blade.
With the right tools and techniques, you can achieve a superb level of sharpness that will make woodworking a pleasure. So, grab your chisels, sharpening stones, and honing guide, and let’s get started.
Sharpening the Secondary Bevel
Sharpening the chisels can seem like a daunting task, but it’s essential to keep them in top condition to ensure precise cuts and longevity. One crucial step in the sharpening process is sharpening the secondary bevel. The secondary bevel is a small angle on the cutting edge that helps maintain sharpness and durability.
To sharpen the secondary bevel, begin by setting the chisel’s primary bevel angle on the sharpening stone. Once that is achieved, reduce the angle by a few degrees and then sharpen the secondary bevel by gently pulling the chisel across the stone with a steady motion. This process will create a clean, sharp edge on the chisel, making it ready for use.
Remember, maintaining a sharp chisel is essential for quality work, so don’t forget to hone the secondary bevel to achieve optimal results while working on your projects.
Polishing the Edges
When it comes to woodworking, mortise chisels are essential tools that are used for creating mortise and tenon joints. However, over time, even the best chisels can lose their sharpness and become ineffective. To get the most out of your mortise chisels, it’s important to sharpen them regularly.
Begin by using a honing guide to maintain the chisel’s bevel angle and ensure a straight edge. Next, use a sharpening stone to remove any nicks or chips in the blade and grind down the cutting edge. Finally, finish by using a fine honing stone to polish the edge of the blade and make it razor sharp.
By following these steps, you’ll be able to get the most out of your mortise chisels and create precise, crisp cuts every time.
Using the Leather Strop
Using the leather strop to polish the edges of your blades can bring back their sharpness and make them look like new again. To start, apply a small amount of polishing compound to the strop and rub it in with your fingers. Then, gently run the blade along the strop, making sure to keep the angle consistent.
You can use a back-and-forth motion or a circular motion, depending on your preference. Be sure to flip the blade over and repeat the process on the other side as well. The leather strop helps to align the edge of the blade, remove any burrs or nicks, and create a razor-sharp edge.
It’s a great way to maintain your knives and other cutting tools between sharpenings. So next time you notice your blade’s edge becoming dull, try using a leather strop to bring it back to life.
Applying Honing Oil
When it comes to sharpening knives, honing oil is an essential tool that helps to refine the blade’s edge. Applying honing oil to a sharpening stone or rod can help to lubricate the surface and reduce friction, resulting in a more efficient sharpening process. To begin, simply apply a few drops of honing oil to the sharpening stone or rod.
Using a consistent pressure, gently run the blade’s edge along the stone or rod, moving in a back and forth motion until the desired sharpness is achieved. The honing oil works to remove any metal shavings that accumulate during the sharpening process, leaving a clean and polished edge. This is especially important for finer blades, such as those on a chef’s knife, where a smooth edge is critical for precision cutting.
With the right technique and a reliable honing oil, anyone can achieve a sharp and polished edge on their knives.
Conclusion
In conclusion, sharpening mortise chisels may seem like a tedious task, but with the right technique and tools, it can actually be quite enjoyable. From selecting the proper sharpening stone to honing the edge to the perfect angle, it’s all about finding the sweet spot that will provide effortless and precise cuts. So the next time your mortise chisels are feeling dull and lackluster, take the time to sharpen them properly and unleash their full potential.
After all, a sharp chisel is like a superhero with an unbeatable weapon – ready to conquer any task that comes its way!”
FAQs
What is a mortise chisel?
A mortise chisel is a robust chisel with a square cross-section used for making square holes in wood.
What are the different types of mortise chisels?
Mortise chisels come in different sizes and shapes. The most common ones are straight, fishtail, and pigsticker chisels.
What is the best way to sharpen mortise chisels?
The best way to sharpen mortise chisels is by using a sharpening stone. Begin with a coarse stone, then use a finer one to polish the edge.
How can I maintain the sharpness of my mortise chisels?
To maintain the sharpness of your mortise chisels, be sure to keep them clean and dry after each use, store them properly, and sharpen them regularly.
What should I look for when buying a mortise chisel?
When buying a mortise chisel, look for a durable and sturdy chisel made with high-quality steel. Also, check for the handle’s comfort and grip.
Can mortise chisels be used for other woodworking tasks besides making square holes?
Yes, mortise chisels can also be used for other woodworking tasks such as chopping and paring.
How do I know if my mortise chisel is dull and needs to be sharpened?
A dull mortise chisel will struggle to cut through the wood, leaving rough and uneven cuts. You may also need to apply more force to complete the cut.
