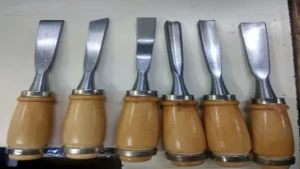
If you’re a woodworker or just someone who loves DIY projects, then chisels are probably one of your favorite tools. But over time, these tools can become dull and unusable if not taken care of properly. One solution to sharpen them is by using a diamond stone.
In this blog post, we’ll go over the steps on how to sharpen chisels with a diamond stone, so you can get back to work and enjoy the sleek and smooth cuts that a sharp chisel can provide. So, let’s get started!
Materials and Tools Required
One of the essential skills of any woodworker is the ability to sharpen chisels with a diamond stone. To get started, you will need a diamond sharpening stone, a honing guide, a chisel, and a lubricant. The diamond sharpening stone is available in various grits, so choose one based on your level of experience and the condition of your chisel.
A honing guide ensures that your chisel’s proper angle is maintained throughout the sharpening process. A good quality chisel ensures a sharp edge for long periods, so invest in a reliable one. Lubricant is used to clean the diamond stone or lubricate the chisel while sharpening.
Once you have all the materials and tools in place, you are ready to sharpen your chisel and achieve a razor-sharp edge. Give it a try and see for yourself how easy sharpening a chisel with a diamond stone can be!
Diamond sharpening stone
When it comes to sharpening your knives and tools, a diamond sharpening stone can be a game-changer. But before you dive into the process, it’s important to gather all the necessary materials and tools to ensure a successful sharpening session. Firstly, you’ll need the diamond sharpening stone itself.
It’s important to choose a stone with the appropriate grit size for your blade – a finer grit for a sharp, polished edge and a coarser grit for a more aggressive edge. Additionally, you’ll need water or oil to lubricate the stone and prevent your blade from becoming too hot. Lastly, consider investing in a sharpening guide to help maintain the proper blade angle throughout the sharpening process.
With these materials and tools in hand, you’re ready to start sharpening and breathe new life into your dull blades.
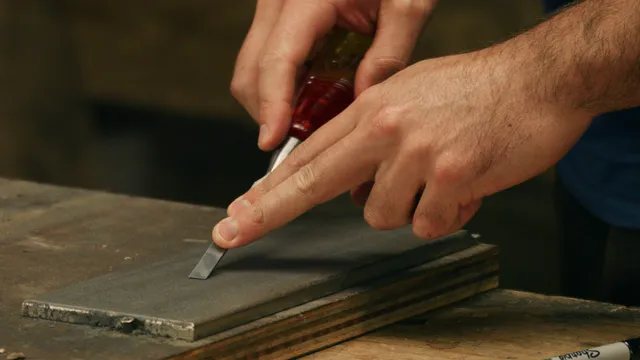
Chisels
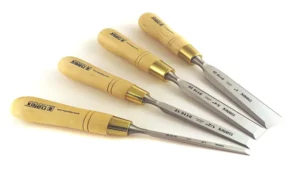
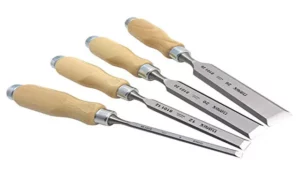
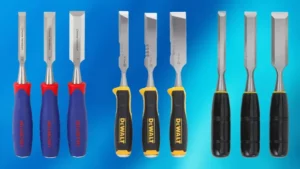
Chisels are essential tools for woodworking, carving, and masonry projects, but choosing the right materials and tools is crucial for achieving precise and clean cuts. First and foremost, you will need a high-quality set of chisels made from durable materials such as carbon steel, high-speed steel, or tungsten carbide. The material and hardness of the chisel will determine its strength, edge retention, and resistance to wear and tear.
Additionally, you will need a sharpening stone or honing guide to keep your chisels razor-sharp, a mallet or hammer to apply controlled force and impact, and a sturdy workbench or vice to keep the project stable and secure. Other useful accessories include a dust mask or respirator, safety goggles, and earplugs to protect your eyes, ears, and lungs from fine dust and debris. With the right tools and materials, you can create intricate designs, elegant curves, and smooth finishes with your chisels and take your woodworking skills to the next level.
Water
When it comes to working with water, there are certain materials and tools that are essential for completing the job successfully. Firstly, a water source is necessary, whether it be a faucet, hose, or bucket. Depending on the task at hand, you may also need hoses of various lengths, connectors, and nozzles.
A pump may also be required for moving large quantities of water. Additionally, a container for holding water, such as a pool, pond, or tub, should be readily available. When working with chemicals or treating the water for various purposes, testing strips, pH kits, and treatment products may also be necessary.
It is important to prioritize safety and always use appropriate protective gear such as gloves, goggles, and rubber boots when handling water. By having access to the necessary materials and tools, you can ensure that your water-related projects go smoothly and efficiently, while minimizing the risk of accidents or damage.
Cloth
When it comes to working with cloth, you’ll need a few key materials and tools to ensure success. First up, you’ll need fabric! Choose a fabric that works best for your project. For example, if you’re making a dress you might choose a lightweight cotton or if you’re making a bag, a sturdy canvas could work well.
You’ll also need a measuring tape to ensure that you’re cutting your fabric to the correct size. A good pair of scissors is also important, as you’ll be doing a fair amount of cutting. Sewing pins are essential for keeping your fabric in place, and a sewing machine or needle and thread will help you put your project together.
Other helpful tools include a rotary cutter, self-healing cutting mat, and an iron to press seams. With these basic materials and tools, you’ll be well on your way to creating your own cloth masterpiece!
Preparing the Chisels for Sharpening
If you want sharp and precise cuts from your chisels, then you need to sharpen them regularly. The best way to do this is by using a diamond stone. Before you start sharpening, check that the chisels are clean and free from rust.
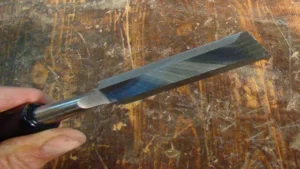
You can use a wire brush or sandpaper to remove any rust or debris from the blade. Next, you need to prepare the bevel and the back of the chisel. The bevel is the angled part of the blade that you will be sharpening.
You can use a honing guide to help you set the correct angle. The back of the blade also needs to be flattened and polished. You can do this by laying the chisel flat on the diamond stone, and then rubbing it back and forth with a circular motion.
Once you have prepared the chisel, you can then start sharpening it using the diamond stone. Remember to keep the pressure and angle consistent throughout the sharpening process to achieve optimal results.
Cleaning the chisels
When it comes to sharpening your chisels, cleaning them beforehand is a crucial step that shouldn’t be overlooked. Dirt, rust, and grime can accumulate on the blades and hinder the sharpening process. To prepare your chisels for sharpening, start by wiping them down with a clean cloth to remove any loose debris.
Then, use a wire brush or sandpaper to remove any rust or stubborn residue. Be sure to pay attention to the corners and edges, which are often the areas that need the most attention. This step not only makes sharpening easier but also helps extend the lifespan of your chisels.
So, take the time to give your chisels a good cleaning before diving into sharpening them. Your tools will thank you!
Check for damage or nicks
Before you start sharpening your chisels, it’s essential to check for any damage or nicks. A nicked or damaged chisel won’t hold a sharp edge, and if you try to sharpen it, you’ll only make the problem worse. Inspect the blade of each chisel for any signs of damage, such as chips, dings, or cracks.
You can feel for nicks by running your fingernail along the cutting edge. If your nail “catches” or feels a rough spot, you’ve found a nick. Don’t worry if you do find any damage – it’s common in chisels, and it’s easy to fix.
However, you’ll need to repair any damage before you can start sharpening your chisels. Taking a few minutes to examine your chisels before you begin will help ensure that you get the best possible results when sharpening them. By doing so, you are ensuring the longevity and effectiveness of your chisels.
Sharpening the Chisels
If you’re a woodworker, then you know how important it is to have sharp chisels. Dull chisels not only make your work slower but can also be dangerous. That’s why it’s essential to know how to sharpen chisels with a diamond stone.
Diamond stones are incredibly durable and ideal for sharpening metal tools like chisels. They come in a range of grits, so you can choose the right one for your tool. The first step to sharpening a chisel is to ensure it’s clean of any debris.
Then, hold the chisel at a 25-degree angle to the diamond stone and move it back and forth along the stone. Make sure you cover the entire surface of the blade evenly. After a few passes, turn the chisel over and repeat the process, honing the other side of the blade.
Remember to keep the angle consistent, and don’t apply too much pressure. With a bit of practice, sharpening your chisels with a diamond stone will become second nature.
Positioning the chisel on the diamond stone
When it comes to woodworking, one of the most crucial tools in your arsenal is the chisel. But like any tool, it can dull over time and lose its effectiveness. That’s where sharpening comes in.
The first step in sharpening your chisel is positioning it on the diamond stone. You want to make sure the bevel is flush against the stone at the correct angle. It’s important to maintain consistent pressure and motion throughout the process.
You can use a honing guide to help you get the right angle, or you can do it by eye if you’re comfortable. Don’t forget to lubricate the stone periodically to ensure a smooth sharpening process. Properly sharpened chisels will make your woodworking projects much more precise and efficient.
So, don’t overlook this important step in maintaining your tools and achieving great results.
Sharpening the bevel edge
When it comes to sharpening chisels, one of the most important steps is sharpening the bevel edge. This is the flat side of the chisel that comes to a point, and it is the part that actually cuts into the wood. To sharpen it effectively, you’ll need to start by selecting the right sharpening tool.
Many woodworkers prefer to use a sharpening stone, while others find that a honing guide makes the process easier. Whatever method you choose, make sure to use consistent pressure and keep the bevel flat against the stone or guide. It can take some practice to get the technique down, but once you do, you’ll find that your chisels are sharper and more efficient than ever before.
Don’t forget to periodically check the angle of your bevel edge using a tool such as a honing guide, as this will ensure that your chisels stay sharp and effective for years to come.
Sharpening the flat side of the chisel
When it comes to woodworking, chisels are a crucial tool. But just like any other tool, they need to be sharpened regularly to perform efficiently. Most people tend to sharpen the beveled side of the chisel and ignore the flat side, which is equally important.
Sharpening the flat side of the chisel is necessary to maintain a clean, straight edge on the woodwork. To sharpen the flat side, secure the chisel in a vise with the beveled edge facing upwards. Use a honing guide to hold the chisel in place at the right angle and start with the coarse grit stone.
Move on to the fine grit once the edge is smooth and straight. It’s essential to be consistent with the angle of the chisel and to avoid pressing too hard. Remember to hone both sides of the blade evenly and to finish with a strop for the best results.
By sharpening both sides of the chisel correctly, you can achieve excellent results without the frustration of a dull or damaged tool.
Finishing the Sharpening Process
If you want to know how to sharpen chisels with a diamond stone, then it’s important to know how to finish the sharpening process. After honing the edge with a coarse diamond stone, you’ll want to move on to a finer grit. This will help refine the edge and remove any burrs or rough spots left from the coarse stone.
One of the most important steps in finishing the sharpening process is to use light pressure and take your time. Rushing the process can lead to a dull edge or uneven bevel. It’s also important to maintain a consistent angle while sharpening.
You may find it helpful to use a honing guide to keep the angle consistent as you work across the blade. Finally, always make sure to use a leather strop to remove any remaining burs and polish the edge. This will help ensure a sharp and durable edge on your chisels.
Removing any burrs
After sharpening a knife, you may notice some burrs on the blade’s edge. These small metal spurs can cause uneven cuts and make the blade dull faster. Removing any burrs is an essential step in finishing the sharpening process.
To do this, you can use a honing steel or ceramic rod. Hold the rod at a 20-degree angle to the blade and gently pull the blade down the rod from heel to tip. Repeat this process on the other side of the blade.
This will help to realign any molecules in the metal and remove any burrs present. You can also use a leather strop or a fine-grit sharpening stone to smooth out the blade’s edge and remove any remaining burrs. By doing this, you ensure that your knife stays sharp and effective for longer.
Remember, a knife is only as good as its edge, so taking the time to finish the sharpening process is crucial for optimal performance.
Polishing the chisel
After mastering the art of sharpening chisels, it’s time to focus on the finishing touches which involve polishing the blade. To do this, you’ll need to use a polishing compound designed for the type of metal your chisel is made of. Gently rub the compound onto the blade using a soft cloth or felt wheel and then buff it until it shines.
If the blade has any rust or stubborn stains, use a rust remover or metal cleaner before polishing. A well-polished chisel not only looks good but also prevents rust from forming and increases its overall lifespan. So, don’t skip this crucial step in the sharpening process! Additionally, it’s essential to ensure the tool is properly stored to maintain its sharpness.
A leather chisel roll or specialized case will protect the blade from damage and keep it sharp for longer. A well-maintained chisel is a valuable investment that will serve you for years to come. Remember, sharpening is not a one-time task; it’s an ongoing process that requires dedication and attention to detail.
Keep up with the sharpening routine, and you will enjoy a sharp and functional chisel at all times.
Tips for Maintaining Your Sharpened Chisels
Maintaining a sharp chisel is vital to achieving precise and clean cuts. One effective way to sharpen chisels is by using a diamond stone. Start by setting the diamond stone on a flat and stable surface.
Hold the chisel firmly and place it flat on the stone, making sure the bevel is in contact with the diamond abrasive. Move the chisel back and forth while applying light pressure until the blade is sharp. Use a honing guide to maintain a consistent angle throughout the sharpening process.
After sharpening, use a leather strop to refine the edge and remove any burrs. Remember to frequently clean and oil your chisels to prevent them from rusting and prolong their lifespan. With regular sharpening and maintenance, your chisels will stay sharp and reliable for all your woodworking needs.
Storing chisels properly
Storing your chisels properly is crucial when it comes to maintaining their sharpness and preventing damage. A few easy-to-follow tips can go a long way in keeping your chisels in their best possible condition. First and foremost, it’s important to keep your chisels clean and dry.
After use, wipe them down with a dry cloth to remove any excess moisture that may have accumulated during use. If your chisels have been exposed to water, be sure to dry them thoroughly before storing them away. Another effective method for preventing rust and moisture damage is applying a light coat of oil to the blades of your chisels.
Lastly, invest in proper storage. A chisel roll or holder can keep your chisels organized and protected from bumps and scratches. Remember, a little bit of care can extend the life of your chisels and save you time and money in the long run.
Regular sharpening maintenance
Regular maintenance is key to maintaining sharpened chisels for longer. Always keep your chisels clean and dry when not in use. You can also apply a protective coat of light machine oil to further prevent rusting.
Sharpen your chisels regularly, preferably after every use, to keep them in good condition. You can use honing oil to lubricate the stones or sharpening surface, making the process easier. When sharpening, ensure that you maintain the same angle as the factory grind.
Make sure to also check the sharpness of your chisels before using them. In the long run, regular maintenance not only saves you time and money, but also ensures the best performance from your chisels. So, develop a habit of keeping your chisels clean and sharpened for the best results.
Conclusion
And there you have it, folks! Sharpening chisels with a diamond stone is the diamond in the rough solution to achieving sharp and precise cuts. With a little patience, dedication, and the right tools, you can transform your dull chisels into sharp and reliable instruments. So, go forth and sharpen those chisels, and let your creativity and craftsmanship shine!”
FAQs
What is a diamond stone?
A diamond stone is a sharpening tool that uses diamond particles to sharpen blades and edges.
How do you prepare your chisel for sharpening with a diamond stone?
Before sharpening your chisel with a diamond stone, ensure that it is clean and devoid of rust or nicks. Also, adjust the angle of the chisel to your preference.
Do you need to lubricate a diamond stone before use?
Although not necessary, it is advisable to use water or oil as a lubricant to prevent the diamond particles from clogging up and to improve the sharpening process.
How long should you sharpen a chisel with a diamond stone?
The duration of sharpening your chisel with a diamond stone depends on the dullness of the blade. However, an average sharpening time of 10-15 minutes is sufficient to achieve a sharp edge.
What is the recommended grit size for a diamond stone for sharpening chisels?
A coarse grit size of 300-600 is suitable for sharpening dull or damaged chisels, while a finer grit size of 1000-3000 achieves a smoother edge.
What are the benefits of sharpening chisels with a diamond stone?
Diamond stones offer a more efficient and faster sharpening process, produce smoother edges and are more durable than traditional sharpening stones.
Can diamond stones sharpen other tools besides chisels?
Yes, diamond stones can be used to sharpen other cutting tools such as knives, scissors, and garden tools.

