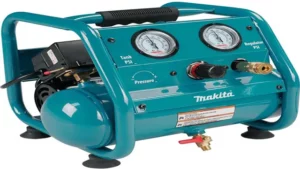
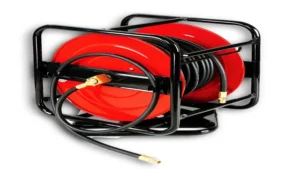
Air compressors are an integral part of many construction and industrial sites, making them an essential tool for professionals and home DIY enthusiasts. However, despite their practicality, air compressors are prone to wear and tear, and they may ultimately fail. For many people, the idea of repairing an air compressor can be daunting, and they might not know where to start.
Fear not! Our comprehensive guide on how to repair your air compressor is here to help. In this blog post, we will take you through the basics of air compressor maintenance and repair, including troubleshooting common problems, identifying issues with your compressor, and addressing these issues. Whether you are a seasoned professional or a novice enthusiast, you’ll gain valuable insight into how air compressors work and how to fix them.
By the end of this guide, you’ll have a better understanding of the different types of air compressors, how to troubleshoot common problems, and how to prevent issues from occurring in the first place. So, get out your handy toolkit, put on your safety glasses, and let’s dive in to learn the ins and outs of air compressor repair!
Identifying the Problem
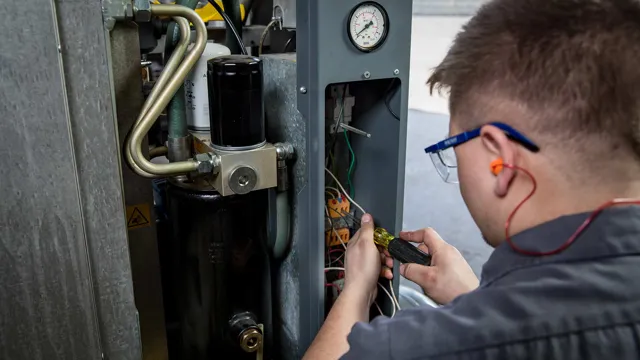
Repairing an air compressor can seem like a daunting task, but often the trick is simply identifying the problem. The first step in how to repair an air compressor is to thoroughly examine the machine, looking for any visible damage or signs of wear and tear. Be sure to check the air filter, oil level, and pressure gauges to ensure that each component is working properly.
If the machine is making any unusual sounds or failing to power on, these may be telltale signs of a more serious issue that requires closer inspection. By taking the time to carefully assess the condition of the air compressor, you can quickly and effectively diagnose any problems and get started on the road to repair.
Checking the Power Cord and Switch
Identifying the Problem with the Power Cord and Switch is the first step in troubleshooting your appliance. If you notice that your device won’t turn on or suddenly stops working, it’s essential to check the Power Cord and Switch. Look at the exterior of the power cord for any visible damage or wear; inspect the wire from the base to the plug and see if there are any cuts or tears that may have affected the performance.
In case you find any damage, try to replace the cord or fix it if you can. If you do not see any visible issues with the cord, check the switch for damage or failure. A broken switch may lead your device to malfunction and cause it not to function.
To identify a faulty switch, you should listen for a click when turning the appliance on and off. If there is no sound, the switch may need to be replaced. It’s important to check these essential parts of your appliance first before proceeding with the diagnosis.
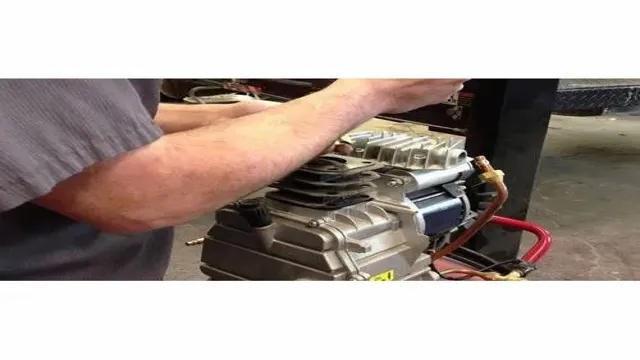
Examining the Motor
When examining the motor, it is important to identify any problems that may be occurring. The first step in this process is to listen carefully to the sounds coming from the motor. If there are any abnormal noises, such as grinding or screeching, it could indicate a problem with the bearings or gears.
Another common issue with motors is overheating, which can result in decreased performance or even complete failure. It’s also important to check for any leaks or loose connections in the motor’s wiring. By identifying the problem early on, it can be repaired before it becomes a major issue.
So, the next time you’re examining your motor, don’t forget to listen closely and check for any signs of trouble.
Inspecting the Pressure Switch
Identifying the Problem with Pressure Switch Inspection If your HVAC system is not working effectively, the problem could be with your pressure switch. This component is responsible for monitoring the pressure levels in your system and triggering the fan or blower motor to turn on when necessary. One of the common issues that can arise with a pressure switch is a faulty connection or a blockage in the airway.
To identify this problem, you can inspect the pressure switch for any visible signs of damage or corrosion. If everything looks fine, you can use a multimeter to check for continuity and ensure that the switch is functioning as it should. However, if you are unsure about handling such a task, it is important to reach out to a professional HVAC technician to prevent any further damage.
Troubleshooting the Issue
If you’re experiencing issues with your air compressor, it can be frustrating and even hinder your work. Fortunately, troubleshooting the problem yourself can often be done with a few simple steps. The first thing you should check is the power source.
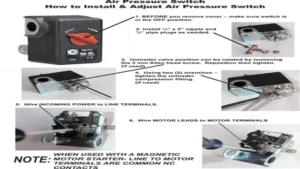
Ensure that the power cord is securely plugged in and that the outlet has power. If the power source is not the problem, check the pressure switch. The pressure switch regulates the amount of pressure in the tank and can often be adjusted to fix the issue.
You should also inspect the air filter and replace it if it appears dirty or clogged. A dirty air filter can reduce airflow and put strain on the motor, potentially causing it to overheat. If none of these solutions seem to fix the problem, it may be time to take your air compressor to a professional for repair.
Remember to always prioritize safety and refer to the owner’s manual for specific instructions on troubleshooting and maintenance. By following these simple steps, you can save yourself time and money by repairing your air compressor on your own.
Replacing Faulty Parts
When facing an issue with faulty parts in your electronic equipment, the first step is to properly troubleshoot the problem. This can involve conducting tests to isolate the faulty component and identifying the specific symptoms leading to the malfunction. Once the problem has been pinpointed, it’s time to replace the faulty part.
In some cases, this can be a simple and straightforward process that can be accomplished by the user with the right tools and knowledge. However, for more complex components or systems, it is recommended to seek the help of a professional technician to avoid additional damage or complications. When replacing the faulty part, it is important to use quality and reliable components to ensure that the equipment functions properly and to prevent future malfunctions.
By taking a systematic approach to troubleshooting and replacing faulty parts, you can extend the life of your electronic equipment and save money in the long term.
Cleaning Air Filters and Regulators
Cleaning air filters and regulators is an essential part of routine maintenance for any air compressor. Most issues with air compressors can be traced back to dirty or clogged filters and regulators. When the filters and regulators are dirty, they cannot function correctly, leading to pressure drops and a reduction in the airflow.
To troubleshoot this issue, first, turn off the air compressor and isolate it from its power source. Remove the filter and clean it with a soft-bristled brush or compressed air. Next, clean the regulator by removing any debris and wiping it clean with a rag.
Once everything is clean, reassemble the components and test the air compressor, monitoring its performance. Regular cleaning of the air filters and regulators ensures that the compressor performs optimally and lasts longer. By doing this, you’ll be saving money in the long run by avoiding premature replacement of the compressor.
Checking for Leaks
When it comes to troubleshooting leaks in your home, it’s essential to be thorough in your investigation. Start by determining where the leak is coming from and then take steps to fix it. One of the first things to check is the plumbing around your house, as this is often a common culprit.
Check for any visible signs of leaks, including wet spots, discolored walls or ceilings, or musty smells. If the leak is not coming from your plumbing, check your roof for any damage or missing shingles. A leaky roof can cause significant problems, including water damage and mold growth.
It’s important to address any leaks as soon as possible to prevent further damage and ensure the safety of your home. So don’t delay—get to the bottom of the issue today!
Performing Maintenance
If you own an air compressor, performing regular maintenance is essential to keep it in top shape and avoid breakdowns. One common issue that can arise is a leak in the compressor’s air tank. To repair this problem, you’ll need to first release all of the air from the tank and then remove the damaged part.
Use a pipe wrench or pliers to remove the damaged valve or fitting and replace it with a new one. Another important aspect of maintenance is checking the compressor’s oil level and changing it regularly. Consult the owner’s manual to determine the proper oil type and frequency of changes.
Additionally, inspect the air filter and replace it if it’s dirty. You should also check the pressure regulator to ensure it’s working correctly and adjust the pressure if necessary. By performing these simple maintenance tasks, you can extend the lifespan of your air compressor and avoid costly repairs down the road.
Changing Oil and Air Filters
Performing regular maintenance on your car is crucial for its longevity and performance. One important aspect of maintenance is changing your oil and air filters. Oil filters trap contaminants and debris that can damage your engine and reduce its efficiency.
Over time, they become clogged and need to be replaced to ensure proper oil flow. Similarly, air filters protect your engine from dust, dirt, and debris. When they become dirty, they can limit airflow to your engine, reducing its performance and fuel efficiency.
By changing your air and oil filters regularly, you can keep your engine running smoothly and extend its life. So, if you notice a decrease in your car’s performance or gas mileage, it may be time to check and replace your filters. Don’t neglect this important maintenance task, as it can save you money in repairs and fuel costs in the long run.
Cleaning the Tank
Cleaning the tank is an important part of maintaining a healthy environment for your fish. It’s recommended to clean your tank at least once a month or more frequently if necessary. First, start by removing any large debris with a net.
Next, use a siphon to remove 25% to 50% of the water and vacuum the gravel to remove excess waste. Once the water is removed, take the opportunity to clean the sides of the tank with a sponge or scraper to remove algae buildup. Be sure to avoid using soap or chemicals, as they can harm your fish.
After cleaning, fill the tank with fresh water and add a water conditioner to neutralize any harmful substances. A clean tank not only benefits your fish but also provides an aesthetically pleasing environment. Remember, a little bit of maintenance can go a long way in ensuring the health and longevity of your fish.
Conclusion
In conclusion, repairing an air compressor can seem like a daunting task but with a little patience, elbow grease, and a willingness to learn, it can be a satisfying DIY project. Just remember to stay safe, invest in quality replacement parts, and don’t be afraid to seek professional help if needed. And who knows, with your newly acquired air compressor repair skills, you just might be able to start your own air compressor repair business – talk about turning lemons into airmade lemonade!”
FAQs
What are the common problems that can occur in an air compressor?
The common problems that can occur in an air compressor are low pressure, leaks, overheating, and motor failure.
How do you troubleshoot an air compressor that won’t start?
To troubleshoot an air compressor that won’t start, check the power source, pressure switch, motor, and capacitor.
Can I fix an air compressor that won’t start on my own?
It depends on your experience and expertise. If you are not comfortable opening up an air compressor, it is best to consult a professional.
How often should I change the oil in my air compressor?
You should change the oil in your air compressor every 500 to 1000 hours of use.
How do I know if my air compressor needs oil?
You can check the oil level in the sight glass or dipstick. If it is below the recommended level, you need to add oil.
What type of oil should be used in an air compressor?
The type of oil used in an air compressor depends on the compressor type and manufacturer’s recommendation. It is usually a synthetic or mineral-based oil.
How do I prevent my air compressor from overheating?
To prevent air compressor overheating, ensure that the compressor has proper ventilation, is not overloaded, and has the correct oil level.
