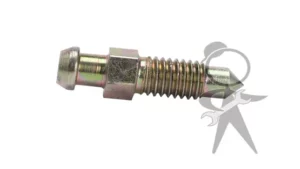
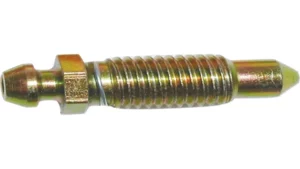
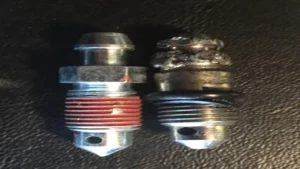
Being a car owner comes with a lot of responsibilities, and one of them is maintaining the vehicle’s brake system. Unfortunately, sometimes things go wrong, and a brake bleeder can break, making it difficult to remove. This can be a nerve-wracking experience, especially if you do not know what to do.
However, fear not! In this blog post, we will discuss some tips and tricks on how to remove a broken brake bleeder easily and efficiently. By the end of this post, you will have a good understanding of what to do in such a situation and how to avoid it in the future. So let’s jump in!
What You’ll Need
If you need to remove a broken brake bleeder, you will need a few specialized tools to get the job done. Firstly, you’ll need a drill bit that is smaller than the size of the broken bleeder. This will allow you to carefully drill out the center of the old bleeder without damaging the surrounding threads.
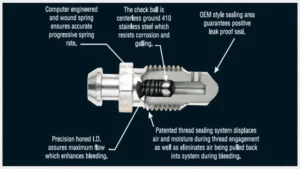
You’ll also need an extractor tool, which is a small device that can latch onto the remaining part of the bleeder and help you turn it counterclockwise to remove it from the brake line. In addition, you’ll want to have a tap set handy, so you can clean out the threads once you’ve extracted the broken bleeder. Lastly, you’ll need a new brake bleeder to replace the old one, as well as some thread sealant to ensure that it is securely installed.
By gathering all of these tools ahead of time, you can get your vehicle’s braking system back up and running smoothly in no time.
Example: Wrenches, Pliers, Screw Extractor
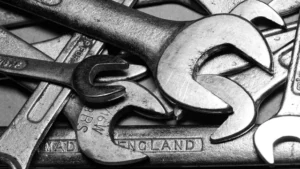
If you’re looking to tackle some DIY projects around the house, having the right tools is essential. When it comes to plumbing repairs or upgrades, there are a few essential items you’ll need to have on hand. First and foremost, a collection of wrenches in various sizes will be crucial for loosening or tightening nuts and bolts in your pipes.
Pliers can also come in handy for these tasks, and for grabbing onto small and hard-to-reach objects. Another must-have tool is a screw extractor, which is designed to remove stripped or damaged screws from their housings. These tools can save you a lot of frustration and time, and can help you avoid having to call in a professional for even minor repairs.
With the right wrenches, pliers, and screw extractor, you’ll be equipped to tackle a range of plumbing issues and upgrades on your own.
Step 1: Evaluate the Damage
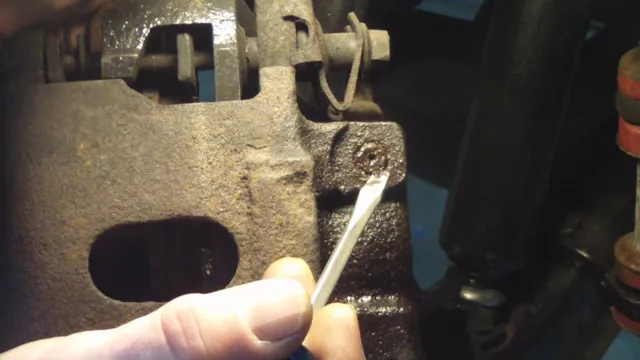
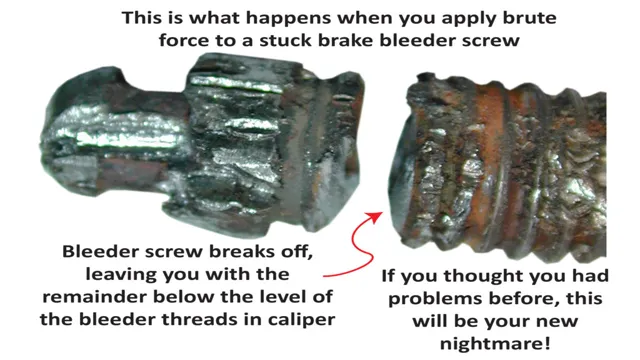
When dealing with a broken brake bleeder, the first step is to evaluate the damage. This involves checking the extent of the damage and determining how deep the broken piece is inside the caliper or cylinder. It’s important to assess whether the threads are stripped or if the bleeder is completely sheared off.
Additionally, you need to check whether any brake fluid has leaked out as this could be a sign of a leaking system. The aim is to identify the level of difficulty involved in removing the broken part and decide on the best approach to take. Removing a broken brake bleeder can be tricky, but with the right tools, skills, and patience, you can get the job done.
Example: Determine the Severity of the Break, Look for Corrosion
When it comes to evaluating the damage in a broken structure, the severity of the break is a key factor to consider. If the damage is minimal, it can be fixed without any major repairs. However, if it is severe, it may require significant repairs or even a complete replacement.
One way to determine the severity of the break is to look for corrosion, which can be an indication of long-term damage. Corrosion occurs when the metal in the structure reacts with the surrounding environment, which can weaken its structural integrity over time. By evaluating the corrosion, you can determine the extent of the damage and take the necessary steps to fix it.
It’s important to address the corrosion and other damage as soon as possible to prevent it from getting worse and potentially causing more significant issues down the road. By taking proactive steps to evaluate and address the damage, you can ensure the safety and stability of your structure for years to come.
Step 2: Apply Heat and Lubricant
To successfully remove a broken brake bleeder, you’ll need to apply some heat and lubricant. First, you’ll want to heat the area surrounding the bleeder with a torch or other heat source. This will help to loosen any rust or corrosion that may be holding the bleeder in place, making it easier to remove.
Once the area is heated, you should apply a lubricant to the bleeder. This will help to loosen any remaining rust or corrosion and further aid in the removal process. Make sure to choose a lubricant that is designed for use with metal, as this will provide the best results.
With the heat and lubricant applied, you can now attempt to remove the broken bleeder using a wrench or pliers. Be sure to use a steady and firm grip to avoid any additional damage to the surrounding area. With a little patience and persistence, you should be able to remove the broken bleeder and get your brakes back in working order.
Example: Heat with a Torch, Lubricate with Penetrating Oil
Now that you have prepared for the task at hand, it’s time for the next step: applying heat and lubricant. When working with a torch to heat the area, it’s important to keep a safe distance to avoid injury. Only target the specific area that needs heating, as too much heat can cause damage.
Once the area is heated, apply a liberal amount of penetrating oil to the part. This will allow the lubricant to penetrate deeply into any crevices and microscopic imperfections. It’s important to let the lubricant sit for a few minutes before attempting to move the part.
This will allow enough time for it to work its way into the tight spaces and loosen any rust or debris that may be blocking movement. Using both heat and lubricant in this way can make a tough job much easier, so don’t hesitate to employ this technique when needed.
Step 3: Loosen with a Wrench or Pliers
Now that you’ve drilled a hole into the broken brake bleeder, it’s important to proceed with caution as you loosen the piece. Depending on the type of bleeder and its location, you may be able to use a wrench or pliers to gently turn it in a counterclockwise direction. If the bleeder is particularly stubborn, you can try spraying it with penetrating oil to lubricate it and make the task easier.
However, be careful not to apply too much force as this could cause further damage to the bleeder or even the surrounding components. With a steady hand and a bit of patience, you should be able to gradually loosen the broken bleeder until it can be removed entirely. Once it’s out, you can replace it with a new bleeder and start the bleeding process all over again.
Remember to take your time and always follow proper safety measures when working on your vehicle’s braking system.
Example: Use a Wrench or Pliers to Turn the Bleeder
Now that you have located the bleeder valve and connected the tubing, it’s time to loosen the valve with a wrench or pliers. This step requires a bit of caution since over-tightening or under-tightening the valve can lead to problems down the line. Grab your wrench or pliers and attach it to the bleeder valve, making sure to grip it firmly without damaging the valve.
Turn the wrench or pliers counterclockwise to loosen the bleeder valve. You’ll notice fluid beginning to flow out of the tubing due to the pressure being released. It’s essential to keep an eye on the tubing and be ready to close the valve as soon as the fluid has stopped flowing.
Remember, over-tightening the valve can cause it to break, whereas under-tightening it can result in an air leak, so be sure to use just the right amount of torque. With the valve loosened, you’re one step closer to completing your brake bleeding task.
Step 4: Use a Screw Extractor
Now that you’ve drilled a hole into the broken brake bleeder, it’s time to use a screw extractor to remove the remaining piece. A screw extractor is a tool specifically designed for this type of situation. It’s important to note that not all screw extractors are the same size, so make sure you have one that fits the hole you drilled.
To use the extractor, insert the tip into the hole and turn it counterclockwise. Apply steady pressure to allow the extractor to grip onto the broken piece and turn it out. It may take some effort and patience, but eventually, the broken bleeder should come loose.
Once removed, you can clean the threads with a tap and die kit, and then install a new brake bleeder. With the help of a screw extractor, removing a broken brake bleeder is possible, saving you time and money from a potentially expensive repair at a professional mechanic.
Example: Screw Extractors for Stubborn Bleeders
Screw Extractors for Bleeders Stubborn bleeders can be a real pain, but lucky for you, there’s a way to get rid of them. Once you’ve identified the problem, the next step is to use a screw extractor. This tool is specifically designed to grip onto stripped or damaged screws and remove them.
Using a screw extractor is easy. Start by drilling a hole into the center of the stripped screw using a drill bit that is slightly smaller than the extractor. Once the hole is drilled, insert the screw extractor and turn the tool clockwise.
The extractor will grip onto the screw, allowing you to turn it and remove it from the bleeder. With the bleeder now removed, you can start to repair or replace it as needed. Remember to hold the extractor straight and steady while turning it to avoid breaking the tool in the screw.
By using a screw extractor, you can quickly and easily remove stubborn bleeders and get your brakes back in shape.
Step 5: Consider Professional Help
Removing a broken brake bleeder can be a daunting task, and without proper knowledge and tools, it can be risky. If you have tried all the previous steps and still cannot remove the broken bleeder, it’s time to consider professional help. A certified mechanic will be able to remove the broken brake bleeder safely and efficiently.
They have the experience required to deal with such issues and the right tools to get the job done. While it may cost you a bit more than doing it yourself, it’s worth it in the long run as you avoid causing further damage to your vehicle or risking your safety. Moreover, most professionals offer guarantees for their work, giving you peace of mind knowing that you’re in good hands.
Remember, safety always comes first, and if you’re unsure what to do, don’t hesitate to seek professional assistance.
Example: When All Else Fails, Seek Professional Assistance
When it comes to dealing with difficult situations in life, sometimes seeking professional help is the best option. It can be easy to feel like we should be able to handle everything on our own, but the truth is that there are times when seeking guidance from someone with specialized knowledge and experience can be incredibly beneficial. This is true whether you’re struggling with mental health issues, relationship problems, or other types of challenges.
If you’re considering professional help, there are a few things to keep in mind. First, it’s important to find someone who is qualified and experienced in the specific type of help you need. For example, if you’re struggling with depression, you might want to seek out a licensed therapist who specializes in treating depression.
If you’re dealing with relationship issues, a couples counselor might be a better fit. Another thing to consider is that seeking professional help is not a sign of weakness. In fact, it takes a lot of courage to admit that you need help and to take steps to actually get it.
It’s also worth noting that the therapeutic process can be incredibly empowering, as it can provide you with the tools and resources you need to navigate difficult situations more effectively in the future. Ultimately, whether you decide to seek professional help or not is a personal decision that only you can make. However, it’s important to remember that there is no shame in seeking guidance and support when you need it.
In fact, doing so can be the first step on the path towards healing and growth. So, if you’re feeling overwhelmed or stuck, consider reaching out to a qualified professional who can help you navigate the challenges you’re facing and find a way forward.
Final Thoughts
Removing a broken brake bleeder can be a challenging task, but with the right tools and approach, it is achievable. First and foremost, it is important to wear protective gear such as gloves and goggles to prevent any possible injuries. Next, one can use a penetrating oil or heat to loosen the corroded area surrounding the bleeder.
Once sufficient time has passed, a wrench that is specifically designed to grip rounded or damaged nuts can be employed to remove the broken bleeder. If this method fails, an easy-out extractor can be used, which is a specialized tool that can remove screws and bolts that are stuck or difficult to remove. Overall, it is important to be patient and cautious during this process to avoid causing further damage.
By following these steps and utilizing these tools, one can easily remove a broken brake bleeder and get back to enjoying a smooth ride.
Conclusion
Removing a broken brake bleeder can be a tricky and frustrating task, but with patience and determination, it is possible to overcome this obstacle. Just remember, even though your brake system may be broken, you are not! Don’t let a stubborn bleeder get you down, put on your thinking cap and get creative with removal tactics. Whether you use heat, penetrating oil, or even a drill, the main thing to keep in mind is safety.
So grab your tools, take a deep breath and let the healing begin. Happy wrenching!”
FAQs
What tools do I need to remove a broken brake bleeder?
To remove a broken brake bleeder, you will need vice grips, a drill, a tap and die set, and a new bleeder screw.
What is the process for removing a broken brake bleeder?
First, use the vice grips to try and turn the broken bleeder. If that doesn’t work, drill a small hole in the center of the bleeder and use the tap and die set to thread in a screw. Then, use the screw to slowly turn and remove the broken bleeder.
Can I still drive my car with a broken brake bleeder?
It is not recommended to drive your car with a broken brake bleeder as it can lead to a brake fluid leak and a loss of braking power. It’s best to fix the issue before driving your car again.
How do I prevent a brake bleeder from breaking in the first place?
Keep your brake system well-maintained and don’t overtighten the bleeder screw when bleeding your brakes. If you encounter resistance when tightening the screw, stop immediately and seek professional help.
Can a professional mechanic help me remove a broken brake bleeder?
Yes, a professional mechanic will have the tools and expertise necessary to safely remove a broken brake bleeder and replace it with a new one.
How do I know if my brake bleeder is broken?
If you are unable to bleed air out of your brake system or see brake fluid leaking from the bleeder screw, it may be broken and in need of replacement.
Can I replace a broken brake bleeder myself?
If you have the necessary tools and mechanical knowledge, you can replace a broken brake bleeder yourself. However, if you’re unsure, it’s best to seek the help of a professional mechanic.
